
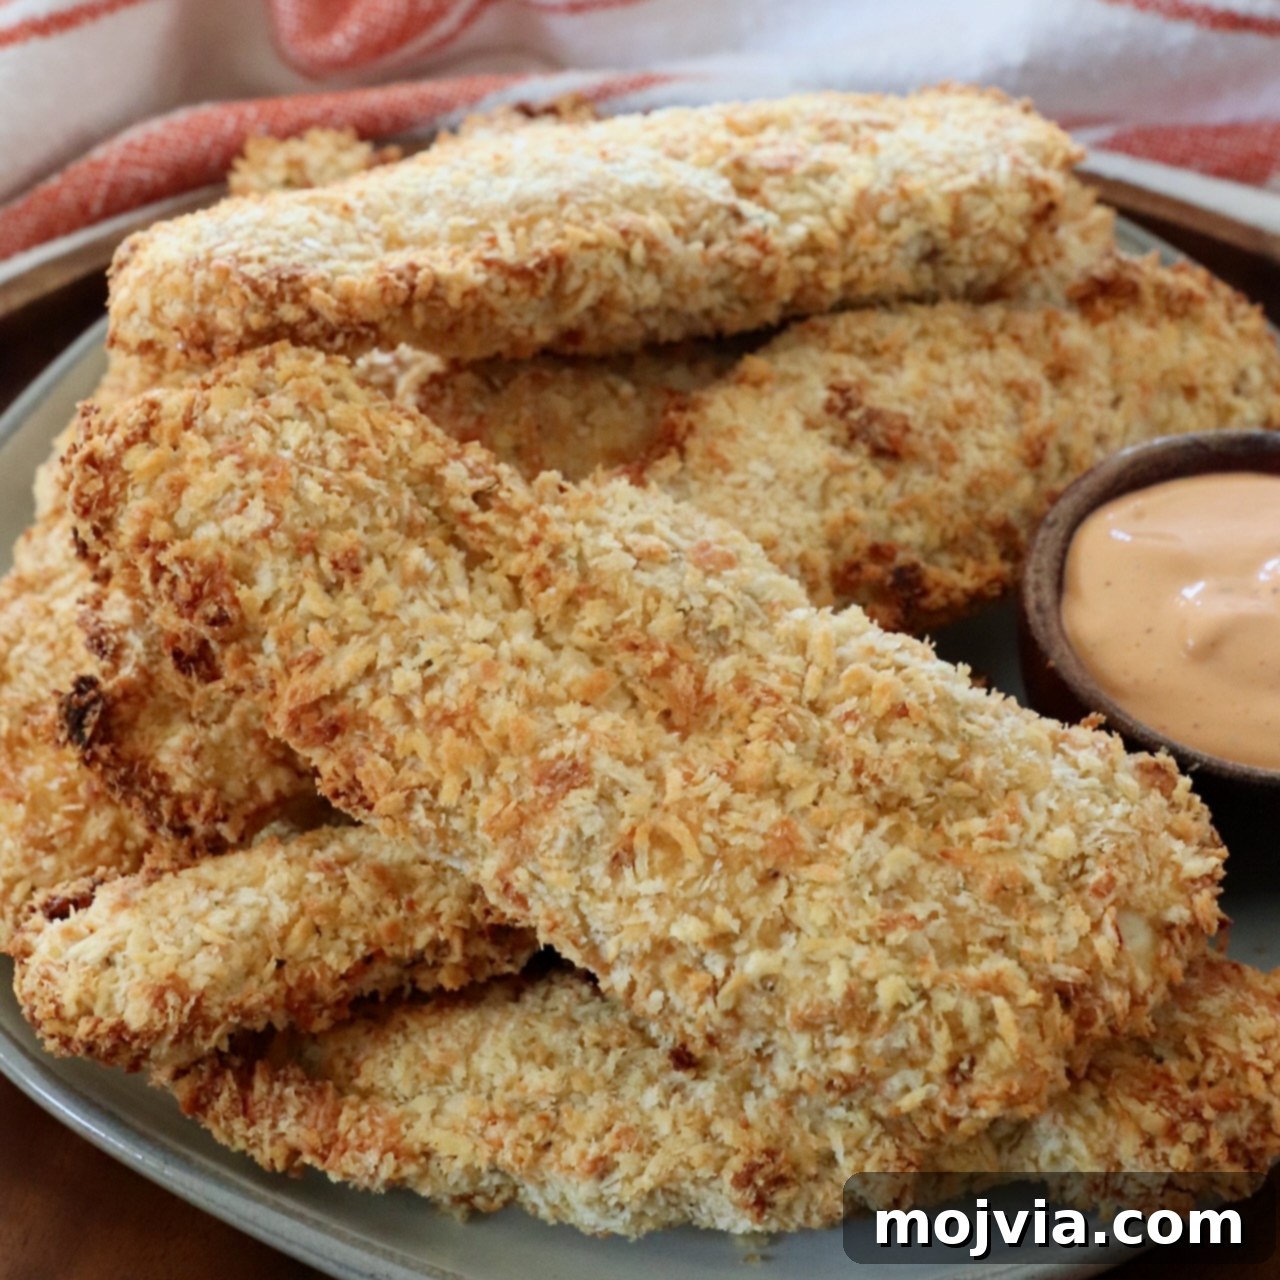
Make the best Air Fryer Chicken Tenders that are crispy on the outside and juicy on the inside with this simple recipe! These panko crusted chicken tenders taste just as good as fried chicken, but are much healthier cooked in an air fryer. They’re easy to make, and you can freeze them for a quick meal or snack later!
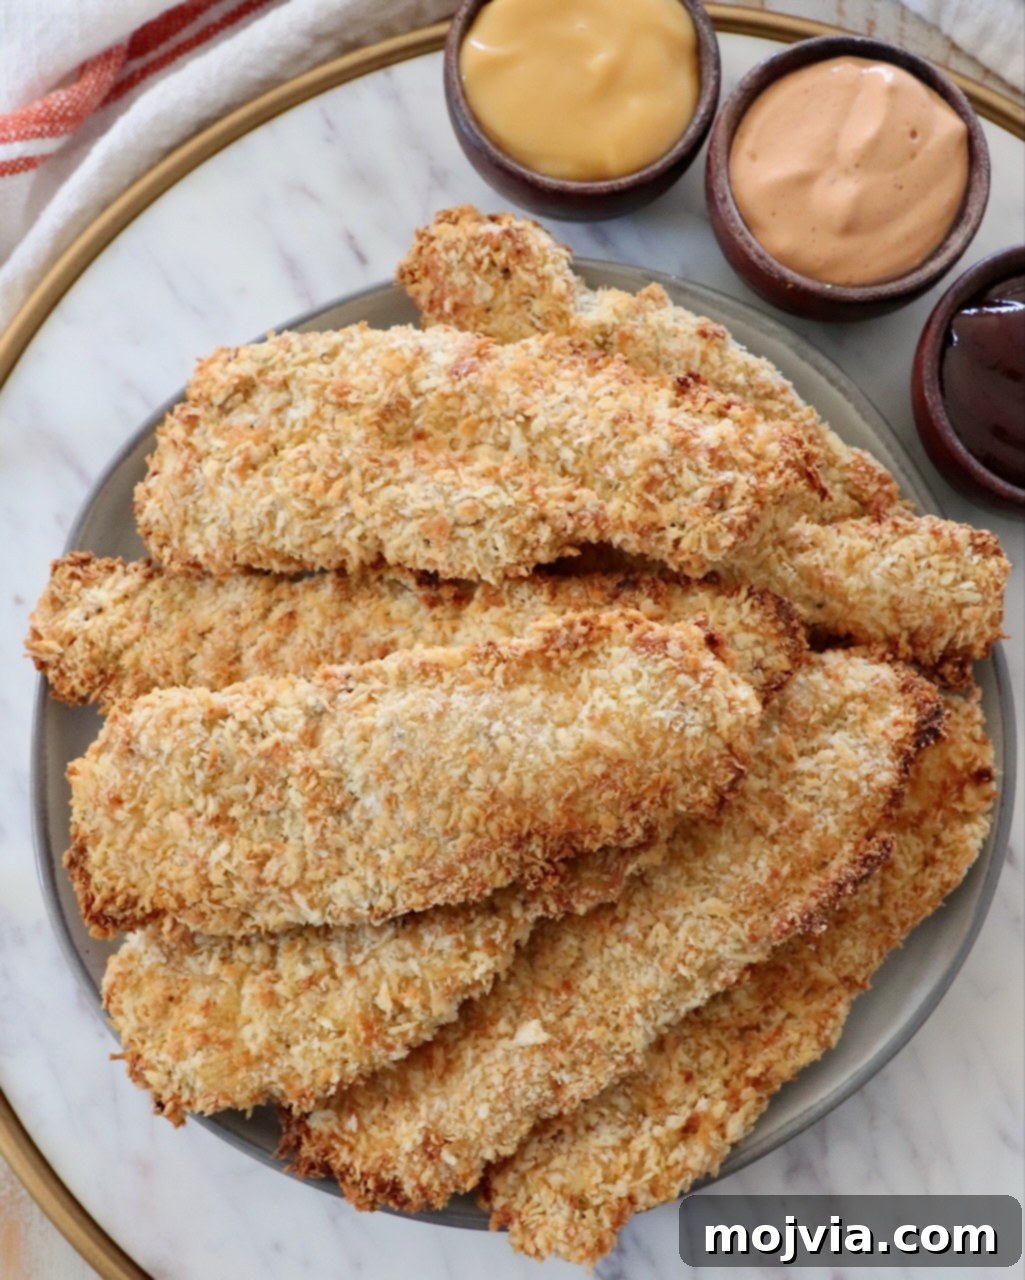
Table of contents
- The Magic of Air Fryer Chicken Tenders: Crispy, Juicy, & Healthy!
- Why Air Fryer for Chicken Tenders? Unlocking Healthier & Crispier Results
- Ingredients for Ultimate Crispiness and Flavor
- Mastering Air Fryer Chicken Tenders: A Step-by-Step Guide
- Perfect Breading Technique for Crispy Air Fryer Tenders
- Air Frying for Golden Perfection: Crispy in Minutes!
- Expert Tips for the Best Air Fryer Chicken Tenders Every Time
- Storage, Freezing, and Reheating Guide for Convenience
- Serving Suggestions: Perfect Pairings for Your Air Fryer Chicken Tenders
- Essential Tools for Making Perfect Air Fryer Chicken Tenders
- Explore More Delicious Air Fryer Recipes!
The Magic of Air Fryer Chicken Tenders: Crispy, Juicy, & Healthy!
Indulge in the ultimate comfort food with these incredible Air Fryer Chicken Tenders. Imagine perfectly golden-brown, irresistibly crispy exteriors giving way to tender, succulent chicken inside – all without the guilt and mess of deep-frying. This recipe transforms ordinary chicken breasts into sensational panko-crusted chicken tenders that rival your favorite fried versions, but with a significantly healthier twist. Whether you’re a seasoned chef or a kitchen novice, these chicken tenders are astonishingly easy to prepare, making them a fantastic choice for a quick weeknight dinner, a fun party appetizer, or a healthy snack. Plus, they’re freezer-friendly, allowing you to prepare them ahead of time for effortless meals whenever hunger strikes!
Why Air Fryer for Chicken Tenders? Unlocking Healthier & Crispier Results
If you’ve ever dreamt of enjoying crispy chicken tenders without the excessive oil, messy cleanup, and added calories of traditional deep-frying, then the air fryer is your culinary hero. This kitchen appliance uses rapid air circulation to cook food, creating a deliciously crunchy texture that mimics frying. Here’s why the air fryer is the optimal choice for your chicken tenders:
- Significantly Healthier: By using just a light coating of cooking spray instead of submerging chicken in oil, you drastically cut down on fat and calories, making these tenders a much healthier option for the whole family.
- Unmatched Crispiness: The powerful convection heat of an air fryer ensures that the panko breading becomes incredibly golden and crispy, delivering that satisfying crunch with every bite.
- Juicy & Tender Inside: The quick cooking time and even heat distribution help to lock in the chicken’s natural juices, preventing it from drying out and ensuring a wonderfully tender interior.
- Speed & Convenience: From prep to plate, these chicken tenders are ready in a fraction of the time compared to oven baking or deep frying. The air fryer heats up quickly and cooks efficiently, perfect for busy schedules.
- Minimal Mess: Say goodbye to splattering oil and greasy countertops. Air frying is a much cleaner cooking method, simplifying your post-meal cleanup.
- Versatile Meal Prep: The ability to prepare and freeze these tenders means you can have a stash of homemade, healthy chicken tenders ready to air fry at a moment’s notice.
As someone who grew up with chicken tenders being a staple (and perhaps a slight obsession!), I can confidently say that these air-fried versions bring back all the delicious nostalgia without any of the drawbacks. They’re not just a childhood favorite; they’re a timeless classic that adults equally adore, especially when paired with a variety of delectable dipping sauces or incorporated into creative meals like wraps and salads. Embrace the ease and flavor of air-fried chicken tenders – your taste buds and waistline will thank you!
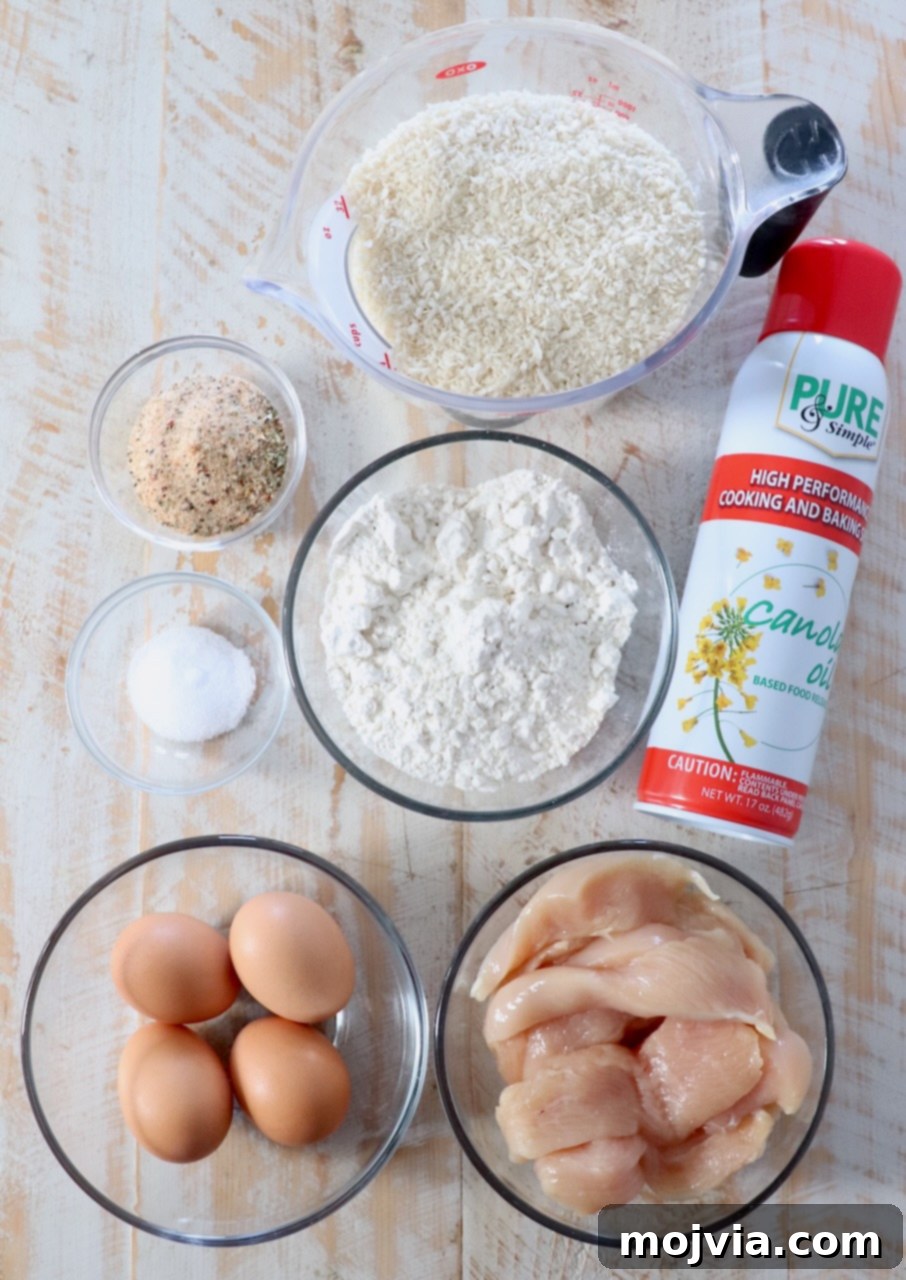
Ingredients for Ultimate Crispiness and Flavor
Crafting perfect air fryer chicken tenders starts with quality ingredients. This recipe uses a straightforward list, but each component plays a crucial role in achieving that sought-after crispy texture and rich flavor. Here’s a closer look at what you’ll need:
- Large Eggs (4): Essential for creating the “egg wash” that helps the flour and panko adhere to the chicken. Whisking them well ensures an even coating.
- All-Purpose Flour (1 cup): The initial dry coating provides a base for the egg wash, helping to create a robust crust. You can also experiment with other types of flour for different textures.
- Salt (1 teaspoon): A fundamental seasoning that enhances the natural flavor of the chicken and the breading. Don’t skip it!
- Panko Breadcrumbs (2 cups): This is your secret weapon for superior crispiness! Panko breadcrumbs are coarser and flakier than regular breadcrumbs, absorbing less oil and producing an incredibly light, crunchy texture that traditional breadcrumbs simply can’t match.
- Boneless, Skinless Chicken Breasts (1 ½ pounds): The ideal cut for tenders. For best results, slice them into uniform strips, approximately 4-6 inches long and 1 inch wide. Uniform size ensures even cooking. If you have pre-cut chicken tenderloins, those work perfectly too!
- Homemade Chicken Seasoning (3 tablespoons): This isn’t just any seasoning; it’s the SECRET INGREDIENT that elevates these tenders from good to absolutely phenomenal! While a basic salt and pepper mix works, this custom blend (containing dried parsley, salt, garlic powder, onion powder, paprika, and black pepper) infuses the chicken with an incredible depth of savory flavor that you won’t find in store-bought options. Clicking the link will provide you with the full recipe to whip up this simple yet powerful blend.
- Cooking Spray: A light, even mist of cooking spray is vital. It helps the panko breadcrumbs achieve that beautiful golden-brown color and irresistible crispiness without adding a lot of oil. Opt for a neutral oil spray like canola or avocado.
Gathering these simple ingredients is the first step towards creating air fryer chicken tenders that will become a new family favorite!
Mastering Air Fryer Chicken Tenders: A Step-by-Step Guide
Achieving perfectly crispy and juicy air fryer chicken tenders is incredibly simple when you follow these clear, step-by-step instructions. We’ve included detailed explanations and visual cues to guide you through each stage, ensuring a successful and delicious outcome every time. Remember, the full detailed recipe with precise ingredient quantities can be found in the comprehensive recipe card at the bottom of this post.
Perfect Breading Technique for Crispy Air Fryer Tenders
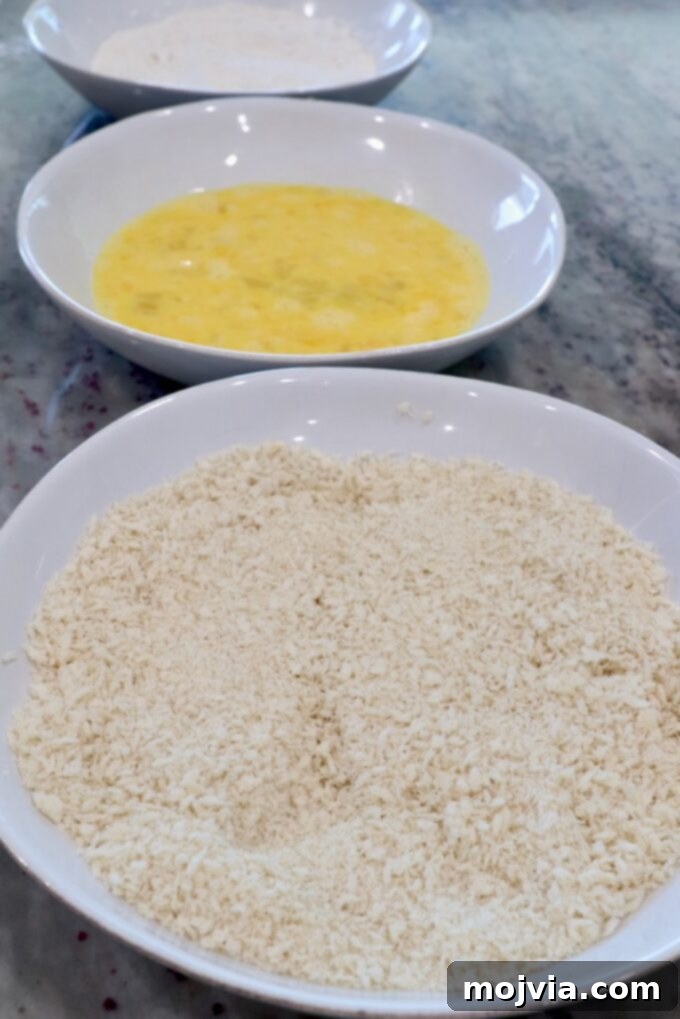
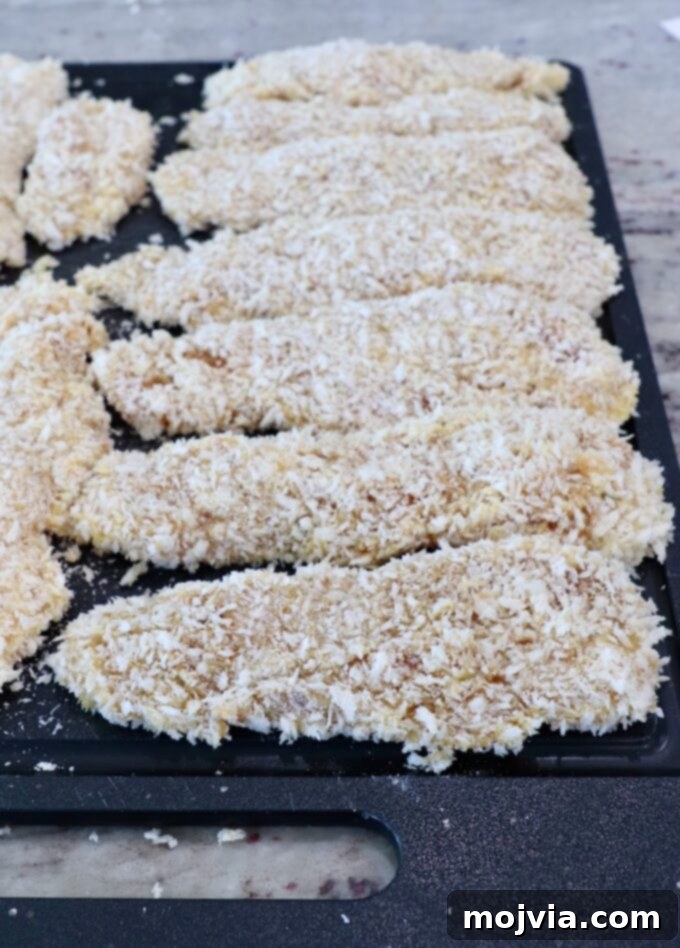
The secret to perfectly crispy air fryer chicken tenders lies in the breading process. Follow these steps meticulously to ensure every tender is coated evenly and delivers maximum crunch:
- Set Up Your Breading Station: Designate three shallow bowls or plates. In the first, whisk the 4 large eggs until fully combined to create your egg wash. In the second bowl, thoroughly mix the all-purpose flour and salt. Finally, pour the panko breadcrumbs into the third shallow bowl. This organized setup is key for efficient and clean breading.
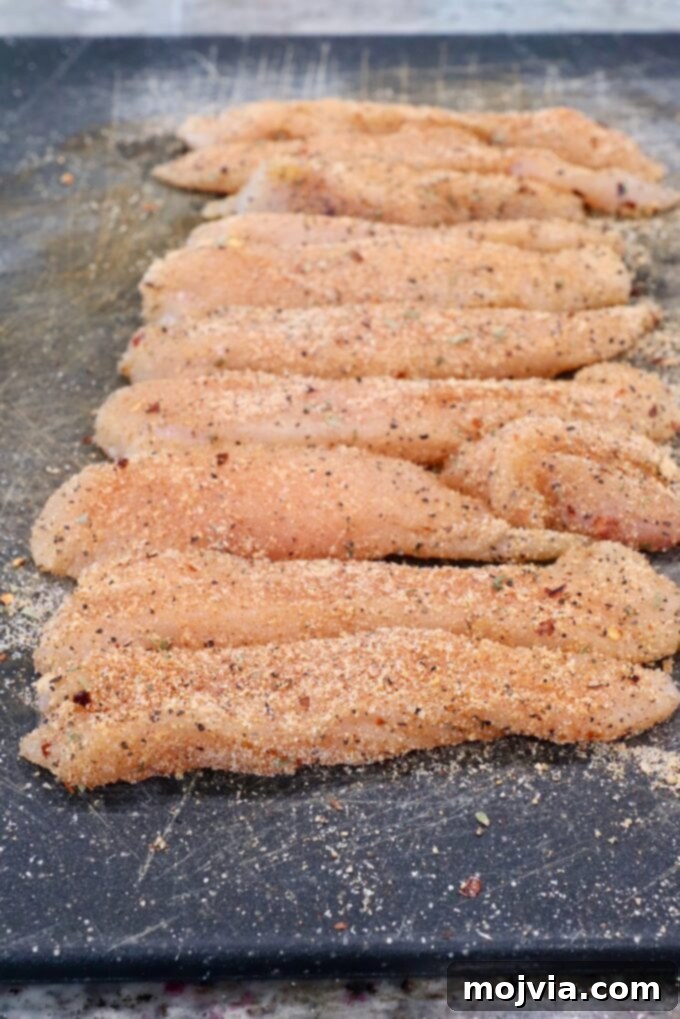
- Prepare and Season the Chicken: Take your boneless, skinless chicken breasts and slice them into uniform strips, aiming for pieces about 4-6 inches long and 1 inch wide. Consistency in size is important for even cooking. Once cut, toss these chicken strips generously with the homemade chicken seasoning until every piece is thoroughly covered. This ensures flavor penetrates deep into the meat.
- Execute the Breading Process: This is where the magic happens!
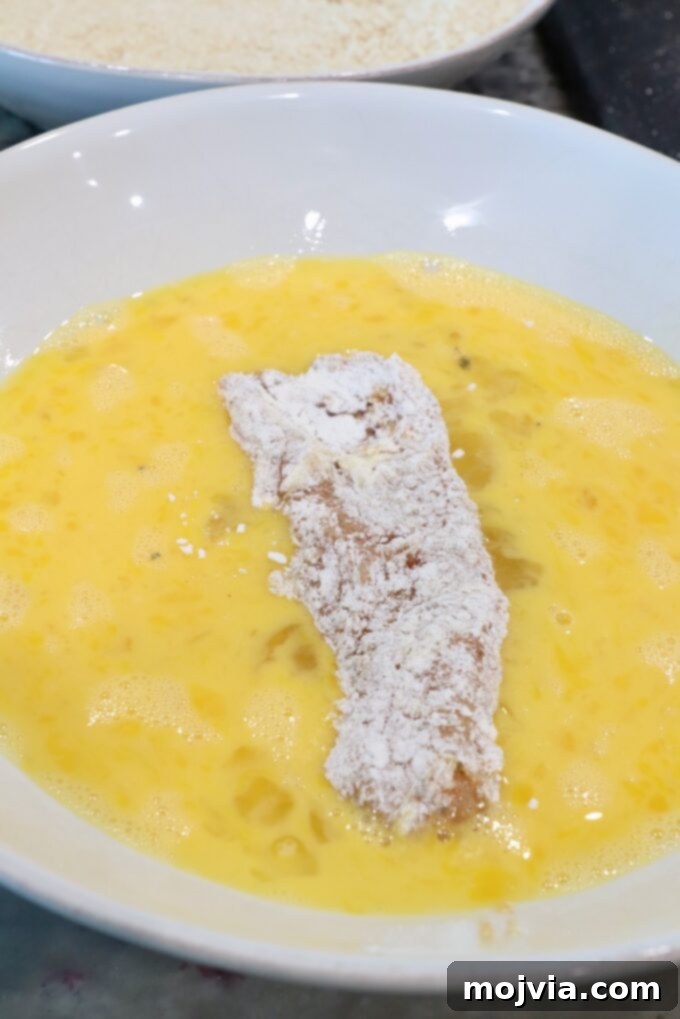
- Begin by dipping each seasoned chicken strip into the egg mixture, ensuring it’s completely coated. Allow any excess egg to drip off briefly before moving to the next step.
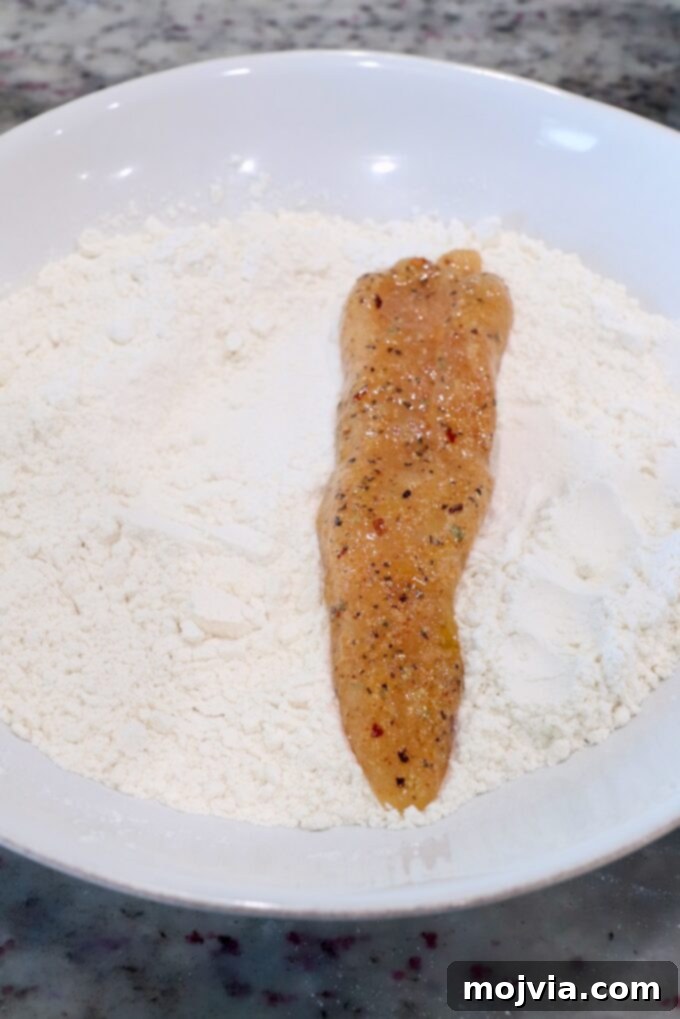
- Next, transfer the egg-coated chicken to the bowl of flour. Gently press and turn the chicken to ensure it’s fully covered in flour. Shake off any excess.
- Return the flour-dusted chicken back into the whisked eggs for a second coating. This double-dip creates a stronger bond for the panko.
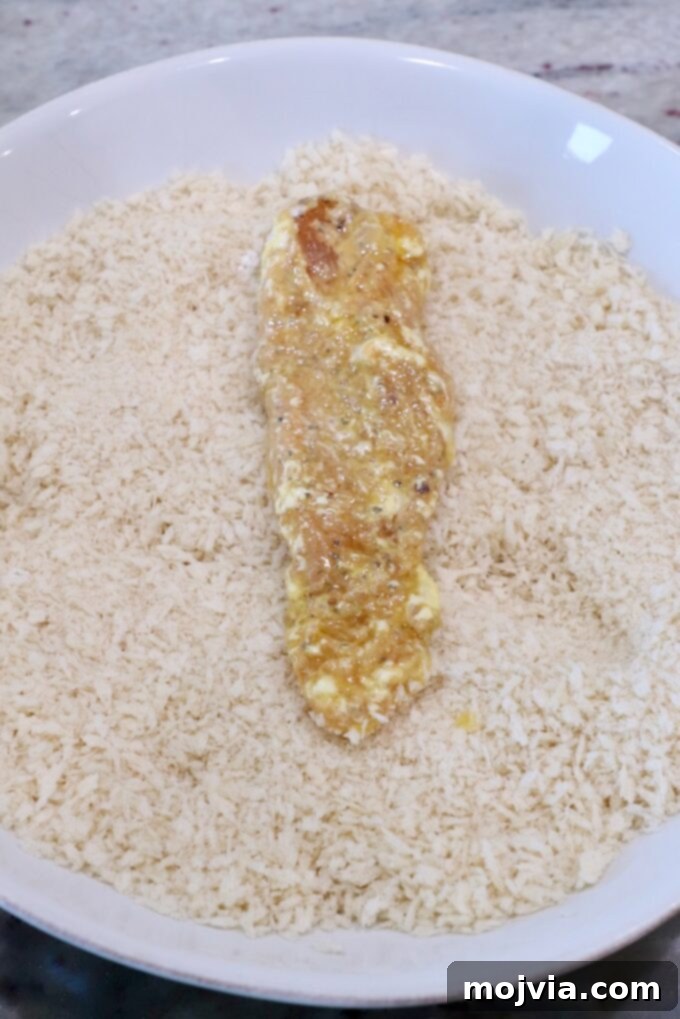
- Finally, transfer the chicken to the panko breadcrumbs. Press down lightly on all sides, ensuring the panko adheres firmly and completely to the chicken. The more panko, the crispier the tender!
Place each perfectly breaded chicken tender onto a clean cutting board or a plate as you go. Repeat this process with all remaining pieces of chicken until every tender is ready for the air fryer.
Air Frying for Golden Perfection: Crispy in Minutes!
Once your chicken tenders are perfectly breaded, it’s time to unleash the power of your air fryer to transform them into golden, crispy delights. Follow these steps for optimal cooking:
- Preheat Your Air Fryer: Always start with a preheated air fryer for the best results. Set your air fryer to 400°F (200°C) and let it preheat for about 3-5 minutes. This ensures immediate crisping and even cooking.
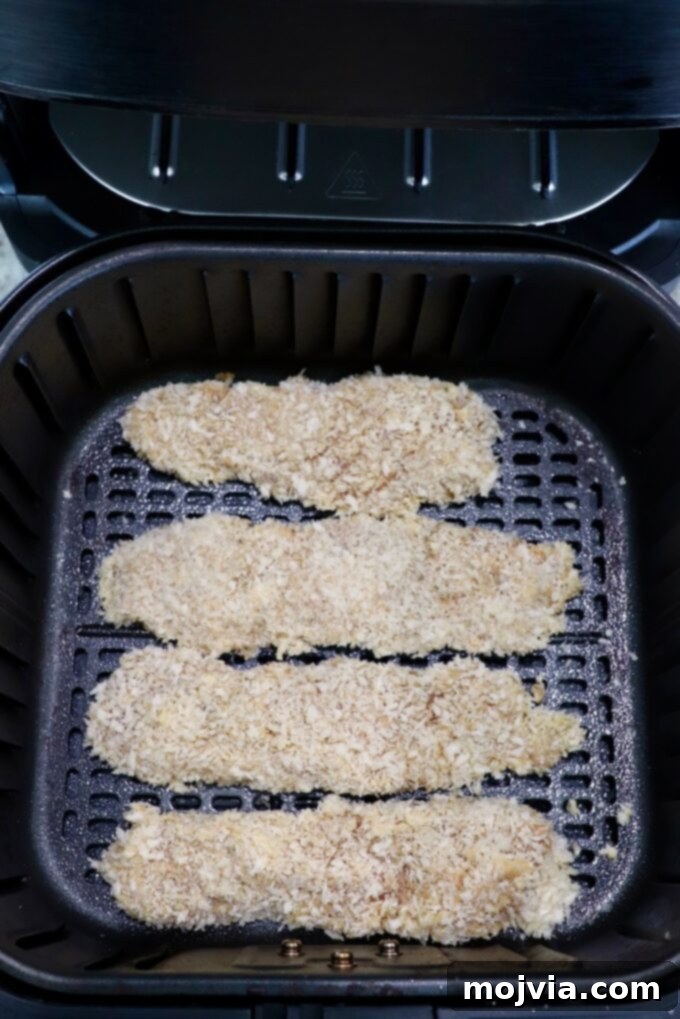
- Arrange in a Single Layer: Carefully place the breaded chicken strips into the air fryer basket in a single layer. It’s crucial not to overcrowd the basket; air needs to circulate freely around each piece to ensure even cooking and maximum crispiness. If necessary, cook in batches.
- Initial Air Fry: Lightly spray the top surface of the chicken strips with cooking spray. This helps achieve that beautiful golden-brown color and irresistible crunch. Cook at 400°F (200°C) for an initial 4-6 minutes.
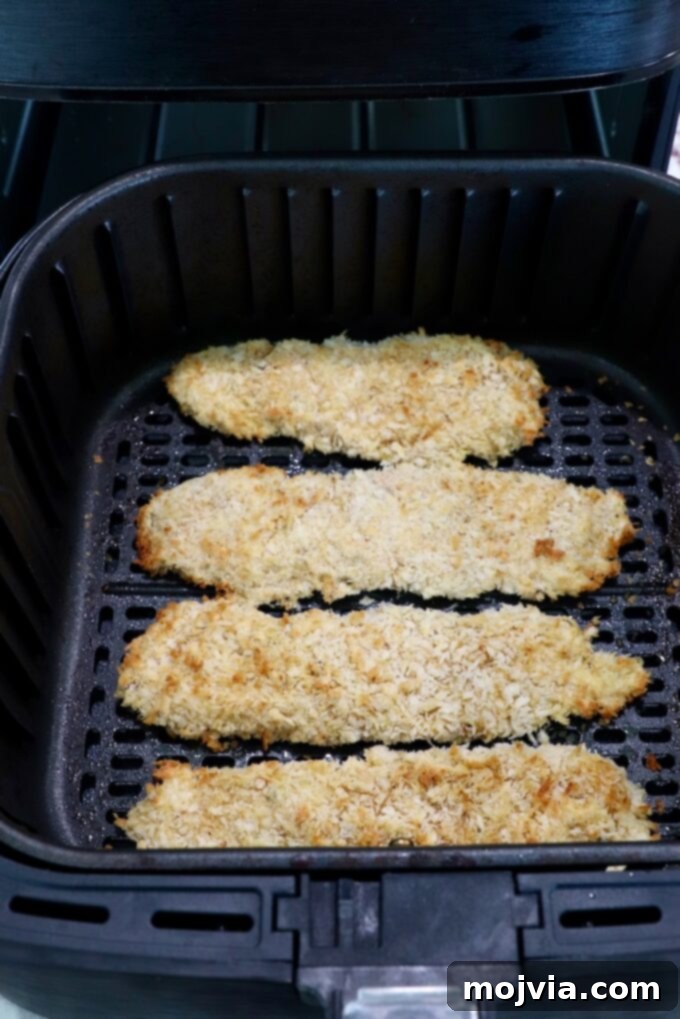
- Flip and Finish: Open the air fryer basket, carefully flip each chicken tender, and lightly spray the other side with cooking spray. Close the basket and continue cooking for an additional 4-6 minutes, or until the chicken is golden brown, crispy, and cooked through. The internal temperature of the chicken should reach 165°F (74°C).
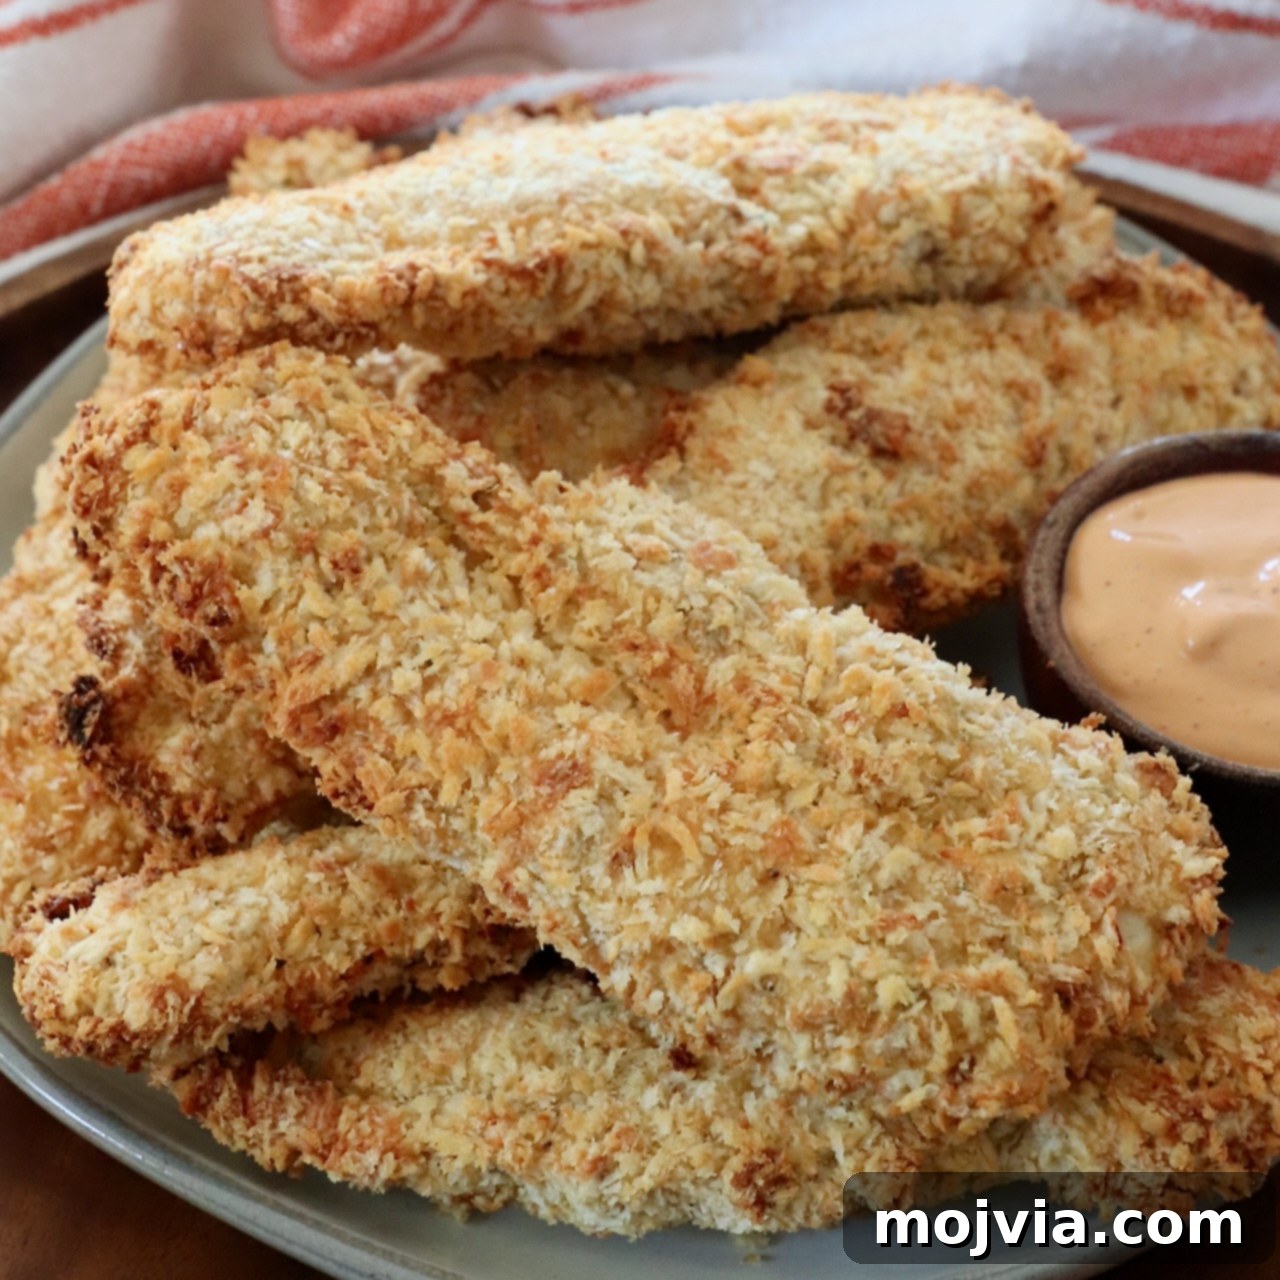
- Rest and Repeat: Once cooked, remove the chicken tenders from the air fryer and place them on a wire rack set over a baking sheet. This allows air to circulate underneath, preventing them from becoming soggy while you cook any remaining batches. Serve immediately with your favorite sides and dipping sauces!
Expert Tips for the Best Air Fryer Chicken Tenders Every Time
Achieving restaurant-quality air fryer chicken tenders is easy with a few insider tips. These techniques will help you maximize flavor, ensure crispiness, and streamline your cooking process:
- Master the Wet Hand/Dry Hand Breading Technique: This is a game-changer! Designate one hand specifically for handling wet ingredients (chicken and egg wash) and the other for dry ingredients (flour and panko). This simple trick prevents your hands from becoming clumpy with breading, keeps your workstation cleaner, and ensures a smoother, more even coating on the chicken. It’s a trick I learned from my Dad while making his famous Captain Crunch Fried Chicken – a technique that works wonders here too! Speaking of which, for a fun twist, you can adapt this recipe to make an air fryer version of Captain Crunch chicken by substituting crushed Captain Crunch cereal for the panko breadcrumbs!
- For Gluten-Free Options: Easily adapt this recipe for gluten-free diets. Simply replace the all-purpose flour with your favorite gluten-free flour blend or rice flour. Crucially, use gluten-free panko breadcrumbs, which are widely available and perform just as well as traditional panko in achieving a crispy crust.
- Batch Cooking & Scaling the Recipe: This recipe yields approximately 12 chicken tenders. If you’re feeding a crowd or planning for meal prep, you can easily double the recipe. For convenience, the ingredient amounts in the recipe card below can be adjusted automatically by clicking the 2X button, making it simple to scale up.
- No Air Fryer? No Problem! Oven Instructions: Don’t have an air fryer yet? You can still make these delicious chicken tenders in your conventional oven. Preheat your oven to 425°F (220°C). For the crispiest results, use the convection setting if your oven has one. Place the breaded chicken tenders on a wire rack positioned over a foil-lined baking sheet. Lightly spray the tenders with cooking spray, then bake for about 15 minutes, or until they are beautifully golden brown and cooked through.
- Flavor Variations with Different Seasonings: While our signature chicken seasoning is highly recommended, feel free to get creative with other spice blends! Explore new flavor profiles by using my famous Chicken Wing Seasoning for a zesty kick, or my Cajun Seasoning to add a delightful spicy warmth. The possibilities are endless!
- Avoid Overcrowding the Basket: For truly crispy tenders, proper air circulation is vital. Cook in batches if necessary, ensuring there is space between each tender in the air fryer basket. Overcrowding leads to steaming rather than crisping, resulting in soggy tenders.
- Check for Doneness: The safest way to ensure chicken is fully cooked is by using a meat thermometer. Insert it into the thickest part of the chicken tender; it should read an internal temperature of 165°F (74°C).
- Rest for Juiciness: Once cooked, allow the chicken tenders to rest for 2-3 minutes on a wire rack before serving. This allows the juices to redistribute, ensuring maximum tenderness and flavor.
Storage, Freezing, and Reheating Guide for Convenience
These air fryer chicken tenders are not only delicious fresh but also incredibly versatile for meal prepping and storing. This recipe makes approximately 12 chicken tenders, perfect for enjoying now and saving some for later. Here’s how to best store and reheat them:
- Freezing Uncooked Chicken Tenders: For ultimate convenience, you can bread the chicken tenders ahead of time and freeze them. Simply arrange the battered, uncooked chicken tenders in a single layer on a baking sheet and freeze until solid (about 1-2 hours). Once frozen, transfer them to a freezer-safe airtight container or heavy-duty freezer bag. They will keep beautifully in the freezer for up to 3 months.
- Cooking Frozen Tenders Directly: When you’re ready to cook your frozen, breaded chicken tenders, there’s no need to thaw! Just add an extra 2 minutes to the cooking time per side. So, cook them at 400°F (200°C) for 6-8 minutes per side, or until golden brown and cooked through to an internal temperature of 165°F (74°C). This makes for an incredibly quick and easy meal on demand.
- Storing Cooked Leftovers: If you have any cooked chicken tenders left over, allow them to cool completely before storing. Place them in an airtight container and refrigerate for up to 5 days.
- Reheating Cooked Tenders: To bring leftover chicken tenders back to their crispy glory, reheating them in the air fryer is key. Simply pop them back into a preheated air fryer at 400°F (200°C) for just 2-3 minutes. This method ensures they become delightfully crispy again, rather than soggy like microwave reheating might make them.
With these storage and reheating tips, you can enjoy homemade, healthy chicken tenders whenever you desire, making meal planning a breeze!
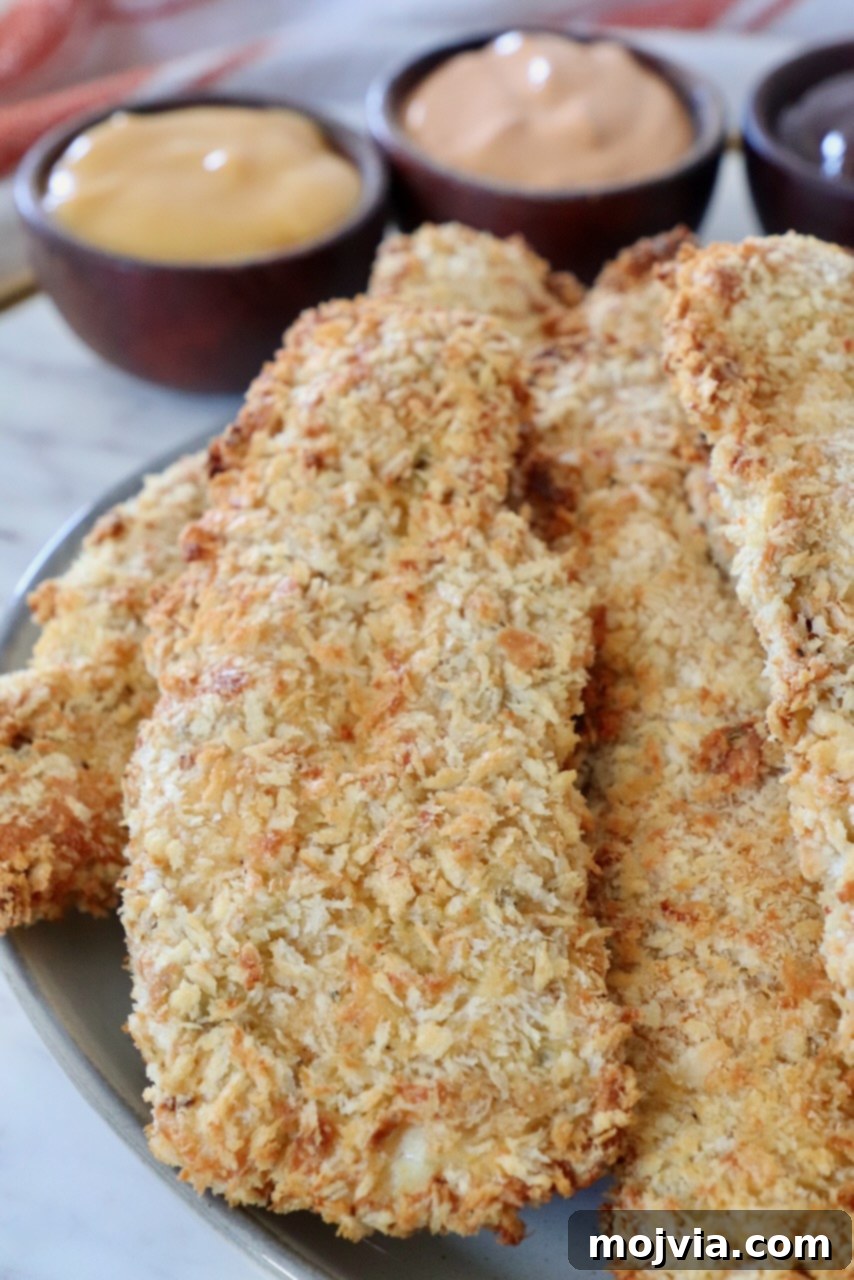
Serving Suggestions: Perfect Pairings for Your Air Fryer Chicken Tenders
Air Fryer Chicken Tenders are incredibly versatile and pair beautifully with a wide array of side dishes and dipping sauces. Whether you’re planning a family dinner, a casual lunch, or a game-day spread, these tenders are sure to be a hit. Here are some fantastic ideas to complete your meal:
Delicious Side Dishes to Complement Your Tenders:
- Air Fryer French Fries: The ultimate classic pairing! Double down on air-fried goodness for an easy, crispy duo.
- Animal Style Fries (In-N-Out Copycat): Elevate your fry game with this flavor-packed copycat recipe.
- Mac and Cheese: A creamy, comforting classic. Our easy 20-minute stovetop recipe makes it a perfect quick addition.
- Baked Sweet Potato Fries: A healthier and flavorful alternative to traditional fries, offering a touch of sweetness.
- Loaded Mashed Potatoes: Creamy, cheesy, and utterly satisfying – a hearty side that complements the tenders well.
- Crispy Smashed Potatoes: Achieve another layer of crispy goodness with these flavorful and tender smashed potatoes.
- Fresh Salad: For a lighter option, a crisp green salad with a vibrant vinaigrette offers a refreshing contrast.
- Steamed Vegetables: Broccoli, green beans, or asparagus provide a healthy and colorful addition to your plate.
Irresistible Dipping Sauces for Every Palate:
- Chipotle Sauce: A smoky and slightly spicy choice that adds a wonderful depth of flavor.
- Jack Daniel’s BBQ Sauce: Sweet, tangy, and with a hint of whiskey, this sauce is always a crowd-pleaser.
- White BBQ Sauce: A unique, tangy, and creamy Alabama-style sauce that’s perfect for chicken.
- Garlic Parmesan Sauce: Rich, savory, and incredibly addictive – a must-try for garlic lovers.
- Buffalo Sauce: For those who love a spicy kick, classic buffalo sauce is a timeless choice.
- Honey Mustard: The perfect balance of sweet and tangy, universally loved by kids and adults alike.
- Chick-Fil-A Sauce: Recreate the iconic fast-food flavor right at home with this creamy, tangy sauce.
- Carolina Gold BBQ Sauce: A mustard-based BBQ sauce offering a distinct sweet and tangy profile.
- Ranch Dressing: A creamy, herby classic that’s always a hit.
- Blue Cheese Dressing: A pungent and creamy option for those who enjoy its bold flavor.
- Polynesian Sauce: A sweet and sour sauce with a tropical twist, reminiscent of your favorite takeout.
- Southwest Salad Dressing: Adds a zesty, creamy, and slightly spicy flair to your tenders.
Creative Ways to Enjoy Your Tenders Beyond Dipping:
Beyond dipping, air fryer chicken tenders are fantastic for incorporating into other dishes:
- Chicken Wraps: Dice them up and add to a tortilla with fresh veggies, cheese, and your favorite dressing for a satisfying wrap. They’re especially delicious in this Buffalo Chicken Wrap.
- Salad Toppers: Slice them and place them on top of a vibrant salad for added protein and crunch. They work wonderfully with this Cobb Salad or as a copycat for a Chick-Fil-A Crispy Chicken Salad.
- Sandwiches & Sliders: Use them as the main protein in a delicious sandwich or slider.
With so many options, you’ll never get tired of these versatile and delicious air fryer chicken tenders!
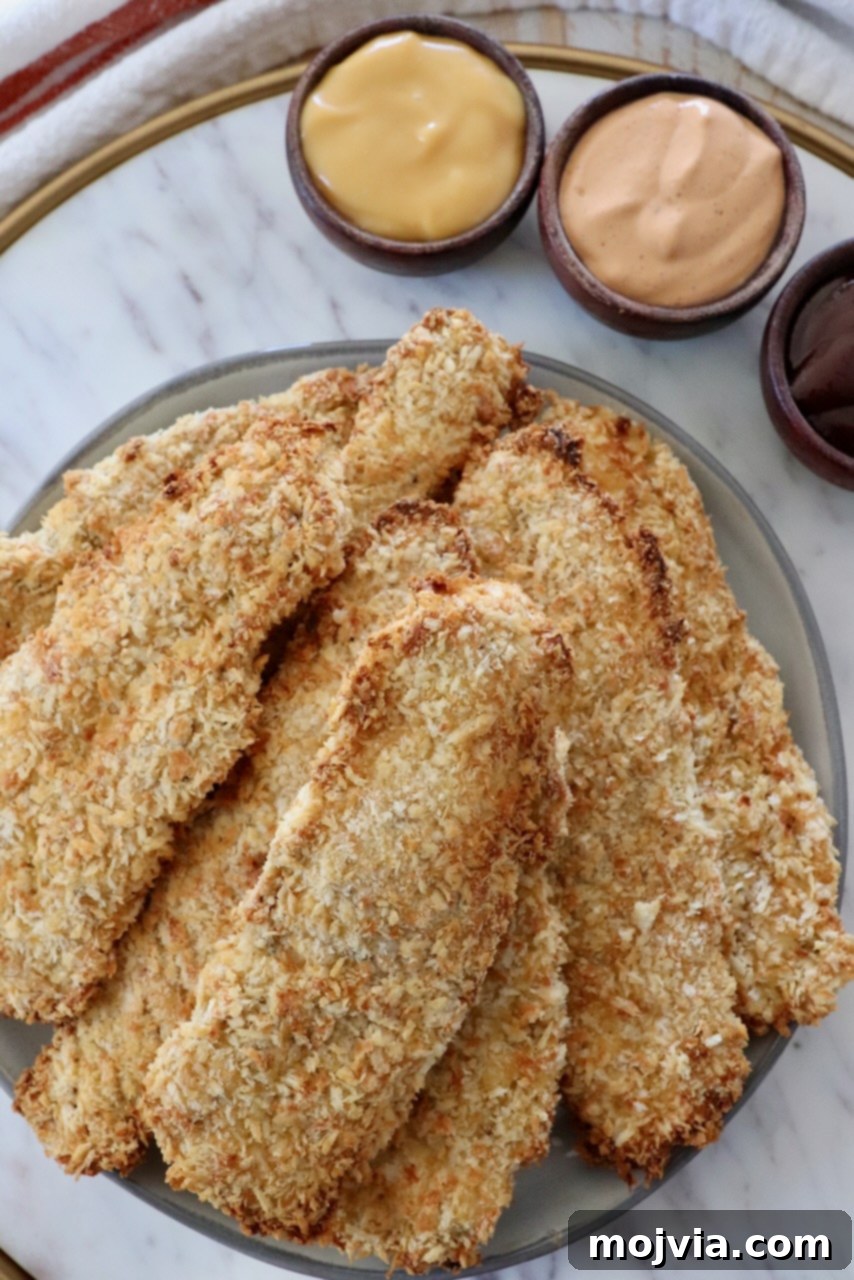
Essential Tools for Making Perfect Air Fryer Chicken Tenders
Having the right tools can make all the difference in the kitchen, especially when striving for perfection with your air fryer chicken tenders. Here are the essential items that will help you achieve the best results:
- Air Fryer (5.8 Quart or similar): A quality air fryer is, of course, the star of this recipe. A 5.8-quart model is often a good size for family meals, allowing you to cook a decent batch of tenders without overcrowding.
- Air Fryer Parchment Paper Liners: These are a lifesaver for easy cleanup! They prevent food from sticking to the basket and catch any drips, making post-cooking tidying a breeze.
- Kitchen Tongs: Indispensable for safely flipping chicken tenders in the hot air fryer basket and transferring them to a wire rack once cooked. Long-handled, heat-resistant tongs are ideal.
- Shallow Bowls (3): For setting up your breading station efficiently.
- Sharp Knife and Cutting Board: For safely preparing and slicing your chicken breasts into uniform strips.
- Meat Thermometer: While optional, a reliable meat thermometer is the best way to ensure your chicken is cooked to a safe internal temperature of 165°F (74°C) without overcooking.
- Wire Rack and Baking Sheet: Useful for resting cooked tenders to maintain crispiness and for freezing uncooked tenders in a single layer.
With these tools at hand, you’ll be well-equipped to make perfectly crispy and juicy air fryer chicken tenders with ease!
Explore More Delicious Air Fryer Recipes!
The air fryer is a versatile appliance capable of creating a wide variety of delicious and healthier dishes beyond just chicken tenders. If you’re loving the convenience and results, fire up your air fryer and dive into these other fantastic recipes to expand your culinary repertoire:
Air Fryer Chicken Tenders Recipe
Yields: 12 chicken tenders
Prep time: 25 mins
Cook time: 10 mins
Total time: 35 mins
Author: Whitney Bond
Course: Appetizer, Main Course
Cuisine: American
Ingredients:
- 4 large eggs, whisked
- 1 cup all-purpose flour
- 1 teaspoon salt
- 2 cups panko breadcrumbs
- 1 ½ pounds boneless, skinless chicken breasts, sliced into 4-6 inch strips
- 3 tablespoons chicken seasoning (click link for recipe)
- Cooking spray (e.g., canola or avocado oil)
Instructions:
Part 1: Breading the Chicken Tenders
- Prepare three shallow bowls: In the first, whisk 4 large eggs. In the second, combine 1 cup all-purpose flour and 1 teaspoon salt. In the third, add 2 cups panko breadcrumbs.
- Cut the chicken breasts into uniform 4-6 inch strips. Toss the chicken strips thoroughly with 3 tablespoons of chicken seasoning until fully coated.
- Using the “wet hand/dry hand” method, dip each seasoned chicken strip into the egg wash, letting excess drip off.
- Transfer the chicken to the flour bowl, coating completely. Shake off any excess flour.
- Dip the flour-coated chicken back into the egg wash.
- Finally, transfer to the panko breadcrumbs, pressing gently on all sides to ensure a complete and firm coating.
- Place the breaded chicken on a cutting board or clean plate and repeat with the remaining chicken strips.
Part 2: Air Frying the Chicken Tenders
- Preheat your air fryer to 400°F (200°C) for 3-5 minutes.
- Arrange the breaded chicken tenders in a single layer in the air fryer basket, ensuring not to overcrowd. Cook in batches if necessary.
- Lightly spray the top of the chicken tenders with cooking spray. Cook for 4-6 minutes.
- Open the air fryer, carefully flip the chicken, and spray the other side with cooking spray. Cook for an additional 4-6 minutes, or until golden brown, crispy, and the internal temperature reaches 165°F (74°C).
- Remove cooked tenders to a wire rack to prevent sogginess. Repeat with any remaining batches.
- Serve immediately with your favorite dipping sauces and sides.
Recipe Notes:
- Breading Technique: Use one hand for wet ingredients and one for dry to prevent clumping and keep your hands clean.
- Gluten-Free Option: Substitute all-purpose flour with a gluten-free flour blend and use gluten-free panko breadcrumbs.
- Scaling the Recipe: This recipe yields about 12 tenders. Easily double for more servings.
- Oven Baking Method: If you don’t have an air fryer, bake at 425°F (220°C) for 15 minutes on a wire rack over a foil-lined baking sheet, spraying with cooking spray.
- Flavor Variations: Experiment with Chicken Wing Seasoning or Cajun Seasoning for different flavor profiles.
- Freezing Uncooked Tenders: Bread and freeze on a baking sheet until solid, then transfer to an airtight container for up to 3 months. Cook from frozen by adding 2 minutes per side to the air frying time (total 6-8 minutes per side).
- Storing Cooked Leftovers: Store in an airtight container in the refrigerator for up to 5 days.
- Reheating Cooked Tenders: Reheat in the air fryer at 400°F (200°C) for 2-3 minutes for best crispiness.
Nutrition Facts (per serving):
- Calories: 206 kcal (10%)
- Carbohydrates: 23g (8%)
- Protein: 18g (36%)
- Fat: 4g (6%)
- Saturated Fat: 1g (5%)
- Polyunsaturated Fat: 1g
- Monounsaturated Fat: 1g
- Cholesterol: 91mg (30%)
- Sodium: 427mg (18%)
- Potassium: 287mg (8%)
- Fiber: 1g (4%)
- Sugar: 1g (1%)
- Vitamin A: 123mg (2%)
- Vitamin C: 1mg (1%)
- Calcium: 59mg (6%)
- Iron: 2mg (11%)
Enjoy your homemade Air Fryer Chicken Tenders! Don’t forget to share your creations and tag @WhitneyBond #WBRecipes on Instagram!