
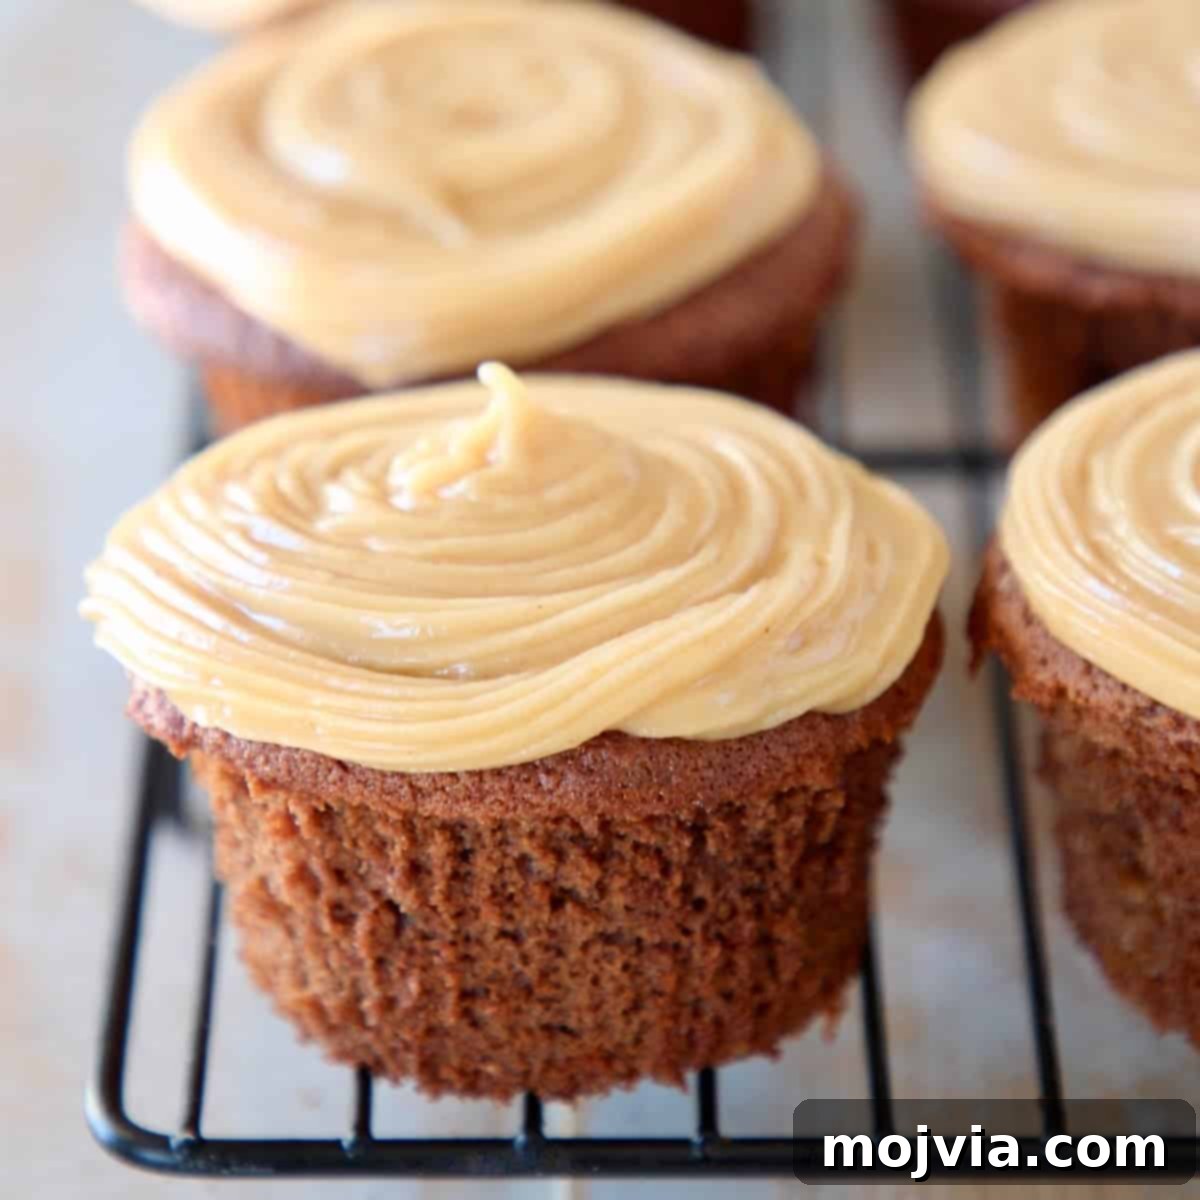
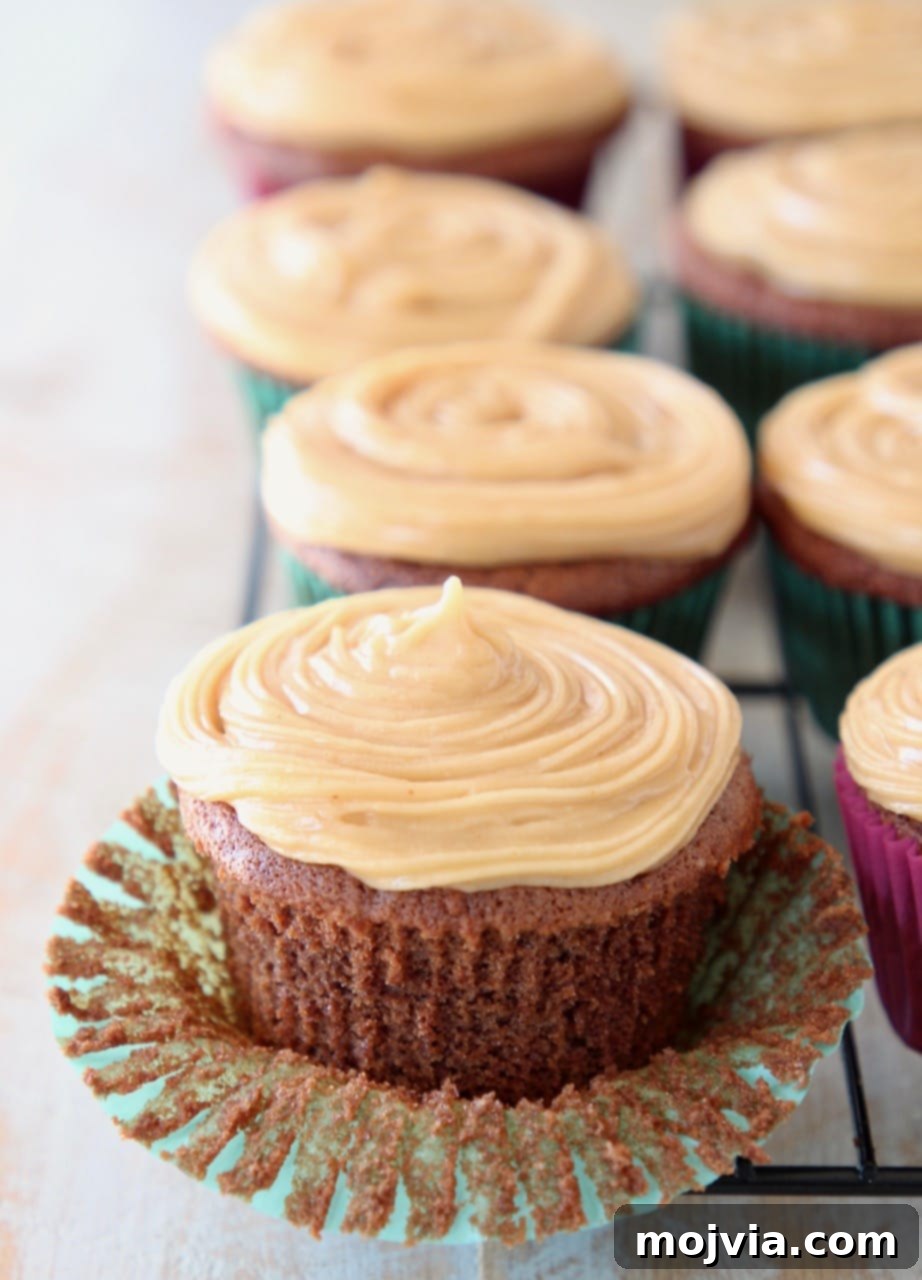
Get ready for an extraordinary treat! Imagine your favorite chocolate peanut butter candy, transformed into the most luscious, irresistible cupcake you’ve ever tasted. These **Gluten-Free Peanut Butter Chocolate Cupcakes** are not just a dessert; they’re an experience. Boasting a rich, moist chocolate base, a creamy peanut butter filling, and crowned with a decadent peanut butter frosting, these cupcakes are so incredibly good, no one will ever suspect they’re gluten-free. Prepare to impress everyone with this perfect blend of classic flavors and tender texture!
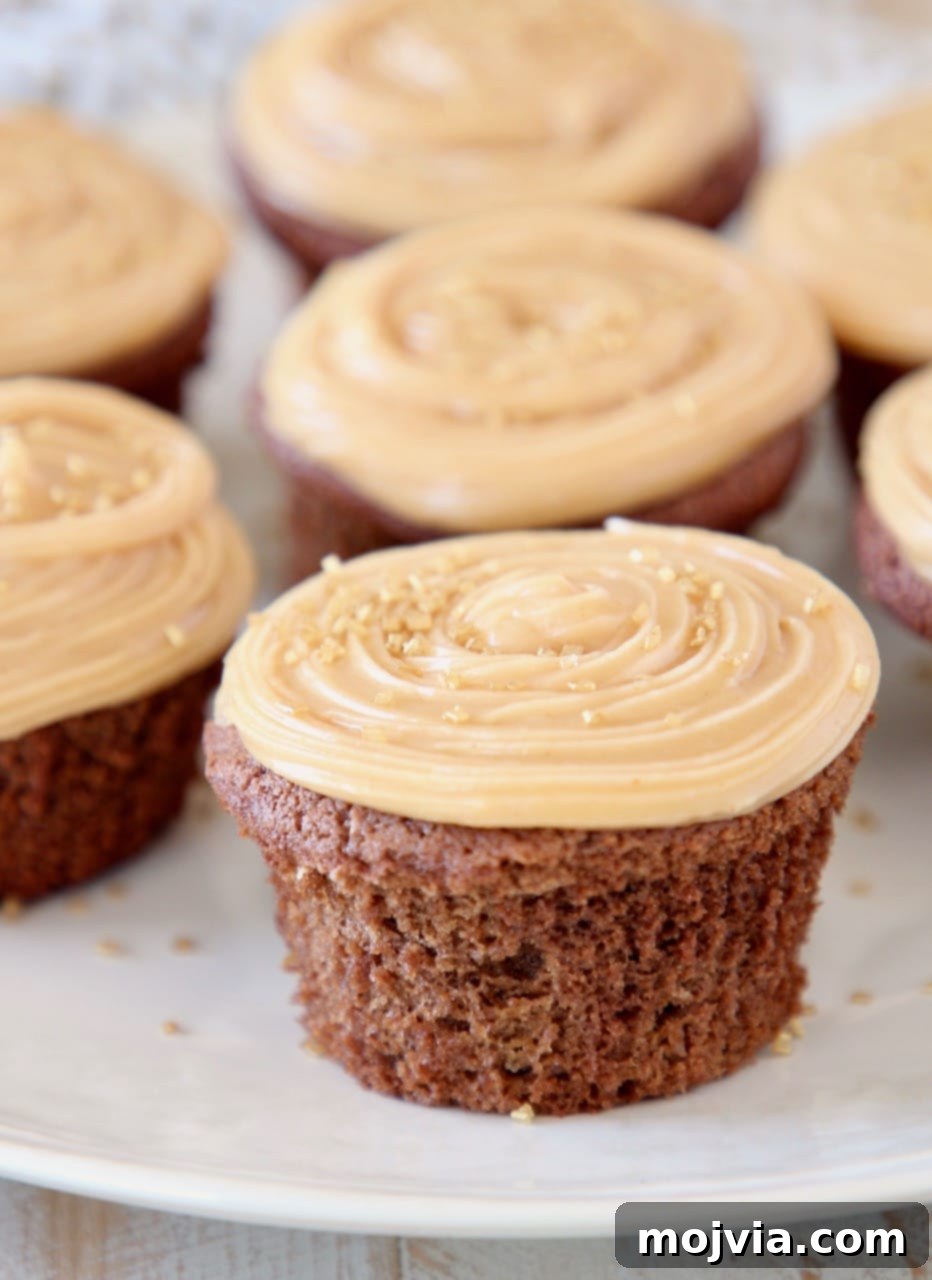
If the mere thought of a Reese’s Peanut Butter Cup makes your mouth water, then this gluten-free cupcake recipe is about to become your new obsession. My enduring love for that iconic chocolate and peanut butter combination sparked the creation of this recipe several years ago, and it has since become a staple at countless gatherings, birthday parties, and special events. What makes these cupcakes truly exceptional is their uncanny ability to fool even the most discerning palates. Time and time again, guests are astonished when I reveal that these tender, flavorful treats are entirely gluten-free. They possess all the moistness and decadent richness of a traditional chocolate cupcake, making them not just the best gluten-free cupcakes I’ve ever made, but arguably the best cupcakes, period.
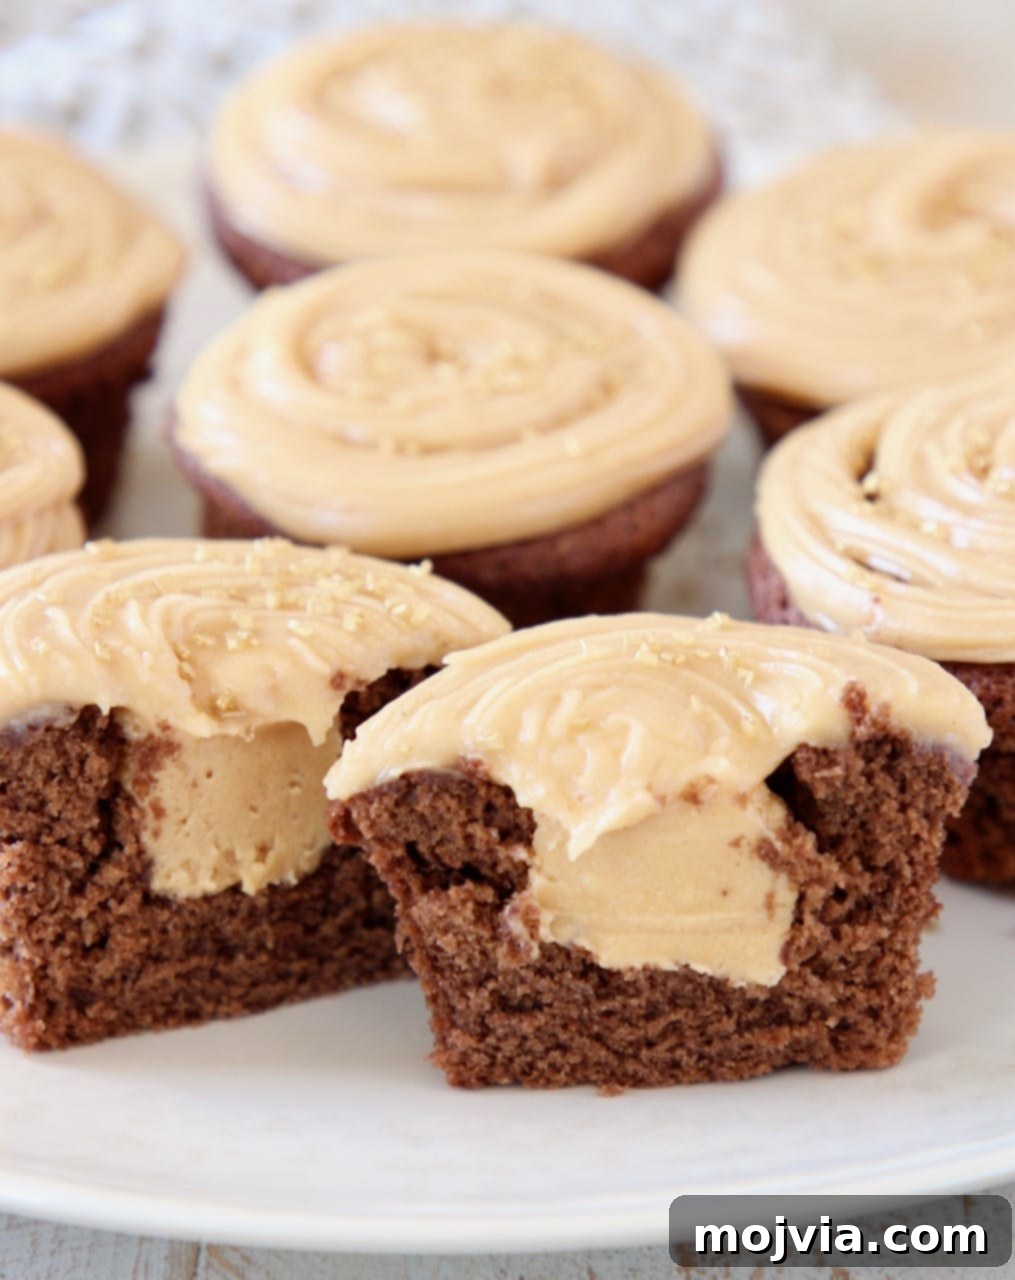
Each bite delivers a symphony of flavors and textures: a bakery-quality chocolate cupcake, generously filled with a sweet, creamy peanut butter center, and elegantly topped with a swirl of velvety peanut butter frosting. Life truly doesn’t get much sweeter than enjoying these homemade delights with friends and family.
Crafting Your Irresistible Gluten-Free Peanut Butter Chocolate Cupcakes
Creating these delightful cupcakes is a straightforward process, broken down into manageable steps. Follow these instructions for a perfect batch every time:
- Prepare the Gluten-Free Chocolate Cupcake Batter: Begin by combining your dry ingredients. In a small mixing bowl, whisk together the gluten-free flour blend, cocoa powder, baking powder, baking soda, and a pinch of salt. Set this aside. In a separate, larger bowl, cream together the softened butter and a portion of peanut butter until smooth. This combination lays the foundation for a rich flavor profile. Gradually add both white and brown sugar, beating with an electric hand mixer until the mixture is light and fluffy. Incorporate the eggs one at a time, mixing well after each addition to ensure everything is thoroughly combined. Finally, pour in the milk and vanilla extract, mixing until just blended. Gently fold the dry ingredients into the wet mixture until just combined. Be careful not to overmix, as this can lead to tough cupcakes.
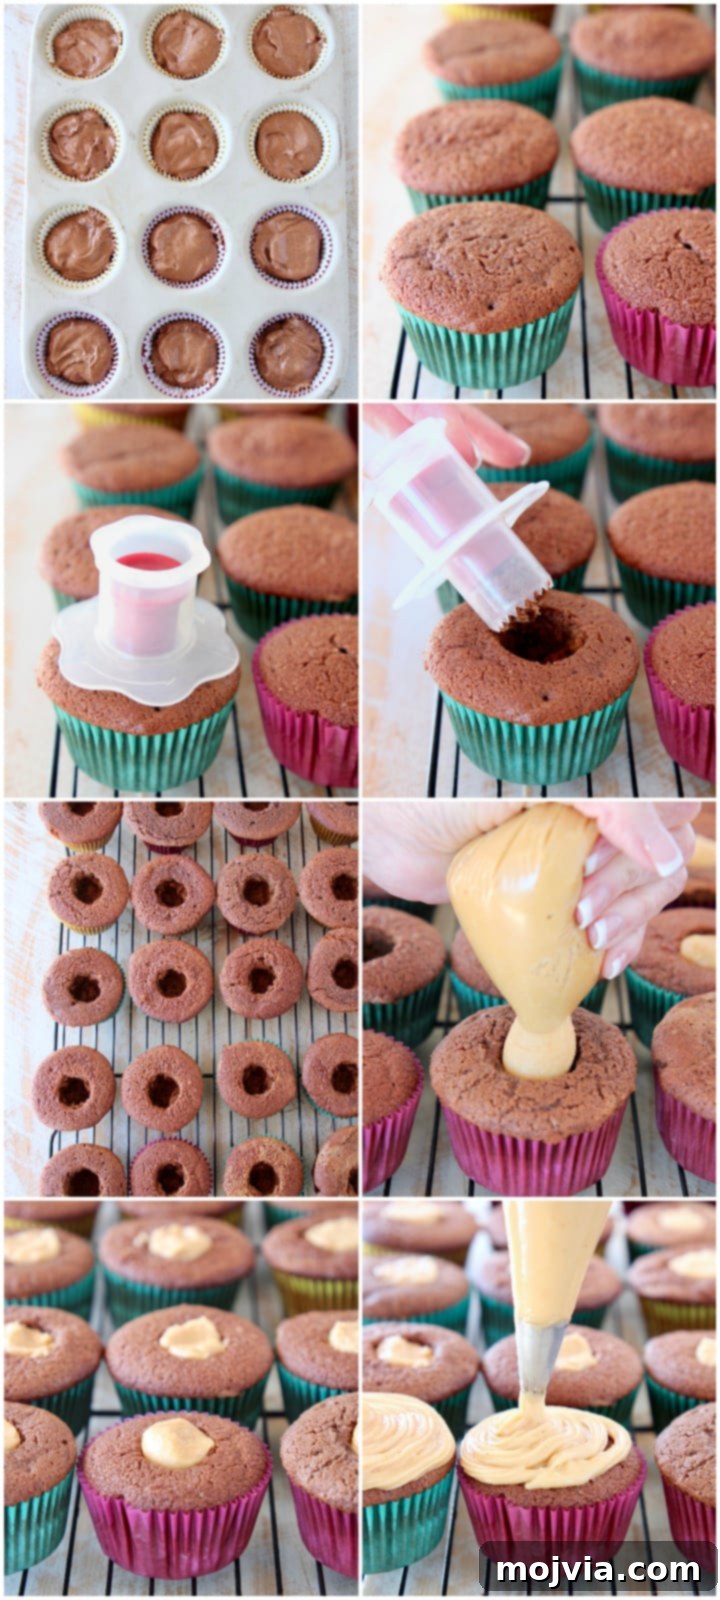
- Bake the Gluten-Free Chocolate Cupcakes: Preheat your oven to 350 degrees Fahrenheit (175°C). Line two standard cupcake pans with paper liners, preparing for 24 cupcakes. Carefully fill each liner approximately three-quarters full with the prepared batter. Bake for about 20-25 minutes, or until a wooden skewer or toothpick inserted into the center of a cupcake comes out clean. Once baked, remove the cupcakes from the oven and allow them to cool completely on a wire baking rack. This crucial step prevents the filling and frosting from melting.
- Prepare the Peanut Butter Filling: While your cupcakes are cooling, prepare the luscious peanut butter filling. In a medium mixing bowl, cream together softened butter, creamy peanut butter, and powdered sugar until smooth and well combined. The consistency should be thick enough to hold its shape for piping. Transfer this delicious filling into a piping bag fitted with a round tip, or simply use a large, sturdy resealable bag with a corner snipped off. Quick Tip! Avoid using “stand and fill” style resealable bags, as their pleated bottoms make it difficult to cut a clean hole for piping.
- Fill the Cupcakes with Peanut Butter Goodness: Once the cupcakes are fully cooled, use a sharp paring knife or a cupcake corer to carve a small hole in the center of each cupcake. Don’t discard those delectable middle pieces! Chef’s Delight! Save the leftover cupcake crumbs to sprinkle over ice cream or yogurt for an extra treat. Now, pipe the prepared peanut butter filling generously into the center of each cored cupcake, ensuring a delightful surprise in every bite.
- Whip Up the Peanut Butter Frosting: In a large bowl, combine creamy peanut butter, powdered sugar, honey, vanilla extract, and milk. Beat with an electric mixer until the frosting is light, fluffy, and smooth. If the frosting is too thick, add milk a teaspoon at a time until the desired consistency is reached. If it’s too thin, add more powdered sugar. Transfer the frosting to a pastry bag fitted with your favorite piping tip, or use another large resealable bag with a corner snipped off.
- Frost the Cupcakes with Flair: With your piping bag ready, elegantly swirl or pipe the peanut butter frosting onto the top of each filled cupcake. Get creative with your piping technique, or simply spread it on with an offset spatula for a classic look. A sprinkle of chocolate shavings or a mini peanut butter cup on top can add a beautiful finishing touch.
Do Gluten-Free Cupcakes Truly Taste Different?
It’s a common misconception that gluten-free baked goods inherently taste “different” or inferior. While it’s true that cupcakes made with non-wheat flours will have a slightly distinct texture and flavor profile compared to their traditional counterparts, this doesn’t mean they’re any less delicious. The key lies in selecting the right gluten-free flour blend and balancing flavors. Flours like rice, quinoa, and almond flour each contribute unique qualities to baking. My approach involves using a carefully selected blend of gluten-free flours to achieve an optimal balance of flavors and a wonderfully moist, airy texture. In the case of these peanut butter chocolate cupcakes, the bold, classic flavors of rich cocoa and creamy peanut butter take center stage, so effectively masking any subtle differences in the gluten-free flour that people genuinely can’t tell they’re missing gluten. This is precisely why they’re such a crowd-pleaser!
Do Gluten-Free Cupcakes Require Refrigeration?
For optimal freshness and taste, these delightful gluten-free cupcakes can be kept at room temperature for up to 2-3 days, provided they are stored in an airtight container. Beyond this period, to extend their shelf life and ensure food safety, especially due to the dairy in the frosting, it’s advisable to refrigerate them. When refrigerated, the texture of the cake may become slightly firmer. For the best enjoyment, I recommend consuming them within 2-3 days of baking. If you do refrigerate them, a quick 10-second warm-up in the microwave can work wonders, restoring some of their original moistness and making them wonderfully tender again before serving.
Choosing the Best Gluten-Free Flour for Your Cupcakes
The secret to light and fluffy gluten-free cupcakes often lies in the quality of your flour blend. As I mentioned, I prefer using a well-formulated gluten-free flour blend rather than a single type of flour. Most effective gluten-free flour blends incorporate xanthan gum, which is a vital ingredient that mimics the structural properties of gluten. This ensures your baked goods maintain their shape, develop a pleasant texture, and don’t crumble. For consistently excellent results, I highly recommend using either Premium Gold Gluten-Free Flour or Bob’s Red Mill One-to-One Gluten-Free Baking Flour. Both of these blends already contain xanthan gum and are renowned for producing beautifully light, airy, and moist gluten-free cupcakes every single time, making your baking experience seamless and delicious.
Can I Bake These Cupcakes Using Traditional Wheat Flour?
Absolutely! This recipe is incredibly versatile. If you don’t follow a gluten-free diet and prefer to use traditional all-purpose wheat flour, you can confidently substitute it in this recipe on a one-to-one basis for the gluten-free flour blend. I’ve tested this variation, and it yields equally delightful results, producing moist and flavorful cupcakes. So, whether you’re catering to gluten-free needs or simply want a fantastic chocolate peanut butter cupcake, this recipe has you covered!
Explore More Delicious Gluten-Free Dessert Recipes
If you’ve fallen in love with these peanut butter chocolate cupcakes and are eager for more sweet, gluten-free indulgences, you’re in luck! Dive into these other incredibly popular gluten-free recipes that are sure to satisfy any craving:
- Nutella Muddy Buddies – A naturally gluten-free snack that’s always a smash hit at parties. It’s also fantastic for a sweet addition to any lunchbox!
- Gluten-Free Blueberry Oat Bars – Inspired by your favorite coffee shop, these bars are versatile enough to be enjoyed as a delightful breakfast treat with your morning coffee or as a satisfying dessert.
- Gluten-Free Nutella Brookies – Imagine the best of both worlds: a rich brownie combined with a chewy cookie, all infused with irresistible Nutella. It’s pure heaven in every bite!
- Gluten-Free Lemon Dessert Cups – These charming individual mason jar desserts are incredibly easy to make, requiring just 4 ingredients and about 15 minutes of your time for a refreshing, sweet finish.
- Gluten-Free Strawberry Banana Bread – Prepare to be amazed; this is genuinely one of the most incredibly moist and flavorful banana bread recipes you’ll ever encounter, perfected with the added sweetness of strawberries.
We hope you adore this recipe as much as we do! If you’ve made these Gluten-Free Peanut Butter Chocolate Cupcakes and loved them, be sure to let us know your thoughts.
Print Recipe
Pin Recipe
Rate this Recipe
Gluten-Free Peanut Butter Chocolate Cupcakes
Ingredients
Gluten-Free Chocolate Cupcakes
- 1 ¼ cups gluten-free flour blend
- ½ cup cocoa powder
- ¼ teaspoon baking soda
- 1 teaspoon baking powder
- ¼ teaspoon salt
- ½ cup butter, softened
- ¼ cup peanut butter
- ¾ cup white sugar
- ¾ cup brown sugar
- 3 eggs
- 1 cup milk
- 1 teaspoon vanilla extract
Peanut Butter Filling
- ½ cup butter
- 1 cup peanut butter
- 1 ¼ cups powdered sugar
Peanut Butter Frosting
- 2/3 cup peanut butter
- 4 cups powdered sugar
- 4 teaspoons honey
- 2 teaspoons vanilla
- ½ cup milk
Instructions
-
Preheat your oven to 350°F (175°C).
-
In a small bowl, thoroughly whisk together the gluten-free flour blend, cocoa powder, baking powder, baking soda, and salt. This ensures leavening agents are evenly distributed.
-
In a large mixing bowl, using an electric hand mixer, cream the softened butter and ¼ cup of peanut butter together until smooth and light. Gradually add the white and brown sugar, continuing to beat until the mixture is fluffy. Incorporate the eggs one at a time, mixing well after each addition.
-
Pour in the milk and vanilla extract, mixing until just combined. Avoid overmixing at this stage.
-
Gradually add the dry flour mixture to the wet ingredients, stirring gently until just combined. Be careful not to overmix the batter.
-
Line two cupcake pans with paper liners to make 24 cupcakes. Evenly distribute the cupcake batter, filling each liner approximately three-quarters full.
-
Bake in the preheated oven for 20-25 minutes. The cupcakes are ready when a toothpick inserted into the center comes out clean.
-
While the cupcakes are baking and cooling, prepare the peanut butter filling. In a medium bowl, cream together ½ cup butter, 1 cup peanut butter, and 1 ¼ cups powdered sugar until smooth and thick. Transfer to a piping bag.
-
After the cupcakes have cooled on a wire rack for 10-15 minutes (or completely), use a sharp knife or cupcake corer to carefully cut a small hole in the center of each cupcake.
-
Using your piping bag (or a sturdy plastic bag with a small corner snipped), pipe the prepared peanut butter filling into the center of each cored cupcake until it’s full.
-
To make the frosting, whip all the peanut butter frosting ingredients (2/3 cup peanut butter, 4 cups powdered sugar, 4 teaspoons honey, 2 teaspoons vanilla, ½ cup milk) together in a large bowl until smooth, light, and fluffy.
-
Transfer the frosting to a pastry bag with your desired tip, and pipe generously onto each filled cupcake. Garnish as desired and serve!
Notes
- Any leftover middle pieces of the cupcakes can be stored in the refrigerator or freezer. They are absolutely delicious crumbled over ice cream, yogurt, or even as a mix-in for milkshakes!
- If you opt to use a resealable plastic bag instead of a professional piping bag for filling or frosting, ensure you choose a standard, heavy-duty bag. Avoid the “stand and fill” varieties, as their pleated bottoms can make it tricky to cut a clean, functional hole for piping.
- These cupcakes will stay wonderfully fresh at room temperature for up to 2-3 days when stored in an airtight container. For longer storage, or if your kitchen is particularly warm, they should be refrigerated.
- This recipe is wonderfully adaptable! If you or your guests are not gluten-free, you can easily substitute the gluten-free flour blend with an equal amount of traditional all-purpose wheat flour for equally delicious results.