
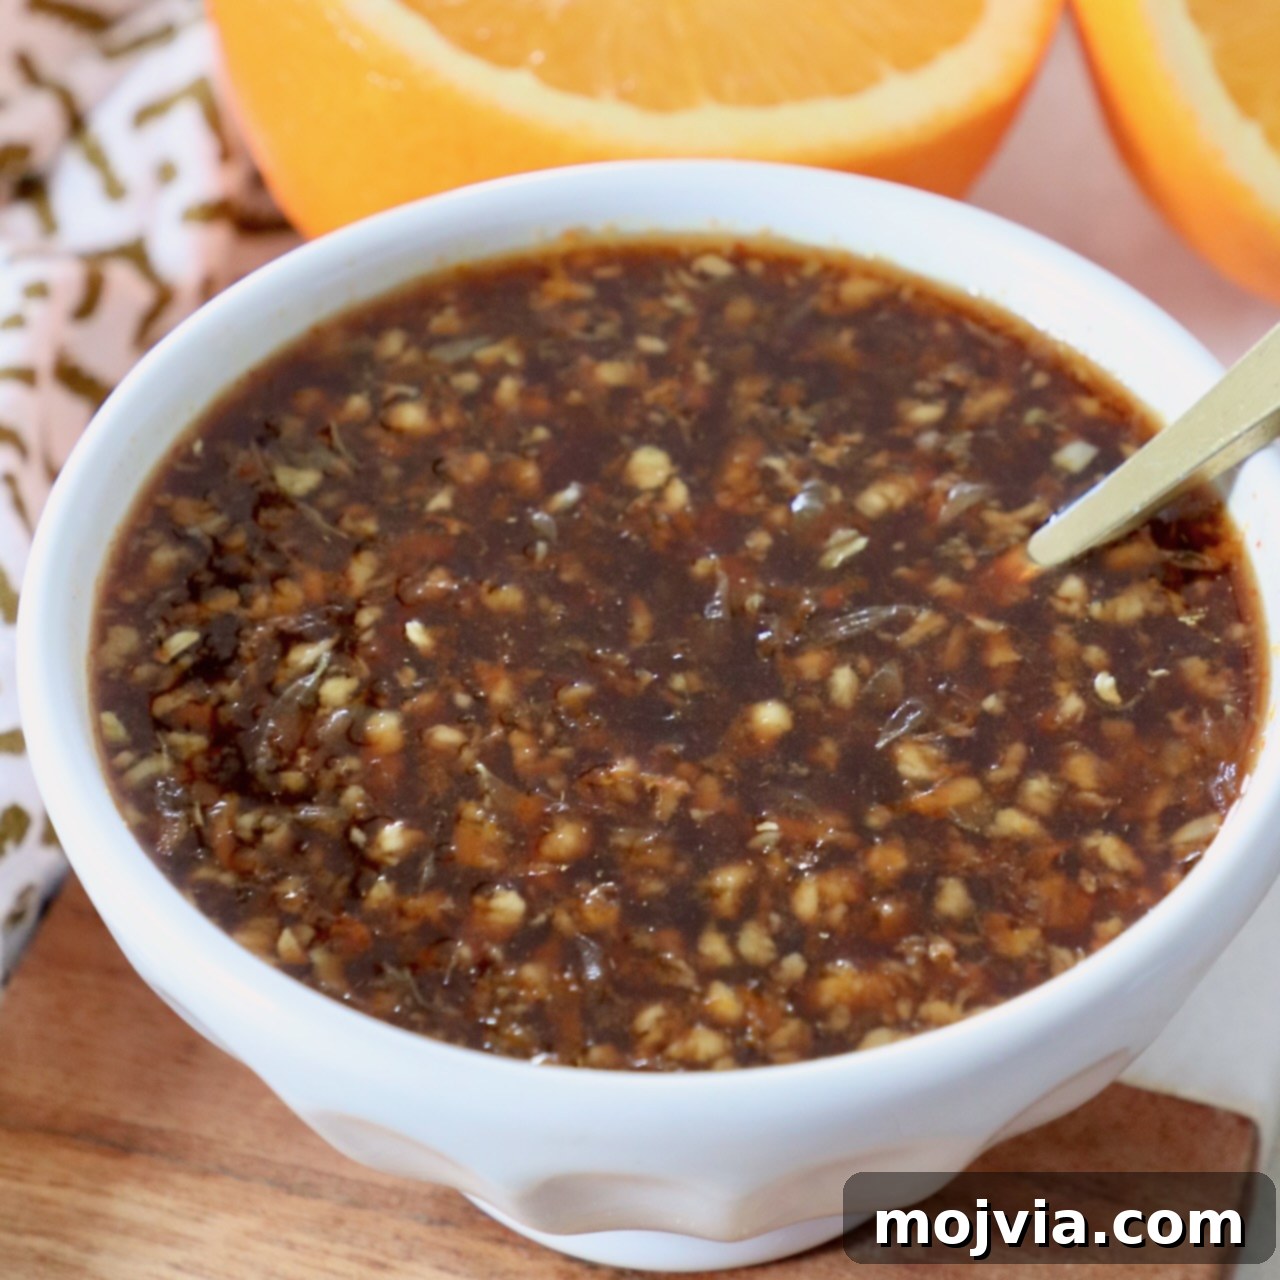
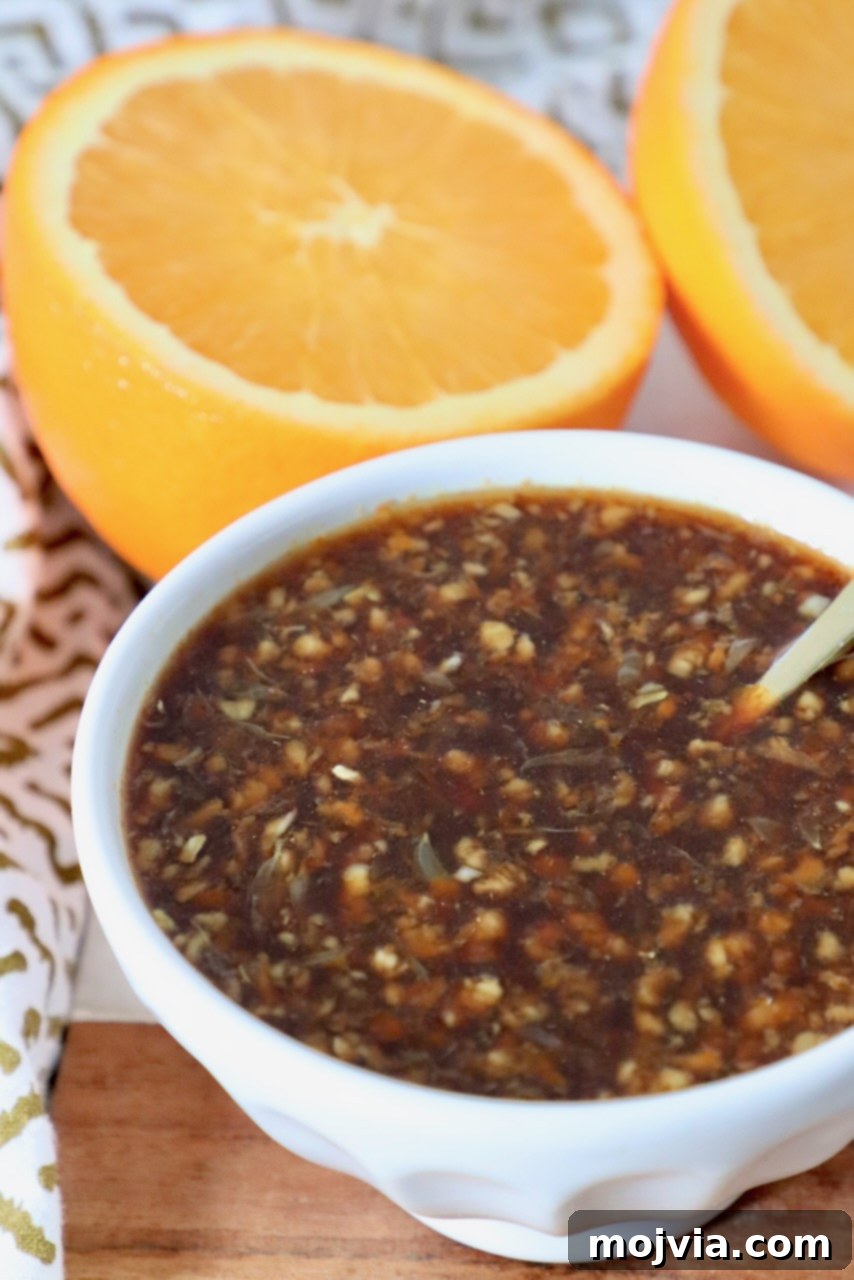
Welcome to the ultimate guide for creating the **BEST Chinese Orange Sauce** you’ll ever taste! This incredibly easy recipe has been a staple in my kitchen for years, especially as the star of my Gluten-Free Orange Chicken, consistently earning rave reviews. Imagine a sauce that’s perfectly sticky, lusciously sweet, and bursting with a vibrant, tangy zest of fresh citrus – it’s all that and more. Forget takeout; this homemade orange sauce surpasses even the most popular chain restaurants like Panda Express, delivering an authentic flavor experience that’s simply unparalleled. Its versatility knows no bounds, transforming ordinary meals into extraordinary culinary delights, from perfectly glazed chicken and fish to vibrant steamed vegetables. Get ready to elevate your cooking with this essential sauce recipe!
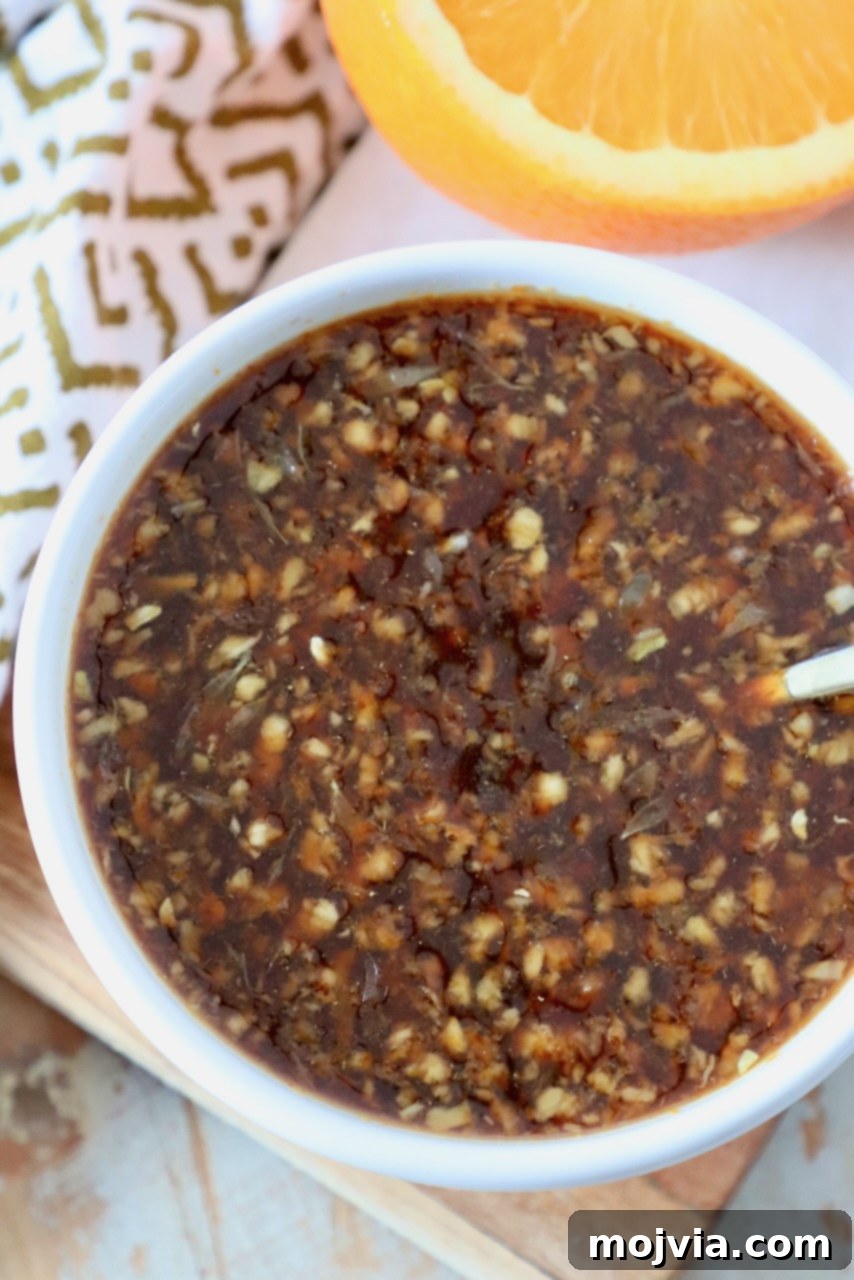
Table of Contents
- Introduction to the Best Orange Sauce
- Why This Orange Sauce Is Unforgettable
- What People Are Saying
- Essential Ingredients for Your Orange Sauce
- Step-by-Step Sauce Preparation
- How to Thicken Your Orange Sauce to a Perfect Glaze
- Crafting the Ultimate Orange Chicken
- Beyond Chicken: Creative Uses for Your Orange Sauce
- Storage and Make-Ahead Tips
- More Delicious Sauce Recipes
- Printable Orange Sauce Recipe Card
While this exceptional orange sauce initially gained fame for its incredible pairing with chicken, its culinary potential extends far beyond. Over the years, I’ve discovered its magic in glazing succulent salmon and flavorful meatballs, transforming them into gourmet meals. It’s equally delightful drizzled generously over a simple plate of steamed veggies, adding a burst of complex flavor, or spooned over fluffy cooked rice, turning it into a complete and satisfying dish. Truly, this sauce is so irresistible, it makes you want to put it on everything! Its rich, balanced profile elevates every ingredient it touches, making it an indispensable part of your kitchen.
Why This Orange Sauce Is Unforgettable
What truly sets this orange sauce apart and cements its reputation as THE BEST homemade orange sauce recipe available is its meticulously balanced flavor profile. It masterfully combines elements of sweetness from brown sugar, bright acidity and zest from fresh oranges, a savory depth from soy sauce, and a subtle yet satisfying kick of spice from sriracha. This intricate interplay of tastes creates a harmonious explosion of flavor that tantalizes the palate without overwhelming it. Unlike many store-bought options that can be overly sweet or lack complexity, our recipe delivers a robust, nuanced experience that tastes genuinely fresh and authentic. It captures the essence of classic Chinese-American cuisine, providing a sticky, glossy glaze that clings beautifully to any dish. Experience the difference a truly premium, homemade sauce can make, a difference so profound you’ll never look back at store-bought alternatives.
What People Are Saying About This Sauce
Don’t just take my word for it; the countless enthusiastic reviews from home cooks speak volumes about the irresistible appeal of this orange sauce. It consistently receives praise for its exceptional flavor and versatility, becoming a fast favorite in kitchens everywhere. Here’s a glimpse of what our community is raving about:
- “Yes. Yes. And more yes!!! My boyfriend didn’t stop raving the entire time we were eating this.” – Samantha
- “Made this tonight and my husband told me this is now his favorite sauce. Said it is better than Panda Express.” – Anne
- “This is so good, we actual triple the sauce because it’s so good. Can’t go wrong with this. Seems like we’ve been eating it every week for dinner.” – Ana
- “Excellent. We did it the first time as the recipe calls. The next time we made it, we quadrupled the sauce. AMAZING. Thank you!”
- “This orange sauce was fabulous!” – Chester
- “I’ve made it twice now and we LOVE it.” – Jeanette
As you can see, the enthusiasm is infectious! Many readers find themselves doubling, tripling, or even quadrupling batches of this sauce, ensuring they always have a supply on hand. This practice is not only a testament to its deliciousness but also a smart strategy for meal prepping. The sauce can be **stored securely in the fridge for up to 2 weeks**, making it incredibly convenient to prepare a large batch and enjoy its incredible flavor in a variety of different recipes throughout the week. This flexibility makes weeknight dinners a breeze and adds a gourmet touch to any spontaneous culinary creation.
Essential Ingredients for Your Orange Sauce: A Deep Dive into Flavor
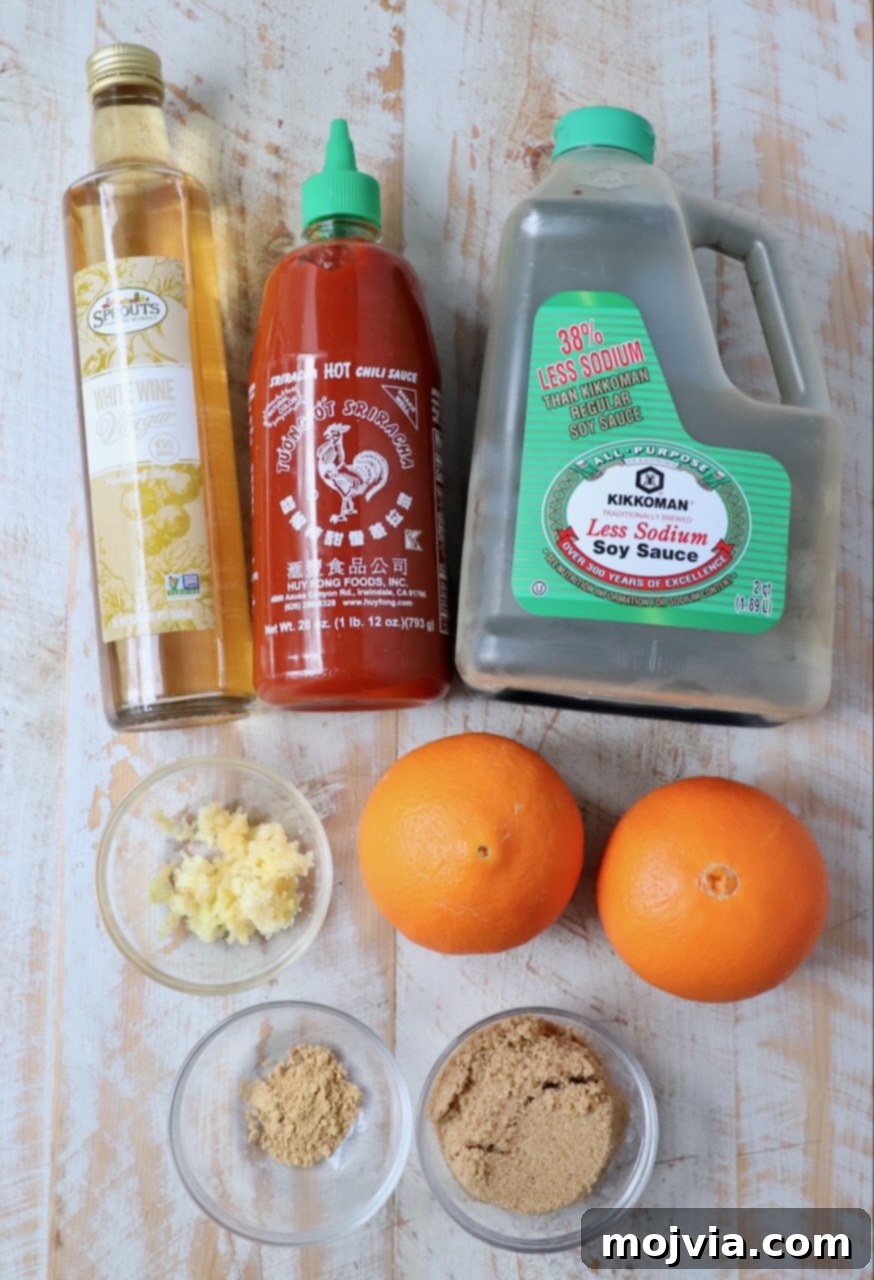
Crafting a truly exceptional orange sauce begins with selecting high-quality ingredients. Each component plays a crucial role in building the complex, harmonious flavor profile that makes this sauce so addictive. From the bright citrus notes to the savory umami and subtle heat, every ingredient is carefully chosen to contribute to its unique character. Here’s a detailed look at what you’ll need and why it matters:
- Fresh Orange: This is, naturally, the star of the show. To achieve the most vibrant and authentic orange flavor, you’ll utilize both the zest and the freshly squeezed juice from a ripe orange. The zest contains concentrated aromatic oils that deliver a potent burst of citrus tang, while the juice provides the foundational sweet-tart liquid. When selecting your oranges, look for bright, unblemished fruit with a smooth, firm skin, as you’ll be zesting the exterior.
- White Wine Vinegar: This ingredient introduces a crisp, subtle acidity that beautifully cuts through the sweetness and enriches the overall flavor balance. Its delicate notes enhance the citrus without overpowering it. In a pinch, or if you prefer a slightly different profile, rice vinegar makes an excellent alternative, offering a milder, slightly sweeter acidity that is also commonly used in Asian cuisine.
- Soy Sauce: As a cornerstone of Asian cooking, soy sauce brings essential umami and saltiness, deepening the savory aspects of the sauce. For those managing dietary restrictions, it’s crucial to use gluten-free soy sauce, widely known as tamari. Tamari offers a similar rich flavor but is made without wheat, ensuring the sauce remains accessible to everyone without compromising taste.
- Sriracha: This popular chili sauce is integral for providing a balanced heat that prevents the sauce from being overly sweet. It introduces a pleasant warmth and a touch of complexity that elevates the entire profile. In our household, we enjoy a spicier kick, often doubling the amount of sriracha for an extra vibrant balance of sweet and spicy. Feel free to adjust the quantity to match your personal preference for heat, or substitute with red pepper flakes for a different kind of warmth.
- Fresh Garlic: The pungent aroma and sharp flavor of freshly crushed garlic are indispensable. Garlic adds an aromatic foundation and depth that is characteristic of authentic Chinese sauces. While garlic powder can be used in a pinch, fresh cloves offer a superior, more robust flavor that truly makes a difference in the final product.
- Ground Ginger: Ginger contributes a warm, spicy, and slightly peppery note that is vital for an authentic Asian flavor profile. I typically use ground ginger for convenience, which integrates seamlessly into the sauce. However, if you happen to have fresh ginger on hand, grating it directly into the sauce will provide an even more potent and fragrant ginger essence, adding an extra layer of freshness.
- Light Brown Sugar: This ingredient is key to achieving the signature sticky sweetness and glossy finish of the orange sauce. Brown sugar not only provides sweetness but also adds a subtle caramel note and a moist texture that white sugar cannot replicate. It perfectly balances the tang of the citrus and the heat of the sriracha, resulting in a wonderfully cohesive and incredibly delicious sauce.
Mastering the Sauce: Step-by-Step Instructions for Flawless Flavor
Preparing this incredible Chinese orange sauce is remarkably simple, requiring just a few minutes and minimal effort. Follow these clear, concise steps to create a flavorful foundation for countless dishes. Precision in zesting and juicing will ensure maximum citrus impact, and a thorough whisking will guarantee a perfectly smooth and integrated sauce.
- Zest and Juice the Orange: Begin by preparing your fresh orange. Using a microplane zester or the smallest holes on a box grater, carefully zest the outside of 1-2 vibrant, clean oranges until you have 2 teaspoons of fragrant orange zest. Ensure you only get the bright orange part, avoiding the bitter white pith. Add this zest to a mixing bowl or a mason jar. Next, cut the zested oranges in half and thoroughly juice them directly into the same bowl, aiming for ½ cup of fresh orange juice. This dual approach ensures a full spectrum of orange flavor.
- Combine All Ingredients: To the bowl containing the orange zest and juice, add the remaining ingredients: ¼ cup of white wine vinegar (or rice vinegar), ¼ cup of soy sauce (remember to use tamari for a gluten-free option), 2 teaspoons of sriracha (adjust this to your preferred level of spice; for a milder sauce, reduce it, or for more heat, feel free to double it), 4 cloves of freshly crushed garlic, ½ teaspoon of ground ginger (or an equivalent amount of freshly grated ginger for a more intense flavor), and ½ cup of packed light brown sugar.
- Whisk Until Smooth: With all ingredients now in the bowl, vigorously whisk the mixture until everything is thoroughly combined and the brown sugar has fully dissolved. Continue whisking until the sauce appears smooth and cohesive, with no visible sugar granules remaining. This ensures an even distribution of flavors and a consistent texture.
- Store or Use Immediately: Your homemade Chinese orange sauce is now ready! You can either cover the sauce and store it securely in the refrigerator for up to two weeks, allowing the flavors to meld even further, or proceed to use it immediately in your favorite recipes. The versatility of this sauce makes it ideal for both spontaneous cooking and advanced meal preparation.
If you’re using this incredible sauce as the star of a classic orange chicken dish, please refer to the detailed “How to Make The Ultimate Orange Chicken” section provided below for specific instructions on integrating the sauce with your chicken.
Alternatively, if your plan is to simply drizzle this aromatic sauce over steamed vegetables, fluffy rice, or other savory dishes, you can use it precisely as it’s made here for a thinner, flavorful coating. However, if you prefer a richer, more luxurious glaze-like consistency, continue to the next section for instructions on how to effortlessly thicken your orange sauce.
How to Thicken Your Orange Sauce to a Perfect Glaze
Achieving a beautifully thick and glossy glaze from your homemade orange sauce is simple and takes only a few extra minutes. This thickened version is perfect for coating chicken, salmon, or meatballs, ensuring the rich flavors cling perfectly to your dish. Here’s how to do it:
- Prepare the Cornstarch Slurry: In a small, separate bowl, combine 2 tablespoons of cornstarch with 2 tablespoons of cold water. Whisk these two ingredients together thoroughly until you have a smooth, lump-free mixture. This is your cornstarch slurry, the key to thickening your sauce. The cold water is essential to prevent the cornstarch from clumping when added to the hot sauce.
- Heat the Sauce: Pour your prepared orange sauce into a small saucepan and place it on the stove over medium-high heat. Allow the sauce to come to a gentle simmer, where you see small bubbles beginning to form around the edges and in the center of the pan. Stir occasionally to ensure even heating and prevent scorching.
- Combine and Simmer: Once the sauce is simmering, give your cornstarch slurry a quick re-whisk (as cornstarch can settle) and slowly pour it into the bubbling sauce in the saucepan. Stir continuously with a whisk or spoon as you add the slurry to incorporate it evenly.
- Achieve Desired Consistency: Continue to simmer the sauce for another 3-5 minutes, stirring frequently. You will notice the sauce gradually thicken and take on a glossy sheen. Cook until it reaches your desired glaze-like consistency. It should be thick enough to coat the back of a spoon. Once thickened, immediately remove the saucepan from the heat. Your rich, glossy orange glaze is now ready to spoon generously over steamed broccoli, stir-fry vegetables, or cooked rice, or to coat your fried chicken.
Crafting The Ultimate Orange Chicken: Better Than Takeout!
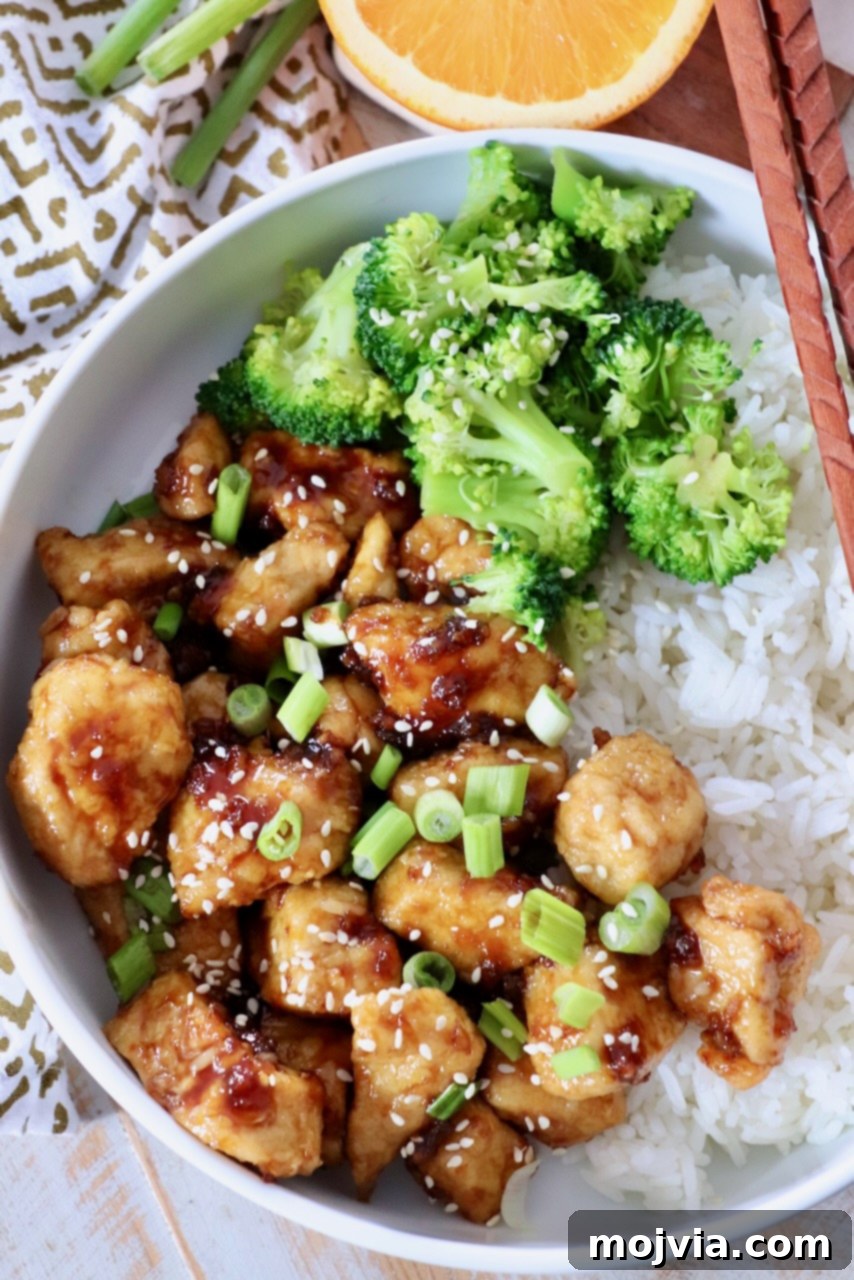
This irresistible orange sauce is the secret weapon behind my renowned gluten-free orange chicken recipe. However, you don’t need my full recipe to create an incredibly delicious and satisfying orange chicken dish right at home that will rival, if not surpass, your favorite takeout from places like Panda Express. Follow these steps to achieve perfectly crispy, saucy, and flavorful orange chicken that the whole family will adore.
- Prepare and Thicken the Orange Sauce: First, prepare your homemade orange sauce according to the instructions above. For orange chicken, you’ll want a luscious, thick glaze. Pour the prepared sauce into a large skillet on the stove over medium-high heat. Allow it to cook and reduce down for 6-8 minutes, stirring occasionally, until it has thickened to a rich, syrupy consistency that will beautifully coat the chicken. Alternatively, use the cornstarch slurry method described in the “How to Thicken Your Orange Sauce” section. Once thickened, remove the sauce from the heat and set it aside.
- Prepare the Chicken: Take 2 pounds of boneless, skinless chicken breasts and cut them into bite-sized pieces, roughly 1-inch cubes. Pat the chicken pieces dry with paper towels; this step is crucial for achieving crispy breading.
- Set Up Breading Station: Create a simple breading station. In a shallow bowl, whisk together ⅓ cup of all-purpose flour, ⅓ cup of cornstarch, and ¼ teaspoon of salt. In a second shallow bowl, whisk 2 large eggs until well beaten.
- Bread the Chicken: Dip each piece of chicken first into the egg mixture, ensuring it’s fully coated. Let any excess egg drip off, then transfer the chicken to the flour and cornstarch mixture. Toss and press gently to coat completely. Place the breaded chicken pieces on a clean cutting board or plate, making sure they don’t overlap too much.
- Heat Frying Oil: In a large, heavy-bottomed skillet or pot, heat 2-3 inches of vegetable oil (or canola, peanut, or grapeseed oil) over medium-high heat on the stove. The ideal temperature for frying is around 350-375°F (175-190°C). You can test the oil by dropping a tiny pinch of the flour mixture into it; if it sizzles vigorously, it’s ready.
- Fry the Chicken in Batches: Carefully add the breaded chicken pieces to the hot oil, ensuring you do not overcrowd the skillet. Frying in batches is essential to maintain the oil temperature and ensure the chicken fries evenly and becomes golden brown and crispy, which usually takes 2-3 minutes per batch. Depending on the size of your pot, you will likely need 4-5 batches to cook all the chicken.
- Drain Excess Oil: As each batch of chicken finishes frying, use a slotted spoon or spider to carefully remove the pieces from the oil. Transfer them to a wire rack placed over a plate lined with paper towels to drain any excess oil. This step helps keep the chicken crispy.
- Toss with Sauce and Serve: Once all the chicken is fried, return the pieces to the skillet where you have your thickened orange sauce. Toss the chicken gently but thoroughly until every piece is completely coated in the sticky, glossy sauce. Serve immediately with your favorite sides. Optionally, garnish with a sprinkle of diced green onions and toasted sesame seeds for added flavor and visual appeal.
For a complete meal, serve your homemade orange chicken over a bed of fluffy white or brown rice, alongside steamed vegetables like broccoli or snap peas. The combination of crispy chicken, vibrant sauce, and fresh sides creates a restaurant-quality dish that’s both comforting and incredibly satisfying. Enjoy the applause from your family and friends for this fantastic, from-scratch creation!
Beyond Chicken: Creative Uses for Your Homemade Orange Sauce
While this orange sauce is undoubtedly a stellar choice for chicken, its incredible flavor profile makes it astonishingly versatile. Don’t limit its potential! This sweet, tangy, and subtly spicy glaze can transform a multitude of dishes, adding an exciting Chinese-inspired twist to your everyday meals. Here are some fantastic and creative ways to incorporate this delicious sauce into your cooking:
- Orange Glazed Salmon: Elevate your seafood game by using this sauce to glaze baked or pan-seared salmon. Follow my Orange Glazed Salmon recipe, substituting this sauce. Remember, this recipe makes enough sauce for about 2 pounds of meat or seafood, so you might only need half the batch for 1 pound of salmon. You can easily save the remaining sauce for another delightful meal, or simply double your salmon portion to utilize all of the wonderful glaze!
- Chinese Orange Glazed Meatballs: Perfect as a main course with rice or as an irresistible appetizer for parties, this sauce works wonders when glazed over oven-baked meatballs. The sweet and savory notes infuse every bite, creating a dish that’s both comforting and gourmet. Serve with toothpicks for an easy crowd-pleaser!
- Orange Glazed Fried Cauliflower: For a fantastic vegetarian alternative or a unique side dish, try glazing fried cauliflower with this sauce. Adapt my recipe for Korean Fried Cauliflower, but instead of using Korean BBQ sauce, generously coat the crispy florets with your homemade Chinese orange sauce. It’s a flavor revelation that even meat-eaters will adore.
- Stir-Fry Vegetables with Orange Sauce: Ditch your usual stir-fry sauce and inject a burst of bright, citrusy flavor into your vegetable medley. When preparing your stir-fry vegetables, substitute your regular sauce with ½ cup of this vibrant orange sauce. It will beautifully coat your crisp-tender vegetables, creating an incredibly aromatic and flavorful side or light main.
- Drizzling and Dipping: Beyond specific recipes, this sauce is simply fantastic for drizzling over a variety of cooked grains and roasted vegetables. Try it over perfectly roasted asparagus, carrots, or Brussels sprouts to add a sweet-tangy finish. It’s also exceptionally delicious spooned over white rice, brown rice, or even cauliflower rice for a light, flavorful meal. Use it as a dipping sauce for spring rolls, chicken nuggets, or even crispy tofu for an extra punch of flavor.
Embrace the versatility of your homemade orange sauce and let your culinary creativity soar. Whether you’re making a quick weeknight dinner or preparing a special meal, this sauce is sure to impress with its depth of flavor and ease of use.
Storage and Make-Ahead Tips for Your Orange Sauce
One of the many benefits of this homemade orange sauce recipe is its excellent shelf life and adaptability for meal prepping. Making a larger batch can save you time during busy weekdays and ensure you always have a flavorful option ready to go.
Refrigeration: Once prepared, allow the orange sauce to cool completely to room temperature. Transfer it to an airtight container, such as a glass jar or a sealed plastic container. Stored properly in the refrigerator, the sauce will maintain its fresh taste and quality for up to 2 weeks. The flavors often deepen and meld even more beautifully after a day or two in the fridge, making it an excellent candidate for advance preparation.
Freezing: For longer-term storage, this orange sauce freezes wonderfully. Once cooled, pour the sauce into freezer-safe containers or heavy-duty freezer bags. If using bags, squeeze out as much air as possible before sealing to prevent freezer burn. You can also freeze it in smaller portions using ice cube trays; once frozen solid, transfer the cubes to a freezer bag. Frozen orange sauce can be stored for up to 3 months.
Thawing and Reheating: To thaw frozen sauce, simply transfer it from the freezer to the refrigerator overnight. For quicker thawing, you can gently heat it in a saucepan over low heat, stirring frequently. When reheating, whether from the fridge or after thawing, do so over low to medium heat on the stovetop, stirring constantly until it’s warmed through. If the sauce has thickened too much or seems a bit too dense after reheating, you can thin it out with a teaspoon or two of water or chicken broth until it reaches your desired consistency. Avoid boiling vigorously, as this can alter the texture.
With these simple storage tips, you can enjoy the incredible flavor of your homemade Chinese orange sauce whenever inspiration strikes, making it a truly convenient and versatile addition to your culinary arsenal.
Explore More Delicious Sauce Recipes
Enhance the flavor profile of all your meals with these popular and effortlessly **easy** homemade sauce recipes! From creamy and cheesy to bold and spicy, these versatile sauces are perfect for elevating everything from weeknight dinners to special occasions.
Print Recipe
Pin Recipe
Homemade Chinese Orange Sauce
Master the art of Chinese cooking with this incredibly easy and unbelievably delicious homemade orange sauce recipe! Boasting a perfect balance of sticky sweetness, tangy citrus, and a hint of spice, this sauce is a game-changer for your culinary repertoire. Far superior to store-bought varieties or even popular fast-food versions, it’s designed to elevate everything from classic orange chicken to steamed vegetables and delicate fish dishes. Get ready for rave reviews!
12
ounces
5
5
Whitney Bond
Sauce
Chinese
Ingredients
-
2
teaspoons
orange zest -
½
cup
fresh squeezed orange juice -
¼
cup
white wine vinegar,
or rice vinegar -
¼
cup
soy sauce,
use tamari for gluten-free -
2
teaspoons
sriracha,
or 1 teaspoon red pepper flakes (adjust to taste) -
4
cloves
garlic,
freshly crushed -
½
teaspoon
ground ginger,
or freshly grated ginger for an intense flavor -
½
cup
light brown sugar,
packed
Instructions
-
Begin by preparing your fresh orange: Using a microplane zester, or the smallest holes on a box grater, carefully zest the outside of 1-2 vibrant oranges until you have precisely 2 teaspoons of fragrant orange zest. Transfer this zest to a mixing bowl or a mason jar.
-
Next, cut the zested oranges in half and thoroughly juice them directly into the same bowl, aiming for ½ cup of fresh orange juice. Add it the bowl with the zest.
-
Add the remaining ingredients—white wine vinegar (or rice vinegar), soy sauce (tamari for gluten-free), sriracha (adjust to your preferred spice level), crushed garlic, ground ginger (or fresh grated), and light brown sugar—to the bowl with the zest and juice.
-
Whisk all ingredients vigorously until everything is thoroughly combined and the brown sugar has fully dissolved, creating a smooth, cohesive sauce.
-
You can either cover the sauce and store it in the refrigerator for up to two weeks, allowing the flavors to meld even further, or proceed to use it immediately.
-
If your culinary goal is to prepare delectable orange chicken, refer to the detailed “Crafting the Ultimate Orange Chicken” section within this blog post for specific application instructions.
-
To thicken the sauce for a perfect glaze: Pour it into a small saucepan on the stove over medium-high heat. In a small bowl, combine 2 tablespoons cornstarch with 2 tablespoons water to make a cornstarch slurry. Once the sauce starts to bubble in the pan on the stovetop, add the cornstarch slurry and stir to combine. Let the sauce simmer for 3-5 minutes, then remove it from the stove and use it immediately for coating or drizzling.
Notes
- This recipe yields a generous amount of sauce, perfectly portioned for coating approximately 2 pounds of chicken or other protein.
- To ensure your orange sauce is entirely gluten-free, always opt for gluten-free soy sauce, commonly labeled as tamari.
- For an extra layer of flavor and aroma, consider adding a pinch of freshly grated ginger in addition to, or as a substitute for, ground ginger.
- Adjust the sriracha quantity to suit your heat preference. For a milder sauce, reduce or omit it; for more kick, feel free to double it.
Nutrition Facts (per serving)
Calories: 45kcal (2%)
Carbohydrates: 11g (4%)
Protein: 1g (2%)
Sodium: 291mg (12%)
Potassium: 52mg (1%)
Fiber: 0.1g
Sugar: 10g (11%)
Vitamin A: 23mg
Vitamin C: 6mg (7%)
Calcium: 13mg (1%)
Iron: 0.3mg (2%)
Did you make this recipe?
Tag @WhitneyBond on Instagram and hashtag it #WBRecipes!