
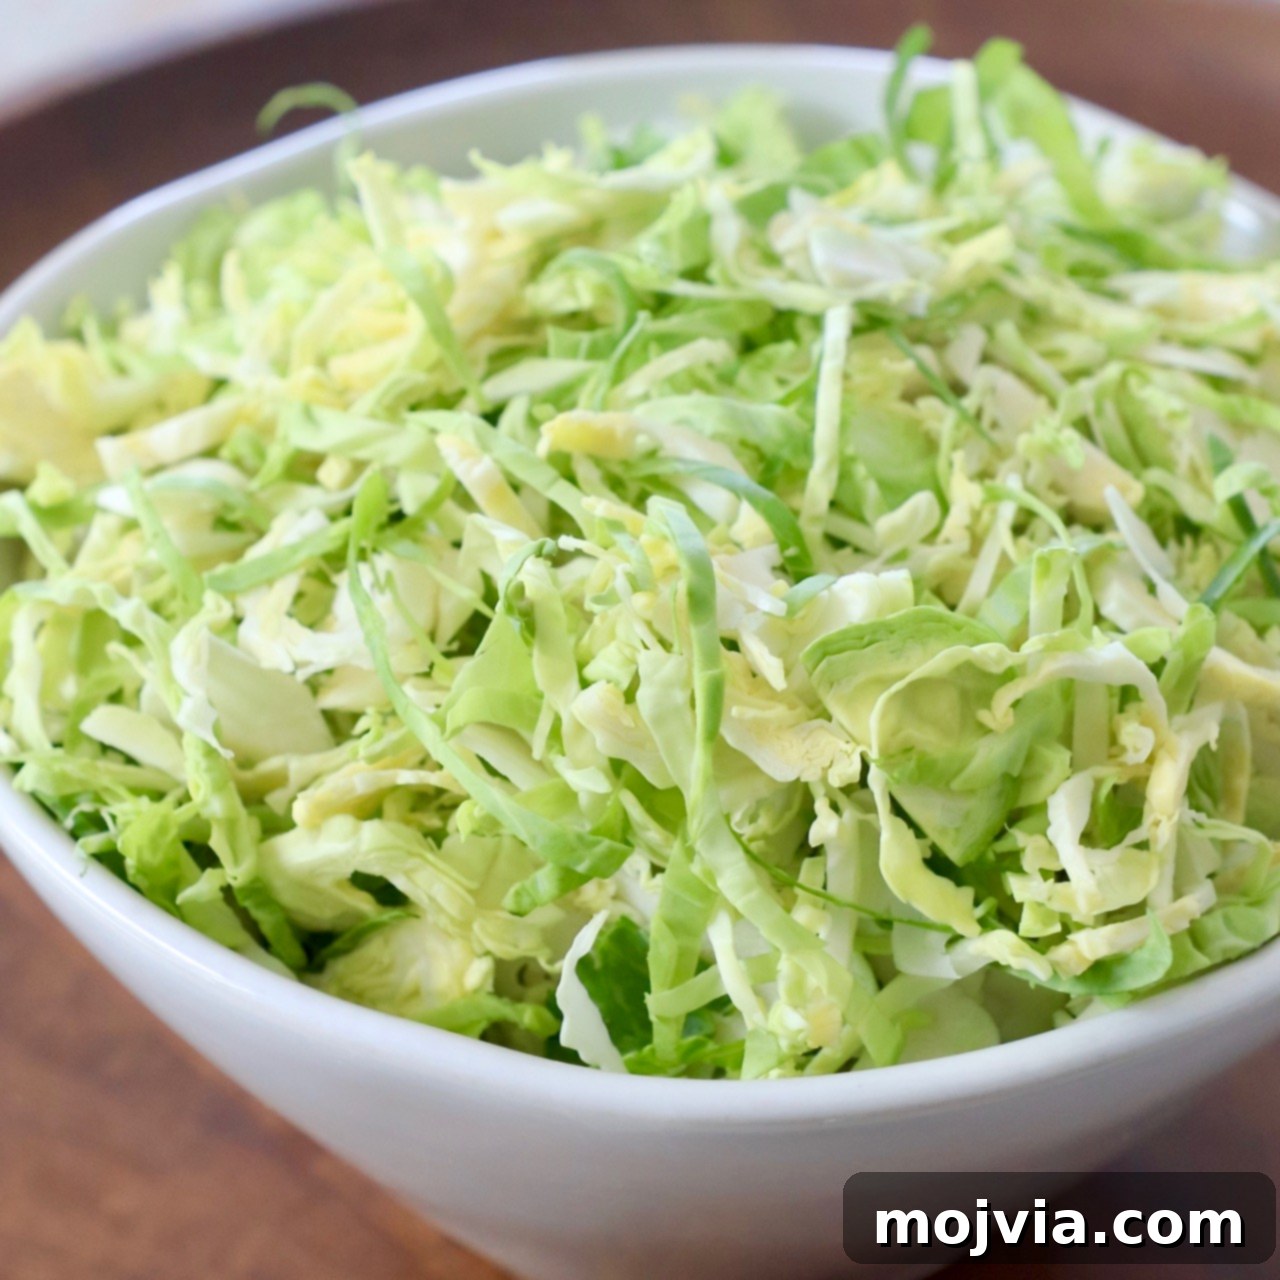
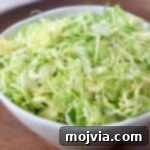
Unlock the full potential of your Brussels sprouts with this comprehensive guide on how to shred Brussels sprouts using three easy-to-master methods: a sharp knife, a versatile mandoline, or a powerful food processor. Shredded Brussels sprouts are a game-changer for preparing vibrant salads, quick and healthy side dishes, or adding a unique texture to your favorite casseroles and stir-fries. Learning to shred these nutritious mini-cabbages at home not only saves money but also ensures maximum freshness and customizability for your culinary creations.
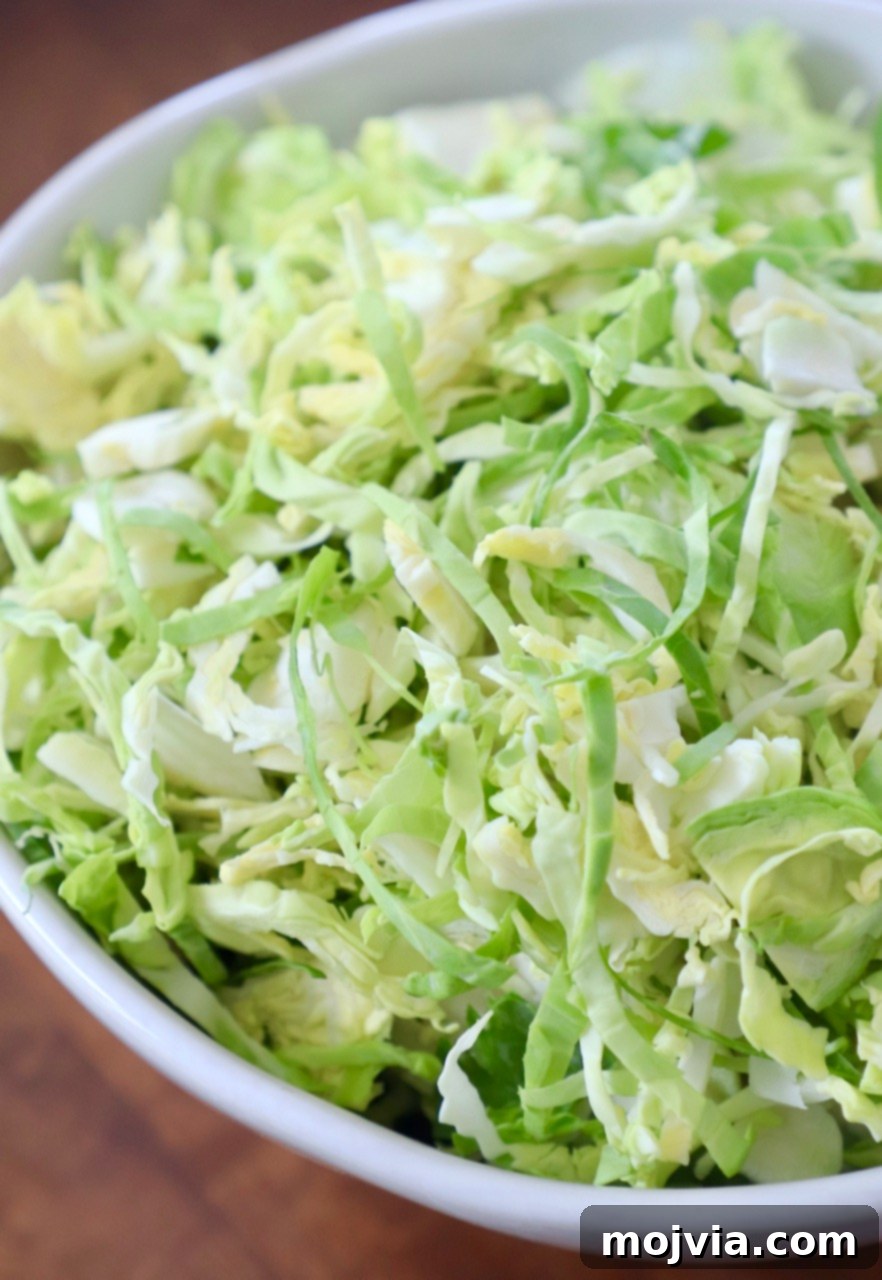
Table of Contents
- How to Prep Brussels Sprouts for Shredding
- Shredding Brussels Sprouts with a Knife (The Manual Method)
- Shredding Brussels Sprouts with a Mandoline (Precision & Speed)
- Shredding Brussels Sprouts with a Food Processor (The Easiest Method)
- Comparing the Methods: The Best Way to Shred Brussels Sprouts
- Essential Tips and Tricks for Perfect Shredded Brussels Sprouts
- Creative Ways to Use Shredded Brussels Sprouts
- More Essential Kitchen Tutorials
Brussels sprouts, often underestimated, possess a delightful flavor profile that transforms beautifully whether enjoyed raw, lightly sautéed, or incorporated into hearty baked dishes. Their mild, slightly nutty taste and tender-crisp texture make them a fantastic addition to a variety of meals.
While pre-shredded or “shaved” Brussels sprouts can be found bagged in many grocery stores, shredding them yourself at home is remarkably simple, more economical, and ensures you get the freshest possible results. This guide will walk you through three proven methods—using just a knife and cutting board, a mandoline slicer, or a food processor—empowering you to prepare perfectly shredded Brussels sprouts with ease. By the end, you’ll be a pro at transforming these humble green gems into culinary stars!
How to Prep Brussels Sprouts for Shredding
Before you begin shredding, proper preparation is key, regardless of the method you choose. This ensures your shredded sprouts are clean, tender, and free of any tough or bitter parts. Follow these simple steps for perfectly prepped Brussels sprouts:
- Wash Thoroughly: Rinse the Brussels sprouts under cool running water. Even if they appear clean, washing helps remove any dirt or residues.
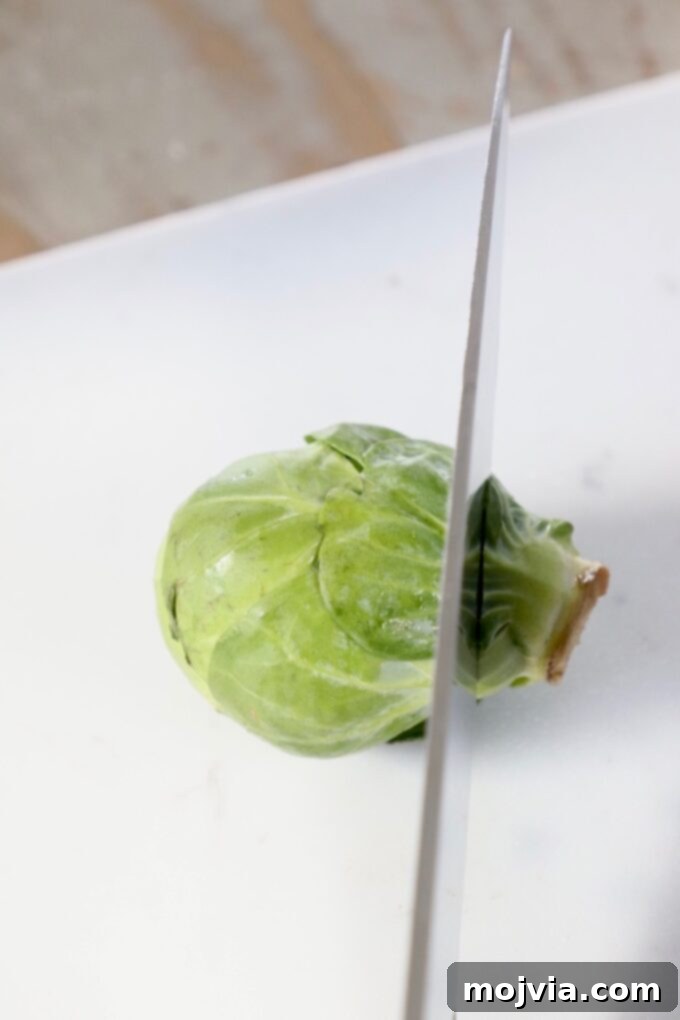
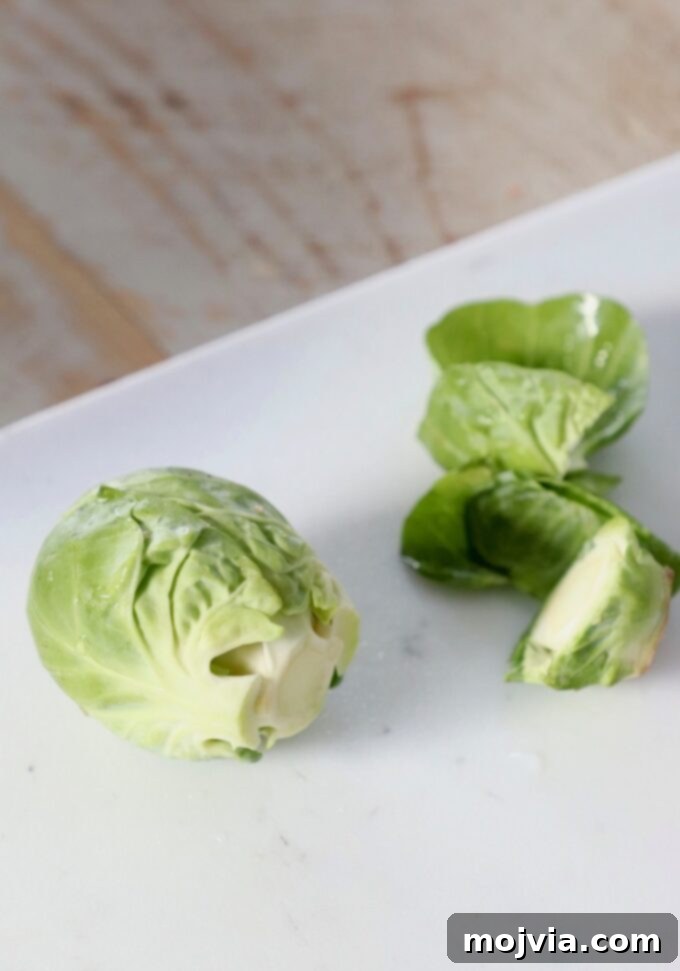
- Remove the Tough Stem End: Using a sharp chef’s knife, carefully trim off the hard, woody stem end from each Brussels sprout. You only need to remove a small portion, enough to expose the interior leaves. This tough part can be bitter and unpleasant to eat.
- Peel Off Outer Leaves: With your hands, gently peel away any loose, discolored, or damaged outer leaves. These leaves can also be tough or have an off-flavor. Continue until you reach the tightly packed, vibrant green leaves.
- Dry Completely: For best results, especially if you’re aiming for crispy sprouts or using a mandoline/food processor, ensure your Brussels sprouts are thoroughly dry. You can use a salad spinner or simply pat them dry with a clean kitchen towel. Excess moisture can make them soggy when cooked or harder to shred evenly.
Once prepped, your Brussels sprouts are ready for shredding using one of the methods described below.
Shredding Brussels Sprouts with a Knife (The Manual Method)
The knife method is the most accessible way to shred Brussels sprouts, requiring no special equipment beyond a good, sharp chef’s knife and a sturdy cutting board. This method also gives you the most control over the thickness of your shreds, which can be useful depending on your recipe.
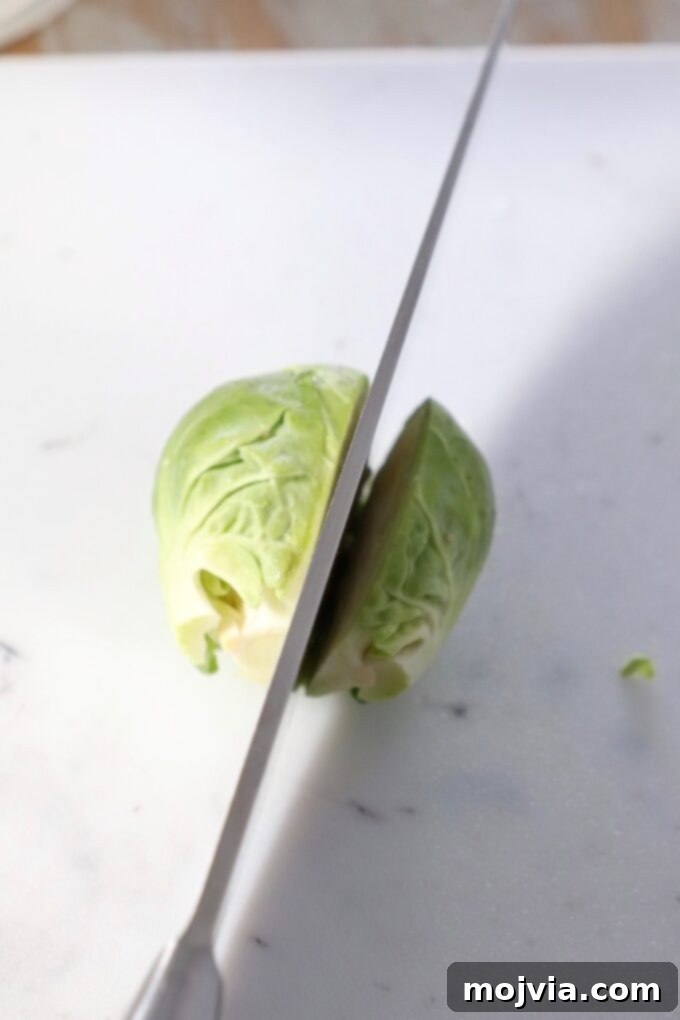
- Halve the Sprouts: After prepping your Brussels sprouts (trimming stems and removing outer leaves), place one sprout on your cutting board. Using your sharp knife, carefully cut each Brussels sprout in half lengthwise, from the trimmed root end to the top. This provides a stable, flat surface to work with.
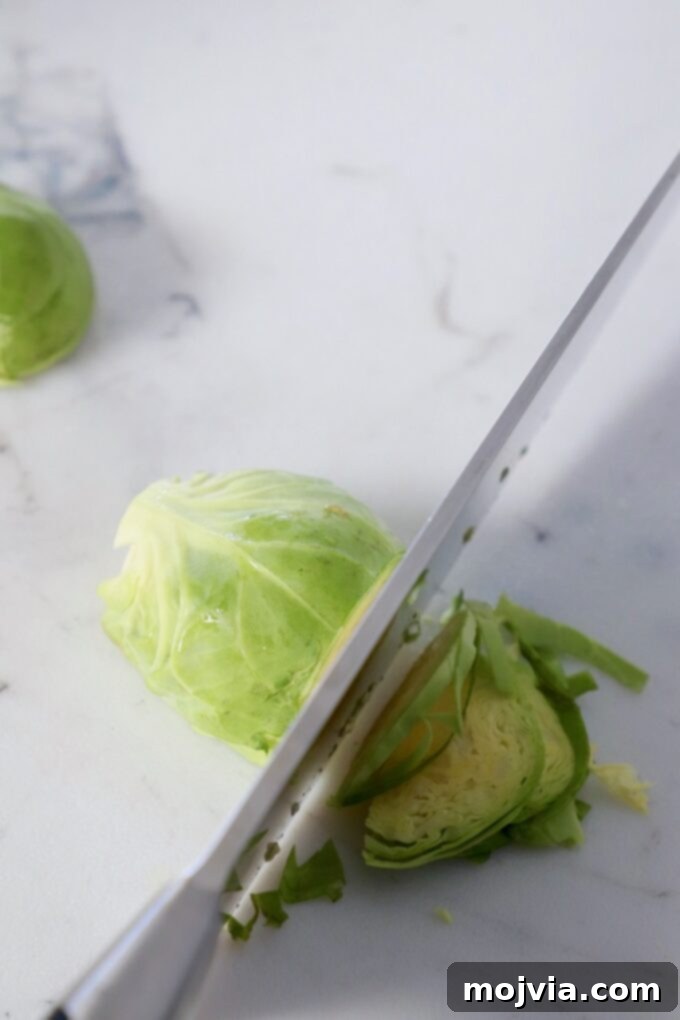
- Thinly Slice: Place a halved sprout cut-side down on the cutting board. Starting from the top (the leafy end) and working your way towards the root, begin to thinly slice the sprout crosswise. Aim for slices that are as thin as you can comfortably achieve, typically about ⅛-inch or less. The thinner the slices, the more delicate your shredded sprouts will be, which is ideal for salads.
- Separate the Shreds: Once sliced, the individual leaves will naturally separate into delicate ribbons. If any remain clumped together, gently run your fingers through them to loosen and separate the shreds.
- Repeat: Continue this process with the remaining Brussels sprouts until you have a pile of beautifully shredded greens ready for your recipe.
Pro Tip: Always use a very sharp knife for this method. A dull knife is not only less efficient but also more dangerous as it can slip. Take your time, keep your fingertips tucked under, and maintain a stable grip on the sprout.
Shredding Brussels Sprouts with a Mandoline (Precision & Speed)
A mandoline slicer is an excellent tool for achieving consistently thin and uniform shreds quickly. However, due to its extremely sharp blade, safety is paramount. Always exercise caution and use the provided safety guard.
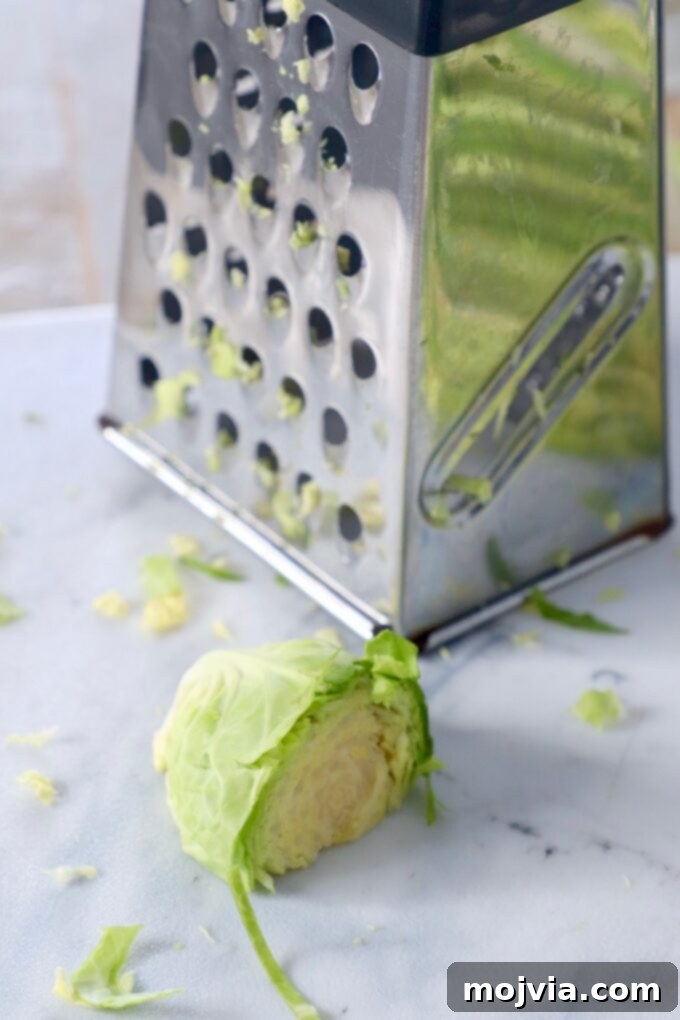
Initially, I considered including the box grater as a method, but after multiple attempts, I found it simply doesn’t work well for Brussels sprouts. The sprouts tend to get mushy rather than shred cleanly, and it can be quite cumbersome. If you don’t have a mandoline or food processor, the knife method is a far superior alternative to a box grater.
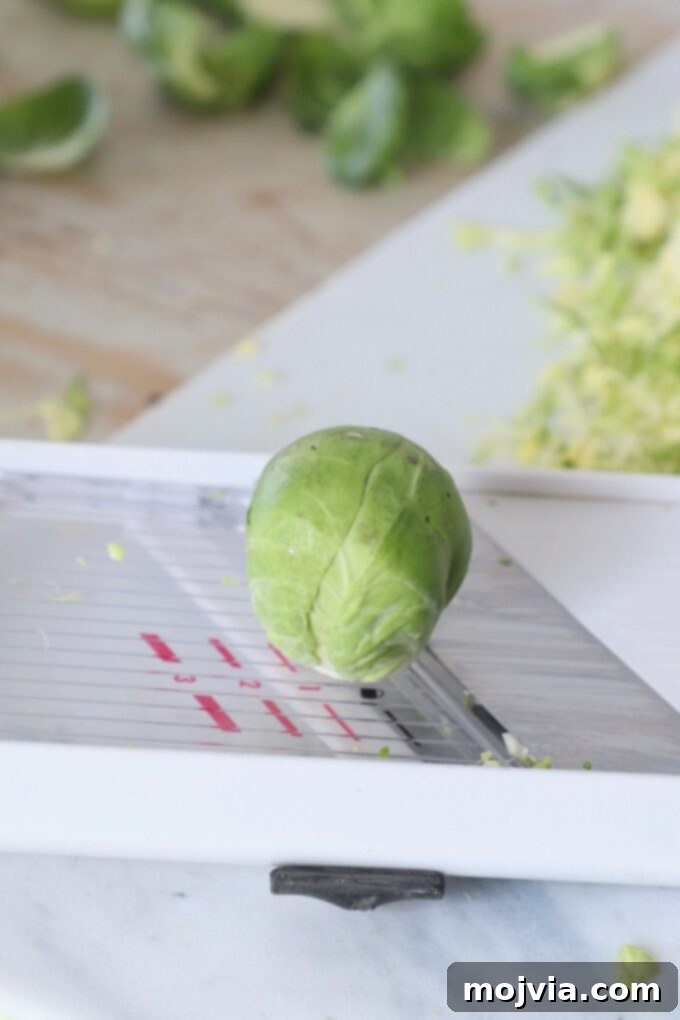
- Prepare the Mandoline: Set your mandoline slicer to its thinnest possible setting. Position it securely over a cutting board or bowl to catch the shredded sprouts.
- Prepare Sprouts (Optional Halving): You can either keep the prepped Brussels sprouts whole or cut them in half lengthwise, as you would for the knife method. Halving can sometimes make them easier to grip and pass over the blade, especially for larger sprouts.
- Use the Safety Guard: This step cannot be stressed enough. Always, always use the safety guard that comes with your mandoline. Brussels sprouts are small vegetables, and it’s incredibly easy to accidentally cut yourself when operating a mandoline without proper protection.
- Slice Carefully: Hold a Brussels sprout (with the safety guard firmly attached if using) and slide it down the mandoline blade with even pressure. Move slowly and deliberately to ensure consistent, thin slices.
- Repeat: Continue shredding each sprout until you’ve processed your desired quantity. Once all sprouts are shredded, gently separate any pieces that are still stuck together.
The mandoline produces beautiful, paper-thin shreds that are perfect for raw salads, allowing dressings to penetrate easily and creating a delightful texture.
Shredding Brussels Sprouts with a Food Processor (The Easiest Method)
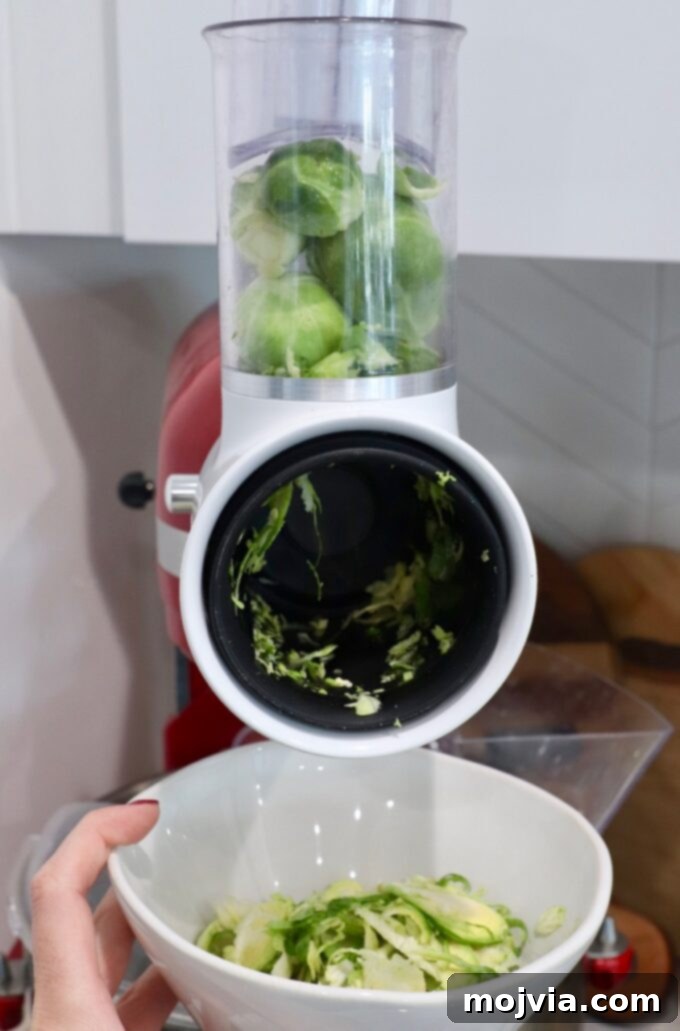
If you need to shred a large quantity of Brussels sprouts quickly and with minimal effort, a food processor is your best friend. Equipped with a slicing disc (sometimes called a shredding disc, but for fine shreds, a slicer is preferred), or using a specialized grater attachment on a stand mixer like a KitchenAid, this method is by far the most efficient.
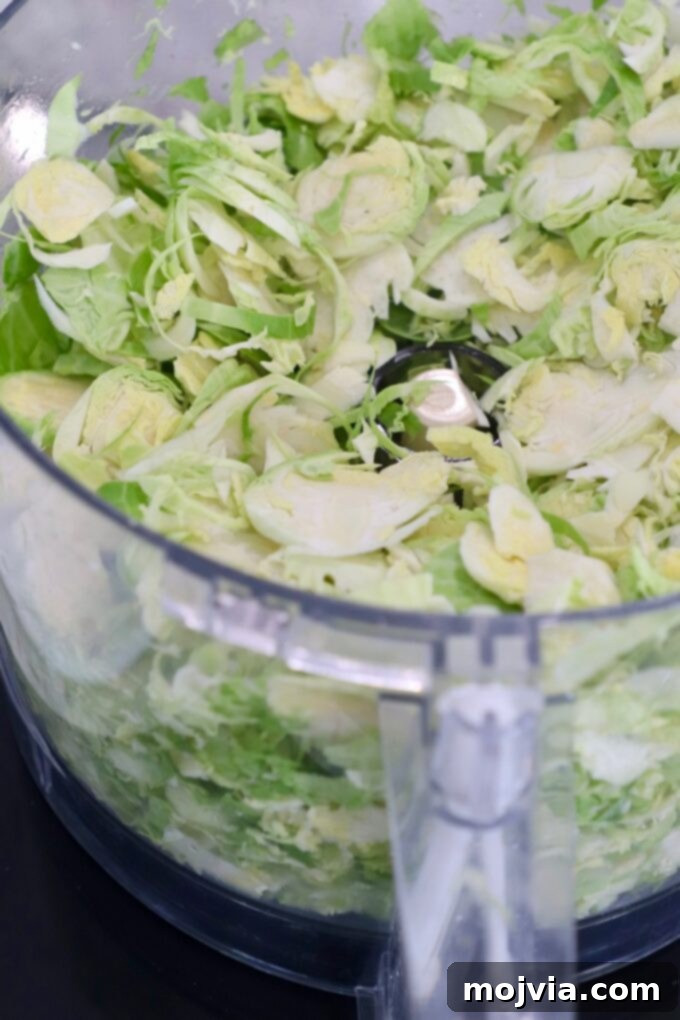
A food processor can handle many sprouts at once, transforming them into uniform shreds in mere seconds. This is especially recommended for meal prep or when preparing dishes for a crowd.
- Assemble Your Appliance: Secure the slicing disc (the one with the blade that looks like a thin knife) in your food processor according to the manufacturer’s instructions. If using a KitchenAid mixer, attach the grater/slicer attachment with the appropriate slicing blade.
- Load the Sprouts: Place the whole, prepped Brussels sprouts (stems trimmed and outer leaves removed) into the feed tube of your food processor or KitchenAid attachment. You can usually fit several at a time, but avoid overfilling to ensure even slicing.
- Process to Shred: Turn the food processor or KitchenAid on to a “high” speed setting. Use the food pusher to gently guide the Brussels sprouts down through the feed tube and onto the slicing disc. The sprouts will be quickly and efficiently shredded into the work bowl below.
- Continue Processing: Keep adding Brussels sprouts to the feed tube until all of them have been processed. You’ll be amazed at how quickly you can achieve a large volume of perfectly shredded sprouts.
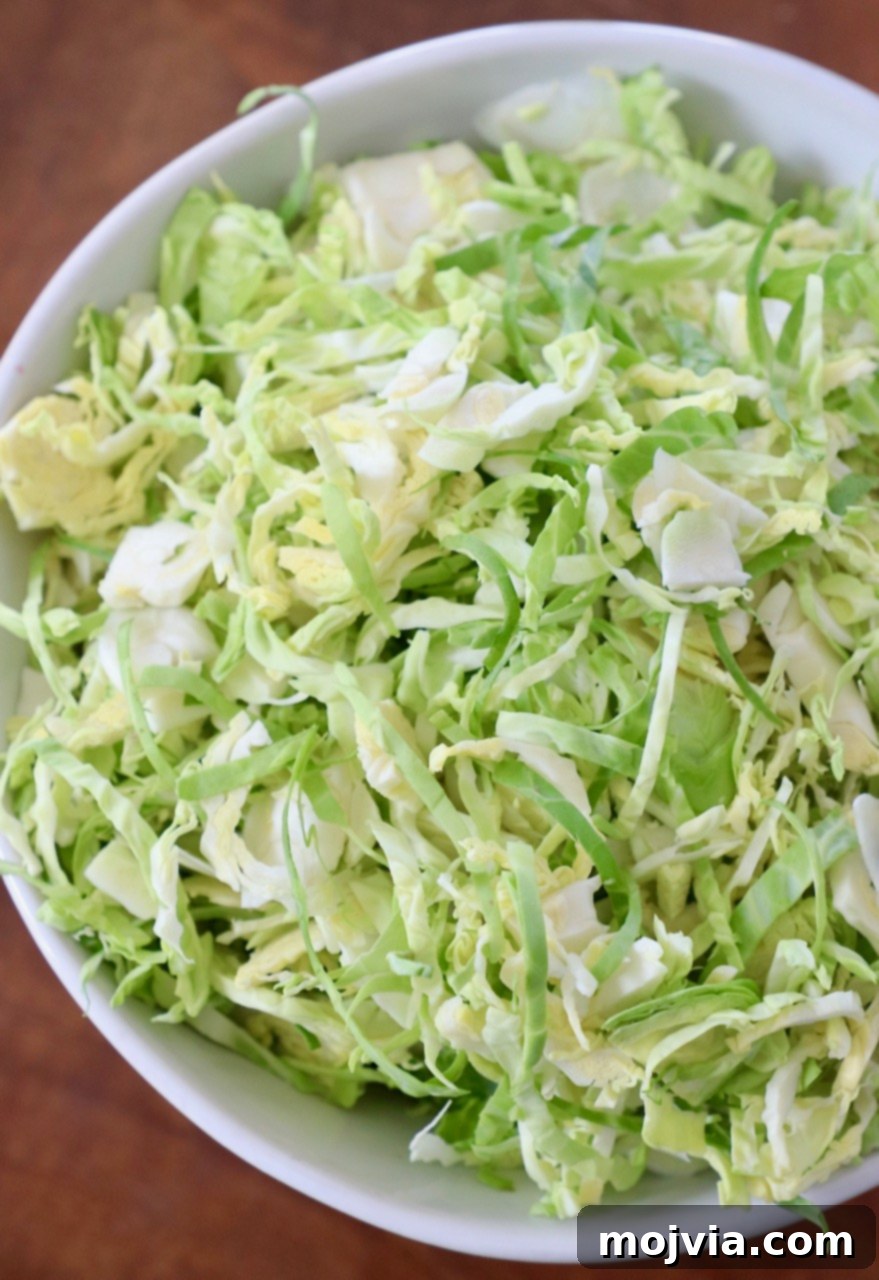
The food processor delivers consistent, fine shreds, ideal for anything from raw salads to quick stir-fries where delicate texture is desired.
Comparing the Methods: The Best Way to Shred Brussels Sprouts
Choosing the “best” method for shredding Brussels sprouts often depends on factors like the quantity you’re preparing, the time you have, and the equipment available in your kitchen. Here’s a comparative breakdown to help you decide:
- Food Processor, or KitchenAid Grater Attachment: This is unequivocally the quickest, easiest, and most efficient method, especially when dealing with a large batch of Brussels sprouts. It produces uniform, beautifully shredded results with minimal effort. If you have either of these appliances, it’s highly recommended for its speed and consistency.
- Knife: The knife method is an excellent choice if you’re working with a smaller quantity of sprouts or if you prefer manual control over the shred thickness. It requires no specialized equipment beyond a sharp knife and a cutting board. While it demands a bit more precision and takes longer than a machine, the results can be just as good, offering delicate, fine shreds when done carefully.
- Mandoline: A mandoline provides consistent, thin slices, making it superior to a knife in terms of uniformity and speed for small to medium batches. However, its primary drawback is the significant safety risk due to its extremely sharp exposed blade. You must use a safety guard, and even then, extra caution is necessary because Brussels sprouts are small and can be challenging to hold securely.
I do not recommend using a box grater to shred Brussels sprouts. My tests showed that it tends to produce inconsistent, often mushy results rather than clean shreds. The small, dense nature of Brussels sprouts simply doesn’t lend itself well to the coarse grating action of a box grater, making it inefficient and often disappointing.
Ultimately, for speed and ease with larger quantities, the food processor wins. For precision and control with smaller amounts, a sharp knife is fantastic. The mandoline offers speed and uniformity but requires careful handling.
Essential Tips and Tricks for Perfect Shredded Brussels Sprouts
Mastering the art of shredding Brussels sprouts is easy with these helpful tips and tricks that will ensure delicious results every time:
- Always Use a Sharp Knife: This cannot be overstated. When employing the knife method, a sharp knife glides through the sprouts effortlessly, resulting in clean, even shreds and significantly reducing the risk of slips and accidents. Dull knives require more force, making the task harder and less safe.
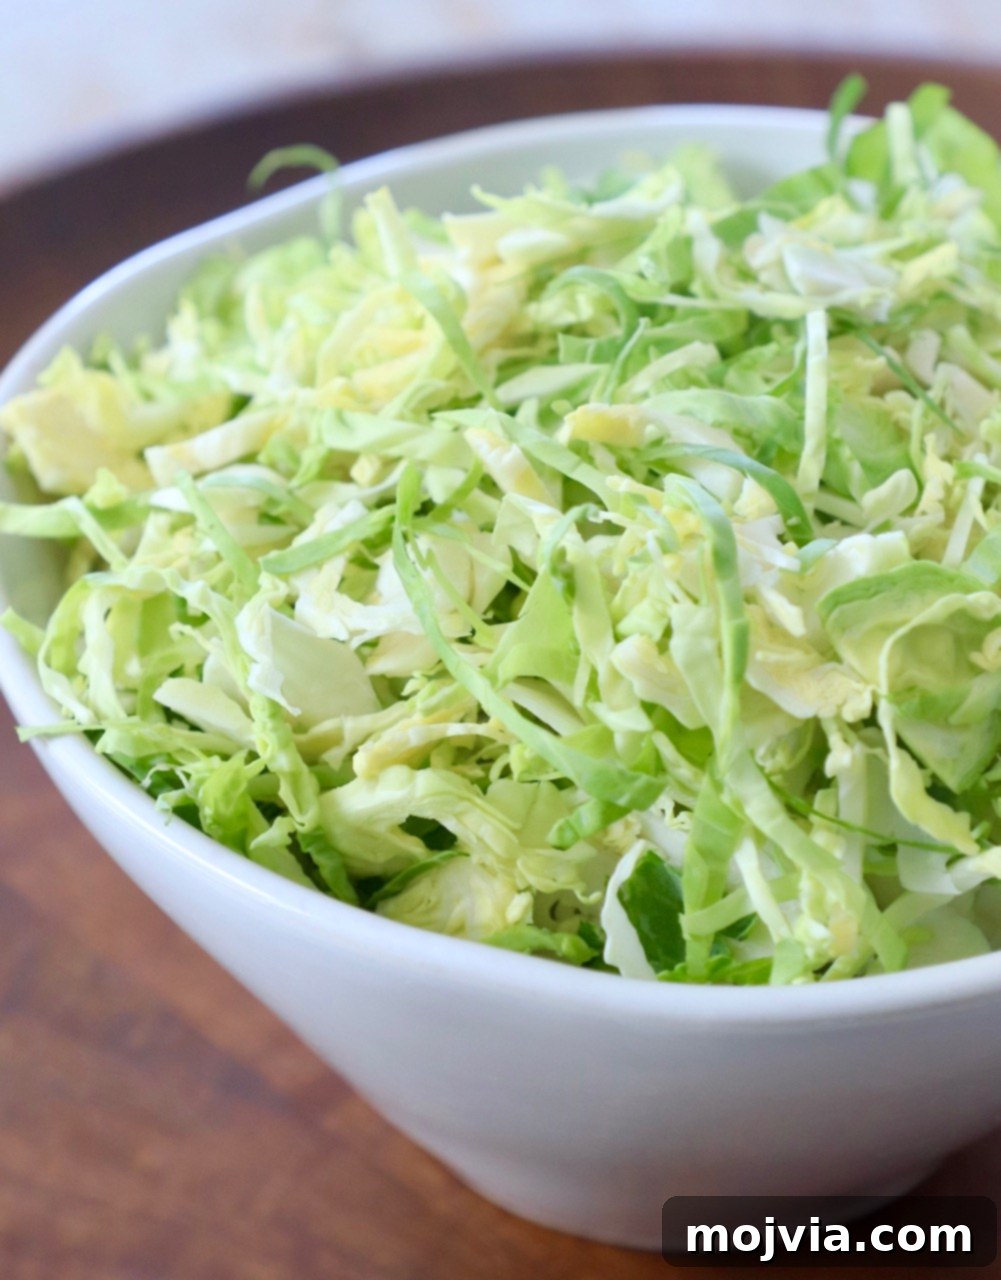
- Understand the Yield: For recipe planning, remember that one pound of whole Brussels sprouts typically yields approximately 8 cups of shredded Brussels sprouts. This is a great guideline for scaling recipes.
- Versatile Cooking Options: Shredded Brussels sprouts cook much faster than whole or halved sprouts. They can be beautifully roasted at 400°F (200°C) for just 20-25 minutes until tender-crisp and caramelized, or quickly sautéed on the stovetop for 10-12 minutes. Finish them with a splash of fresh lemon juice or a drizzle of balsamic vinegar to enhance their natural flavors and add a bright, zesty counterpoint.
- Customize Shred Thickness with a Knife: One of the major advantages of the knife method is the ability to easily adjust the thickness of your shreds. Make them paper-thin for delicate raw salads or slightly thicker for heartier cooked dishes where you want more bite and texture.
- Chill for Easier Shredding: If you find your Brussels sprouts a bit soft or difficult to handle, try chilling them in the refrigerator for at least 30 minutes before shredding. Colder sprouts tend to be firmer, making them easier to slice cleanly, especially with a knife or mandoline.
- Optimal Storage: Brussels sprouts are best stored whole in a breathable bag in the crisper drawer of your refrigerator for up to a week. However, once shredded, their shelf life decreases. Store shredded Brussels sprouts in an airtight container in the fridge for up to 2 days to maintain freshness.
- Freezing for Longer Storage: If you’ve shredded too many Brussels sprouts or want to preserve them for future use, blanching is key before freezing. Quickly blanch the shredded sprouts in boiling water for 1-2 minutes, then immediately plunge them into an ice bath to stop the cooking. Drain thoroughly, pat dry, and then freeze them in an airtight container or vacuum-sealed bag. They will keep for several months in the freezer.
- Maximize Flavor: Consider tossing shredded Brussels sprouts with a little olive oil, salt, and pepper before cooking to enhance their flavor and aid in browning.
Creative Ways to Use Shredded Brussels Sprouts
Shredded Brussels sprouts are incredibly versatile and can elevate a wide array of dishes. Their delicate texture and slightly nutty flavor make them perfect for both raw and cooked applications. Beyond traditional side dishes, they shine in salads, stir-fries, and even as a topping. When using shredded sprouts in recipes that originally call for whole or halved ones, remember to significantly reduce the cooking time due to their smaller size.
- Vibrant Salads: Their tender-crisp texture is ideal for raw salads. Toss them with a bright vinaigrette, nuts, dried fruit, and cheese for a refreshing side or main dish.
- Quick Sautéed Sides: Sauté shredded Brussels sprouts with garlic, butter, or olive oil for a speedy and delicious side dish. They cook in minutes, maintaining a pleasant bite.
- Stir-fries and Bowls: Add shredded Brussels sprouts to your favorite stir-fries for an extra boost of greens and texture. They absorb sauces beautifully.
- Roasted Delights: Roast them until crispy and caramelized with a sprinkle of Parmesan, bacon bits, or a balsamic glaze.
- Casseroles and Bakes: Incorporate shredded sprouts into cheesy gratins, savory tarts, or pasta bakes for added nutrition and flavor.
- Tacos, Wraps, and Sandwiches: Use them as a crunchy, flavorful topping or filling for tacos, burritos, wraps, or even grilled cheese sandwiches.
- Breakfast Hash: Mix shredded Brussels sprouts into a breakfast hash with potatoes, onions, and eggs for a hearty morning meal.
- Pizza Topping: Sprinkle them on pizza before baking for a unique and delicious vegetable topping.
Here are some specific recipe ideas to get you started:
- Sautéed Shredded Brussels Sprouts: A simple yet elegant side that highlights their best qualities.
- Brussels Sprout Salad: A fresh and crisp salad, perfect for any season.
- Honey Fig and Bacon Brussels Sprouts Pizza: An adventurous and flavorful pizza creation.
- Maple Bacon Brussels Sprouts: A classic combination of sweet, savory, and smoky.
- Stuffed Acorn Squash with Cranberries & Brussels Sprouts: A hearty and festive dish.
- Crispy Asian Brussels Sprouts Bowl: An umami-packed and satisfying meal.
- Sauté them in a pan with butter and Caramelized Onions: A rich and comforting pairing.
- Spaghetti with Brussels Sprouts via Carolyn’s Cooking: A delightful way to incorporate sprouts into pasta.
More Essential Kitchen Tutorials
Expand your culinary skills with these other quick and easy how-to guides designed to help you navigate your kitchen with confidence!
- How To Cut A Pomegranate: Master the art of deseeding this vibrant fruit without the mess.
- How To Cook Bacon In The Oven: Achieve perfectly crispy bacon every time with this foolproof method.
- 3 Ways – How To Cook Sweet Potatoes: Explore different techniques for preparing this versatile and nutritious root vegetable.
- How To Cook Spaghetti Squash: Learn the best methods for transforming this unique squash into a pasta alternative.
- How To Cook Acorn Squash: Discover easy ways to prepare and enjoy the rich, sweet flavor of acorn squash.
Print Recipe
Pin Recipe
Rate this Recipe
Shredded Brussels Sprouts
Ingredients
- 1 pound fresh Brussels sprouts
Instructions
Knife Method
-
Slice the tough stem end off each Brussels sprout, then remove any loose or tough outer layers with your hands. Rinse and pat dry.
-
Cut each prepped Brussels sprout in half lengthwise, from the trimmed root to the top.
-
Place each halved sprout cut-side down on a cutting board. Starting from the top, thinly slice crosswise from top to root, aiming for fine ribbons.
-
Gently separate the shredded Brussels sprout pieces with your fingers. They are now ready to use in your favorite recipe.
Mandoline Method
-
Begin by slicing the tough end off each Brussels sprout and removing any tough outer layers. Rinse and thoroughly pat dry.
-
Set your mandoline to its thinnest slicing setting. You may cut larger sprouts in half lengthwise or keep them whole.
-
ALWAYS use the safety guard to hold the Brussels sprout. Carefully slide each sprout down the mandoline blade with even pressure to create thin, consistent shreds. Be extremely cautious as the blade is very sharp.
-
Repeat until all of the Brussels sprouts are finely shredded.
Food Processor Method
-
After trimming the stems and removing outer leaves, add the whole Brussels sprouts to the feed tube of your food processor equipped with a slicing disc, or to a KitchenAid attachment with a slicer blade.
-
With the slicer disc/blade attached, turn the food processor or KitchenAid on the “high” speed setting. Use the food pusher to guide the sprouts through until all are evenly shredded into the work bowl.
Notes
- Brussels sprouts are best stored whole in the refrigerator, but shredded Brussels sprouts can be kept for up to 2 days in an airtight container in the fridge.
- To extend shelf life, if you shred too many, quickly blanch them for 1-2 minutes, then plunge into an ice bath. Drain thoroughly and freeze in an airtight container or vacuum-sealed bag.
- One pound of whole Brussels sprouts will yield approximately 8 cups of shredded Brussels sprouts.
- Shredded Brussels sprouts can be roasted at 400°F (200°C) for 20-25 minutes, or sautéed on the stove for 10-12 minutes. Adjust cooking times based on desired tenderness.