
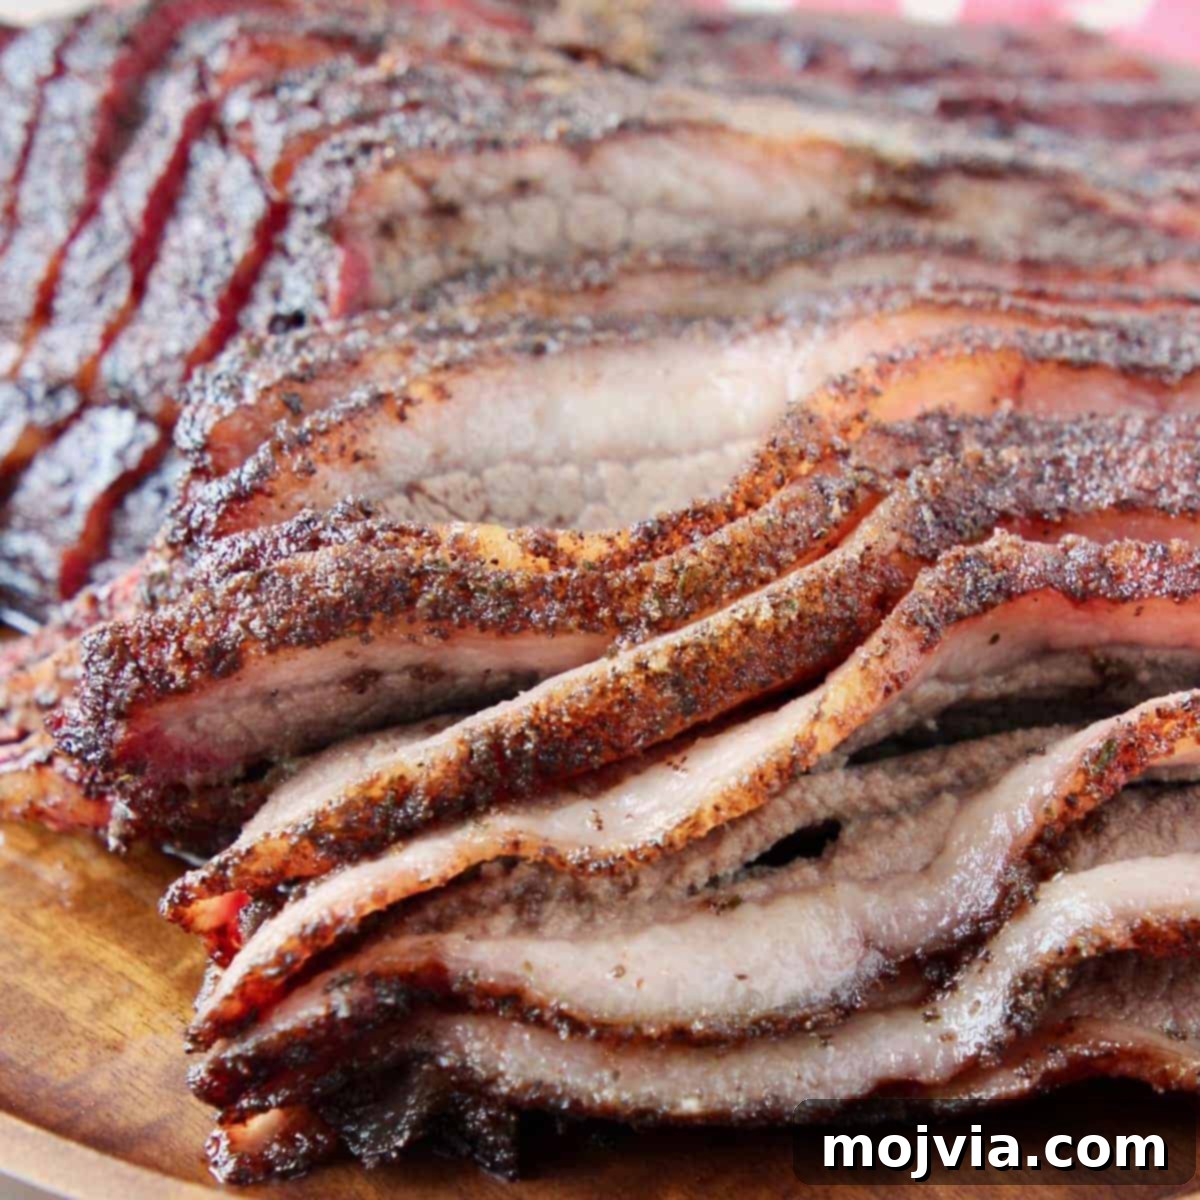
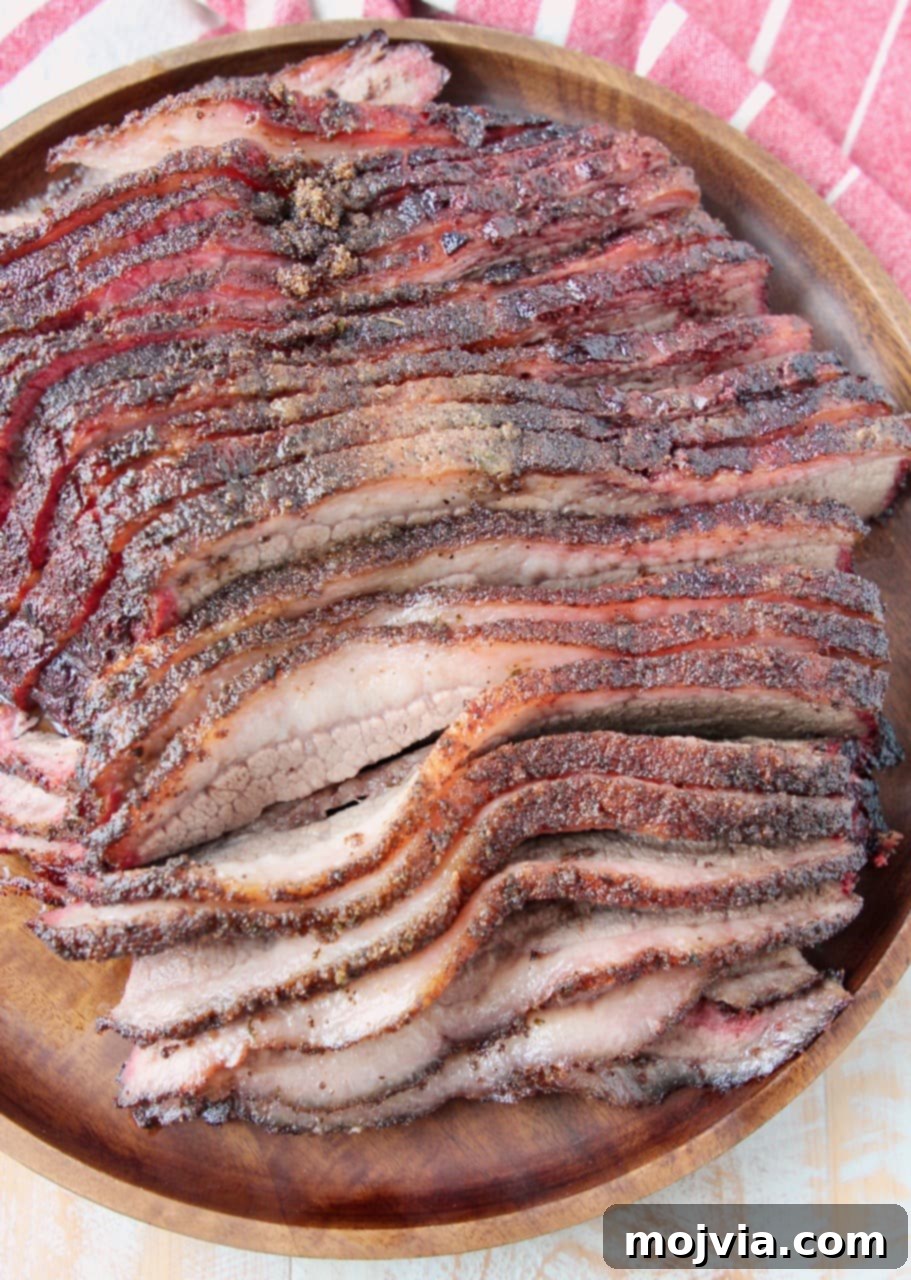
Unlock the secrets to crafting truly exceptional Smoked Brisket right in your backyard. Whether you’re a seasoned pitmaster or just starting your barbecue journey, this comprehensive guide, honed over three decades of family tradition and countless hours of testing, will empower you to create a brisket that’s unbelievably tender, juicy, and bursting with smoky flavor. Say goodbye to dry, tough brisket and hello to your new BBQ masterpiece!
From simple, yet effective marination and seasoning techniques to the art of low-and-slow smoking and the crucial resting period, we’ll walk you through every step. This isn’t just a recipe; it’s a legacy. Passed down through generations, this method has been perfected to ensure a perfect bark, melt-in-your-mouth texture, and an unforgettable taste that will make your next BBQ event legendary. And don’t forget the glorious leftovers – they make the best sandwiches you’ll ever taste! Pair your succulent smoked brisket with a vibrant Buffalo Potato Salad or a refreshing Bacon Tomato Avocado Pasta Salad for an unparalleled culinary experience.
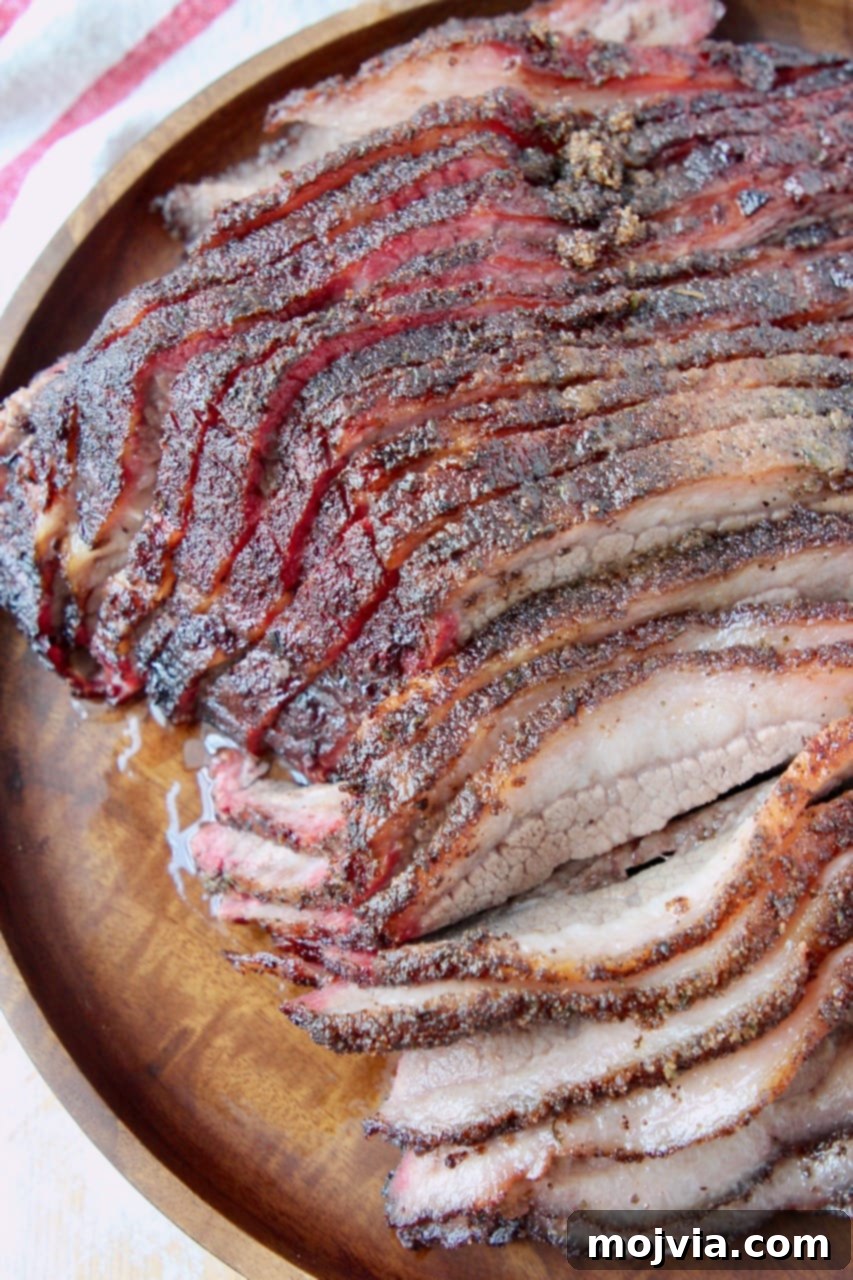
Table of Contents
- Your Brisket Smoking Journey: An Overview
- The Legacy of Smoked Brisket
- Understanding Brisket: Cuts and Characteristics
- Crafting the Perfect Smoked Brisket Marinade
- The Ultimate Dry Rub for Brisket
- The Magic of the Wet Mop Sauce
- Step-by-Step Smoking Process
- Essential Brisket Smoking Tips and Tricks
- Tools for the Aspiring Pitmaster
- What to Serve with Your Smoked Brisket
- Smoked Brisket Recipe Card
The Legacy of Smoked Brisket
Growing up in Oklahoma, the scent of wood smoke was a familiar and comforting aroma at every family gathering. My Grandpa, a true pioneer of backyard BBQ, owned an iconic Oklahoma Joe’s smoker. It was more than just a piece of equipment; it was a gathering point, a focal point for delicious memories. He eventually passed this cherished smoker down to my Dad, who continued the tradition with passion and skill.
As I developed an interest in cooking, my Dad became my mentor, patiently teaching me the intricate art of smoking meats on Grandpa’s beloved smoker. For a decade, our summer visits revolved around smoking succulent briskets, tender pulled pork, and fall-off-the-bone ribs. These weren’t just cooking sessions; they were bonding moments, passing down not just recipes but a deep appreciation for the craft.
Last year marked a significant milestone: I finally became the proud owner of my very own smoker, a versatile Traeger pellet grill. This allowed me to take our family’s time-honored techniques and elevate them with modern precision. I spent countless hours over the past year meticulously testing and perfecting our smoked brisket and pulled pork recipes. While I continue to honor the core flavors of our family’s marinade, rub, and wet mop recipes, I’ve discovered a few invaluable techniques and nuanced tricks that make our smoked brisket even more extraordinary.
Initially, the idea of smoking my own brisket felt incredibly daunting. The long cook times, the fear of drying it out, the pursuit of that elusive perfect bark—it all seemed overwhelming. However, through dedication and practice, I’ve demystified the process. What once felt intimidating is now incredibly easy and gratifying. This recipe has become a staple, and I’m thrilled to share our perfected method with you, ensuring your journey to perfect smoked brisket is as smooth and delicious as possible.
Understanding Brisket: Cuts and Characteristics
Before diving into the cooking process, it’s essential to understand what brisket is and why it requires a specific approach. Brisket is a cut of beef from the lower chest or pectoral muscle of the cow. It’s known for being tough due to its connective tissues, which is precisely why it benefits immensely from long, slow cooking methods like smoking.
The “Packer” Brisket: Point vs. Flat
Most commonly, you’ll find brisket sold as a “packer” cut, which includes two main parts:
- The Flat: This is the leaner, larger portion, typically used for slicing. It has a uniform shape, making it ideal for consistent slices.
- The Point: This is the fatter, more marbled portion, often used for chopped brisket, burnt ends, or shredding. It’s rich in collagen and flavor.
Our recipe is designed for a full packer brisket, weighing typically between 12-14 pounds. This allows for both the flavorful point and the sliceable flat, giving you the best of both worlds. The fat cap on a packer brisket is crucial for moisture and flavor during the long smoke.
Your Brisket Smoking Journey: An Overview
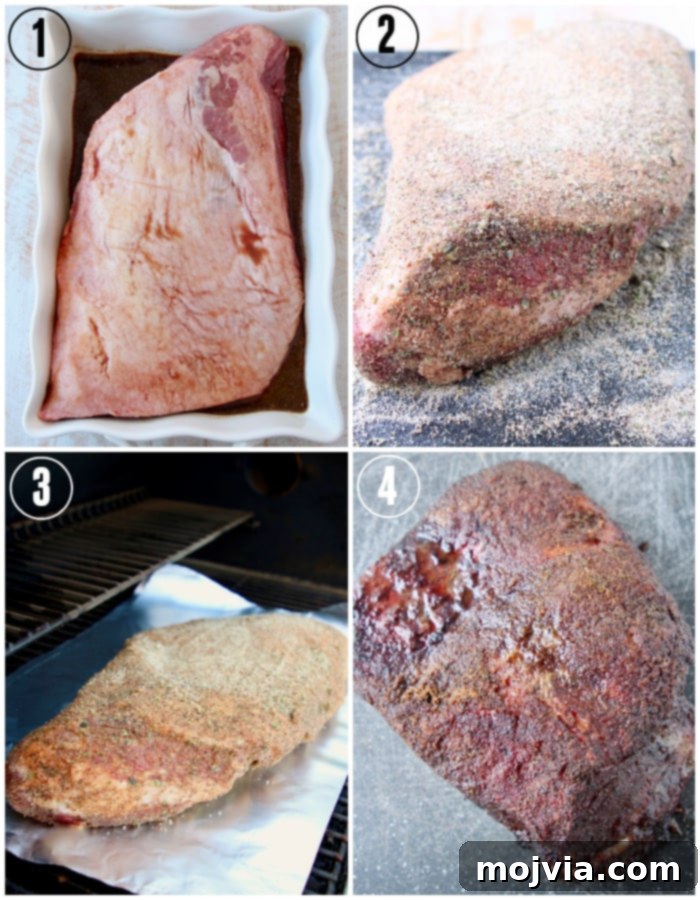
Creating the ultimate smoked brisket might seem complex, but it truly boils down to four fundamental steps, each contributing to that tender, smoky perfection:
- Marinate the Brisket: Infuse deep flavor and initial tenderness.
- Apply the Dry Rub: Build a savory, peppery crust (the bark).
- Smoke & Wet Mop the Brisket: Cook low and slow, adding moisture and developing complex smoky notes.
- Rest the Brisket: The non-negotiable step for ultimate juiciness.
Mastering these steps, along with a few clever tricks, will transform a simple cut of meat into an unforgettable culinary experience.
Crafting the Perfect Smoked Brisket Marinade
The journey to an incredibly tender and flavorful smoked brisket begins with a powerful marinade. This liquid infusion penetrates the meat, breaking down some of the tougher fibers and adding a foundational layer of savory goodness that complements the smoke beautifully.
Marinade Ingredients:
- 1 cup soy sauce
- 1/2 cup brown sugar
- 1 tbsp liquid smoke
- 1 tsp garlic powder
- 3 tbsp white vinegar
Marinade Instructions:
- Prepare the Marinade: In a medium bowl, whisk together the soy sauce, brown sugar, liquid smoke, garlic powder, and white vinegar until the sugar is fully dissolved. The soy sauce provides umami and salinity, brown sugar adds a touch of sweetness for caramelization, liquid smoke enhances the smoky notes, garlic powder contributes aromatic depth, and white vinegar acts as a tenderizer.
- Brisket Preparation: Place your brisket in a large, non-reactive dish or a heavy-duty brining bag. Ensure there’s enough room for the brisket to be fully submerged or well-coated. I’ve successfully used briskets ranging from 6 pounds to a full 14-pound packer. When planning, aim for about 1/2 pound of meat per person. A common packer brisket, including both the point and the flat, usually weighs between 12-14 pounds, perfect for feeding a crowd.
- Marination Process: Pour the prepared marinade over the brisket, ensuring it’s completely covered. Cover the dish tightly with aluminum foil or seal the bag.
- Refrigerate and Flip: Transfer the marinating brisket to the refrigerator for an optimal 8-12 hours. For even flavor distribution, I highly recommend flipping the brisket at least 2-3 times during this period. My preferred method is to start the marination 2-3 hours before bedtime, flip it once before I go to sleep, and then again first thing in the morning.
- Pat Dry: Once the marinating time is complete, remove the brisket from the marinade and thoroughly pat it dry with paper towels. A dry surface is crucial for the rub to adhere properly and for developing that delicious, crispy bark during smoking.
The Ultimate Dry Rub for Brisket
A phenomenal dry rub is essential for building that irresistible, flavorful bark on your smoked brisket. This blend of spices and seasonings forms a crust that locks in moisture and adds incredible depth to every bite.
Dry Rub Ingredients:
- 4 tbsp kosher salt
- 2 tbsp black pepper
- 2 tbsp garlic powder
- 2 tbsp onion powder
- 1 tbsp chili powder
- 2 tsp oregano
- 2 tsp parsley
- 1 tsp sugar
Rub Instructions:
- Combine Ingredients: In a small bowl, thoroughly mix all the dry rub ingredients. Each component plays a vital role: kosher salt enhances flavor, black pepper adds a classic peppery kick, garlic and onion powders provide foundational savory notes, chili powder introduces a subtle warmth, oregano and parsley contribute herbaceous undertones, and a touch of sugar aids in caramelization for a beautiful bark.
- Generous Application: Liberally sprinkle the rub over the entire surface of the brisket. Don’t be shy – this is where much of your exterior flavor comes from. Gently pat and rub the mixture into the meat, ensuring full coverage on all sides. The goal is to create a thick, even layer that will transform into a magnificent bark.
- Pro Tip for Efficiency: Since this smoked brisket recipe often becomes a favorite, I recommend multiplying the rub recipe by at least 4. This way, you can store the pre-mixed rub in an airtight container, like a mason jar, in your pantry. It will stay fresh for up to two years, ready for your next smoking adventure!
The Magic of the Wet Mop Sauce
The wet mop sauce is your secret weapon for maintaining moisture, adding continuous layers of flavor, and contributing to a delectable bark throughout the long smoking process. It’s a simple but highly effective technique.
Wet Mop Ingredients:
- 1/2 cup white vinegar
- 1/2 cup canola oil
- 1/2 cup red wine
- 1 onion, sliced
- 3 cloves garlic, crushed
- 1 lemon, sliced
- 1 tbsp black pepper
- 1 tbsp kosher salt
Wet Mop Instructions:
- Simmer the Base: In a medium saucepan, combine the white vinegar, canola oil, and red wine. Place over medium-high heat and bring the mixture to a slight boil. The acidity of the vinegar tenderizes, the oil helps retain moisture, and the red wine adds a rich depth.
- Infuse Aromatics: Once simmering, add the sliced onion, crushed garlic cloves, sliced lemon, black pepper, and kosher salt. Reduce the heat to low and allow the mixture to gently simmer for 15-20 minutes. This slow simmer allows the flavors from the aromatics to deeply infuse into the liquid, creating a complex and fragrant mop sauce.
- Ready for the Smoker: Cover the saucepan and transport your wet mop sauce to your smoker. You’ll be brushing the brisket with this flavorful concoction approximately every 30 minutes throughout the majority of the smoking process, continuously basting it with moisture and flavor.
Step-by-Step Smoking Process
With your brisket marinated and rubbed, and your wet mop sauce prepared, it’s time for the main event: smoking! This low-and-slow method is what transforms a tough cut into a tender, succulent masterpiece.
- Prepare Your Smoker: Fill your smoker with your chosen wood or pellets. For robust beef flavor, I highly recommend hickory. Mesquite or apple wood also make excellent choices, offering distinct but complementary smoky profiles. Preheat your smoker to a consistent 225°F (107°C). Maintaining a steady temperature is critical for successful brisket.
- Initial Placement: To prepare for the Texas Crutch method (if you choose to use it, detailed below), lay two large sheets of heavy-duty aluminum foil on top of each other directly on the grill grates. This setup allows you to easily wrap the brisket later without removing it from the smoker. Place the prepared brisket directly on top of the foil. Whether the fat side is up or down is a topic of much debate among pitmasters, but I’ve found it doesn’t significantly impact the final result with our method.
- Begin Mopping: Immediately after placing the brisket, brush it liberally with your wet mop sauce. Continue to brush the brisket with the wet mop sauce approximately every 30 minutes while it smokes. This regular basting helps keep the surface moist, builds flavor, and aids in the formation of that beautiful bark.
- Monitor Internal Temperature: The total smoking time will vary significantly based on the size of your brisket and whether you employ the “Texas Crutch” technique. Expect roughly 90 minutes per pound without the Texas Crutch, or about 60 minutes per pound if you use it. Your target internal temperature for doneness is between 200-205°F (93-96°C). Use a reliable meat thermometer with a probe to monitor the thickest part of the flat, avoiding bone or large pockets of fat.
- The Crucial Rest: Once the brisket reaches its target internal temperature, carefully remove it from the smoker. Transfer it to a large cutting board, loosely wrap it with foil, and allow it to rest for a minimum of 60 minutes. This resting period is absolutely critical; it allows the muscle fibers to relax and reabsorb the juices, ensuring a supremely moist and tender brisket. Do not skip this step!
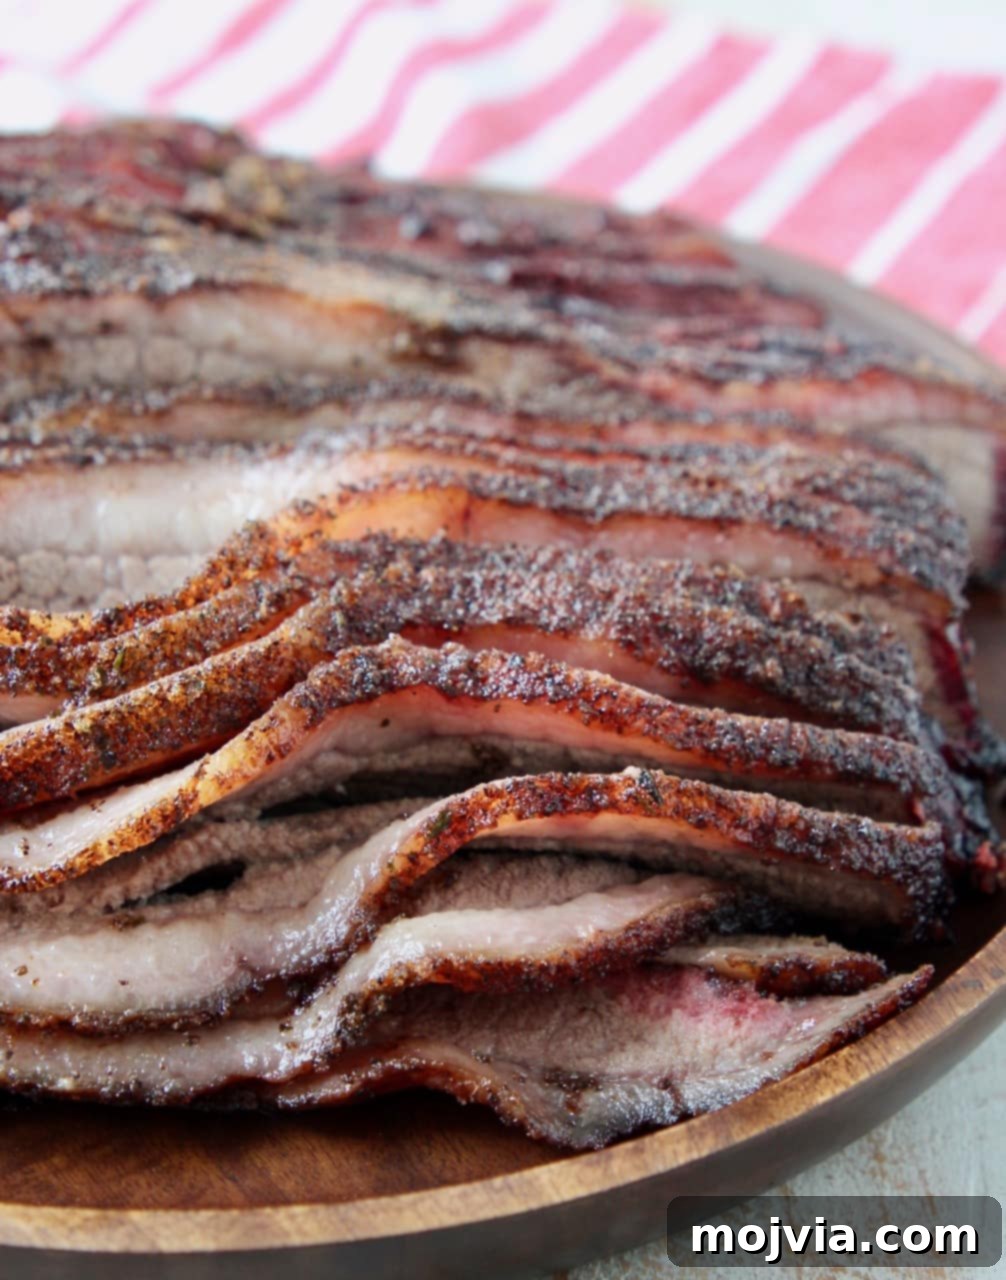
- Slice Against the Grain: After resting, unwrap the brisket. Using a sharp butcher’s knife or, for effortless slicing, an electric knife, slice the meat against the grain. Slicing against the grain is key to tenderness, as it shortens the muscle fibers, making each bite easier to chew and more enjoyable.
Essential Brisket Smoking Tips and Tricks
Achieving legendary smoked brisket goes beyond just following a recipe; it’s about understanding the nuances and employing smart techniques. Here are some invaluable tips and tricks to elevate your pitmaster game:
How to Trim a Brisket
Proper trimming is fundamental for consistent cooking and a great bark. You want to remove excess hard fat, but leave enough to keep the meat moist.
- The Fat Cap: I recommend leaving at least 1/4 inch of fat cap on the brisket. This layer of fat will slowly render throughout the long cooking process, basting the meat and infusing it with incredible flavor and moisture.
- Fat Side Up or Down? Many debates rage about whether to smoke fat side up or down. I’ve experimented extensively and found that with my method, it doesn’t make a significant difference. Focus more on maintaining consistent smoker temperature and moisture.
Ideal Smoking Temperature for Brisket
Brisket demands patience. The golden rule for smoked brisket is “low and slow.”
- Temperature: Brisket should be consistently smoked at 225°F (107°C). This low temperature allows the connective tissues to slowly break down into gelatin, resulting in that signature tender texture, while also giving the smoke ample time to infuse its flavor.
Mastering the Texas Crutch Technique
The “Texas Crutch” is a game-changer for speeding up the smoking process and ensuring a moist, tender result, especially for large cuts like brisket or pork shoulder.
- Understanding The Stall: During a long smoke, large pieces of meat will inevitably hit a “stall.” In pitmaster terms, this means the internal temperature of the meat plateaus. This phenomenon occurs because the meat is releasing so much moisture through evaporation that it actually cools the surface, preventing the internal temperature from rising.
- Combatting the Stall: The Texas Crutch technique was developed to power through this stall. By wrapping the meat, you create a steamy environment that prevents further evaporative cooling, allowing the internal temperature to rise more quickly.
- When to Wrap: Tightly double-wrap the brisket in heavy-duty foil (or butcher paper, if preferred) when its internal temperature reaches between 150-160°F (65-71°C).
- Simplified Wrapping Method: To make wrapping easier and avoid losing heat, I lay two large pieces of foil on top of each other on the grill grate before I even start smoking the brisket. When it’s time to crutch, I simply use my Ove Gloves to place two more pieces of foil on top of the brisket, then pull all the foil pieces together to create a tight seal around the meat.
- Continue Monitoring: Insert a meat thermometer probe through the foil into the thickest part of the brisket. Continue cooking until the internal temperature reaches 203°F (95°C).
- Finishing the Bark: Once it hits 203°F, remove the brisket from the foil and place it back on the smoker, unwrapped, for an additional 30 minutes. This final step is crucial for re-establishing and firming up that delicious, crispy bark.
- Wet Mop Adjustment: If you’re using the Texas Crutch method, brush the brisket liberally with the wet mop sauce just before wrapping it. Once wrapped, you can discontinue wet mopping for the remainder of the cooking process until you remove the foil for the final bark-setting stage.
- Further Reading: For those who are true “smoker nerds” like me and want to delve deeper, Mark over at Food Fire Friends has an excellent and extensive article on The Texas Crutch that I highly recommend checking out!
Cooking Time for Smoked Brisket
Cooking time is variable, but here’s a general guideline:
- With Texas Crutch: Expect approximately 60 minutes per pound of meat.
- Without Texas Crutch: Plan for about 90 minutes per pound of meat. Always cook to temperature, not strictly to time.
The Non-Negotiable Rest Period
This is arguably the most important step for a truly juicy brisket.
- Why Rest? After removing the brisket from the smoker, transfer it to a large cutting board. Loosely wrap it with foil and let it rest for at least one hour (or up to 2-4 hours in a cooler). This allows the internal temperature to equalize and the muscle fibers to relax, reabsorbing all those precious juices that would otherwise run out when you slice it. Skipping the rest results in dry brisket.
- Slicing Tip: Once rested, slice the brisket against the grain. This shortens the muscle fibers, ensuring maximum tenderness. An electric carving knife can make this task much easier and yield more uniform slices.
Choosing the Right Wood for Smoking
The type of wood you use imparts distinct flavors.
- Top Choice: For beef brisket, hickory is my absolute top choice. It provides a strong, classic smoky flavor that perfectly complements the rich beef.
- Close Seconds: Mesquite offers a very strong, earthy, and bold smoke, while apple wood provides a milder, sweeter, and fruitier smoke. Experiment to find your personal favorite!
Tools for the Aspiring Pitmaster
Having the right equipment can make all the difference in your smoked brisket journey. Here’s a list of essential tools to ensure success:
- Smoker: The heart of your operation. I personally use a Traeger Pro Series Grill at home for its convenience and consistent results. When I visit my Dad, we use his classic Oklahoma Joe’s offset smoker, which offers a more traditional wood-fire experience.
- Wood or Pellets: Depending on your smoker type. For this recipe, I highly recommend Traeger Hickory Pellets, or hickory chunks/chips for an offset smoker.
- Reliable Thermometer: Absolutely critical for monitoring internal meat temperature. My Traeger comes with built-in probes, which are incredibly convenient. If your smoker doesn’t have one, I recommend investing in a high-quality, instant-read digital meat thermometer.
- Heavy-Duty Grill Foil: Essential for the Texas Crutch technique and for loosely wrapping the brisket during its crucial resting period.
- Large Cutting Board: You’ll need a spacious and sturdy surface for trimming, applying the rub, and most importantly, slicing your finished brisket.
- Butcher’s Knife or Electric Knife: A long, sharp butcher’s knife is excellent for slicing. For extra ease and perfectly uniform slices, especially through a large brisket, an electric knife is a fantastic investment.
- Ove Gloves (Optional but Recommended): Heat-resistant gloves like Ove Gloves are incredibly useful for handling hot grates and wrapping the brisket on the smoker.
What to Serve with Your Smoked Brisket
A perfectly smoked brisket deserves equally impressive accompaniments. While the brisket itself is the star, the right side dishes and condiments can elevate the entire meal. Here are some classic and creative pairings:
Traditional Texas Style:
In Texas, brisket is often served with a simple elegance:
- BBQ Sauce: Always on the side, allowing guests to customize their experience.
- White Bread: Soft slices of white bread are perfect for soaking up juices.
- Pickles and Onions: Sliced dill pickles and raw or pickled red onions provide a tangy contrast that cuts through the richness of the meat.
Popular BBQ Side Dishes:
For a complete feast, these are some beloved sides frequently found at top BBQ joints:
- Mac and Cheese: Creamy, cheesy mac and cheese is a universal crowd-plepleaser. Try our Smoked Mac and Cheese for a truly cohesive BBQ flavor profile—what pairs better with incredible smoked meat than a smoky, cheesy side dish!
- Potato Salad: A cool, creamy potato salad is a refreshing balance to the rich brisket. Our Instant Pot Potato Salad with sharp cheddar and ranch seasoning takes this classic to a whole new level of deliciousness.
- Pasta Salad: A versatile and often colorful addition to any BBQ spread. For a zesty option with a kick, my Spicy Buffalo Macaroni Salad features my absolute favorite sauce and is a fantastic choice.
- Coleslaw: Crisp and tangy coleslaw is another excellent counterpoint to rich meats. For a fun, crunchy twist on traditional coleslaw, our Kale Apple Slaw is a vibrant and flavorful option.
- Corn on the Cob: Sweet, simple, and satisfying, corn is always a hit.
My Favorite Unique Pairings:
- Roasted Cauliflower Salad: For a healthy yet incredibly flavorful side dish that consistently garners rave reviews, I love to include this roasted cauliflower salad on the menu.
- Watermelon Salsa: Super refreshing, especially during hot summer cookouts! I often serve this scrumptious salsa with tortilla chips as an appetizer while the main event is still smoking.
- Smoked Cream Cheese: Why let the smoker sit idle? While your brisket is cooking, throw a block of seasoned cream cheese on there for a surprisingly delicious and easy appetizer or side dish!
No matter which sides you choose, your perfectly smoked brisket is guaranteed to be the star of the show.
Did you make this recipe and absolutely love it? Be sure to rate it 5 stars in the recipe card below! Have burning questions about smoking brisket or need further guidance? Don’t hesitate to comment below and ask away – I’m here to help you achieve brisket perfection!
Pin Recipe
Rate this Recipe
Smoked Brisket
Create mouth-watering Smoked Brisket on a wood or pellet smoker with these simple techniques & delicious marinade, rub, and wet mop recipes!
Servings: 20 people
Prep Time: 1 hr
Cook Time: 9 hrs
Marinating Time: 6 hrs
Total Time: 10 hrs
Author: Whitney Bond
Course: Main Course
Cuisine: American
Ingredients
- 12-14 lb boneless trimmed brisket
Marinade
- 1 cup soy sauce
- 1/2 cup brown sugar
- 1 tbsp liquid smoke
- 1 tsp garlic powder
- 3 tbsp white vinegar
Dry Rub
- 4 tbsp kosher salt
- 2 tbsp black pepper
- 2 tbsp garlic powder
- 2 tbsp onion powder
- 1 tbsp chili powder
- 2 tsp oregano
- 2 tsp parsley
- 1 tsp sugar
Wet Mopping Sauce
- 1/2 cup white vinegar
- 1/2 cup canola oil
- 1/2 cup red wine
- 1 onion, sliced
- 3 cloves garlic, crushed
- 1 lemon, sliced
- 1 tbsp black pepper
- 1 tbsp kosher salt
Instructions
Brisket Marinade
- Place the brisket in a large bowl or dish, ensuring enough room for it to be covered in the marinade.
- Combine all of the marinade ingredients in a medium bowl, whisking until well mixed.
- Pour the marinade over the brisket, making sure it’s fully covered.
- Cover the dish with aluminum foil and place it in the refrigerator for 8-12 hours.
- Flip the brisket 2-3 times during marination so that both sides are evenly flavored.
- After marinating, remove the brisket from the marinade and pat it thoroughly dry with paper towels.
Brisket Rub
- In a small mixing bowl, combine all of the dry rub ingredients.
- Sprinkle the rub generously over the entire brisket, gently rubbing it into the meat to ensure full coverage.
Brisket Wet Mop
- Prepare the wet mopping sauce by placing the vinegar, oil, and red wine in a medium saucepan over medium-high heat.
- Bring the mixture to a slight boil, then add the sliced onion, crushed garlic, sliced lemon, black pepper, and kosher salt.
- Reduce the heat to low and simmer for 15-20 minutes to allow flavors to meld.
- Cover the wet mop sauce and take it out to the smoker, ready to use throughout the smoking process.
Smoked Brisket
- Add hickory, mesquite, or apple wood/pellets to your smoker.
- Heat the smoker to a steady 225°F (107°C).
- To prepare for optional Texas Crutch, place two large sheets of foil on top of each other on the smoker grate. Then, place the brisket (fat side up or down, your preference) directly on the foil.
- Brush the brisket with the wet mop sauce. Continue brushing with the wet mop approximately every 30 minutes during the smoking process.
- Smoke the meat until it reaches an internal temperature between 200-205°F (93-96°C). This will take approximately 90 minutes per pound without the Texas Crutch, or 60 minutes per pound if using the technique described below.
- Once cooked, remove the brisket from the smoker, place it on a cutting board, loosely wrap it with foil, and let it rest for a full 60 minutes before slicing.
- Slice the meat against the grain for maximum tenderness.
Texas Crutch Technique – Optional for Faster Cooking & Moisture
- To speed up the smoking process and combat the “stall” time (see notes below), tightly double wrap the brisket in heavy-duty foil when it reaches an internal temperature between 150-160°F (65-71°C).
- If using the Texas Crutch method, brush liberally with the wet mop just before wrapping, then discontinue wet mopping throughout the remainder of the cooking process until unwrapped.
- Insert a meat thermometer probe through the foil into the meat and continue cooking until it reaches 203°F (95°C).
- Remove the brisket from the foil and continue cooking directly on the grill grate for an additional 30 minutes to set the bark.
- After this final step, remove the brisket from the smoker, place it on a cutting board, loosely wrap it with foil, and let it rest for 60 minutes before slicing.
Notes
- The “stall” occurs when the internal meat temperature hits a plateau, caused by moisture releasing from the meat and cooling it down. The Texas Crutch technique effectively combats this.
- If time is not a concern, the Texas Crutch is optional. The meat’s temperature will eventually rise again, but it will take approximately 30 minutes longer per pound of meat.
- If your butcher hasn’t already trimmed the brisket, ensure you trim it yourself, leaving at least 1/4 inch of fat cap on the meat for moisture and flavor.
- For the best smoky flavor, I recommend hickory wood or pellets for this recipe. However, mesquite and apple wood also work exceptionally well and offer different flavor profiles.
- Plan for approximately 1/2 pound of cooked meat per person when selecting your brisket size.
- If you are using a smaller brisket (e.g., a flat cut), you may want to cut the ingredients for the dry rub in half.
- For convenience, the dry rub ingredients can be multiplied by 5 or 10 times and stored in an airtight container, such as a mason jar, in a cool, dark pantry for up to 2 years.
Nutrition Facts
Carbohydrates 9g (3%)
Protein 58g (116%)
Fat 25g (38%)
Saturated Fat 7g (35%)
Cholesterol 168mg (56%)
Sodium 2619mg (109%)
Potassium 994mg (28%)
Sugar 6g (7%)
Vitamin A 120mg (2%)
Vitamin C 3.5mg (4%)
Calcium 35mg (4%)
Iron 5.9mg (33%)
Did you make this recipe?
Tag @WhitneyBond on Instagram and hashtag it #WBRecipes!