
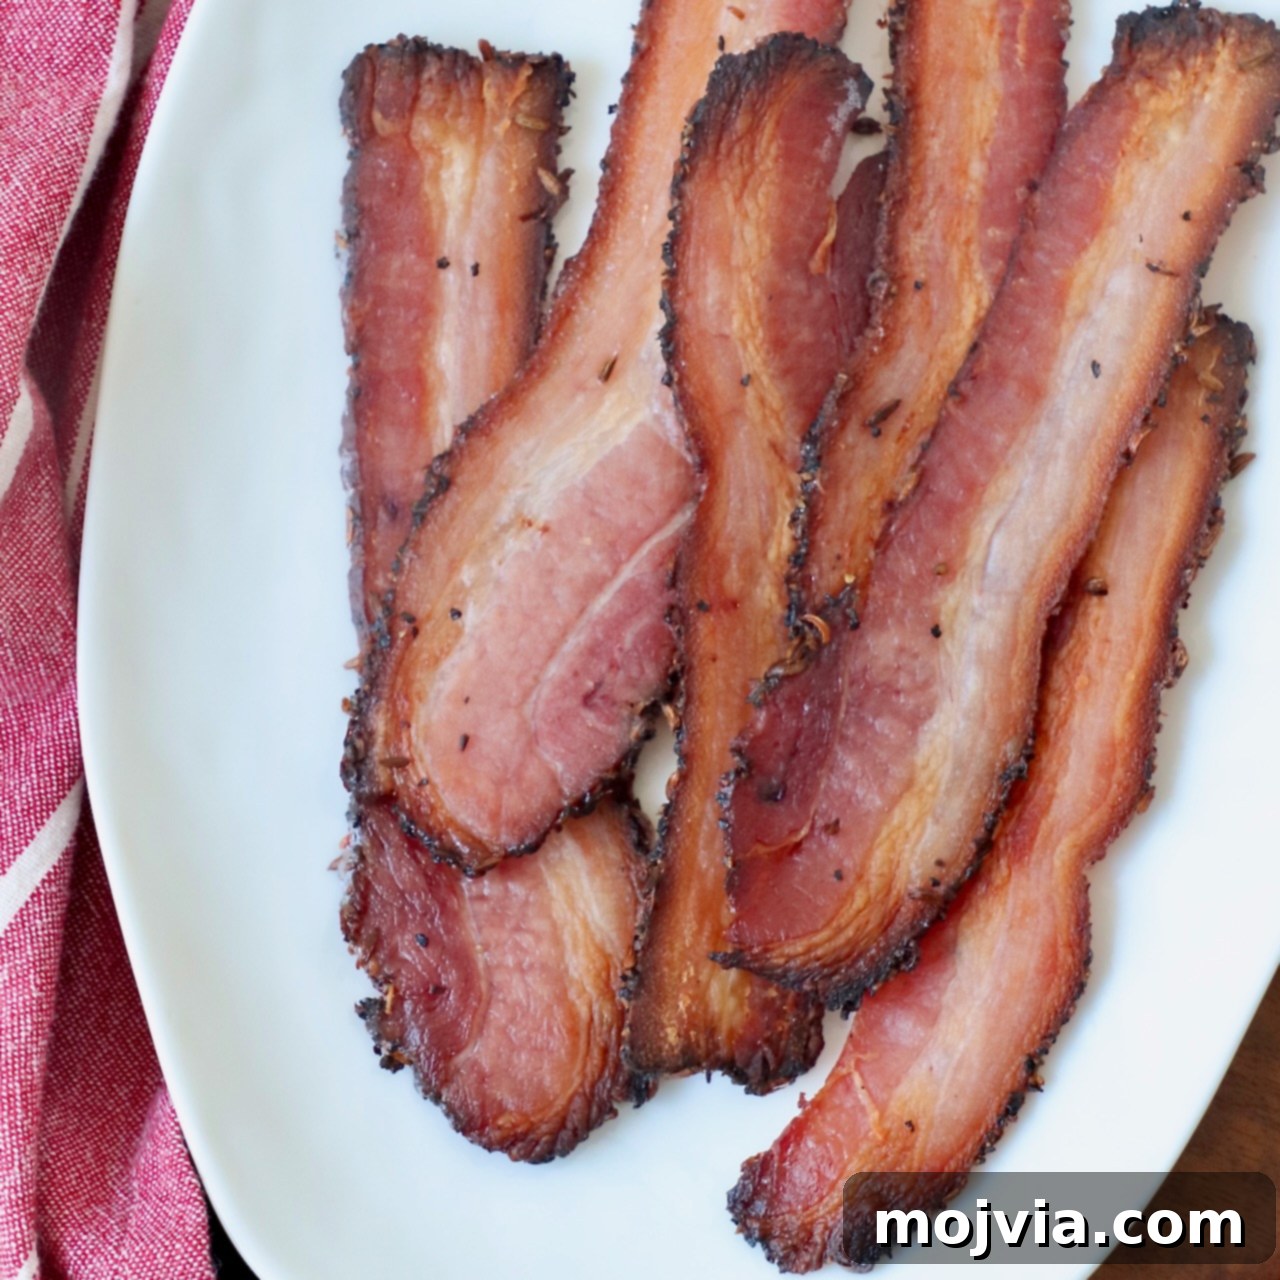
Welcome to the ultimate guide to crafting the most exquisite **homemade bacon** you’ve ever tasted. Forget store-bought varieties; once you experience the rich flavor and melt-in-your-mouth texture of bacon made right in your own kitchen, there’s no going back. This comprehensive, step-by-step recipe reveals the secrets to curing and smoking your own pork belly, transforming it into what we affectionately call “bacon gold.” Prepare to elevate your breakfast, sandwiches, and any dish featuring this irresistible delicacy.
“I made the fennel version and I love it. I’ve made bacon several times before and this is the best it has ever come out. The ice cube trick is brilliant. I’m going to make the maple today, I have a few more belly slabs left from my pigs I will probably stick with these recipes!”
-Katie
Table of contents
- The Journey to Bacon Gold
- Essential Ingredients for Homemade Bacon
- Step-by-Step Instructions
- Cure the Bacon: Flavor Infusion
- Smoke the Bacon: The Flavor Transformation
- Storing and Cooking Your Homemade Bacon
- Expert Recipe Tips for Perfect Bacon
- Comprehensive Storage Guide
- Delicious Ways to Serve Your Homemade Bacon
- Recommended Tools for Bacon Making
- More Smoker Recipes to Enjoy
The Journey to Bacon Gold: Why Make Bacon at Home?
Our adventure into homemade bacon began in 2019 when my husband, a true bacon enthusiast, suggested we try making our own. The idea was instantly captivating. Over the past few years, through extensive research, countless experiments, and fine-tuning our techniques, we’ve developed a **tested and perfected homemade bacon recipe** that consistently delivers extraordinary results.
While making your own bacon does require a bit of patience and advanced planning, the effort is undeniably rewarding. The result is truly the **best bacon** I have ever tasted – thick, succulent slices that genuinely **melt in your mouth like liquid gold!** Beyond the incredible flavor, there’s immense satisfaction in knowing exactly what goes into your food, free from the preservatives and artificial flavors often found in commercial bacon. This process allows for complete customization, letting you tailor the flavor profile to your precise preferences, making it a culinary experience far superior to anything you can buy.
For our recipe, we typically start with a substantial 9-pound slab of pork belly. This generous size allows us to divide it in half and experiment with two distinct, equally delectable flavors: a classic, sweet maple bacon and an unexpectedly delightful toasted fennel bacon. The maple variety offers a comforting, familiar taste, while the toasted fennel introduces an aromatic complexity that is sure to **surprise and delight** your palate. Imagine the best BLT sandwich you’ve ever had, elevated to new heights with thick-cut, intensely flavorful homemade bacon!
Once cured and smoked, this “bacon gold” can be stored whole or sliced, freezing beautifully for up to a year. We find ourselves making this recipe 3-4 times annually, ensuring a constant supply in our freezer for whenever the craving for truly exceptional bacon strikes. I wholeheartedly recommend you embark on this culinary journey and keep your freezer stocked with your own personalized bacon treasure.
Essential Ingredients for Homemade Bacon
Crafting superior homemade bacon begins with selecting the right ingredients. Below, I’ll detail the best components for this recipe, explain their purpose, and offer **substitution options** where applicable. For precise measurements, please refer to the detailed recipe card at the conclusion of this article.
- To cure your exceptional bacon, you’ll need the following foundation:
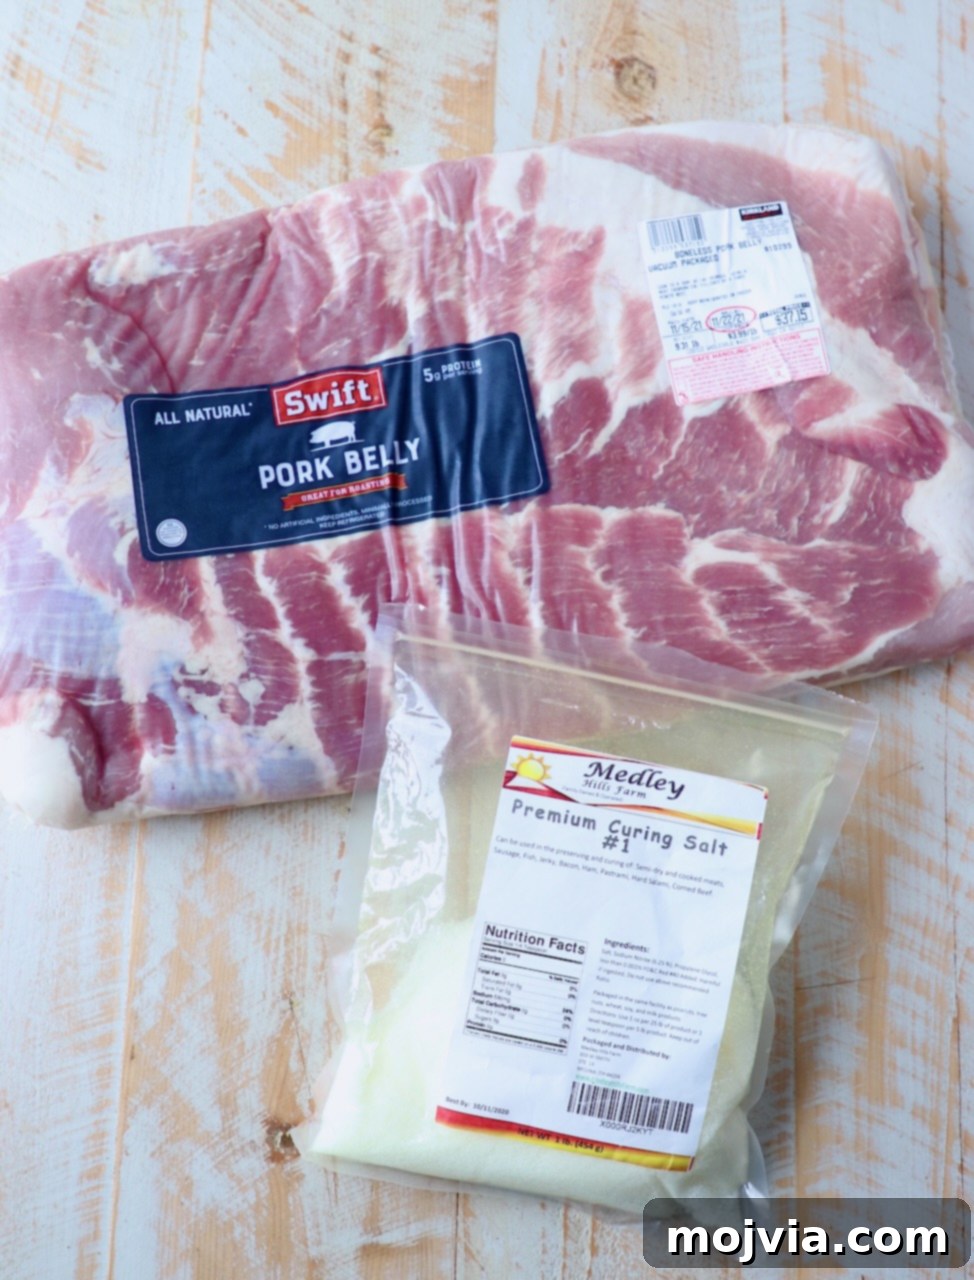
- Pork Belly: The star of our show. We consistently source high-quality pork belly from Costco, typically aiming for a large slab weighing between 8-10 pounds. This size is ideal for splitting into two different flavor profiles. If Costco isn’t an option, speak with the butcher at your local grocery store; they can often special-order or cut a slab to your desired specifications. Other warehouse clubs like Sam’s Club or Smart and Final are also excellent alternatives. Look for a piece with a good balance of lean meat and fat for the best results.
- Premium Curing Salt #1 (Prague Powder #1): This is a non-negotiable ingredient for safety and flavor. Also known simply as “curing salt,” it contains sodium nitrite, which is crucial for preventing spoilage, inhibiting bacterial growth, and developing bacon’s characteristic pink color and flavor. It is distinct from regular table salt and should never be substituted. I’ve always ordered this online for convenience, but some specialized meat and butcher shops may carry it.
- For the irresistibly sweet and savory maple bacon, you’ll need:
- Real Maple Syrup: The quality of your maple syrup significantly impacts the final flavor. Always opt for 100% pure maple syrup, not pancake syrup or imitation varieties. The authentic, complex sweetness of real maple syrup is essential for achieving the rich, nuanced flavor we’re after.
- Brown Sugar: Adds an additional layer of caramel-like sweetness and helps create a beautiful crust during the smoking process.
- Kosher Salt and Ground Black Pepper: These pantry staples provide fundamental seasoning, balancing the sweetness and enhancing the overall pork flavor. Kosher salt is preferred for its pure taste and coarse texture, which helps it adhere well to the pork belly.
- To create the uniquely aromatic toasted fennel bacon, gather these ingredients:
- Fennel Seeds: These delightful seeds, easily found in the spice aisle of any major grocery store, impart a warm, licorice-like aroma and flavor that perfectly complements pork. Toasting them amplifies their fragrant qualities.
- Brown Sugar: As with the maple bacon, brown sugar here contributes to the sweetness and texture of the cure, pairing wonderfully with the fennel.
- Kosher Salt and Ground Black Pepper: The essential seasoning components, ensuring a well-rounded and savory profile.
Step-by-Step Instructions for Making Bacon Gold
Making homemade bacon is a process that requires attention to detail, but with these clear instructions and our expert tips, you’ll achieve perfect results. I’ve included **step-by-step guidance** to make this recipe incredibly easy to follow at home. For the full detailed recipe instructions and precise measurements, remember to scroll to the recipe card at the bottom of this post.
Cure the Bacon: Flavor Infusion and Safety
Curing is the critical first step, responsible for both preserving the pork and infusing it with flavor. It’s during this phase that the magic truly begins.
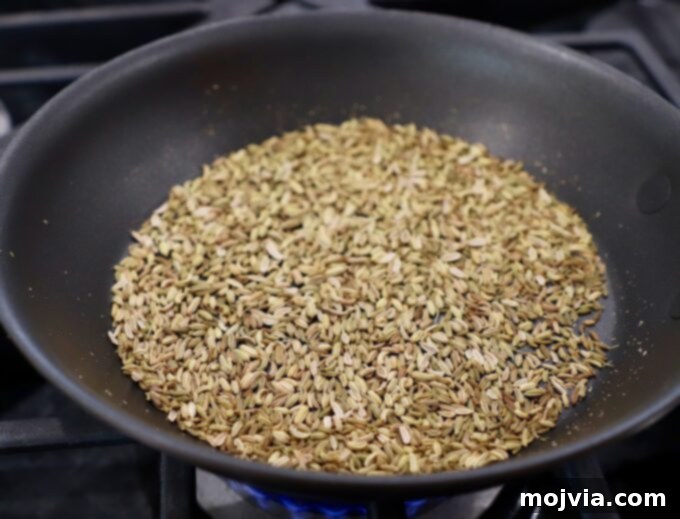
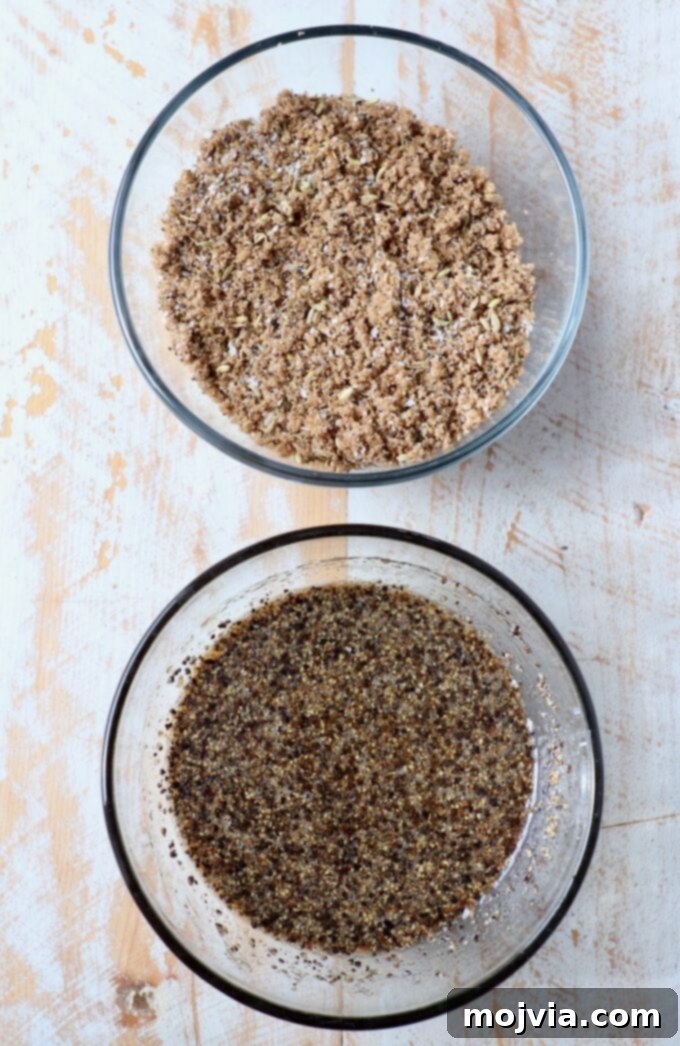
- Prepare the Fennel Cure: If you’re making the fennel bacon, begin by toasting the fennel seeds. Place the fennel seeds in a small, dry skillet over medium-high heat on your stovetop. Continuously toss and stir the seeds for 5-7 minutes. This process is crucial as it awakens their essential oils, intensifying their fragrance and flavor. The seeds should become lightly toasted and release a wonderful, aromatic scent. Once toasted, immediately remove them from the heat and transfer them to a small bowl. Combine the toasted fennel seeds with brown sugar, kosher salt, black pepper, and the essential curing salt (Prague powder #1). Mix thoroughly until all ingredients are evenly distributed.
- Prepare the Maple Cure: For the maple bacon, combine the real maple syrup, brown sugar, kosher salt, black pepper, and curing salt (Prague powder #1) in a separate small bowl. Stir these ingredients together until they form a smooth, consistent mixture.
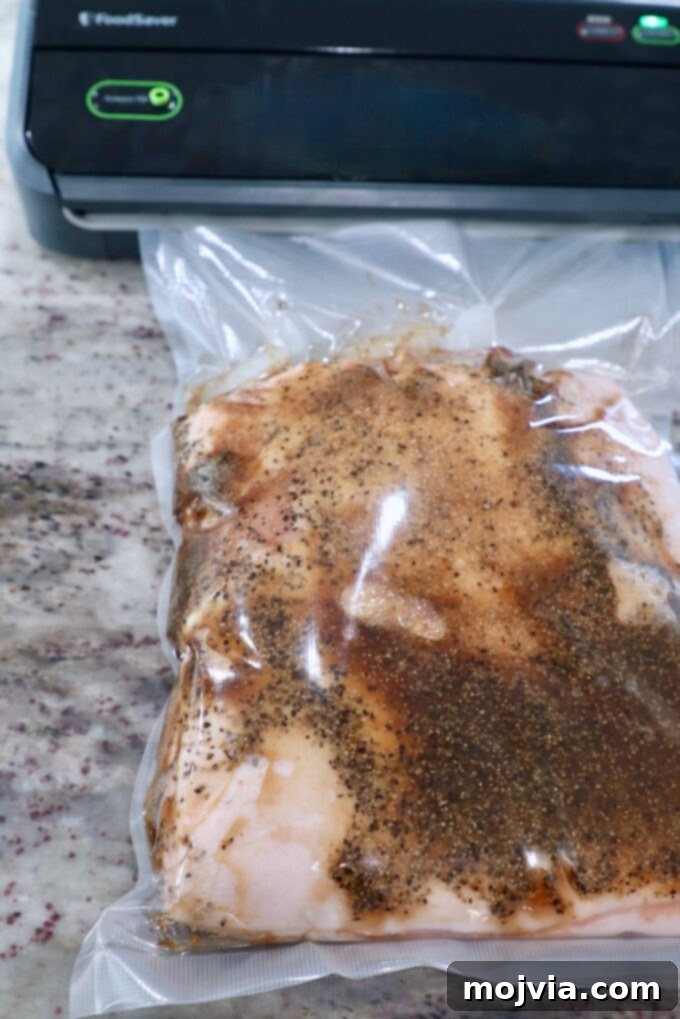
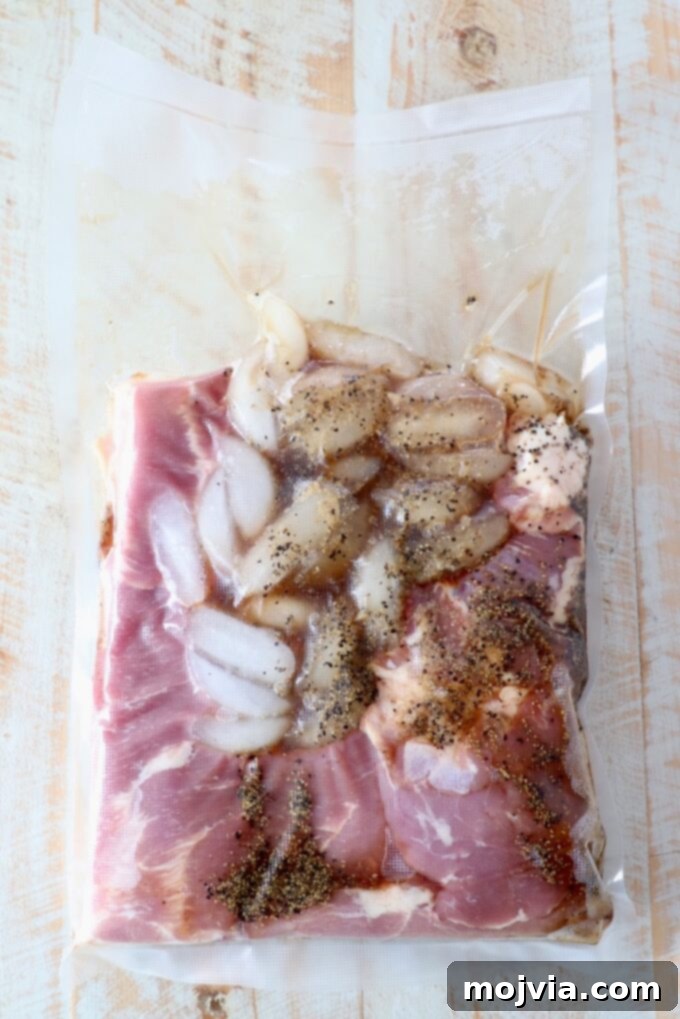
- Apply the Cure and Prepare for Sealing: Take your two pork belly halves (or a single pork belly, cut in half for different flavors) and place each into separate vacuum sealer bags. Add the maple seasoning mixture to one bag, and the toasted fennel seasoning to the other. Now for our brilliant “ice cube trick”: add several ice cubes to each bag (approximately 20 ice cubes per 4.5 lbs of pork belly, which equals about 1 cup of water). The ice cubes will melt slowly in the refrigerator, creating a consistent liquid cure without making it difficult to vacuum seal, which can be tricky with excessive liquid. If you’re using a large plastic zipper bag instead of a vacuum sealer, you can simply add the appropriate amount of water directly to the bag.
- Vacuum Seal and Refrigerate for Curing: Using a vacuum sealer, remove all air from each bag and seal it tightly. This creates an anaerobic environment essential for the curing process. If a vacuum sealer isn’t available, meticulously press out as much air as possible from a large plastic zipper bag before sealing it securely. Place the seasoned, sealed bags of pork belly in the refrigerator, initially with the fat side facing down. For the next 10 days, diligently flip the bags daily, alternating between fat side up and fat side down. This ensures even distribution of the cure and consistent flavor penetration throughout the pork belly. Each day, take a moment to gently massage the seasoning into the pork as you flip, further aiding the curing process.
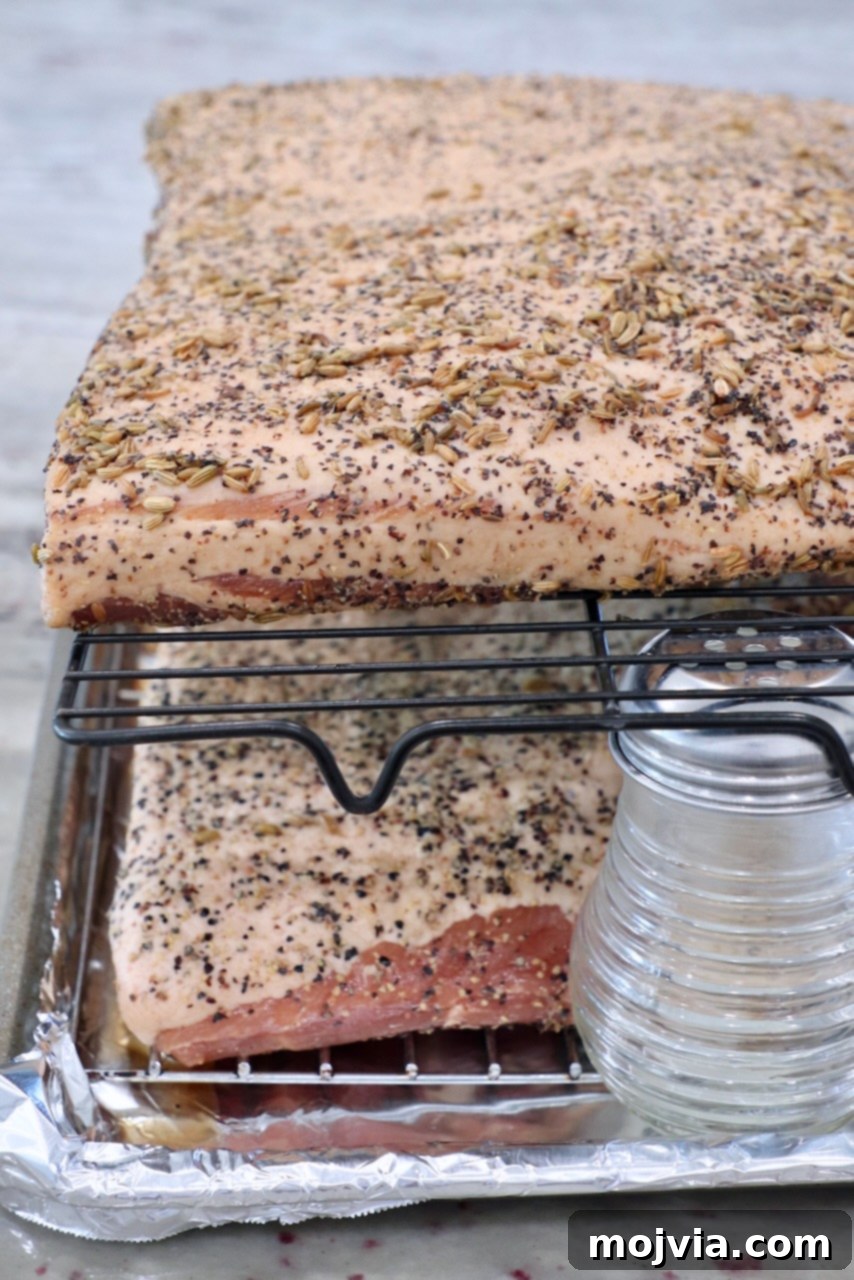
- Prepare for Pellicle Formation: After the 10-day curing period, remove each pork belly from its bag. It’s crucial not to rinse the pork belly, as this would wash away the flavorful seasonings that have worked so hard to penetrate the meat. Instead, use several layers of paper towels to thoroughly pat both sides of each pork belly dry, removing any excess moisture without stripping away the spices.
- Form the Pellicle: Place each dried pork belly on a wire rack, which should be set over a foil-lined baking sheet to catch any drips. Leave the pork belly uncovered in the refrigerator for a full 24 hours. This vital step allows a “pellicle” to form – a slightly tacky, dry surface on the meat. The pellicle is essential for successful smoking, as it allows the smoke to adhere more effectively to the meat, resulting in better flavor and color. If refrigerator space is a concern, you can ingeniously stack two wire racks by using shaker jars or small, stable containers as risers, ensuring adequate air circulation around both pork bellies without them touching.
Smoke the Bacon: The Flavor Transformation
Smoking is where the cured pork belly truly transforms into bacon, absorbing rich, smoky flavors that define this beloved breakfast staple.
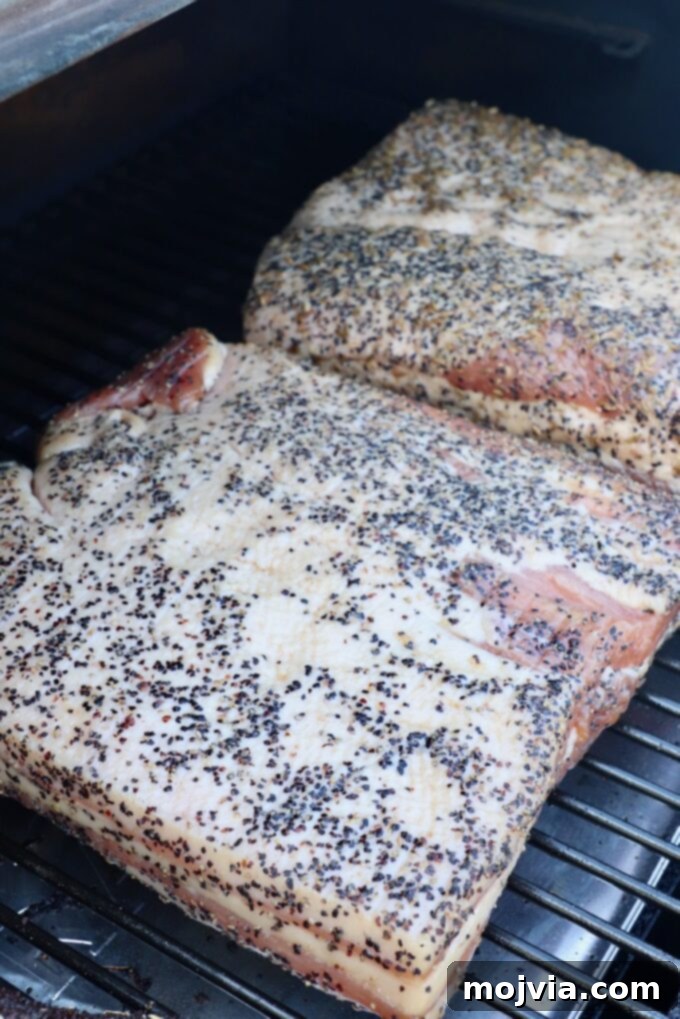
- Smoke to Perfection: Preheat your smoker to a consistent 225°F. Once the temperature is stable, carefully place the pellicle-formed pork bellies on the smoker grates, ensuring the fat side is facing up. Insert a reliable temperature probe into the thickest part of the middle of the pork belly, or be ready with an instant-read meat thermometer. The goal is to remove the pork belly from the smoker once its internal temperature reaches 150°F. Remember, smoking is fundamentally about achieving the correct internal temperature, not about a fixed cooking time. While it typically takes about 2 hours to reach this temperature, individual smokers and pork belly sizes can cause variations. Once the pork belly reaches 150°F internally, promptly remove it from the smoker and let it rest undisturbed on a clean cutting board for at least 30 minutes. This resting period allows the juices to redistribute, ensuring a more tender and flavorful final product.
- Chill for Firmness and Flavor: After the initial 30-minute rest at room temperature, securely wrap each piece of smoked pork belly in heavy-duty foil. Transfer the foil-wrapped bacon to the refrigerator and allow it to chill for a minimum of 4 hours. This cooling period is crucial for firming up the bacon, making it much easier to slice neatly and enhancing its overall texture and flavor before you store it or begin cooking.
Storing and Cooking Your Homemade Bacon
Now that your “bacon gold” is ready, it’s time to learn how to store it properly and unleash its full potential in your kitchen.
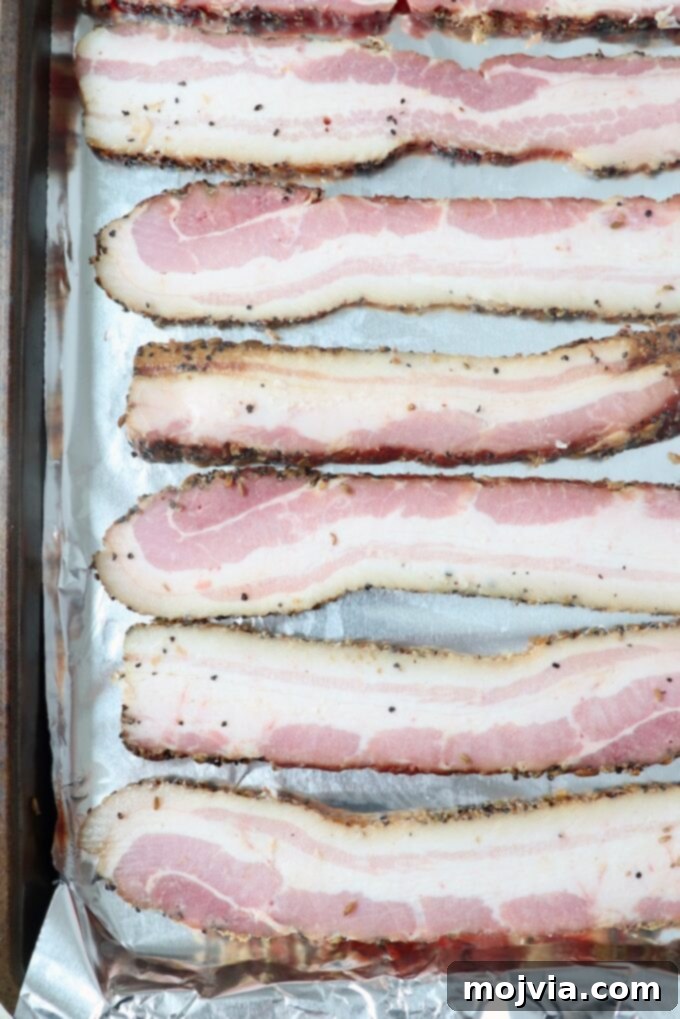
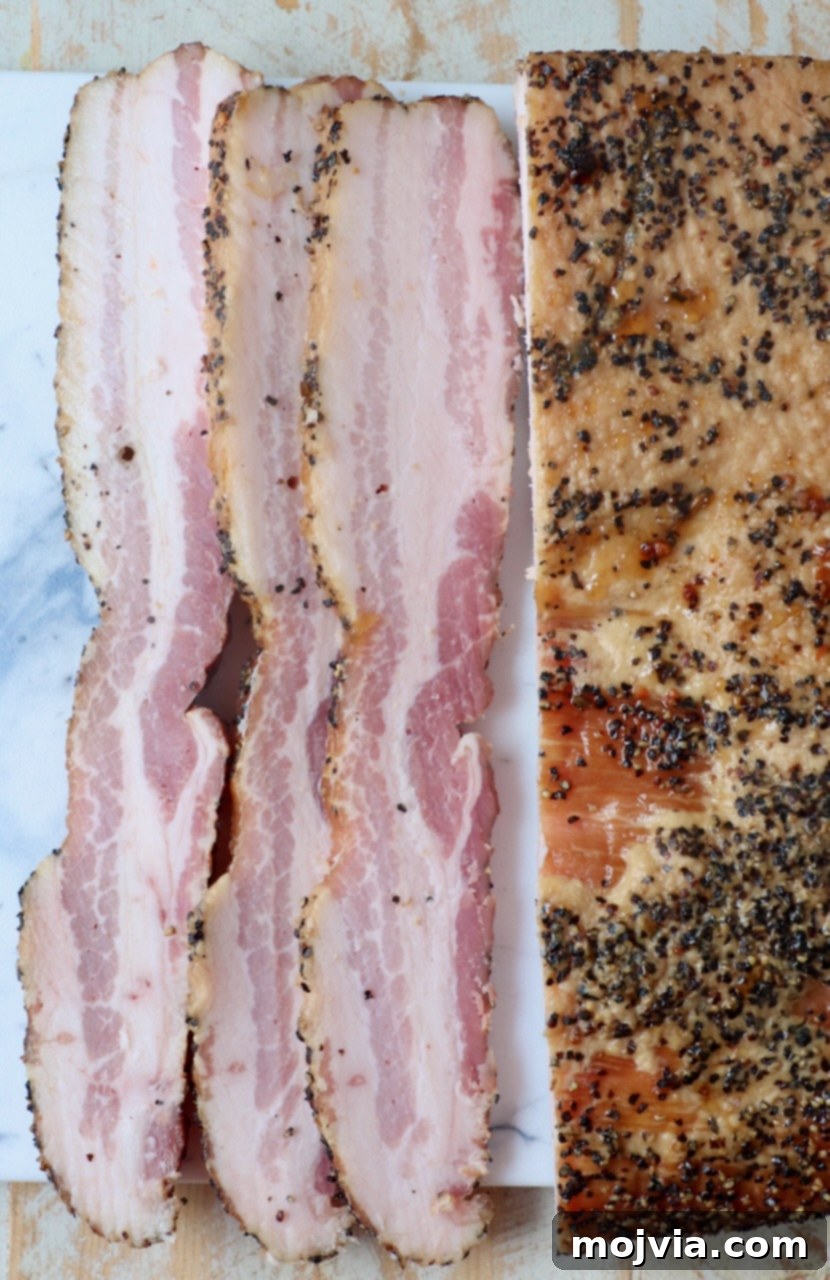
- Storing Your Bacon: To maximize convenience and minimize waste, I highly recommend slicing your cured and smoked bacon into manageable 1-2 pound blocks. This way, you only need to defrost the amount you plan to use at any given time. Each block should then be vacuum sealed or placed in a high-quality freezer-safe plastic bag. Always remember to label each package clearly with the date it was prepared and its specific flavor (maple or fennel). Properly stored, your homemade bacon can be frozen for up to one year, ensuring you always have a delicious supply on hand.
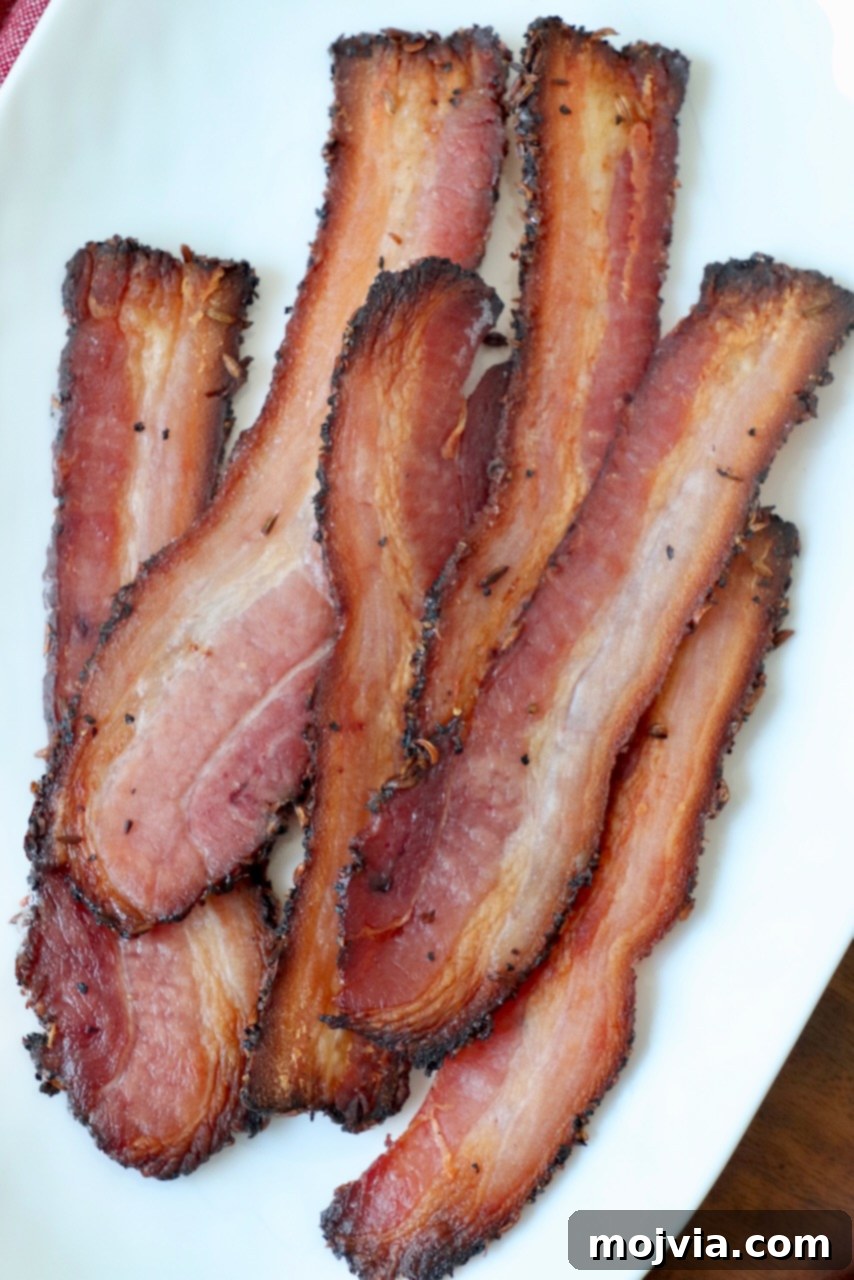
- Cooking Your Bacon Gold: The beauty of homemade bacon lies in its versatility. You can slice it as thick or as thin as your heart desires. For our “bacon gold,” we prefer a thick-cut slice, which we cook at a slightly lower temperature than traditional store-bought bacon. This method allows the luxurious fat within the bacon to render out perfectly and crispen up, while preventing the savory outer crust from overcooking or burning. For optimal results, arrange your sliced bacon in a single layer on an aluminum foil-lined sheet pan. Bake in a preheated oven at 350°F for approximately 15-20 minutes. It’s crucial to keep a close eye on the bacon during this time, as oven temperatures can vary, and slice thickness will impact cooking duration. Burning your precious homemade bacon gold would indeed be the saddest outcome! Alternatively, you can pan-fry the slices in a large frying pan over medium-high heat for about 5-6 minutes per side, or until it reaches your desired level of crispness.
Expert Recipe Tips for Perfect Bacon
To ensure your homemade bacon turns out perfectly every time, keep these expert tips in mind:
- Embrace the Ice Cube Trick for Vacuum Sealing: This clever hack, credited to my resourceful husband, makes vacuum sealing pork belly significantly easier. Instead of trying to seal a bag already filled with liquid, adding ice cubes allows the water to be introduced gradually as they melt in the refrigerator. This prevents liquid from interfering with the vacuum sealer’s heat strip, ensuring a strong, consistent seal every time. Remember, approximately 20 standard ice cubes equate to about 1 cup of water, providing a slow and steady cure.
- Consistent Daily Flipping is Key: It might seem like a small detail, but diligently flipping your pork belly in its curing bag every single day for the full 10 days is vital. This action ensures that the cure mixture, whether liquid or rub, is evenly distributed around the entire surface of the pork belly. Consistent contact with the cure is essential for thorough preservation, uniform flavor development, and a beautifully even texture throughout the entire slab. Don’t skip this step!
- Always Smoke to Internal Temperature, Not Just Time: This is arguably the most crucial tip for any smoked meat, especially bacon. While an estimated time is provided, the actual time required can vary based on your smoker’s efficiency, ambient temperature, pork belly thickness, and how often the lid is opened. Relying on an accurate internal temperature of 150°F ensures your bacon is perfectly cooked, safe to eat, and retains its moisture without becoming dry. If you don’t have a sophisticated wireless meat thermometer like the MEATER (which allows you to monitor temperature without opening the smoker lid), start checking the internal temperature with an instant-read meat thermometer after about 1 hour of smoking, then every 15-20 minutes until the target temperature is reached.
- Choose the Right Wood for Smoking: The type of wood you use for smoking dramatically influences the final flavor of your bacon. Applewood smoked bacon is a classic for a reason – its mild, sweet, and fruity notes perfectly complement the richness of pork without overpowering it. This gentle smoke infusion creates a universally loved flavor profile. Beyond apple, other excellent choices include maple, which adds a subtle sweetness; peach, for another delicate fruit wood flavor; or cherry, which offers a slightly stronger, darker fruit essence and a beautiful reddish hue to the bacon. Experiment to find your favorite!
Comprehensive Storage Guide for Homemade Bacon
Proper storage is essential to maintain the quality and safety of your delicious homemade bacon. Here’s a detailed guide:
- Refrigerating Uncooked Bacon: Whether whole or sliced, uncooked homemade bacon can be safely stored in an airtight container or tightly wrapped in the refrigerator for up to 2 weeks. Beyond this period, we strongly recommend transferring it to the freezer to maintain its freshness and quality.
- Refrigerating Cooked Bacon: While homemade bacon is undeniably best enjoyed hot and fresh right out of the oven or pan, any leftovers should be promptly stored. Place cooked bacon in an airtight container and refrigerate it. It will remain delicious and safe to consume for up to 5 days after cooking.
- Freezing Uncooked Bacon: This is our preferred method for long-term storage. Uncooked homemade bacon, whether kept as a whole slab or pre-sliced into convenient 1-2 pound blocks, stores exceptionally well in the freezer. Ensure it’s placed in a freezer-safe bag or, ideally, vacuum-sealed to prevent freezer burn. Don’t forget to label each package with the date and flavor. Frozen uncooked bacon will maintain its peak quality for up to one year.
- Freezing Cooked Bacon (Not Recommended): We do not recommend freezing homemade bacon after it has been cooked. The texture tends to degrade upon reheating, losing its desired crispness and succulence. It’s always best to cook it fresh from its uncooked, thawed state.
Delicious Ways to Serve Your Homemade Bacon
This bacon is so utterly delicious, it’s hard to resist eating it straight off the baking sheet while standing over the kitchen island, as soon as it emerges from the oven. Of course, what I *meant* to say was, after carefully transferring the perfectly cooked bacon to a plate and gracefully sitting down at the table, like a perfectly civilized adult. *Wink, wink.*
But seriously, this truly exceptional homemade bacon elevates any meal. It’s the most wonderful addition to a classic breakfast plate, paired with fluffy scrambled eggs or a gourmet Caprese avocado omelette, alongside golden toast or a stack of sweet strawberry pancakes with cream cheese syrup, all washed down with a refreshing Bloody Mary. Beyond breakfast, you could feature this incredible bacon as part of an interactive Bagel Bar, or incorporate it into any of these other fantastic bacon-centric recipes:
- For Dinner Delights: Transform your evening meals with bacon in dishes like Pasta Boscaiola, a hearty Bacon Wrapped Meatloaf, or an elegant Bacon Wrapped Pork Loin.
- As an Unforgettable Side Dish: Add a smoky, savory kick to your sides with Chipotle Bacon Guacamole, sweet and crispy Maple Bacon Brussels Sprouts, vibrant Green Beans with Bacon and Blue Cheese, or a rich Bacon Jam.
- For a Hearty Breakfast or Brunch: Elevate your morning with a Spinach Frittata with Bacon and Goat Cheese.
- For Lunchtime Masterpieces: Craft the ultimate Bacon Tomato Avocado Grilled Cheese, add crunch to a Blue Cheese Salad, or build a show-stopping BBQ Bacon Burger.
Recommended Tools for Homemade Bacon Making
Having the right equipment can make the homemade bacon process smoother and more successful. Here are the tools we recommend:
- Vacuum Sealer: An indispensable tool for curing and long-term storage. Our FoodSaver vacuum sealer is used almost weekly for preserving meats and other foods, ensuring freshness and preventing freezer burn. It creates the ideal anaerobic environment for curing.
- Vacuum Sealer Bags/Rolls: To accommodate large cuts of pork belly, you’ll either need extra-large bags or, more practically, vacuum sealer rolls. Rolls allow you to customize the bag size precisely to fit your pork belly, minimizing waste and ensuring a snug seal. These are highly recommended for this recipe.
- Smoker: A quality smoker is key to imparting that signature smoky flavor. We use a Traeger Pro Series Grill for this recipe, which doubles as a smoker. Any reliable pellet smoker, offset smoker, or even a charcoal grill with a smoke box can work.
- Wood or Pellets: The choice of wood significantly impacts the flavor. For classic bacon, we highly recommend Traeger Apple Pellets. Applewood provides a mild, sweet, and fruity smoke that perfectly complements pork. Other great options include cherry, maple, or peach wood.
- Meat Thermometer: Accurate temperature monitoring is non-negotiable for safe and perfectly cooked bacon. If your smoker (like the Traeger) comes with integrated probes, use them. Otherwise, invest in a reliable wireless meat thermometer that allows you to monitor internal temperature without repeatedly opening the smoker lid, thus maintaining consistent cooking temperatures.
- Heavy-Duty Aluminum Foil: Essential for tightly wrapping the smoked bacon after it rests, helping it chill evenly and develop its final texture in the refrigerator.
More Smoker Recipes to Enjoy
If you’re already firing up your smoker to make a batch of incredible homemade bacon, why not make the most of your cooking session? Consider throwing some of these other incredibly popular and delicious smoker recipes on at the same time:

Print Recipe
Pin Recipe
Rate this Recipe
Homemade Bacon
Ingredients
- 9 pound pork belly, sliced in half to make two different flavors
Maple Bacon Cure (for 4.5 pounds pork belly)
- ⅜ cup maple syrup
- 4 ½ tablespoons brown sugar
- 2 ¼ tablespoons salt
- 2 ¼ tablespoons ground black pepper
- ¾ teaspoon Prague powder #1, also called curing salt
- 1 ⅛ cup water, or 24 ice cubes
Fennel Bacon Cure (for 4.5 pounds pork belly)
- 3 tablespoons fennel seeds
- 9 tablespoons brown sugar
- 2 ¼ tablespoons salt
- 2 ¼ tablespoons ground black pepper
- ¾ teaspoon Prague powder #1, also called curing salt
- 1 ⅛ cup water, or 24 ice cubes
Instructions
To cure maple bacon:
-
Combine maple syrup, brown sugar, salt, black pepper and curing salt (prague powder #1) in a small bowl.
-
Add a 4.5 pound pork belly to a vacuum sealer bag, or large plastic zipper bag.
-
Add the maple syrup mixture from the bowl to the bag.
-
If using a vacuum sealer bag, add 24 ice cubes, so that it’s easier to vacuum seal without too much liquid. If using a large zipper bag, simply add 1 ⅛ cups water.
-
Use a vacuum sealer to remove all air from the bag and seal it shut. If you don’t have a vacuum sealer, simply push all of the air out of a large plastic zipper bag before sealing it shut.
-
Place the maple seasoned pork belly in the refrigerator, fat side down. Each day, for 10 days, flip the bag, so that the fat side is up one day and down the next.
To cure fennel bacon:
-
Add the fennel seeds to a small dry skillet on the stove over medium-high heat.
-
Continually toss the seeds in the skillet for 5-7 minutes, or until they become lightly toasted and smell fragrant.
-
Remove them from the heat and add them to a small bowl with brown sugar, salt, black pepper and curing salt (prague powder #1).
-
If using a vacuum sealer bag, add 24 ice cubes, so that it’s easier to vacuum seal without too much liquid. If using a large zipper bag, simply add 1 ⅛ cups water.
-
Use a vacuum sealer to remove all air from the bag and seal it shut. If you don’t have a vacuum sealer, simply push all of the air out of a large plastic zipper bag before sealing it shut.
-
Place the fennel seasoned pork belly in the refrigerator, fat side down. Each day, for 10 days, flip the bag, so that the fat side is up one day and down the next.
To form a pellicle on the pork belly:
-
Remove both pieces of seasoned pork belly from the bags and pat them dry thoroughly. I do not recommend rinsing them, or you will rinse off all of the seasoning. A thorough pat dry will be enough.
-
Place each pork belly on a wire rack on top of a foil-lined baking sheet, and into the fridge for 24 hours.
To smoke the pork belly:
-
Preheat a wood or pellet smoker to 225°F.
-
Place the pork belly on the smoker with the fat side facing up.
-
Smoke the pork belly until the internal temperature reaches 150°F.
-
It could take anywhere from 1-3 hours to smoke the pork, depending on the size of the pork belly, how many times the smoker lid is open, and many other factors. I recommend using a wireless thermometer or meat probe to monitor the internal temperature of the pork belly as it’s on the smoker.
-
If using an instant-read meat thermometer, begin checking the pork belly after 1 hour, then every 15-20 minutes, until it reaches 150°F in the thickest part of the pork belly.
-
Remove the pork belly from the smoker and let it rest on a cutting board for 30 minutes at room temperature.
To refrigerate, freeze or cook the bacon:
-
After the pork belly has rested, wrap it tightly in foil and place it in the refrigerator for at least 4 hours before storing or cooking it.
-
The bacon can be stored in the refrigerator, whole or sliced, for up to 2 weeks.
-
To freeze the bacon, I recommend cutting it into 1-2 pound blocks, so that you’re only defrosting up to 2 pounds at a time.
-
Either vacuum seal the 1-2 pound slabs of bacon, or place them in freezer-safe zipper bags. Always label them with the date and flavor of the bacon. Freeze for up to 1 year.
-
To cook the bacon, slice it as thick or thin as you’d like, using a sharp knife, or electric knife.
-
Place the slices of bacon on a foil-lined baking sheet and bake in a 350°F preheated oven for 15-20 minutes. Always watch the bacon after 15 minutes, as oven temperatures vary and how thick the bacon is sliced will determine how long it will take to cook in the oven.
Notes
- The nutritional information provided is for 1 pound of bacon. If the bacon is thick-sliced, this will equal about 10-12 slices of bacon. For a thinner sliced bacon, one pound will equal 16-20 slices of bacon.
- The recipe instructions above are divided in half to make both maple bacon and fennel bacon. You can double the ingredients for either, if you’d like to make only one flavor of bacon.
- Cooked, homemade bacon should always be stored in the refrigerator. Store it in an airtight container in the fridge for up to 5 days after it’s been cooked.