
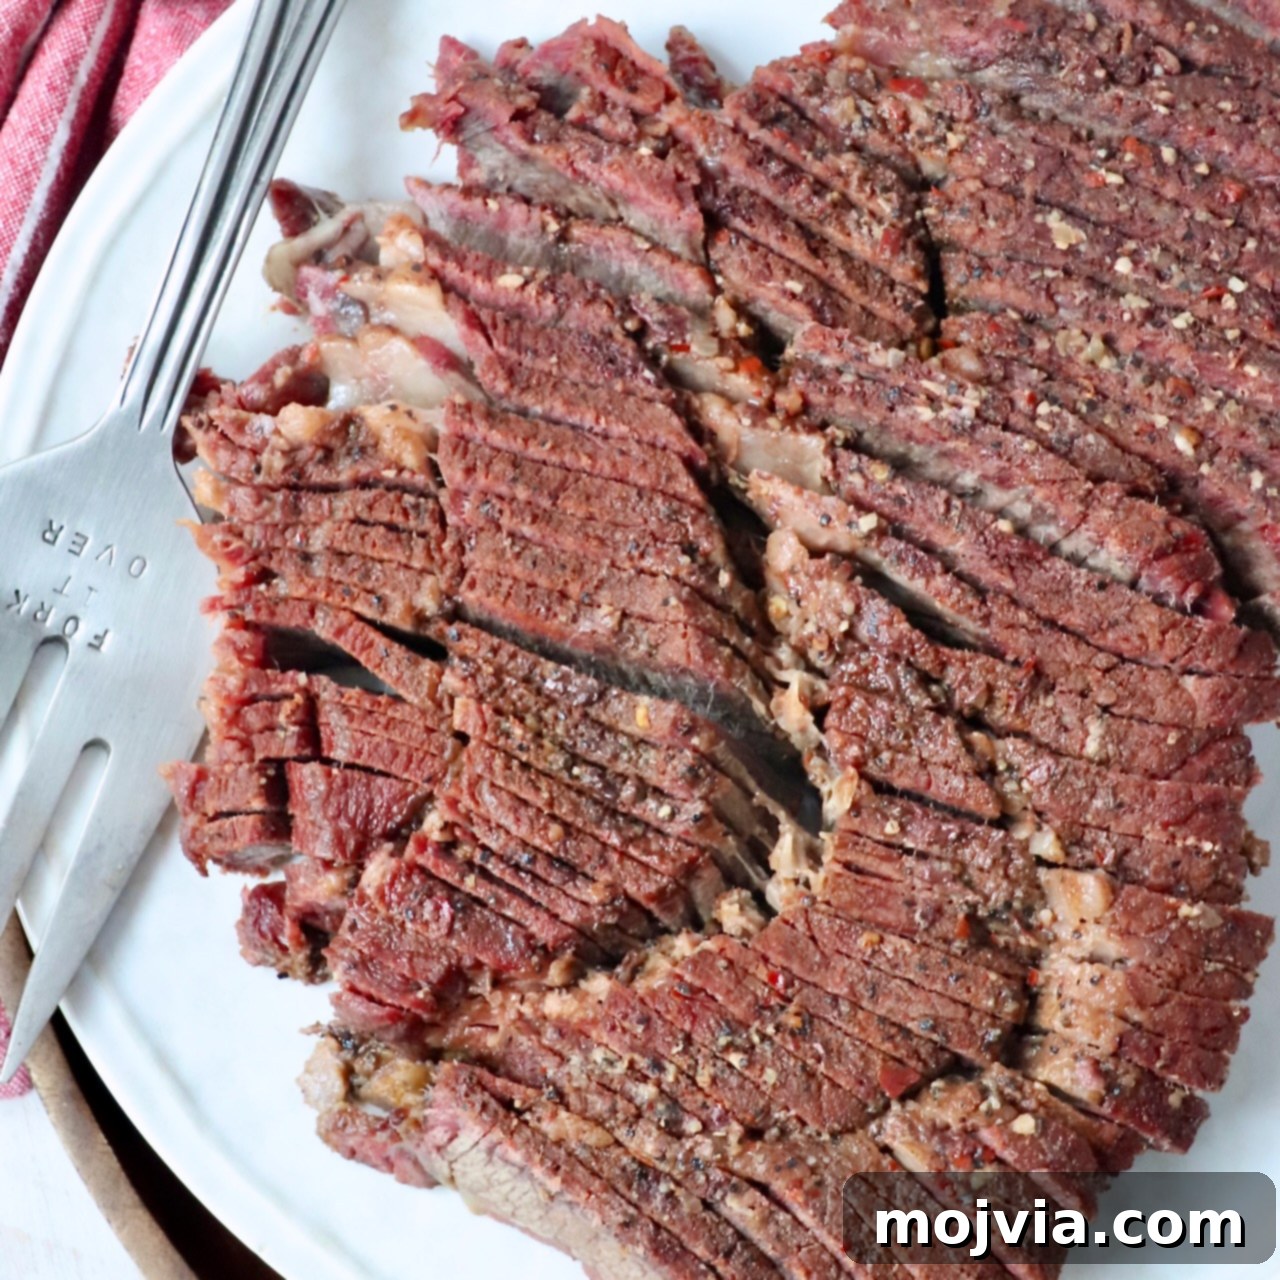
Welcome to the world of authentic Texas-style barbecue, where rich, smoky flavors meet melt-in-your-mouth tenderness. While brisket often steals the spotlight, we’re here to introduce you to an unsung hero of the smoker: the humble yet magnificent **Smoked Chuck Roast**. With this meticulously crafted recipe, you’re not just cooking meat; you’re creating a culinary experience. Our secret? An overnight brine that guarantees unparalleled juiciness, coupled with my celebrated steak seasoning that imparts a depth of flavor you won’t soon forget. Finished with the tried-and-true Texas crutch method—a technique perfected over generations in my family’s brisket tradition—this chuck roast transcends expectations, promising extra juicy, tender results every single time. Prepare to impress your taste buds and your guests with this simple yet sophisticated smoked beef masterpiece.
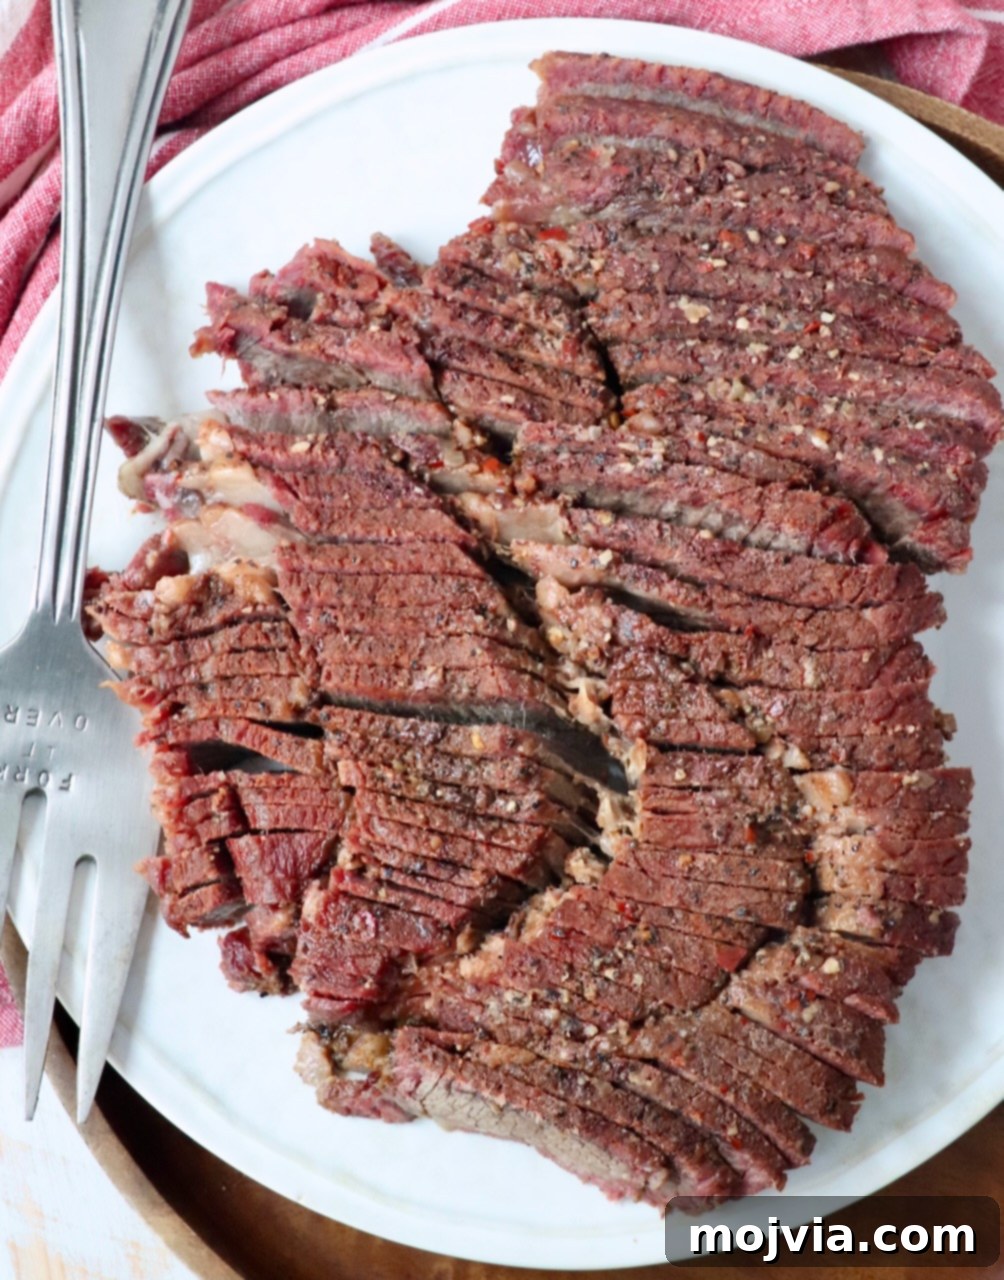
Table of contents
- Why Smoked Chuck Roast Is A Game-Changer
- The Secret To Ultimate Tenderness And Flavor: Brining And Seasoning
- Mastering The Smoke Process And The Texas Crutch
- Essential Tips For A Perfect Smoked Chuck Roast
- Storage And Reheating Methods
- What To Serve With Your Smoked Chuck Roast
- Recommended Tools For Smoking Success
- Explore More Smoker Recipes
- Frequently Asked Questions About Smoked Chuck Roast
Why Smoked Chuck Roast Is A Game-Changer
When envisioning smoked beef, many minds instantly turn to brisket—the undisputed king of barbecue. And for good reason! Brisket is a timeless classic, a staple my family has passionately prepared for generations, offering an unparalleled depth of flavor. However, the world of smoked meats is vast and full of delightful alternatives. For those seeking equally rich, beefy flavor without the extensive time commitment of a full brisket (which typically weighs 10-15 pounds), the chuck roast emerges as a brilliant contender. It’s an ideal choice for smaller gatherings, family dinners, or simply when you’re craving that incredible smoked taste without committing to an all-day affair.
Hailing from the shoulder area of the cow, chuck roast shares a similar fibrous structure with brisket, which comes from the animal’s breast. Both cuts are inherently tough, making them perfect candidates for the “low and slow” cooking method that defines authentic barbecue. This extended, gentle heat breaks down the connective tissues, transforming a tough cut into something incredibly tender. The primary advantage of a chuck roast is its size; generally weighing between 3-5 pounds, it cooks significantly faster than a large brisket, making it more approachable for home smokers.
Over the past year, as I meticulously developed and refined this smoked chuck roast recipe, I encountered a common challenge: chuck roast, being leaner than some other cuts, tends to dry out more easily during the long smoking process. This presented a puzzle that required a delicious solution. The answer, dear readers, is butter! Before wrapping the chuck roast for the final phase of smoking—a technique known as the Texas crutch—I generously topped the meat with pats of butter. As the roast continues to cook, this butter slowly melts, basting the beef and infusing it with unparalleled moisture and richness. This simple addition elevates the chuck roast, ensuring every slice is unbelievably juicy and tender, creating what I confidently declare to be the best smoked chuck roast imaginable. If you’ve been on the fence about trying a chuck roast on your smoker, consider this your definitive call to action!
The Secret To Ultimate Tenderness And Flavor: Brining And Seasoning
Achieving a truly remarkable smoked chuck roast begins long before it ever touches the smoker. The foundation of its incredible tenderness and deep flavor lies in two crucial preparatory steps: brining and meticulous seasoning. These aren’t just optional extras; they are the bedrock of this recipe’s success.
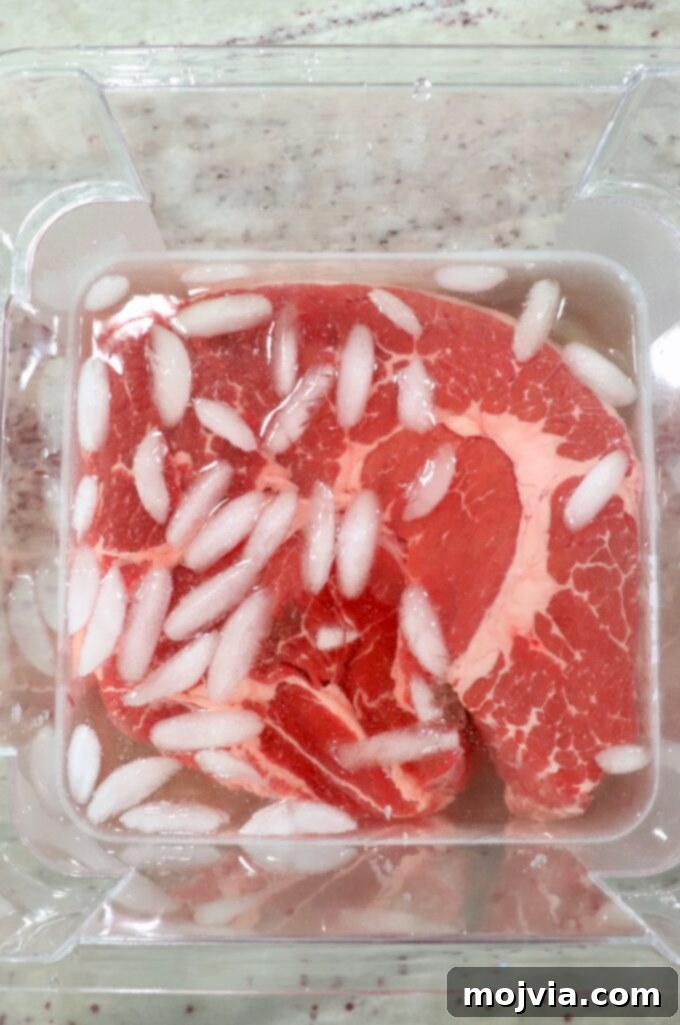
- Brine the Chuck Roast for Unmatched Moisture. Brining is a game-changer for leaner cuts like chuck roast. It’s a simple process that yields dramatic results, ensuring the meat remains incredibly juicy throughout the extended smoking period. To create our brine, begin by bringing 16 ounces of water to a boil in a medium pot. Once boiling, introduce kosher salt and granulated sugar, stirring for 2-3 minutes until both are completely dissolved. This creates a powerful flavor and moisture-enhancing solution. Crucially, allow this brine to cool rapidly by adding 3-4 cups of ice cubes to the pot. This quick cooling prevents the meat from prematurely cooking when it’s added. Once the brine has reached room temperature or below, transfer your chuck roast to a large, non-reactive container—such as the 6-quart storage container shown in the images. Pour the cooled brine over the roast, ensuring it is fully submerged. If necessary, add a little extra cold water to cover completely. Then, tuck it into the refrigerator for 8-10 hours, or ideally, overnight. This extended soak allows the salt and sugar solution to penetrate the meat fibers, enhancing both flavor and moisture retention.
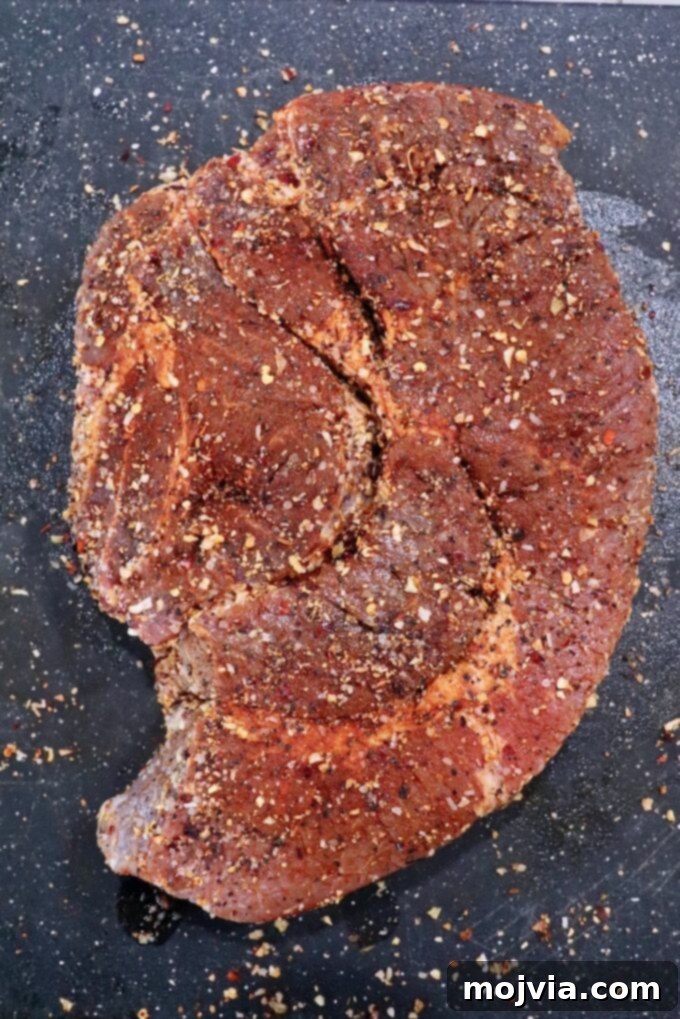
- Season the Chuck Roast with a Flavorful Rub. After its rejuvenating brine bath, remove the chuck roast from the liquid. It’s vital to pat it thoroughly dry with paper towels; a dry surface allows for better smoke penetration and bark formation. Next, rub the entire surface of the chuck roast with a thin layer of olive oil. This acts as a binder for our signature seasoning. For this recipe, I swear by my homemade steak seasoning—a robust blend of minced onions, garlic, salt, black pepper, and paprika that delivers a classic, bold flavor profile. If you prefer, a high-quality store-bought Montreal steak seasoning from your grocery store’s spice aisle will also work beautifully. Be generous with the seasoning, ensuring all sides of the roast are evenly coated. This creates a flavorful crust that will develop into an exquisite “bark” during the smoking process, sealing in juices and adding another layer of complexity.
Mastering The Smoke Process And The Texas Crutch
The heart of any truly great smoked meat lies in the careful management of the smoking process, a dance between heat, smoke, and time. For our extra juicy chuck roast, we employ a strategy that maximizes flavor and tenderness, culminating in the renowned Texas crutch method to push through the notorious “stall.”
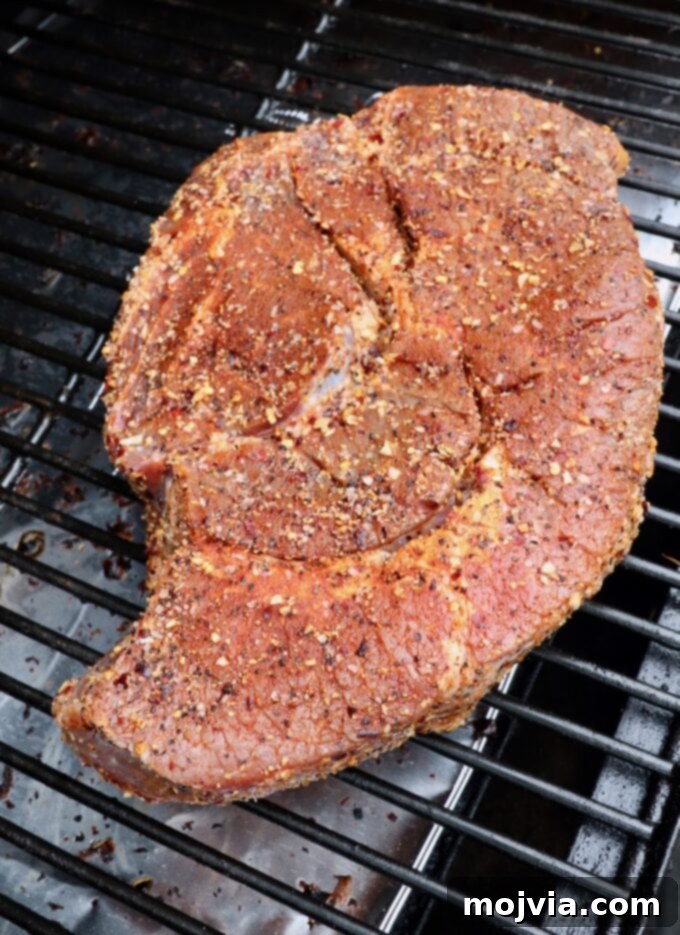
- Initial Smoke Phase: Flavor Infusion. Begin by preheating your smoker to a consistent 250°F. This steady, low temperature is crucial for the “low and slow” cooking method, allowing the chuck roast to slowly absorb the rich smoky flavors without drying out prematurely. Once your smoker is up to temperature, place the seasoned chuck roast directly on the grill grates. During this initial phase, the meat will develop a beautiful “bark”—a dark, flavorful crust that is a hallmark of expertly smoked barbecue. This stage is all about smoke penetration and bark formation. Monitor the internal temperature of the roast. Smoke the chuck roast for approximately 45 minutes per pound, or until it reaches an internal temperature of 160°F. This is usually when the meat hits the “stall,” where its temperature plateaus due to evaporative cooling.
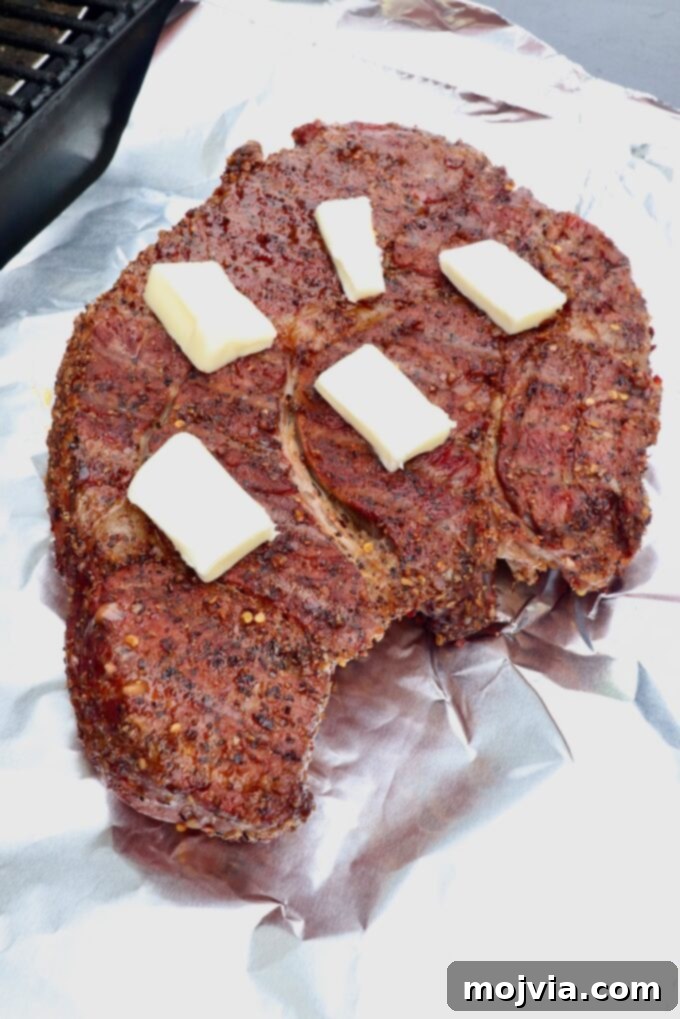
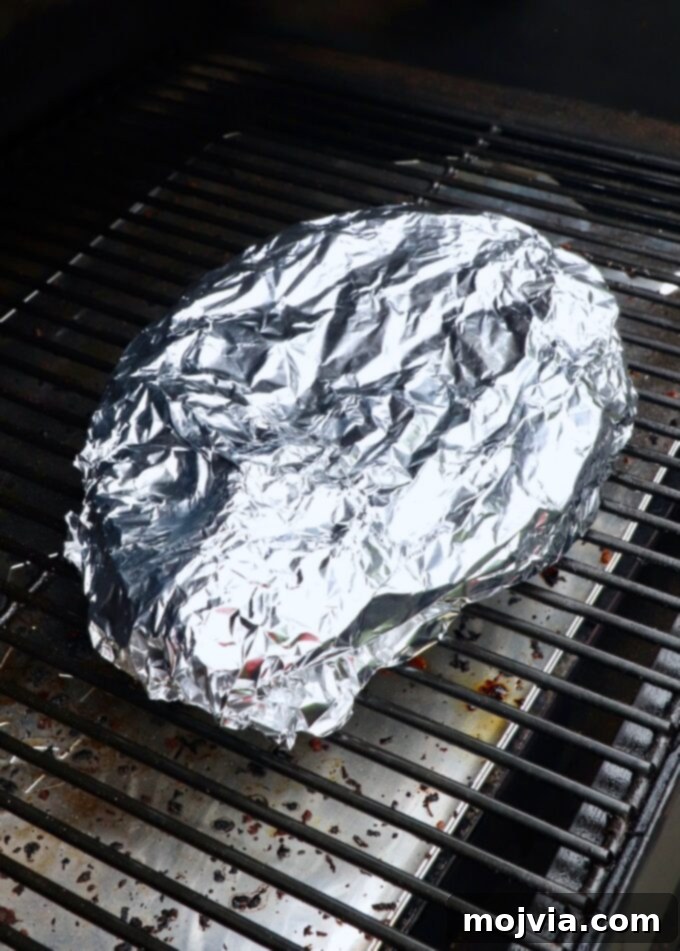
- The Texas Crutch: Butter for Ultimate Juiciness. Once the chuck roast reaches 160°F, it’s time for the Texas crutch. Carefully remove the roast from the smoker and place it on a large piece of heavy-duty aluminum foil or butcher paper. Now comes our secret weapon for juiciness: generously top the roast with small pats of butter. The butter, as it melts, will continually baste the meat, adding moisture and rich flavor. Tightly wrap the foil (or butcher paper) up and over the roast, creating a sealed packet. For extra security and to prevent any steam from escaping, double-wrap the chuck roast with another layer of foil or butcher paper. This wrapping technique is the Texas crutch—it helps the meat push through the stall by minimizing evaporative cooling, and in our case, it introduces that essential extra moisture from the butter. Place the double-wrapped roast back on the smoker. Continue to smoke for an additional hour, or until the internal temperature of the roast reaches a blissful 195-200°F. This higher temperature is vital for breaking down the tough connective tissues in the chuck roast, ensuring it becomes incredibly tender.
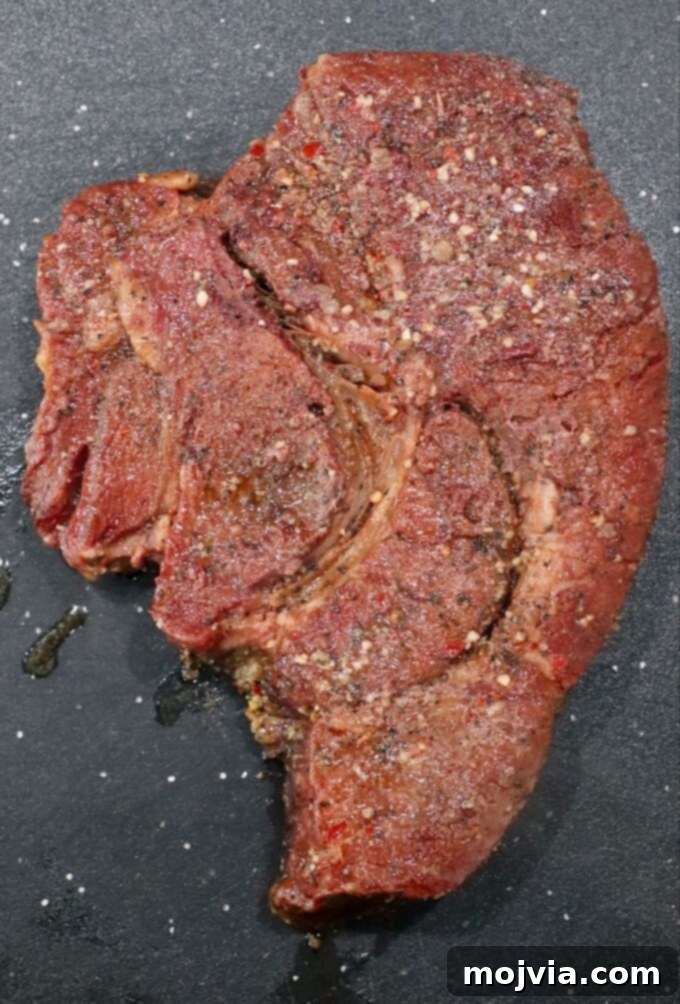
- The Essential Rest: Distributing Juices for Tenderness. This step is non-negotiable for truly tender and juicy meat. Once your chuck roast reaches the target internal temperature of 195-200°F, remove it from the smoker. Leave it wrapped in its foil cocoon and let it rest undisturbed for at least 30 minutes, and ideally up to an hour. Resting allows the muscle fibers to relax and reabsorb the juices that have been pushed to the center during cooking. If you slice into the roast too soon, those precious juices will simply run out, leaving you with a drier piece of meat. Patience here is rewarded with ultimate juiciness.
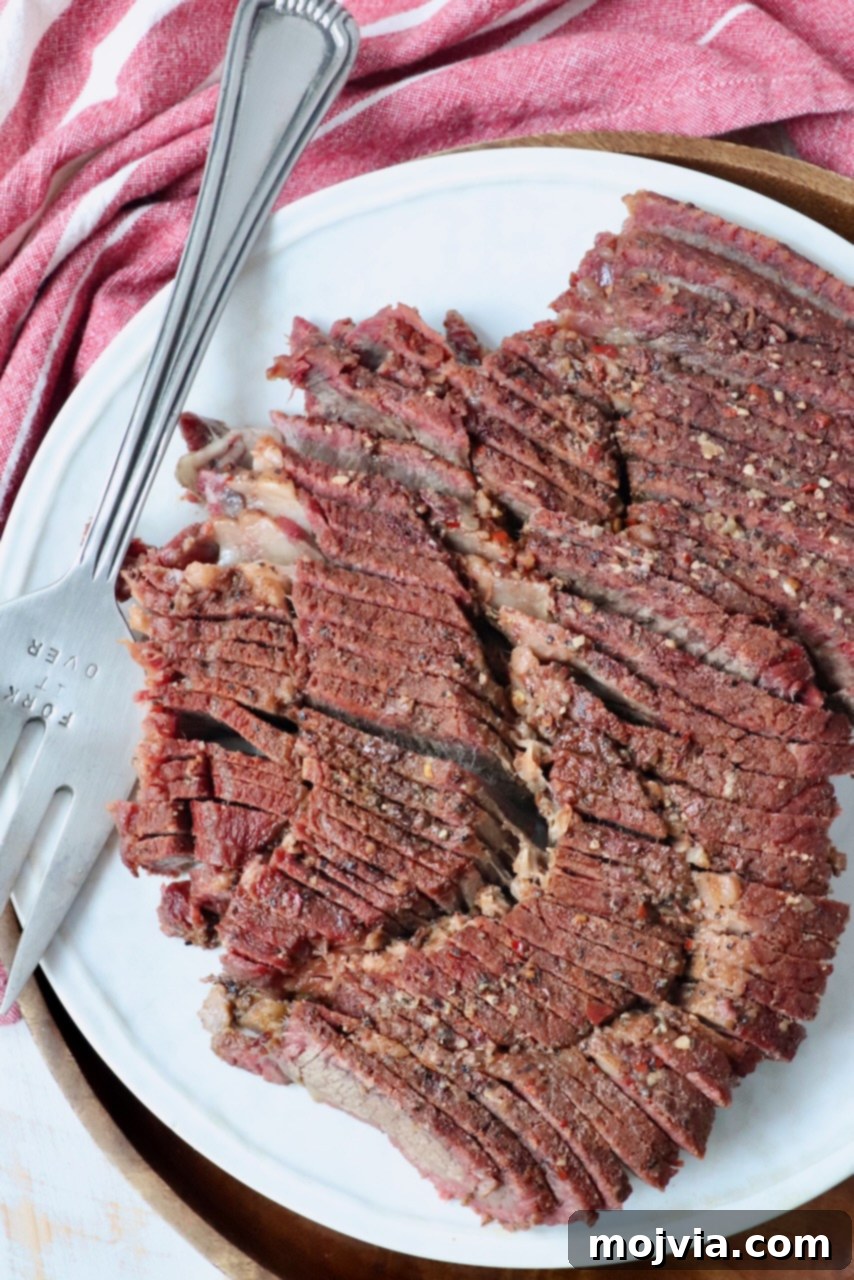
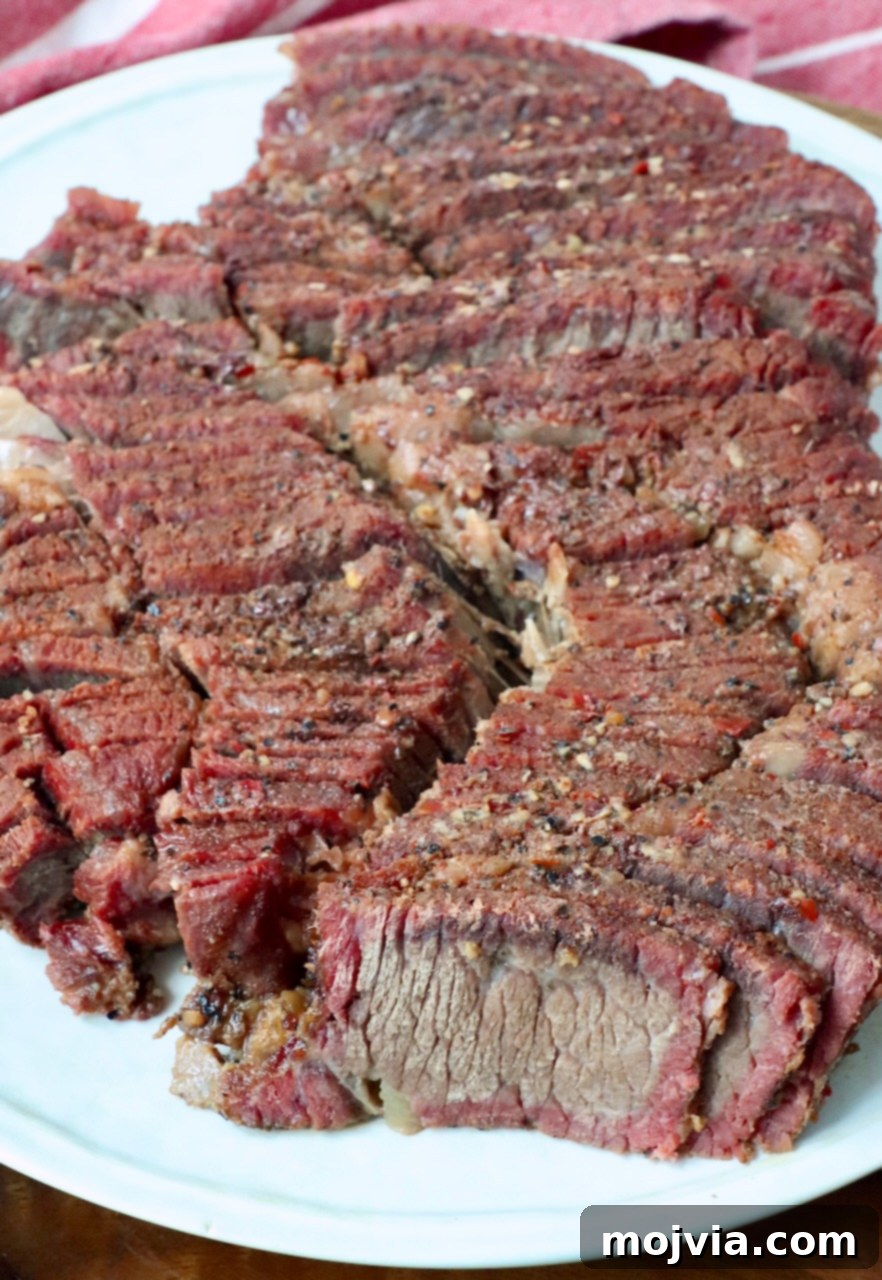
- Slice or Shred: The Perfect Finish. After a proper rest, your smoked chuck roast is ready to be transformed. If you aim to serve it in tender slices, use a sharp carving knife and slice the chuck roast against the grain. This technique shortens the muscle fibers, resulting in wonderfully tender, easy-to-chew pieces of beef. Alternatively, for a more rustic presentation or for use in sandwiches and tacos, you can easily shred the beef using two forks. Its tender nature after the low and slow smoke and crutch will make shredding effortless.
Essential Tips For A Perfect Smoked Chuck Roast
- Always Smoke to Temperature, Not Time! This is perhaps the most critical rule in barbecue. While our recipe provides approximate cooking times (e.g., 45 minutes per pound), these are merely guidelines. The actual cooking time can vary significantly based on the size and thickness of your chuck roast, the consistency of your smoker’s temperature, and even external weather conditions. Invest in a reliable meat thermometer—either a wireless probe like the MEATER (which allows you to monitor the temperature without opening the smoker lid) or an instant-read thermometer. For a 4-pound chuck roast, you might start checking the internal temperature around the 3-hour mark. Continue to check every 15-20 minutes until it reaches 160°F before wrapping. After wrapping, check again after 45 minutes, then every 15 minutes until it reaches the final target of 195-200°F. This ensures your chuck roast is perfectly cooked, every time.
- Maintain the Ideal Smoking Temperature of 250°F. Low and slow is truly the name of the game for cuts like chuck roast. Smoking at a consistent 250°F allows the connective tissues to slowly render and break down, resulting in maximum tenderness. Attempting to cook at a higher temperature will inevitably rush the process, leading to a drier, tougher result and significantly less smoke flavor absorption. Patience at this stage is rewarded with superior texture and taste.
- Choose Your Wood Wisely: Hickory, Mesquite, or Pecan. The type of wood or pellets you use profoundly impacts the flavor profile of your smoked chuck roast. For beef, I highly recommend using hickory pellets or wood. Hickory imparts a strong, classic smoky flavor that beautifully complements beef. Mesquite is another excellent choice, offering an even bolder, more intense smoky flavor that is a hallmark of traditional Texas barbecue. Pecan provides a slightly milder, sweeter smoke that works well if you prefer a less aggressive smoke flavor. Experiment to find your personal favorite, but any of these will deliver fantastic results.
- The Non-Negotiable Rest Period. After removing the chuck roast from the smoker, resist the urge to slice into it immediately. Allowing it to rest, still wrapped in its foil, for at least 30 minutes—preferably an hour—is absolutely crucial. During cooking, the meat’s muscle fibers contract, pushing juices towards the center. Resting allows these fibers to relax and redistribute the juices evenly throughout the entire roast. Cutting it too soon will cause those precious, flavorful juices to run out onto your cutting board, leaving your meat dry. A well-rested roast is a juicy roast.
- Plan for Generous Servings. When planning your meal, a good rule of thumb is to estimate about a half-pound of smoked beef chuck roast per person if it’s the primary entrée. This accounts for bone, fat, and shrinkage during cooking, ensuring everyone gets a satisfying portion of this delicious meat. For larger appetites or if you anticipate leftovers, you might even consider increasing this slightly.
Storage And Reheating Methods
One of the many joys of smoking a chuck roast is the possibility of enjoying its deliciousness for days to come. Proper storage and reheating are key to maintaining its incredible flavor and tender texture.
Storing Leftovers: Leftover smoked chuck roast should be stored in an airtight container in the refrigerator and consumed within 6 days for optimal freshness and safety. It’s perfectly delicious eaten cold, perhaps thinly sliced for sandwiches, or it can be easily reheated.
Reheating for Perfection: My favorite method for reheating smoked chuck roast ensures it stays wonderfully juicy and tender, preventing it from drying out. I recommend gently dropping individual slices into simmering beef broth for just 30 seconds. This quickly warms the meat through without overcooking it, preserving its succulence. The reheated slices are fantastic on their own, or they make an incredible base for gourmet beef sandwiches, sliders, or even a hearty beef bowl.
What To Serve With Your Smoked Chuck Roast
A perfectly smoked chuck roast is a star in its own right, delivering robust flavor and tender texture. It’s fantastic on its own, perhaps dipped in a tangy White BBQ Sauce or a rich Jack Daniels BBQ Sauce. However, pairing it with the right side dishes elevates the entire meal, transforming it into a memorable barbecue feast, a hearty dinner, or the highlight of any party. Here are some of my favorite accompaniments that perfectly complement the rich flavors of smoked beef:
- Red White and Blue Cheese Potato Salad – a vibrant and flavorful twist on a classic, always a fan favorite!
- Pasta Salad with Greek Yogurt Dressing – a lighter, yet satisfying, pasta salad that offers a refreshing contrast.
- Smoked Mac and Cheese – double down on the smoke flavor by tossing this comforting dish right onto the smoker alongside your chuck roast!
- Blue Cheese Salad – essentially a sophisticated chopped wedge salad, offering a crisp, tangy counterpoint.
- Green Beans with Bacon and Blue Cheese – a savory and indulgent vegetable side.
- BBQ Baked Beans – my Dad’s famous recipe, a sweet and smoky classic that’s a must-have at any barbecue.
- Baked Sweet Potatoes – a naturally sweet and earthy complement to the savory beef.
- Instant Pot Mashed Potatoes – quick, creamy, and effortlessly delicious.
- Rosemary Blue Cheese Mashed Potatoes – an elevated potato dish bursting with aromatic herbs and sharp cheese.
- Crock Pot Creamed Corn – a comforting, rich, and creamy Bond family favorite.
- Air Fryer Baked Potato – crispy on the outside, fluffy on the inside, and a convenient alternative to oven baking.
- Coleslaw – a cool, crunchy, and tangy salad that provides a refreshing balance to rich meats.
- Sauteed Mushrooms – earthy and savory, these make a wonderful, umami-rich pairing with beef.
Recommended Tools For Smoking Success
Achieving the perfect smoked chuck roast is made significantly easier and more consistent with the right tools. These are the essential items that I rely on in my own kitchen and highly recommend for any aspiring pitmaster:
- Smoker – A good smoker is, of course, the cornerstone of this recipe. I personally use and highly recommend the Traeger Pro Series Pellet Smoker for its ease of use, consistent temperature control, and excellent smoke production, which is what I used to develop this very recipe. Its “set it and forget it” nature makes long smoke sessions much more manageable.
- Wood or Pellets – The fuel you choose directly impacts the flavor. For this smoked chuck roast, Traeger Hickory Pellets are my top choice. They impart a robust, classic smoky flavor that pairs exceptionally well with beef. As mentioned, mesquite or pecan pellets are also excellent alternatives, offering slightly different but equally delicious smoke profiles.
- Reliable Thermometer – Precise temperature monitoring is non-negotiable for successful smoking. While my Traeger comes with integrated probes, if your smoker doesn’t, a high-quality wireless meat thermometer is an absolute must-have. It allows you to track the internal temperature of your chuck roast remotely, eliminating the need to constantly open the smoker lid (which causes temperature fluctuations and extends cooking time). This ensures your meat cooks to perfection without guesswork.
- Electric Knife – After hours of patient smoking, you want to slice your masterpiece effortlessly. An electric knife is one of my favorite kitchen tools for this task. It glides through the tender meat with ease, creating uniform, clean slices that make for beautiful presentation and a wonderful eating experience.
Explore More Smoker Recipes
My passion for cooking meats on a smoker runs deep, tracing back to my childhood in Oklahoma where I eagerly assisted my Dad and Grandpa with their smoking endeavors. This lifelong experience has led to a collection of tested and perfected smoker recipes, a blend of innovative creations and cherished family archives. If you’ve enjoyed this smoked chuck roast, I invite you to explore more of my trusted recipes designed to make you a smoking sensation!
Frequently Asked Questions About Smoked Chuck Roast
- What is the best type of chuck roast for smoking? Look for a chuck roast that has good marbling throughout the meat. Marbling (the small streaks of fat) will render down during the slow smoking process, contributing significantly to the juiciness and flavor. A roast weighing between 3-5 pounds is ideal for manageability and quicker cooking times compared to larger cuts.
- Why is brining important for chuck roast? Chuck roast, while flavorful, can be a bit leaner than a brisket. Brining helps to infuse the meat with moisture and flavor before it even hits the smoker. The salt in the brine denatures proteins, allowing the muscle fibers to retain more moisture, preventing the meat from drying out during the long cooking process and resulting in a much juicier final product.
- Can I use a different seasoning instead of Montreal steak seasoning? Absolutely! While Montreal steak seasoning offers a classic, robust flavor that complements beef beautifully, you can certainly experiment with your favorite beef rubs. Consider blends with garlic powder, onion powder, black pepper, paprika, and a touch of cayenne for a little kick. The key is to apply it generously to create a good bark.
- What is the Texas Crutch and why do you use butter with it? The Texas Crutch is a barbecue technique where meat is wrapped tightly in foil or butcher paper partway through the smoking process. This helps the meat push through the “stall” (where the temperature plateaus due to evaporative cooling) and retains moisture. We add butter inside the crutch for chuck roast specifically because it’s a leaner cut than brisket. The melting butter continuously bastes the meat, ensuring extra juiciness and richness, preventing it from drying out as it finishes cooking to its tender final temperature.
- How do I know when my smoked chuck roast is done? Always cook to internal temperature, not just time. For a truly tender, shreddable chuck roast, you’re aiming for an internal temperature between 195°F and 200°F. At this temperature, the connective tissues have fully broken down. Use a reliable meat thermometer, inserting it into the thickest part of the roast, avoiding any bones.
- How long should I rest the chuck roast after smoking? Resting is crucial! Once the chuck roast reaches its target temperature, remove it from the smoker and let it rest, still wrapped, for at least 30 minutes, and ideally up to an hour. This allows the meat’s juices to redistribute evenly throughout the roast, resulting in a much juicier and more tender bite. If you cut it too soon, the juices will simply run out, leaving you with dry meat.
- Can I freeze leftover smoked chuck roast? Yes! Smoked chuck roast freezes beautifully. Once cooled, slice or shred the leftovers and store them in an airtight freezer-safe bag or container for up to 3 months. To reheat, thaw in the refrigerator overnight and then reheat using the beef broth method mentioned above for best results.
Print
Pin
Rate this Recipe
Smoked Chuck Roast
Ingredients
- 16 ounces water
- 3 ounces kosher salt
- ½ ounce granulated sugar
- 4 pound chuck roast
- 1 tablespoon olive oil
- 4 tablespoons steak seasoning, click link for the recipe
- 2 tablespoons butter, sliced into small pieces
Instructions
Brine
-
In a medium pot on the stove, bring 16 ounces of water to a boil.
-
Once the water is boiling, add the kosher salt and sugar.
-
Stir for 2-3 minutes, or until the sugar and salt are dissolved into the water.
-
Set aside and add 3-4 cups of ice cubes to the pot of water. This will help cool down the brine quickly, so that you can pour it over the chuck roast.
-
Once the brine water is at room temperature, or below, pour it over the chuck roast in a large bowl, or plastic tub.
-
Add additional cold water, if needed, to cover the chuck roast.
-
Place in the refrigerator for 8-10 hours, or overnight.
Smoke
-
Preheat the smoker to 250°F.
-
Fill the smoker with hickory, mesquite, or pecan pellets.
-
Place a water pan in the smoker filled with water. This will help keep the chuck roast moist throughout the cooking process.
-
Remove the chuck roast from the brine and pat it dry with paper towels.
-
Rub the chuck roast on all sides with olive oil, then generously sprinkle the steak seasoning over the chuck roast, making sure to cover all sides of the roast.
-
Place the chuck roast in the smoker on the grill grates.
-
Cook for 45 minutes per pound of meat, or until the internal temperature reaches 160°F.
-
Remove the chuck roast from the smoker, place it on a large sheet of foil, then add the pieces of butter on top of the chuck roast. Wrap the roast up in the foil, then double wrap it in another piece of foil.
-
Place it back on the smoker for another hour, or until the internal temperature reaches 195-200°F.
-
Remove the chuck roast from the smoker and let it rest for at least 30 minutes before slicing, or shredding, and serving.
Notes
- Remember to smoke to temperature, not time! If you don’t have a meat probe, or wireless meat thermometer, like the MEATER, to watch the temperature of the chuck roast without opening the lid of the smoker, I recommend starting to check the internal temperature of the meat with an instant-read meat thermometer after 45 minutes per pound of meat. For a 4 pound chuck roast, this would be at 3 hours.
- Always let the meat rest. After removing the chuck roast from the smoker, allow it to rest for at least 30 minutes, preferably one hour. This will guarantee that all the juices stay in your meat and don’t leak out.
- When planning for how much smoked beef chuck roast to serve per person, I recommend about a half pound per person, if this is the only meat you’re serving, and the main entree at the meal.
- Store leftover smoked chuck roast in an airtight container in the fridge and eat within 6 days. The leftover chuck roast can be eaten cold, or reheated
- To reheat the chuck roast, I like to drop the slices in boiling beef broth for 30 seconds. This heats up the roast, without overcooking it, and keeps it juicy and tender! The slices can be eaten by themselves, or used to make a delicious beef sandwich.