
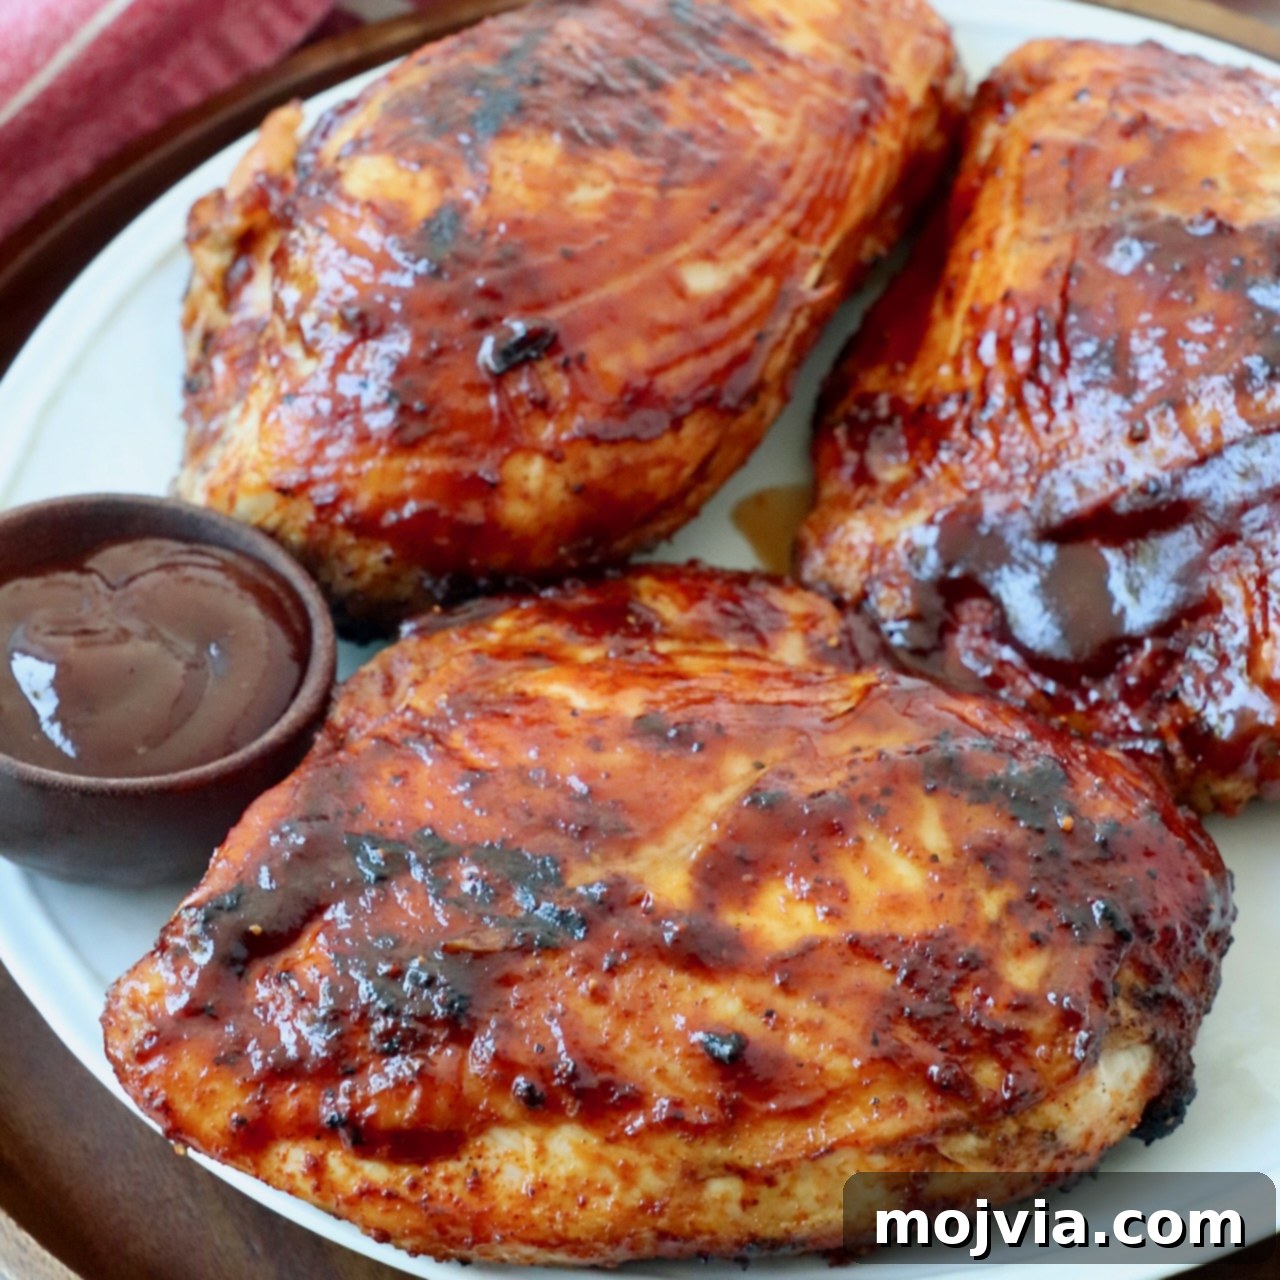
Experience the ultimate delight of perfectly cooked BBQ Chicken, where succulent chicken breasts, wings, drumsticks, or thighs are transformed with a mouth-watering BBQ seasoning. This exceptional recipe guides you through a slow and steady grilling process, culminating in a generous basting of your favorite BBQ sauce to ensure every bite is incredibly juicy, tender, and bursting with flavor. Whether you’re hosting a vibrant summer barbecue or cheering on your team at a game day cookout, this grilled chicken recipe is an absolute must-try for any occasion. Prepare to impress your guests and satisfy your cravings with the best barbecue chicken you’ve ever made!
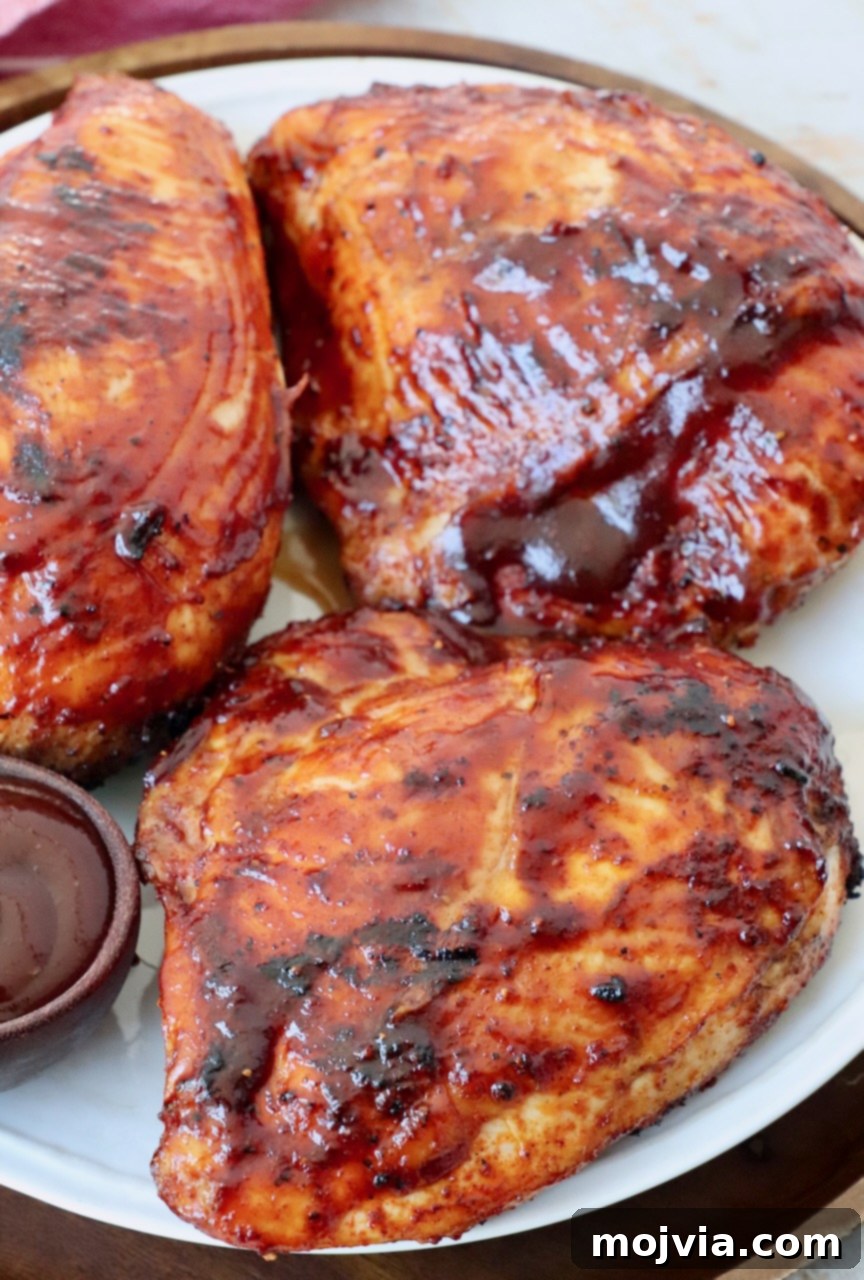
Table of Contents
- The Art of BBQ Chicken: Indirect Heat vs. Direct Grilling
- Essential Ingredients for Unforgettable BBQ Chicken
- Mastering the Art of BBQ Chicken: Step-by-Step Instructions
- Pro Tips for Flawless BBQ Chicken Every Time
- Storing and Reheating Your Delicious Leftovers
- Perfect Pairings: What to Serve with BBQ Chicken
- Beyond BBQ Chicken: More Grilling Adventures
When it comes to preparing chicken on the grill, a crucial distinction exists between true barbecue chicken and simple grilled chicken. This difference goes far beyond just the sauce; it lies primarily in the cooking method. Authentic BBQ chicken, as we’ll master in this recipe, is characterized by its “low and slow” approach, typically utilizing indirect heat. This technique involves setting up your grill so that one half is heated to a high temperature, while the other half remains unheated. The chicken then cooks for the majority of its time on this unheated side.
The gentle, indirect heat radiating from the active side of the grill slowly coaxes the chicken to perfection, ensuring it remains incredibly juicy and tender throughout the cooking process. Our recipe elevates this method with a “reverse-sear,” meaning the chicken is finished over high, direct heat at the very end. This final step is key to crisping up the skin beautifully and allowing the BBQ sauce to caramelize into a sticky, sweet, and irresistible glaze. This technique locks in moisture while creating that desirable charred exterior.
In contrast, traditional grilled chicken is usually cooked over direct, medium to medium-high heat. While this method is much faster, it carries a higher risk of drying out the chicken, especially with bone-in cuts. While direct grilling has its place for certain dishes, for bone-in chicken pieces where tenderness and moisture are paramount, this BBQ chicken recipe consistently delivers superior results. The thoughtful approach of indirect cooking followed by a precise sear ensures a depth of flavor and texture that direct grilling alone simply can’t achieve.
While this method might require an hour or more, depending on the size of your chosen chicken pieces, rest assured that the hands-on time is minimal and the process is surprisingly straightforward. It boils down to three simple, yet highly effective, steps: generously season the chicken, cook it low and slow over indirect heat until nearly done, then move it to direct heat for a quick sear while basting with your favorite barbecue sauce. These three steps are your secret to achieving truly juicy, tender, and intensely flavorful barbecue chicken every single time!
Essential Ingredients for Unforgettable BBQ Chicken
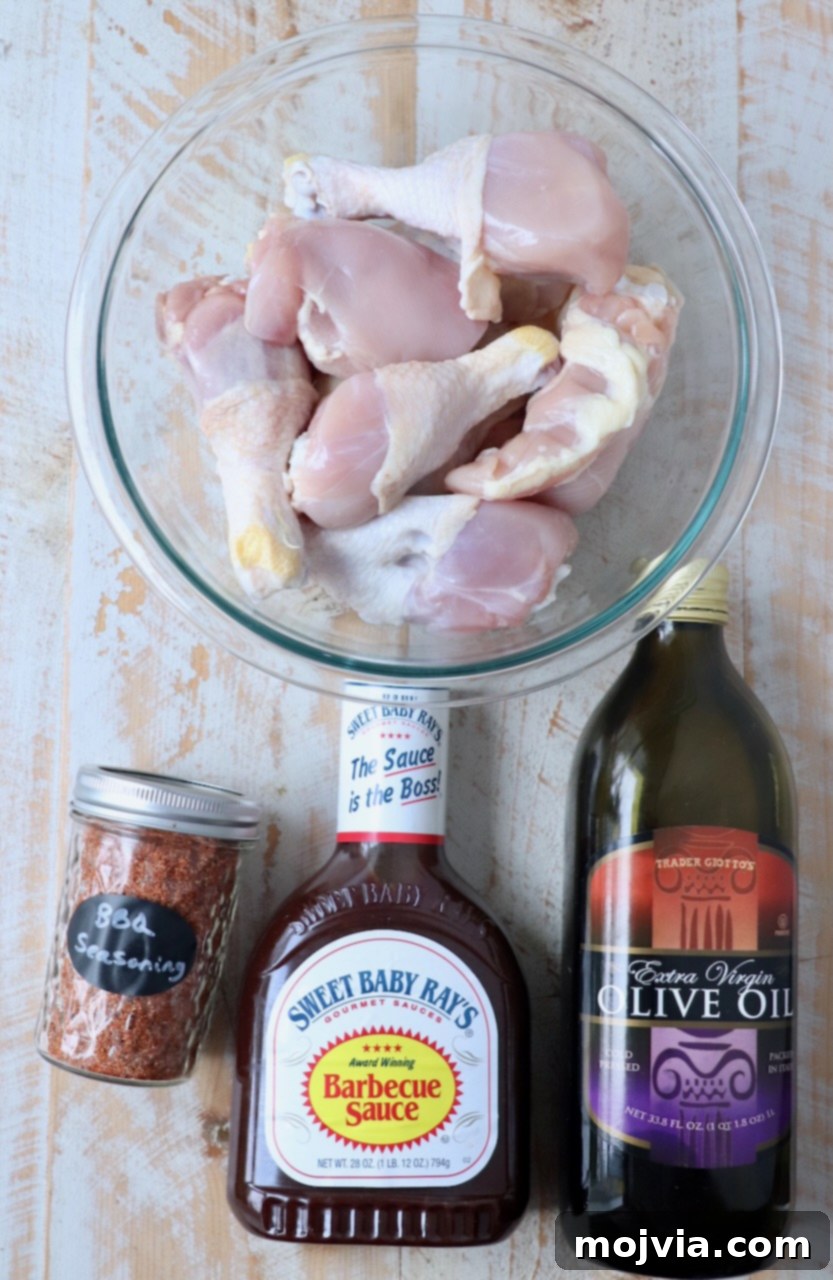
Crafting the perfect BBQ chicken starts with selecting quality ingredients that work harmoniously to build layers of flavor and ensure a tender, juicy outcome. Here’s what you’ll need to make this incredible dish:
- Chicken: For this versatile recipe, you have the freedom to choose almost any cut of chicken. Both boneless and bone-in pieces will work, but for the absolute juiciest and most tender results, we wholeheartedly recommend bone-in chicken. You can mix and match various cuts such as chicken breasts, thighs, wings, or drumsticks to create a diverse platter. Keeping the skin on is highly advised, as it acts as a natural protective barrier, helping to prevent the chicken from drying out and contributing to that coveted crispy finish. However, if you prefer your chicken without skin, simply use a sharp knife to remove it before you begin.
- Olive Oil: This serves a dual purpose in our recipe. It helps the seasoning adhere beautifully to the chicken, ensuring an even coating, and also aids in moisture retention during the cooking process. Any neutral-flavored vegetable oil, such as canola or avocado oil, can be used as a suitable alternative.
- BBQ Seasoning: The rub is the soul of true barbecue, infusing the chicken with deep, aromatic flavors. Our easy, homemade spice blend is highly recommended for its exceptional balance and ease of preparation. It’s built on a foundation of brown sugar, paprika, salt, and pepper, creating a blend that’s both sweet and savory with a hint of warmth. It takes just about 5 minutes to mix up and performs wonderfully in this recipe. Alternatively, you can opt for a high-quality pre-made BBQ seasoning mix, readily available in the spice aisle of most grocery stores. Look for one that complements your preferred flavor profile.
- BBQ Sauce: The final touch to our barbecue chicken, a good BBQ sauce transforms the grilled chicken into a sticky, caramelized masterpiece. The beauty of this recipe is its flexibility: choose your absolute favorite bottled barbecue sauce, or take it to the next level by preparing a homemade version. Whether you lean towards a sweet, spicy, tangy, or traditional smoky BBQ sauce, any flavor will pair wonderfully with the seasoned chicken. The sauce is basted onto the chicken in the final stages of cooking, creating that irresistible glaze.
Mastering the Art of BBQ Chicken: Step-by-Step Instructions
Follow these detailed step-by-step instructions, complete with visual guidance, to easily recreate this incredible BBQ chicken recipe at home. For the full, precise ingredient quantities and detailed timings, please refer to the comprehensive recipe card located at the bottom of this post.
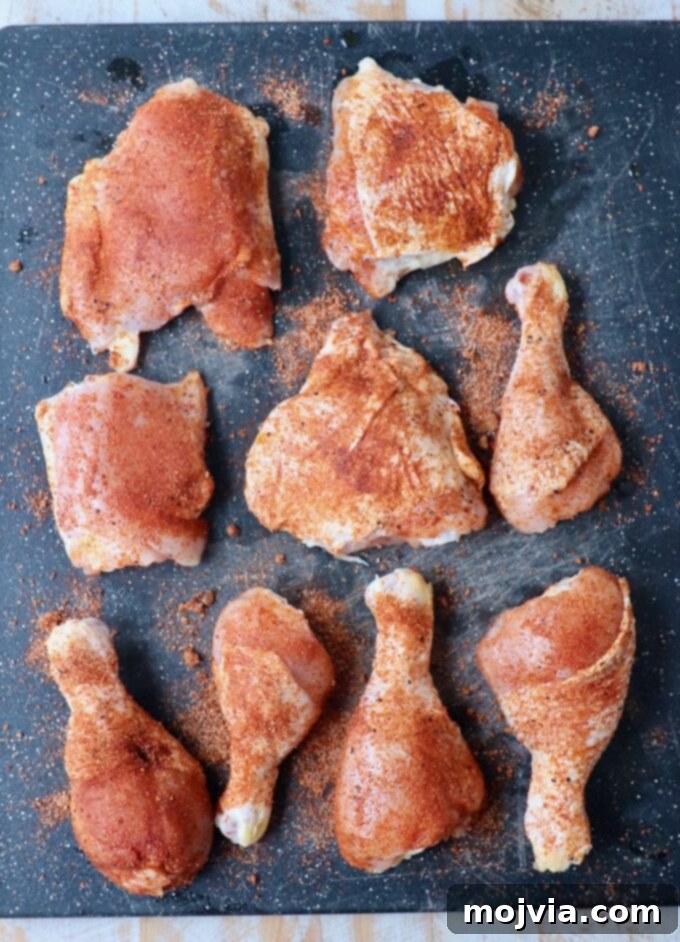
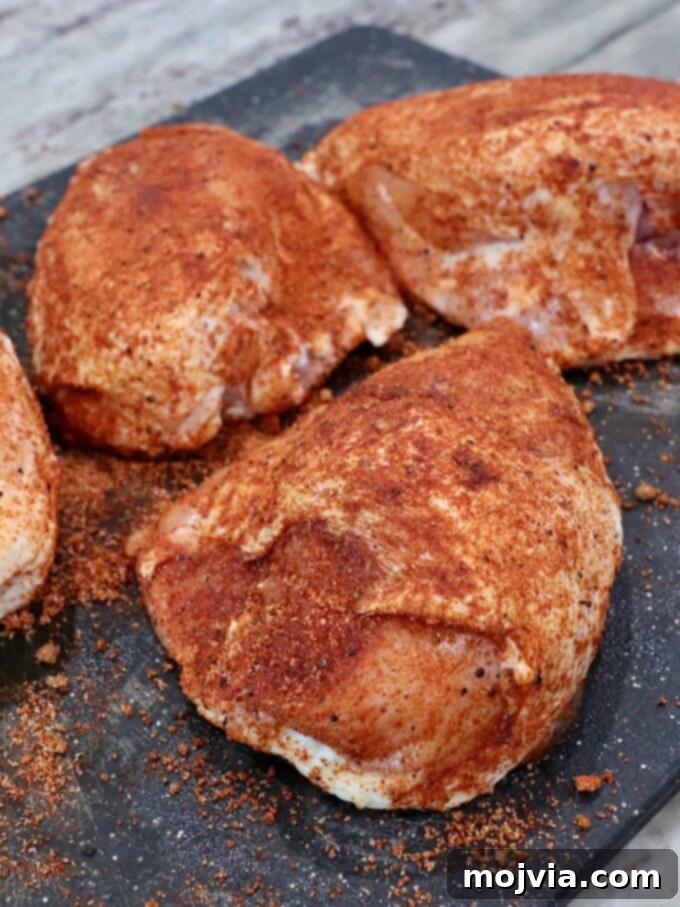
- Season the Chicken for Flavor Foundation: Begin by thoroughly patting all chicken pieces dry with paper towels. This crucial step helps the skin crisp up and ensures the seasoning adheres properly. Next, generously rub each piece on all sides with olive oil. This acts as a binder for the seasoning and helps keep the chicken moist. Finally, sprinkle your chosen BBQ seasoning evenly over the chicken, making sure every surface is fully coated with the flavorful rub. Gently massage the seasoning into the meat for maximum penetration.
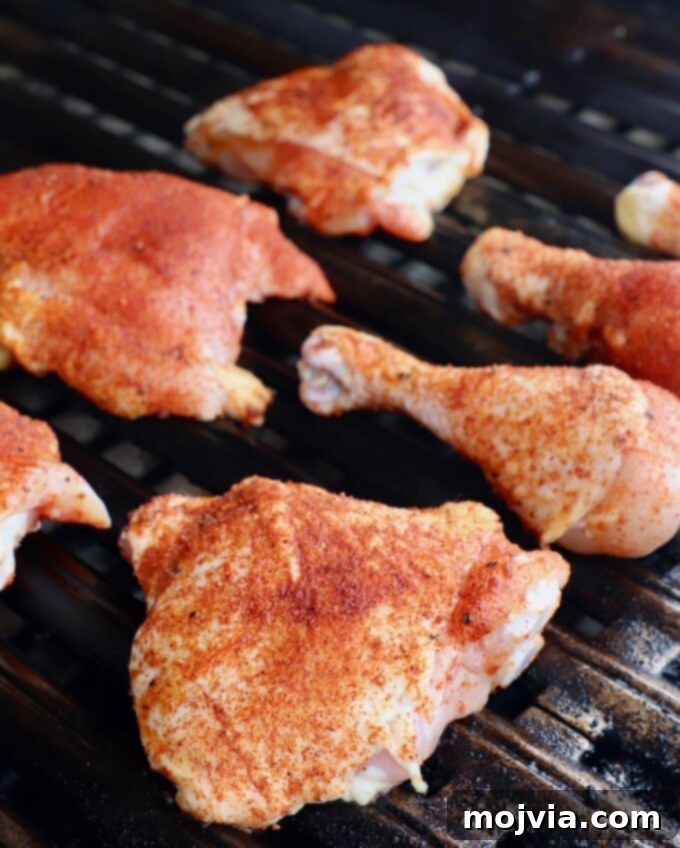
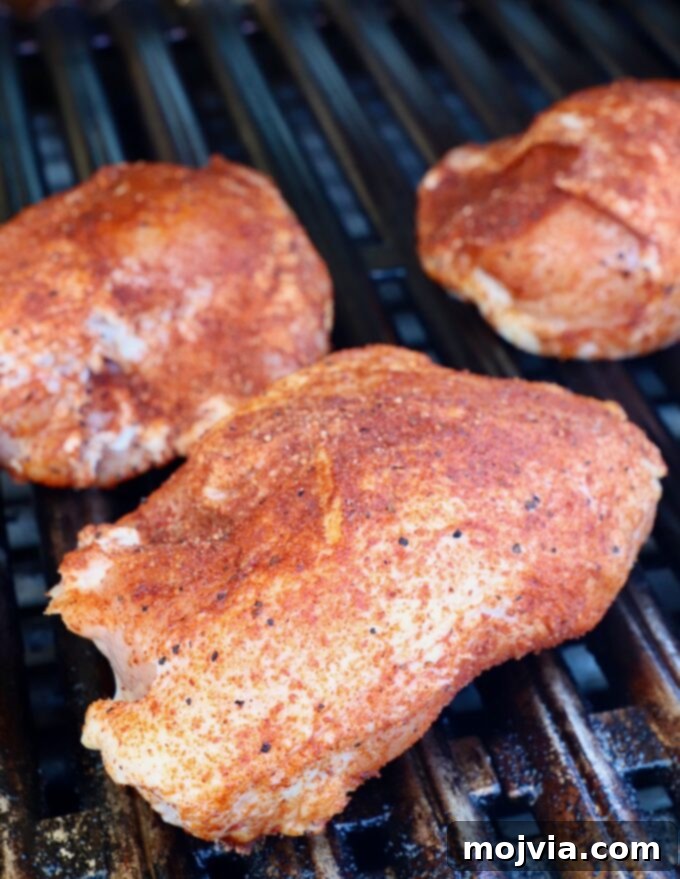
- Set Up for Indirect Grilling: Prepare your grill for indirect cooking by heating one side to a high temperature, aiming for around 450°F (230°C). Crucially, leave the other side of the grill completely unlit. Once the heated side reaches the desired temperature, thoroughly clean and oil the grill grates on both sides to prevent sticking. Carefully place the seasoned chicken pieces on the unheated side of the grill. This is the essence of grilling with indirect heat, allowing the chicken to cook gently and evenly.
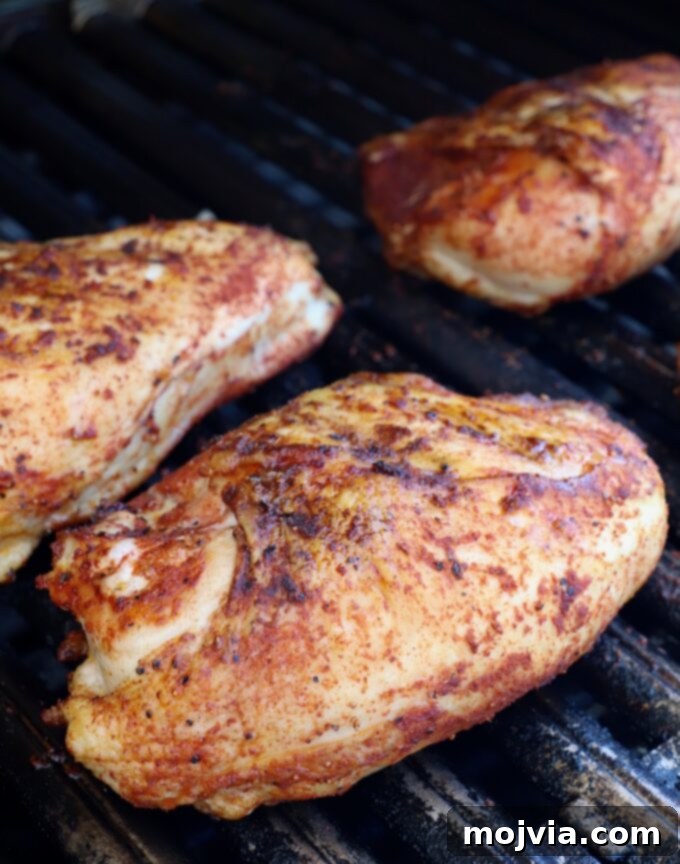
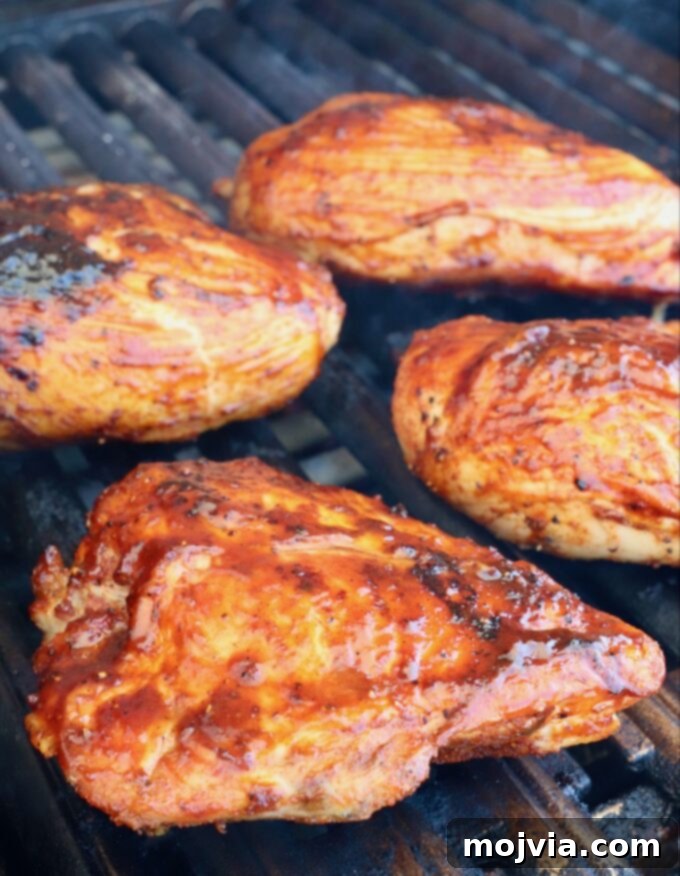
- The “Low and Slow” Indirect Cook: Close the grill lid to allow the indirect heat to circulate and cook the chicken gently. The cooking duration will vary significantly based on the size and cut of your chicken pieces. For larger bone-in chicken breasts, anticipate grilling for approximately 40 minutes per side. Smaller cuts, such as wings and drumsticks, will typically require around 20 minutes per side, while bone-in chicken thighs usually need about 30 minutes per side. It is crucial to remember the mantra: “grill to temperature, not time!” Always use an accurate instant-read thermometer to verify the internal temperature of each piece. Aim for 160°F (71°C) before proceeding to the final searing step. The temperature will naturally rise an additional 5-10 degrees as the chicken rests and during the direct heat searing. Refer to our “Recipe Tips” section below for more specific guidance on managing different chicken cuts.
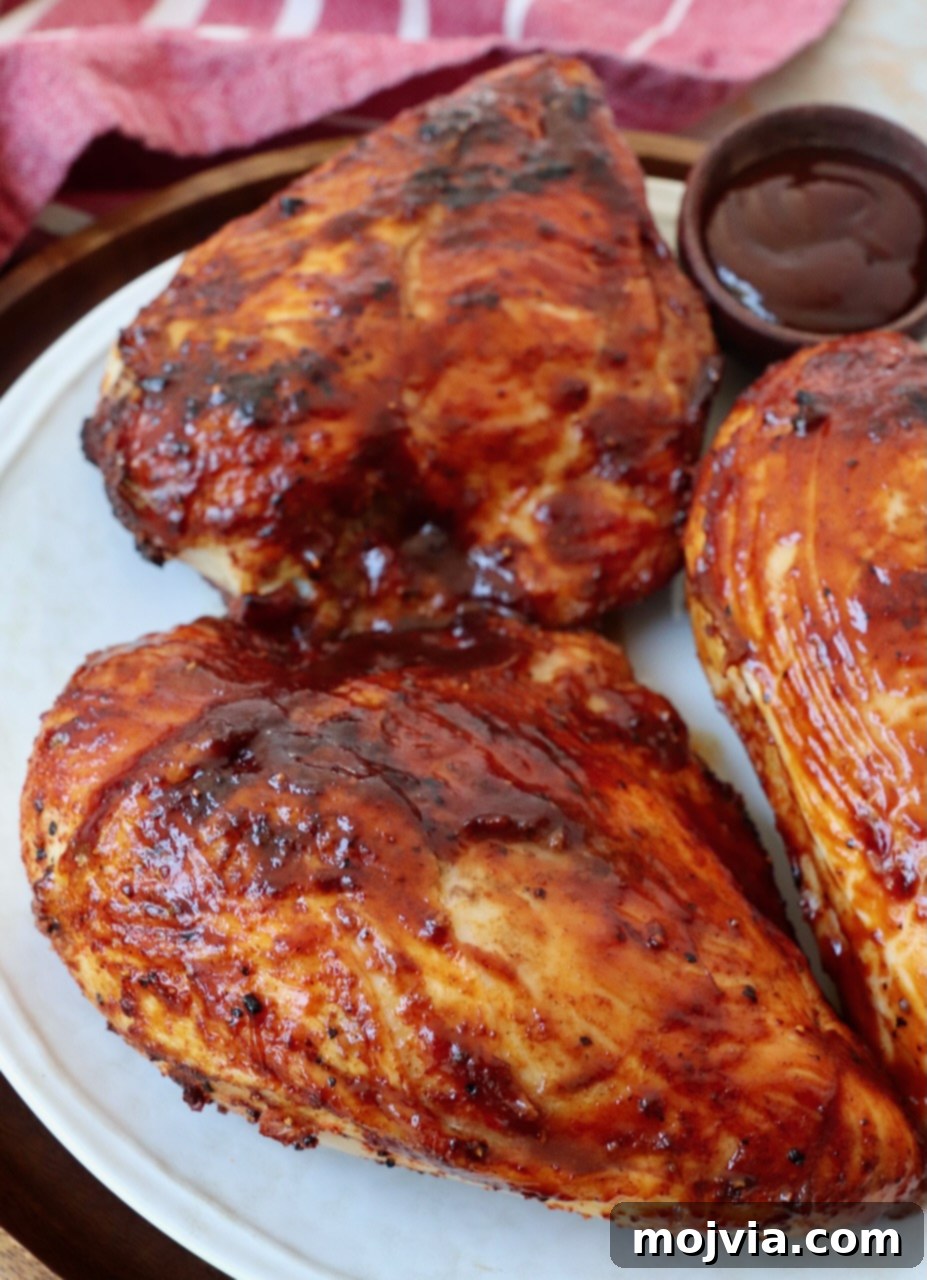
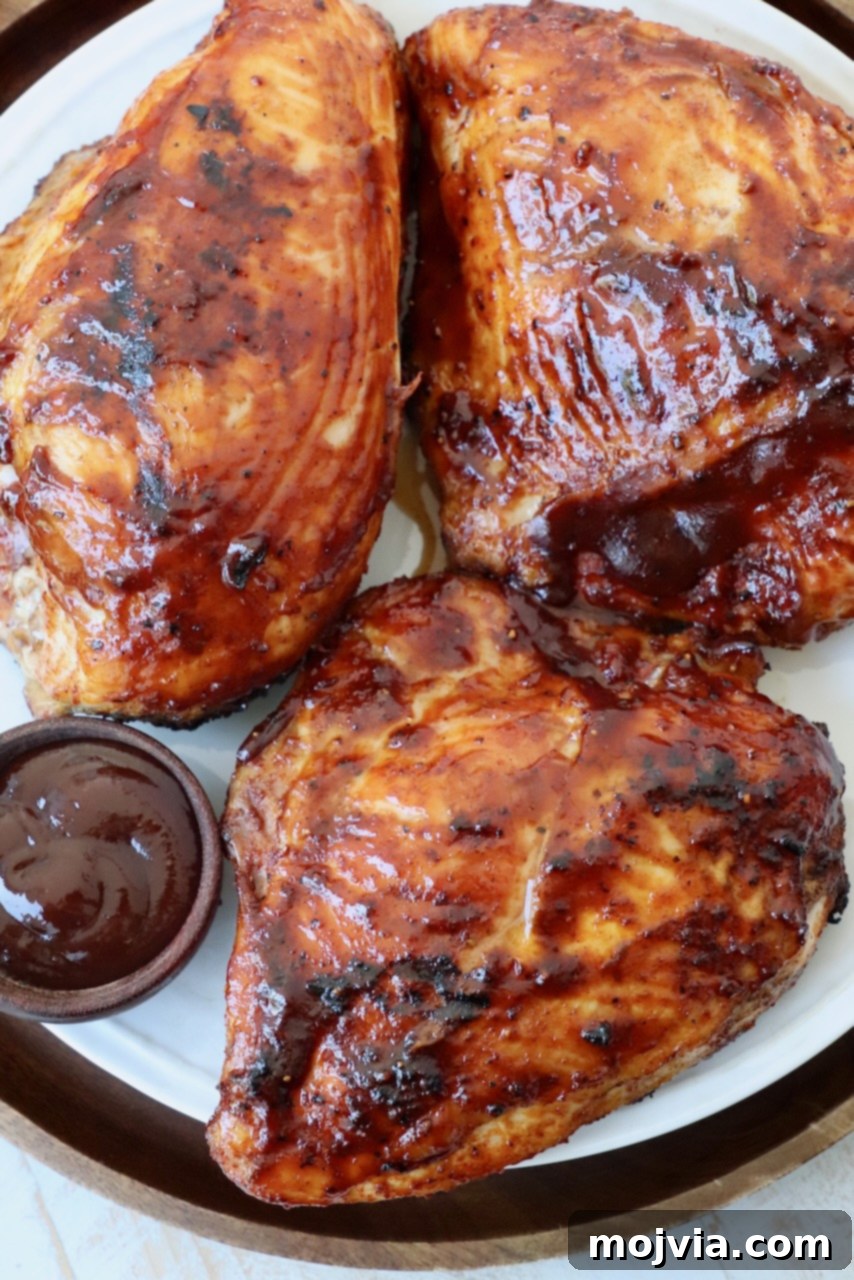
- The Reverse Sear and Irresistible Basting: Once all chicken pieces have reached an internal temperature of 160°F (71°C), carefully move them from the indirect side to the preheated, hot side of the grill. Immediately brush a generous layer of your favorite BBQ sauce onto each piece of chicken. Grill for 1-2 minutes, allowing the sauce to caramelize and form a beautiful glaze. Flip the chicken, brush the other side with more BBQ sauce, and continue grilling for an additional 1-2 minutes. This reverse sear creates that desirable crispy skin and sticky, flavorful exterior. Continue cooking until the internal temperature reaches a safe 165°F (74°C). Finally, remove the chicken from the grill and let it rest for at least 5 minutes before serving. Resting allows the juices to redistribute, ensuring maximum tenderness and flavor.
Pro Tips for Flawless BBQ Chicken Every Time
Achieving consistently perfect BBQ chicken involves a few key techniques and considerations. Heed these expert tips to elevate your grilling game and ensure juicy, tender, and flavorful results:
- Strategic BBQ Sauce Application: It is paramount to only brush the chicken with BBQ sauce during the final stages of the cooking process, specifically during the reverse-sear over direct heat. Most barbecue sauces contain a significant amount of sugar. If applied too early, the high sugar content will caramelize rapidly and burn, resulting in a bitter, unappetizing crust on your chicken long before the meat is fully cooked. Delaying the sauce application ensures a beautifully glazed, sticky finish without charring.
- Mastering Mixed Cuts: If you plan to grill a variety of chicken pieces (breasts, thighs, wings, drumsticks), it’s wise to add the larger bone-in chicken breasts to the grill first. These cuts are typically the thickest and therefore require the longest cooking time. Allow them to cook for approximately 40 minutes on their first side before introducing smaller cuts like chicken thighs, wings, or drumsticks. This staggered approach helps ensure that all pieces reach the target internal temperature of 160°F (71°C) around the same time, promoting even cooking.
- Handling Uneven Cooking: Grills can have hot spots, and chicken pieces vary in size and thickness. If some chicken pieces reach the critical 160°F (71°C) internal temperature before others, simply remove the cooked pieces from the grill. Place them on a clean cutting board and loosely tent them with aluminum foil. This allows them to rest and hold their heat without overcooking. Once all remaining chicken pieces have reached 160°F, you can then return the previously removed pieces to the hot side of the grill for the final searing and basting step. This ensures all your chicken is perfectly cooked, hot, and ready to serve simultaneously.
- Grill to Temperature, Not Time!: This is arguably the most important rule for perfectly cooked chicken. Cooking over indirect heat is a nuanced process, much like smoking, and individual grills can vary in heat distribution. Furthermore, chicken pieces differ greatly in size and density, meaning cook times will always be approximate. Invest in and always use an accurate instant-read meat thermometer to confidently check the internal temperature of each piece before moving it to the hot side of the grill for searing. Aim for 160°F (71°C) before the sear, and 165°F (74°C) after.
- Gluten-Free Assurance: This recipe is naturally gluten-free when using the specified ingredients. However, it’s always prudent to double-check the label of your chosen BBQ sauce, as some brands may contain gluten-based thickeners or additives.
- Whole30 Compliance: To adapt this recipe for Whole30 approval, substitute the regular BBQ seasoning with a sugar-free alternative, such as our recommended chicken seasoning or chicken wing seasoning. For the basting sauce, use a sugar-free Whole30 compliant BBQ sauce.
- Flavor Exploration: Don’t hesitate to experiment with different sauce profiles! While traditional BBQ sauce is a classic, you can easily switch things up with white BBQ sauce (a creamy, tangy Alabama staple), spicy buffalo sauce, or even a rich garlic parmesan sauce for a unique twist.
- Brining or Marinating for Extra Moisture: For an even juicier outcome, consider brining your chicken for a few hours or overnight before seasoning. A simple saltwater brine can significantly increase moisture retention. Alternatively, a quick marinade (e.g., with buttermilk, citrus, or vinegar) can add another layer of flavor and tenderize the meat.
- Gas vs. Charcoal Grill Setup: For gas grills, simply turn on burners on one side to high, leaving the others off. For charcoal grills, bank the hot coals to one side of the grill, creating a direct heat zone, and leave the other side empty for indirect cooking. Ensure your grill has a lid to capture and circulate heat effectively.
Storing and Reheating Your Delicious Leftovers
One of the many joys of making delicious BBQ chicken is having leftovers to enjoy later. Properly stored, leftover barbecue chicken will maintain its quality and flavor in the refrigerator for up to 5 days. Here are some fantastic ways to enjoy your delicious remnants:
For a quick and effortless meal, I often love to pull the tender meat off the bone, much like you would with a store-bought rotisserie chicken. This shredded chicken is fantastic eaten cold, especially when tossed into a vibrant BBQ Chicken Salad, offering a refreshing and flavorful lunch option.
Another excellent way to repurpose the meat is to pull it off the bone and gently reheat it in a skillet on the stovetop over medium-high heat for 4-6 minutes, stirring occasionally. Once warmed through, toss the shredded chicken with a little extra BBQ sauce to revive its moisture and flavor. Pile this delectable mixture onto toasted buns, with or without a creamy coleslaw, for an utterly satisfying homemade BBQ chicken sandwich.
If you prefer to reheat the chicken pieces on the bone, both the air fryer and a conventional oven are excellent choices:
- Reheating in the Air Fryer: For crispy results, arrange the leftover chicken pieces in a single layer in your air fryer basket, ensuring they are not touching for optimal air circulation. Reheat at 400°F (200°C) for 3-6 minutes. The exact time will depend on the size and thickness of your chicken pieces, so check for warmth and crispness.
- Reheating in the Oven: Place the chicken pieces in a single layer on a foil-lined baking sheet for easy cleanup. Preheat your oven’s broiler to high. Position the baking sheet on a middle rack in the oven. Heat the chicken for 4-6 minutes, flipping halfway through to ensure even heating and crisping. When using the broiler, it’s crucial to keep a very close eye on the food, as it can go from perfectly warmed to burnt very quickly.
No matter how you choose to enjoy them, these leftover BBQ chicken ideas ensure that none of your delicious efforts go to waste!
Perfect Pairings: What to Serve with BBQ Chicken
While this BBQ chicken recipe shines as a star during summer barbecues, its simplicity and incredible flavor make it a fantastic dish to enjoy on the grill year-round. It transforms into a complete and utterly delicious meal when paired with any of these delightful side dishes, perfectly complementing the rich, smoky, and sweet notes of the chicken:
- Blue Cheese Salad: A crisp, refreshing salad with tangy blue cheese crumbles provides a wonderful counterpoint to the rich chicken.
- Air Fryer Baked Potato: Fluffy on the inside and perfectly crisp on the outside, a baked potato is a classic, comforting accompaniment.
- Baked Sweet Potatoes: For a touch of natural sweetness and vibrant color, baked sweet potatoes are a healthy and delicious choice.
- Smoked Mac and Cheese: Indulgent and incredibly flavorful, this mac and cheese can even be cooked on the grill alongside your chicken for an extra smoky touch!
- Corn Casserole: A creamy and savory corn casserole adds a delightful texture and comforting sweetness to your plate.
- Grilled Zucchini: Lightly charred and tender-crisp grilled zucchini offers a fresh, seasonal vegetable option that complements the smoky flavors.
- Red White and Blue Cheese Potato Salad: A unique and flavorful potato salad with a hint of sharpness from blue cheese, perfect for patriotic celebrations or any gathering.
- Cheesy Grilled Potatoes: Crispy, savory, and loaded with melted cheese, these potatoes are an instant crowd-pleaser and ideal for grilling.
Beyond BBQ Chicken: More Grilling Adventures
Once you’ve mastered the art of this delicious BBQ chicken, expand your grilling repertoire with these other mouth-watering recipes. The grill offers endless possibilities for creating fantastic meals, from succulent beef to flavorful seafood.
BBQ Chicken
Make the best BBQ Chicken by covering chicken breasts, wings, drumsticks or thighs with a delicious bbq seasoning. Cook the chicken low and slow on the grill and finish it with a generous coating of bbq sauce to make juicy, tender, flavorful barbecue chicken every time! This grilled chicken recipe is perfect for everything from summer bbq’s to game day cookouts!
Servings: 6 people
Prep Time: 10 mins
Cook Time: 45 mins
Total Time: 55 mins
Author: Whitney Bond
Course: Main Course
Cuisine: American
Ingredients
- 3 pounds boneless or bone-in chicken pieces (breasts, thighs, wings, drumsticks, or combination)
- 2 tablespoons olive oil
- 3 tablespoons BBQ seasoning (click link for homemade recipe)
- 1 cup BBQ sauce (your favorite brand)
Instructions
- Pat the chicken pieces dry with a paper towel, then rub them on all sides with olive oil.
- Sprinkle the BBQ seasoning evenly over the chicken and rub it in until the chicken is completely coated in the seasoning.
- Preheat one side of the grill to high heat, around 450°F (230°C). Do not turn on the other side of the grill.
- Oil the grill grates on both sides to prevent sticking.
- Place the seasoned chicken on the side of the grill that’s not turned on (indirect heat zone).
- For bone-in thighs, drumsticks and wings, grill for approximately 20 minutes per side, or until the internal temperature reaches 160°F (71°C) using an instant-read thermometer. For large bone-in chicken breasts, grill for approximately 40 minutes per side, or until the internal temperature reaches 160°F (71°C).
- Once the internal temperature of each piece of chicken reaches 160°F (71°C), use tongs to move the chicken over to the hot side of the grill to cook over direct heat.
- Brush BBQ sauce generously on the chicken, cook for 1-2 minutes. Flip and brush the other side with more BBQ sauce.
- Continue cooking the chicken for an additional 1-2 minutes per side, or until the internal temperature reaches a safe 165°F (74°C).
- Remove the chicken from the grill and let it rest for 5 minutes before serving to allow juices to redistribute.
Notes
- Chicken: You can use any cut, but bone-in chicken offers the juiciest results. Keep skin on for protection and crisping.
- Mixed Cuts: When grilling various cuts, start larger bone-in chicken breasts first (approx. 40 mins per side), then add smaller cuts like thighs, wings, or drumsticks (approx. 20-30 mins per side) to ensure even cooking and all pieces finish around the same time at 160°F (71°C) before searing.
- Staggered Doneness: If some chicken pieces reach 160°F (71°C) before others, remove them, cover loosely with foil, and let them rest. Reintroduce them to the hot side of the grill with the remaining pieces for the final sear and basting.
- Temperature is Key: Always rely on an Did you make this recipe?Tag@WhitneyBondon Instagram and hashtag it#WBRecipes!