
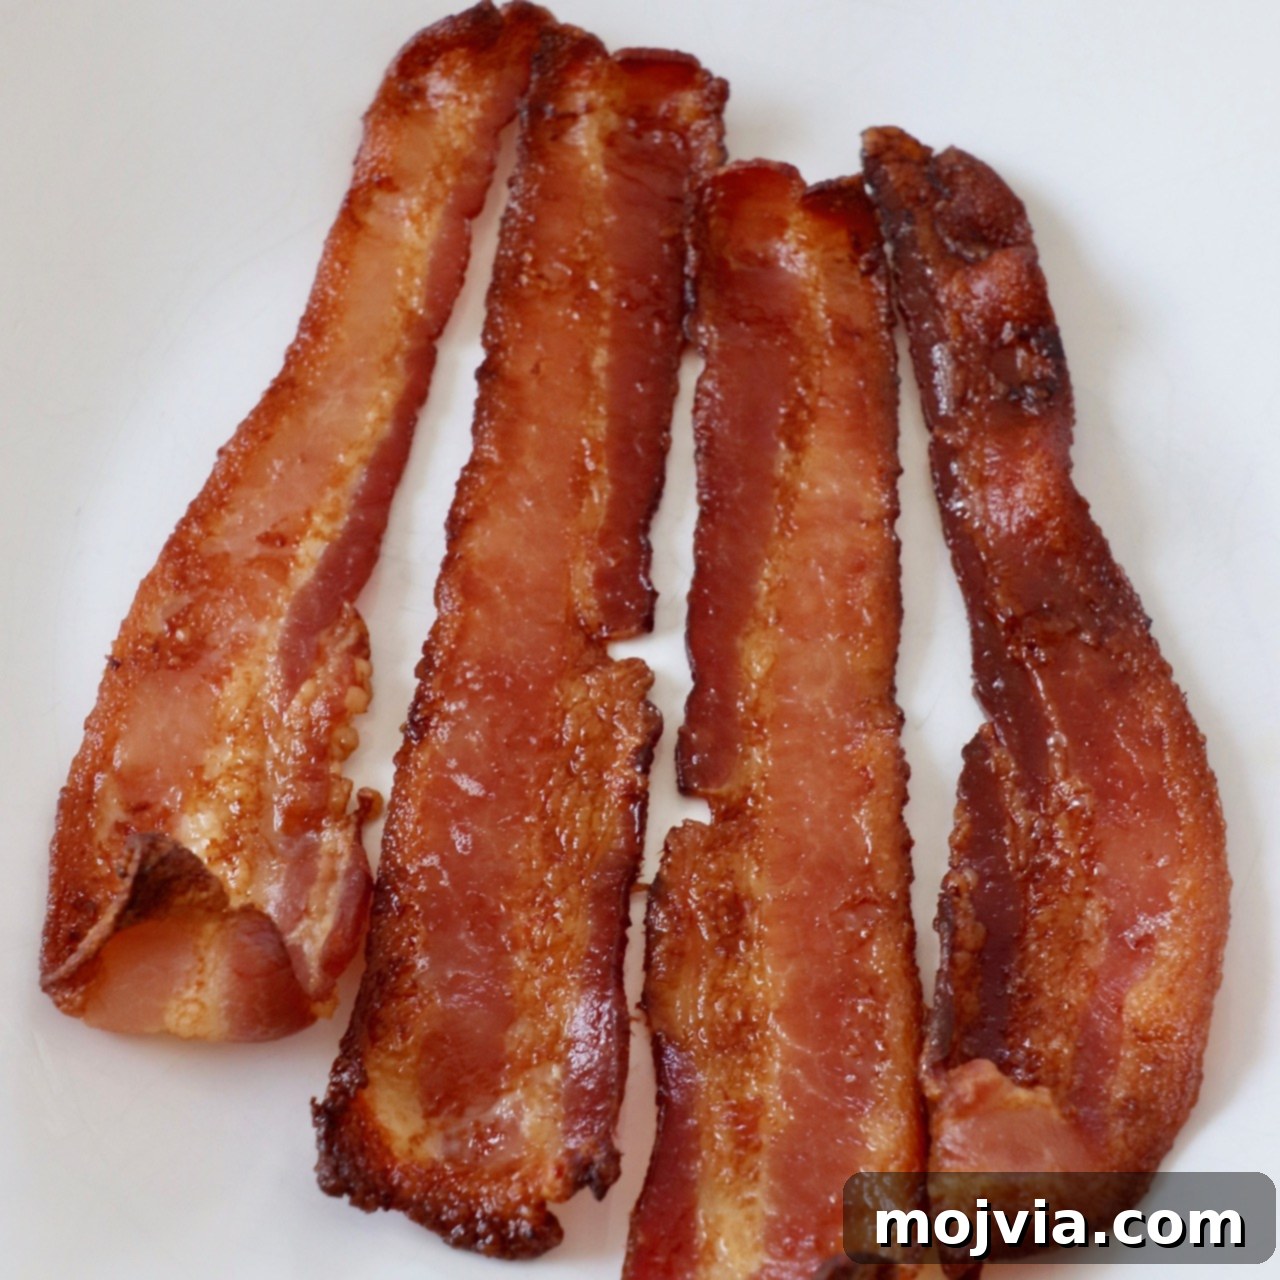
Tired of grease splatters, unevenly cooked strips, and spending precious morning minutes hovering over a hot stove? Discover the ultimate solution to perfectly crispy, undeniably delicious bacon every single time. Learn how to cook bacon in the oven – a game-changing method that promises impeccable results with minimal effort and virtually no mess! Say goodbye to stovetop chaos and hello to beautifully baked bacon, whether you prefer it less greasy on a wire rack or extra crispy cooked directly on foil. This comprehensive guide will walk you through the simple steps to achieve bacon perfection, freeing up your stove and your time for a more relaxed breakfast or meal prep.
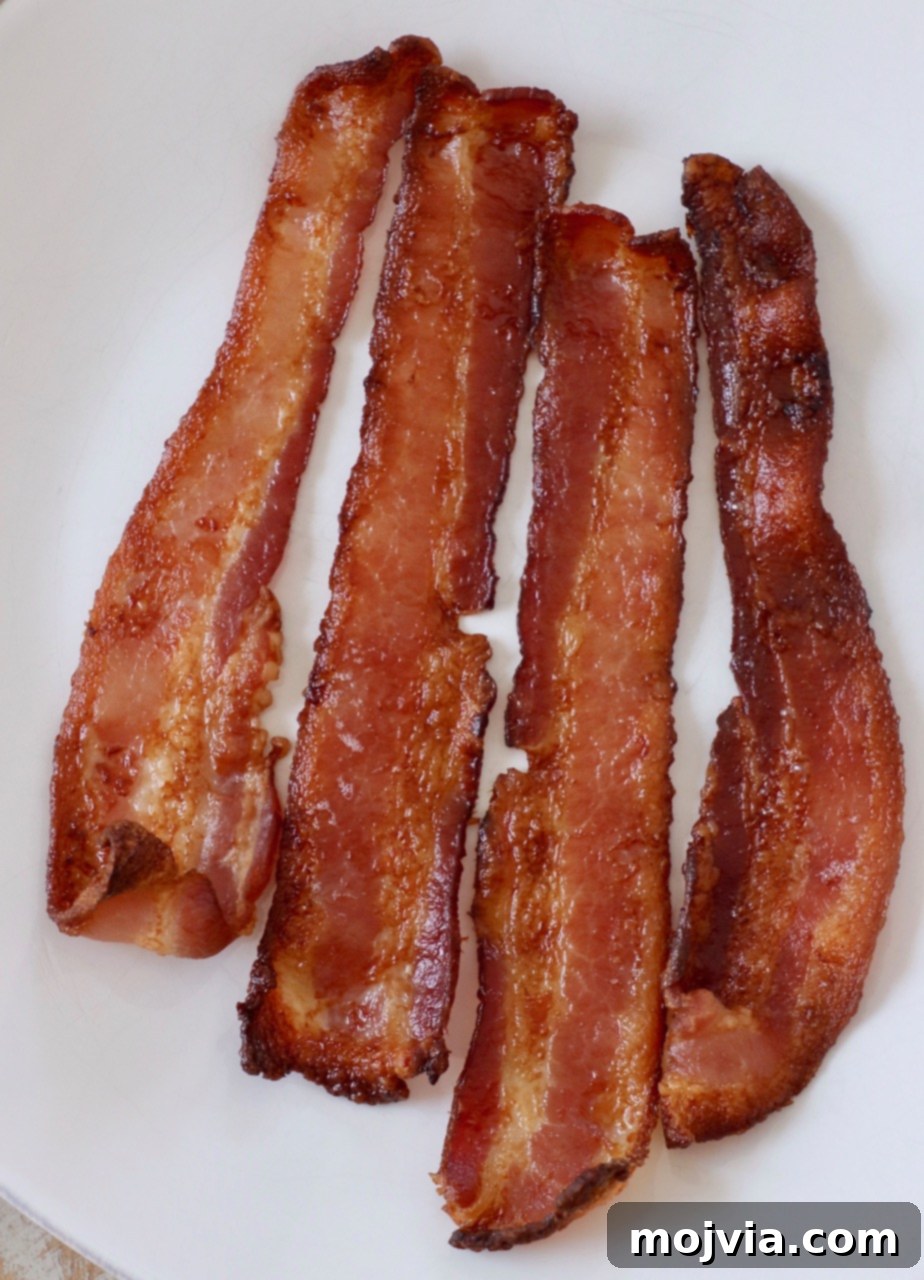
Table of contents
- Why Oven Bacon is the Best Method
- Ingredients for Oven Bacon
- Step-by-Step Oven Bacon Instructions
- Expert Tips for Perfect Oven Bacon
- How to Save and Use Bacon Grease
- Storing and Freezing Cooked Bacon
- Delicious Recipes with Bacon
- Printable Oven Bacon Recipe Card
Why Oven Bacon is the Best Method Ever!
There are so many compelling reasons why cooking bacon in the oven is truly the best method ever for achieving consistently perfect results. Once you try it, you’ll wonder why you ever cooked bacon any other way!
First and foremost, the oven allows you to make significantly larger batches at once. Forget the tedious process of cooking a few slices at a time in a crowded skillet. With the oven method, you can easily cook a full pound of bacon, or even more, all at the same time! This is incredibly practical for feeding a family, preparing for guests, or simply getting ahead on your meal prep for the week. Imagine the time saved and the convenience of having plenty of delicious bacon ready without the constant attention required by stovetop cooking.
Furthermore, baking bacon in the oven exposes each strip to consistent and even heat from all directions. This uniform cooking environment is the secret to achieving that coveted crispy finish all around, without any undercooked spots or burnt edges. Unlike a skillet, where heat distribution can vary and require flipping, the oven’s steady temperature ensures every piece of bacon renders its fat and crisps up beautifully, creating an unparalleled texture that’s both tender and delightfully crunchy.
And last, but certainly not least, is the unparalleled mess-free experience! This might just be the most celebrated benefit of oven-baked bacon. That’s right – no more oil splattered counters, greasy stovetops, or needing to scrub down your kitchen after making breakfast. By simply baking on a foil-lined rimmed baking sheet, all the rendered bacon grease is contained. After cooking, you can easily fold up the foil and dispose of the grease with minimal effort, leaving you with hardly any messy dishes to clean. Who doesn’t love an easy cleanup, especially when it means enjoying perfectly crispy bacon every time without the dreaded aftermath?
Beyond these primary benefits, oven-cooked bacon offers the added advantage of being largely hands-off. Once the bacon is in the oven, you’re free to prepare other parts of your meal, enjoy a cup of coffee, or simply relax. This frees up valuable stovetop space for other dishes, making it an ideal choice for brunch or larger breakfasts where multiple components are being cooked simultaneously. It’s a truly effortless path to delicious, perfectly cooked bacon.
Ingredients for Oven Bacon
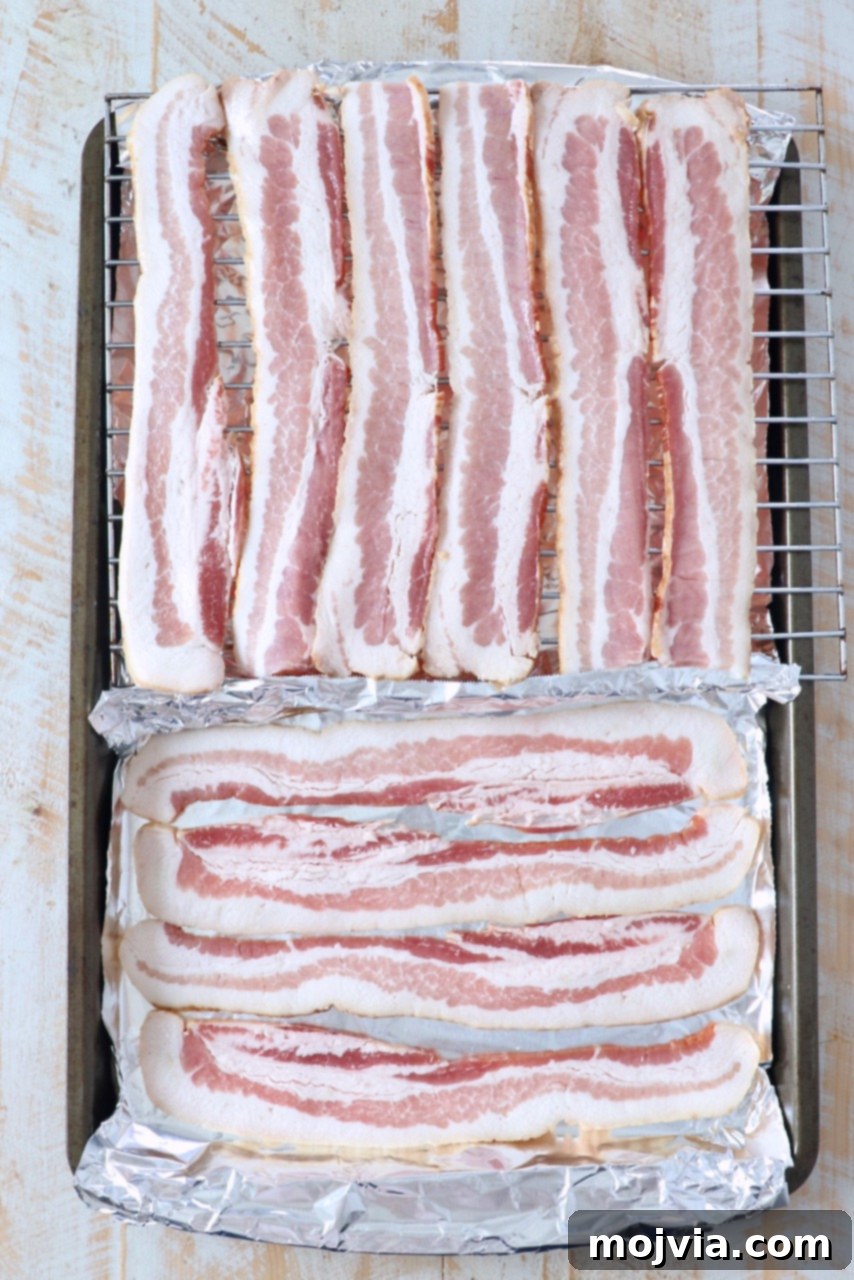
- Bacon – That’s it! The beauty of this recipe lies in its simplicity. You only need one core ingredient.
When selecting your bacon, you have a variety of options. You can use classic pork bacon, or explore different flavor profiles readily available at your local grocery store. Common options include savory applewood smoked, sweet cherrywood, rich hickory smoked, or even nutty pecan wood varieties. Each brings its own subtle nuance to the final flavor, allowing you to customize your breakfast experience.
This guide primarily focuses on standard cut bacon. If you opt for thick cut bacon, which provides a chewier texture and more substantial bite, you will need to adjust the cooking time accordingly. Thick cut bacon typically requires a longer baking period to achieve the desired crispiness. As a general rule, I recommend increasing the cooking time to approximately 23 minutes if cooked directly on foil, or around 30 minutes if cooked on a wire rack. Always keep an eye on it during the last few minutes, as oven temperatures and bacon thickness can vary.
For those who prefer a less common, very thin-cut bacon, you’ll want to reduce the cooking time significantly, perhaps starting at 10-12 minutes and checking frequently to prevent overcooking. Regardless of the cut, ensuring a high-quality bacon product will always yield the best results.
Step-by-Step Oven Bacon Instructions
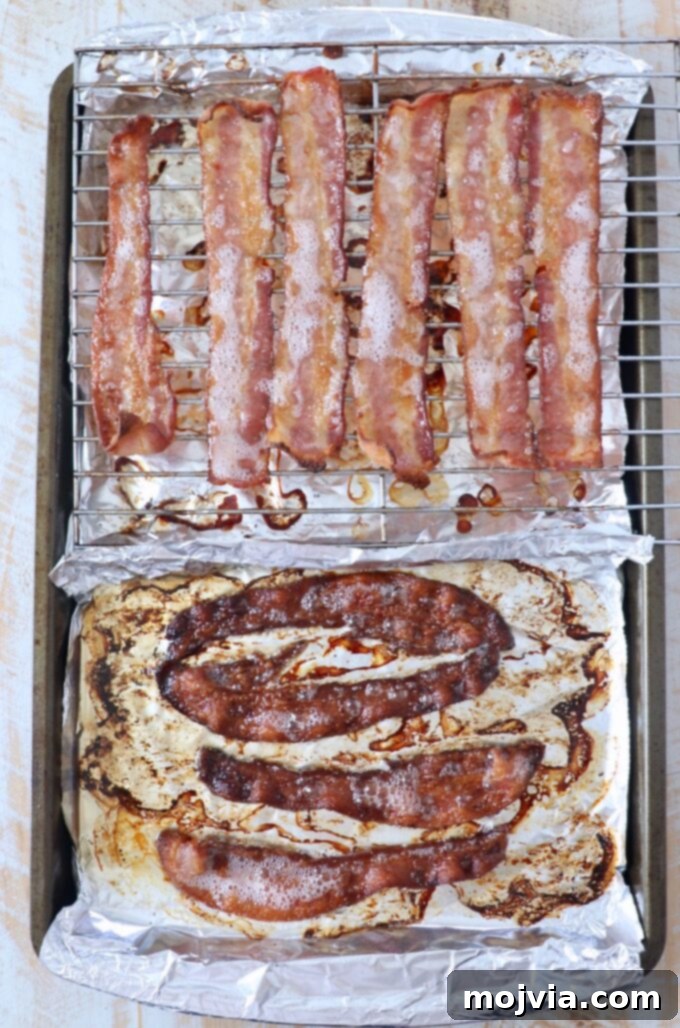
The beauty of cooking bacon in the oven is how easily you can customize the crispiness to your exact preference. Everyone has a different ideal for how chewy or crispy they like their bacon. For instance, the bacon pictured on the left in the images above was baked for 15 minutes at 400°F, resulting in a slightly chewier, yet cooked texture. The bacon on the right, on the other hand, was cooked for 20 minutes at the same temperature, yielding a much crispier result. Personally, I find 18 minutes of cooking directly on foil at 400°F produces the perfect level of crispy bacon.
Follow these straightforward instructions below, and remember to feel free to adjust the cooking time by a few minutes to achieve your desired level of crispiness or chewiness. Your oven may also cook slightly differently, so monitoring is key!
- Prepare Your Pan:
- Begin by lining a sturdy, rimmed baking sheet with aluminum foil. This simple step is critical for effortless cleanup and effective grease containment.
- Carefully arrange your bacon slices in a single layer directly on the foil. Ensure that none of the strips are overlapping; this allows for even cooking and optimal crisping.
- Optional Wire Rack Method: If your goal is to reduce the grease content in your bacon and prefer a slightly less crispy texture, you can place a wire rack directly on top of the foil-lined baking sheet and arrange the bacon on the rack. The rack allows air to circulate around the bacon and the fat to drip below.
- Bake the Bacon to Perfection:
- Place your prepared baking sheet into a 400°F (200°C) preheated oven. Preheating is crucial for consistent cooking from the moment the bacon enters the oven.
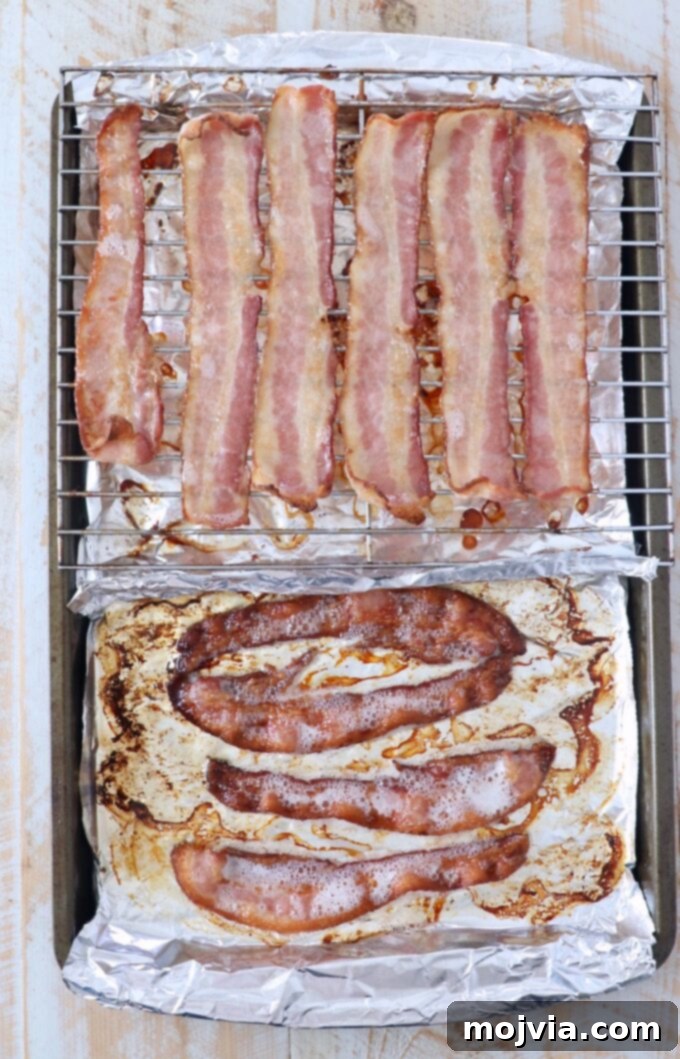
- For standard-cut bacon cooked directly on a sheet of aluminum foil, it will typically reach its perfectly crispy state after approximately 18 minutes.
- If you are using a wire rack for less greasy bacon, you will need to increase the cooking time to about 25 minutes to achieve a satisfying crunch.
- Remember that baking times can vary based on the thickness of your bacon and the specific performance of your oven. Begin to keep a close eye on your bacon around the 15-minute mark to prevent overcooking or burning. Remove it from the oven as soon as it reaches your preferred degree of crispiness.
- Cool and Serve:
- Once the bacon is cooked to your liking, carefully remove the baking sheet from the oven.
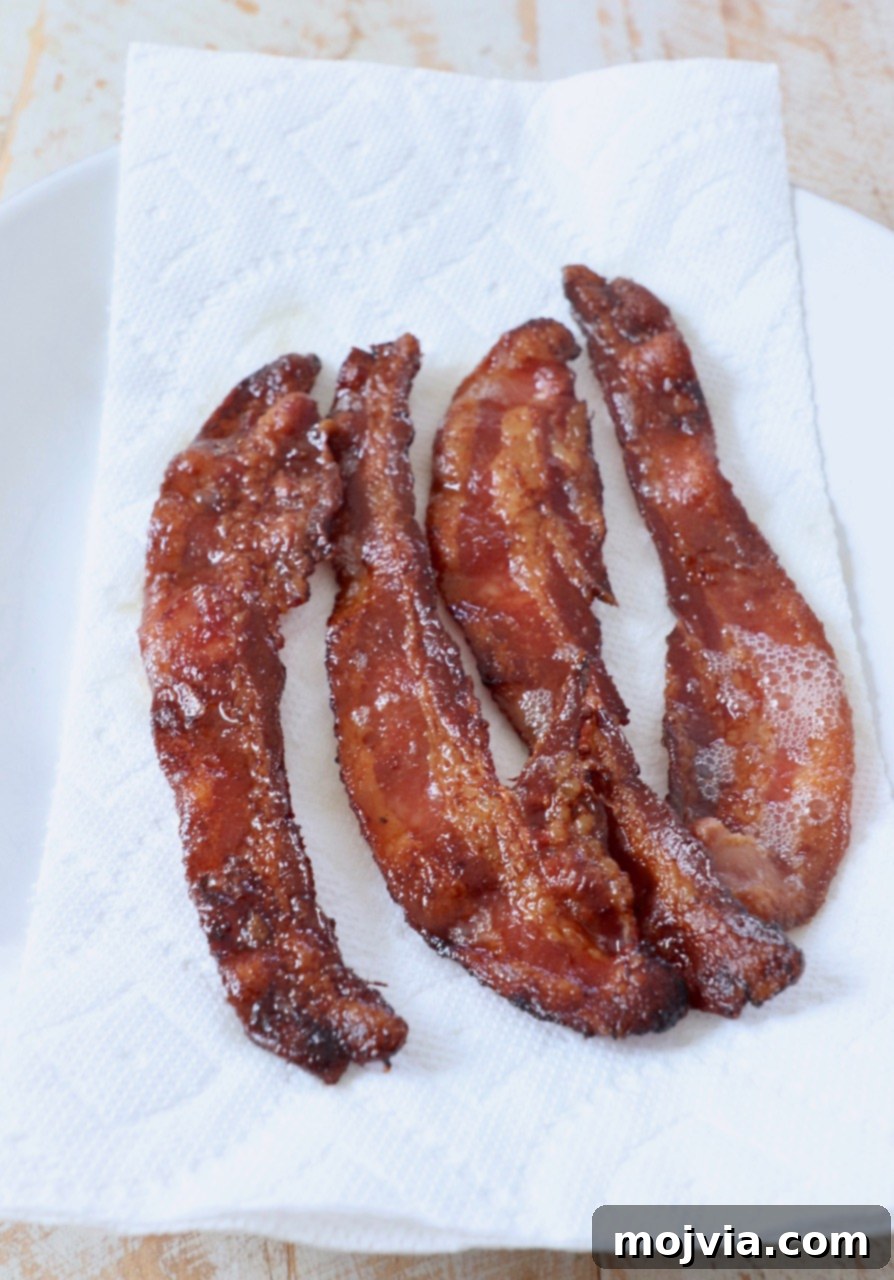
- Using tongs, transfer the strips of bacon from the baking sheet to a plate lined with paper towels or a cooling rack. This step is essential to drain off any excess grease, which contributes to a cleaner, crispier final product.
- Allow the bacon to cool for a few minutes until it’s comfortable to touch. As it cools, the bacon will continue to crisp up slightly, so account for this when assessing its doneness in the oven. Serve warm and enjoy your perfectly cooked, mess-free bacon!
Expert Tips for Perfect Oven Bacon
- Always use a rimmed baking sheet: This is non-negotiable! The rimmed edges are crucial for containing the rendered bacon grease, preventing it from overflowing and splattering inside your oven. This keeps your oven clean and safe.
- Foil for the ultimate easy cleanup: Aluminum foil is your best friend when baking bacon. It’s ideal for lining the pan because it traps all the grease. After cooking, you can simply allow the grease to cool slightly, then carefully fold up the sides of the foil to create a neat package, keeping all the grease contained within the foil and off your baking sheet. This turns cleanup into a truly effortless task.
- Parchment paper as an alternative: While parchment paper can also be used to line the pan, it’s important to note that it won’t contain the bacon grease as effectively as foil. If you use parchment, ensure your baking sheet has a good rim, and be extra careful when moving the pan, as grease can still spill over the edges.
- No flipping required: One of the greatest advantages of oven baking is the hands-off approach. You do not need to flip the bacon while it is baking, whether you’re using aluminum foil or a wire rack. The consistent heat of the oven cooks the bacon evenly on both sides. Resist the urge to open the oven door too frequently, as this can cause temperature fluctuations and extend cooking time.
- Crispiness vs. Greasiness: There’s a slight trade-off between crispiness and greasiness based on your cooking surface. Cooking the bacon directly on the foil typically results in the crispiest texture because the bacon cooks in its rendered fat. This method also offers minimal cleanup. Conversely, using a wire rack will yield less greasy bacon as the fat drips away, but it will generally be less crispy and might have a chewier texture. Keep in mind that a wire rack can also be more challenging to clean after cooking the bacon due to baked-on grease.
- Bacon crisps as it cools: It’s important to remember that bacon will continue to crisp up a little bit as it cools down outside the oven. Take this into consideration when you’re checking for doneness. It’s often better to remove it when it’s just shy of your desired crispiness, as it will reach perfection as it rests.
- Don’t overcrowd the pan: Always ensure your bacon strips are in a single layer with a little space between each piece. Overcrowding the pan can lead to steaming rather than crisping, resulting in soggy bacon. If you have a lot of bacon to cook, use two baking sheets.
- Start with a cold oven (optional): Some cooks prefer placing bacon in a cold oven and then turning the oven on. This allows the bacon to gradually render its fat as the oven preheats, resulting in very flat, crispy strips. While this adds to the overall cooking time, it’s a technique worth experimenting with for a different texture. For speed and general reliability, preheating to 400°F is usually sufficient.
How to Save and Use Bacon Grease
Don’t let that flavorful bacon grease go to waste! Keeping the extra bacon grease on hand is a fantastic culinary secret for adding incredible depth and richness to many dishes. It can be used in place of other oils or butter for cooking, imparting a savory smoky flavor that elevates everyday meals.
Saving bacon grease is simple and highly recommended:
- While the bacon fat is still liquid and warm (but not scalding hot), carefully pour it through a fine mesh strainer into a sturdy, heat-proof glass container, such as a mason jar or a dedicated grease saver. The fine mesh strainer will catch any small bits of bacon, ensuring clean, pure grease for future use. This is another excellent benefit of using foil: you can easily form a small pour spout by gently folding the ends of the foil together, making the transfer smooth and mess-free.
- Once the grease has been strained and is in its container, allow it to cool completely at room temperature. It will solidify as it cools.
- Cover the container tightly with a lid and place the bacon grease in your refrigerator. Stored properly, bacon grease can last for several months, ready to be used any time you want to infuse a dish with its unique flavor. It’s excellent for cooking eggs, sautéing vegetables, making crispy hash browns, popping popcorn, or even using in cornbread or biscuit recipes for an extra savory kick!
Storing and Freezing Cooked Bacon
One of the many benefits of cooking larger batches of bacon in the oven is the ease of meal prepping. If you don’t plan on eating all of your perfectly oven-baked bacon at once, it’s incredibly simple to save some for later. Having pre-cooked bacon on hand is a huge time-saver for busy mornings or for adding a burst of flavor to various meals.
- First and foremost, ensure the cooked bacon cools down completely to room temperature before storing. Storing warm bacon can create condensation, leading to soggy bacon and a shorter shelf life.
- Once cooled, seal the bacon in an airtight container or a heavy-duty zip-top bag. Removing as much air as possible will help maintain its freshness.
- Store the bacon in the refrigerator for up to 5 days. It’s perfect for quickly adding to breakfasts, lunches, or dinners throughout the week.
- For longer storage, you can also freeze cooked bacon for up to 3 months. Place the cooled bacon on a parchment-lined baking sheet and freeze until solid, then transfer the frozen strips to a freezer-safe container or bag. This prevents the strips from sticking together, allowing you to grab just a few pieces as needed.
Reheating is easy: simply warm it in the microwave for a few seconds, crisp it up in a hot skillet, or toss it in an air fryer for a minute or two. Pre-cooked bacon is excellent for crumbling over salads, adding to soups, layering in sandwiches, topping grain bowls, or mixing into omelets and quiches.
Delicious Recipes with Bacon
Now that you’ve mastered the art of cooking bacon in the oven, you’ll want plenty of delicious ways to incorporate this crispy, savory delight into your meals! Bacon isn’t just for breakfast; its smoky, salty flavor and satisfying crunch make it a versatile ingredient that can elevate everything from sweet treats to hearty main courses. Here are some of my favorite bacon recipes that showcase its incredible range:
- Bacon Maple Muffins with Brown Sugar Crumble
- Sweet Potato Skins with Sage Pesto and Bacon
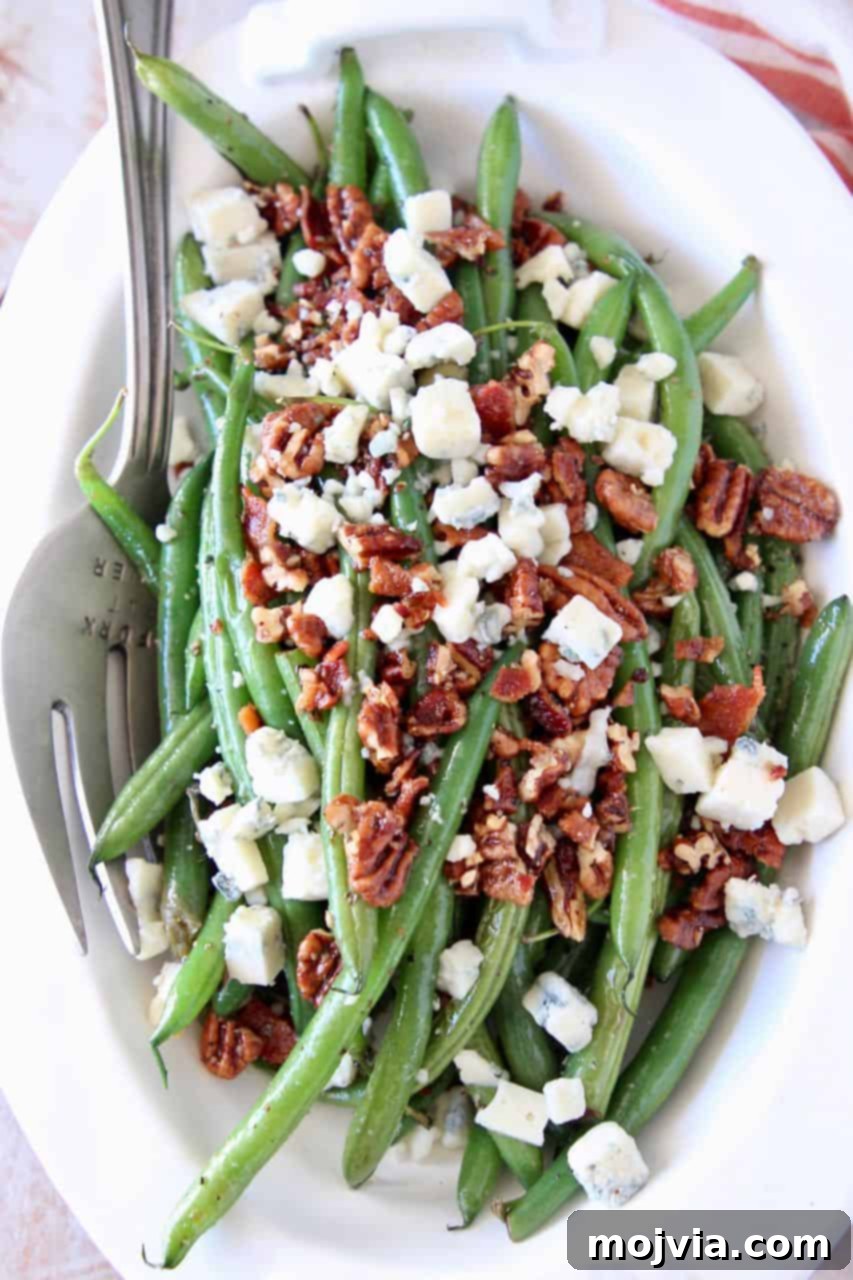
- Green Beans with Bacon, Pecans & Blue Cheese (pictured above)
- Chipotle Bacon Guacamole
- Bacon Tomato Avocado Pasta Salad
- Nutella Bacon Chocolate Chip Cookies
- Bacon Tomato Avocado Grilled Cheese
- Blue Cheese Salad (Chopped Wedge Salad)
- Loaded Mashed Potatoes
- Cheesy Bacon Crescent Rolls
- Breakfast Burger
- BBQ Bacon Burgers
And don’t miss this incredible recipe for how to make delicious Candied Bacon 4 ways for the ultimate sweet and salty snack or garnish!
From sweet and savory to hearty and light, bacon truly proves itself as a culinary superstar. Enjoy experimenting with these recipes and discovering new favorites!
Print Recipe
Pin Recipe
Rate this Recipe
How To Cook Bacon In The Oven
14
slices bacon
2
18
20
Whitney Bond
Breakfast, Brunch, Side Dish
American
Ingredients
-
1
pound
bacon
,
approximately 16 slices
Instructions
-
Preheat the oven to 400°F (200°C).
-
Place slices of bacon in an even layer (not overlapping) on a foil-lined baking sheet.
-
Place in the oven and bake for 18 minutes for perfectly crispy bacon.
-
Alternatively, for less greasy bacon, place slices on a wire rack over a foil-lined baking sheet and bake for 25 minutes.
-
Remove from the oven and use tongs to transfer the strips of bacon to a paper towel lined plate or cooling rack to drain off excess grease before serving.
Notes
- If using thick cut bacon, you will need to increase the cooking time. I recommend 23 minutes cooked directly on the foil, or 30 minutes, cooked on a wire rack.
- Always use a rimmed baking sheet in order to keep the grease from splattering in your oven.
- Cooking the bacon directly on the foil allows for the crispiest texture and minimal cleanup. Whereas the wire rack will result in less greasy bacon, but also less crispy. The wire rack can also be difficult to clean after cooking the bacon.
- Leftover cooked bacon can be stored in an airtight container in the refrigerator for up to 5 days, or stored in the freezer for up to 3 months.
Nutrition Facts
Calories
135
kcal
(7%)
Carbohydrates
0.4
g
Protein
4
g
(8%)
Fat
13
g
(20%)
Saturated Fat
4
g
(20%)
Polyunsaturated Fat
2
g
Monounsaturated Fat
6
g
Trans Fat
0.04
g
Cholesterol
21
mg
(7%)
Sodium
214
mg
(9%)
Potassium
64
mg
(2%)
Vitamin A
12
mg
Calcium
2
mg
Iron
0.1
mg
(1%)
Did you make this recipe?
Tag
@WhitneyBond on Instagram and hashtag it
#WBRecipes!