
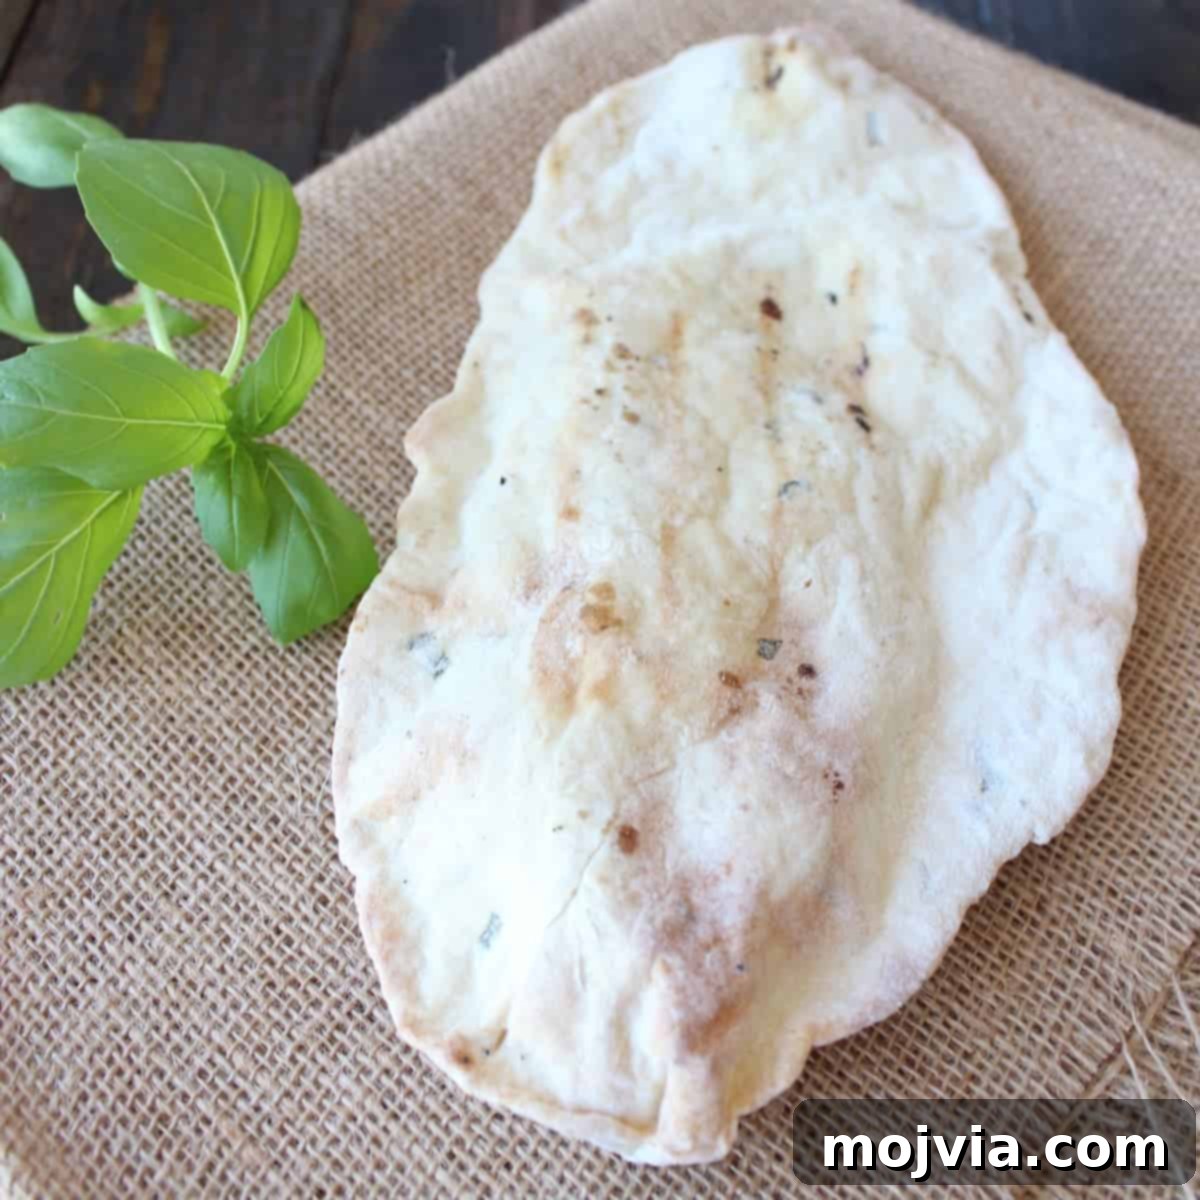
Discover the joy of crafting your own homemade fresh basil flatbread – a remarkably easy recipe that yields a perfectly crispy base, ideal for transforming into a delicious flatbread pizza or serving as a versatile accompaniment to any meal. Elevate your lunch or dinner with this aromatic and delightful bread!
Homemade Basil Flatbread: Your Gateway to Flavorful Feasts
There’s an undeniable satisfaction that comes from baking your own bread. From the comforting aroma that fills your kitchen to the first bite of a freshly made loaf, it’s a culinary experience unlike any other. Having explored the wonders of homemade pizza dough, I found myself eager to dive into its close relative: the versatile and equally delightful flatbread. This culinary exploration led to the creation of this incredible homemade basil flatbread recipe, a true game-changer for anyone who loves simple, fresh, and utterly delicious food that can be customized in countless ways.
What Exactly is Flatbread? A Culinary Canvas for Endless Possibilities
Flatbread is often considered the sophisticated, thin, and crispy sibling of traditional pizza. While both share a common lineage of leavened or unleavened dough baked to perfection, flatbread distinguishes itself with its generally thinner profile and often a more rustic, chewy, yet wonderfully crispy texture. It’s a true culinary canvas, offering endless possibilities for topping with an array of delicious ingredients or simply serving as a flavorful accompaniment to a myriad of dishes, from hearty soups and crisp salads to creamy dips.
The beauty of flatbread lies in its inherent simplicity and incredible adaptability. With origins tracing back to ancient civilizations, flatbreads have been a fundamental staple food across diverse cultures for thousands of years. Think of Indian naan, Middle Eastern pita, Italian focaccia, or Mexican tortillas – each embodies the spirit of flatbread with its unique regional flair, yet all share the core concept: a simple dough, expertly flattened and baked, ready to absorb and complement an astonishing variety of flavors.
For this particular recipe, we’re infusing our flatbread with the vibrant, slightly peppery, and sweet essence of fresh basil. This thoughtful addition transforms it into an aromatic base that promises to elevate any meal to new heights. My initial inspiration for this homemade basil flatbread was to serve as the perfect foundation for a gourmet Grilled Peach Flatbread with Goat Cheese and Balsamic Reduction – and the outcome was nothing short of crisp, flavorful perfection! However, I encourage you not to limit yourself; this basil flatbread is exceptionally versatile and can be topped with virtually anything your palate desires, making it a go-to for quick lunches, elegant appetizers, or satisfying dinners.
Why Opt for Homemade Flatbread? The Unrivaled Benefits of Baking from Scratch
While the convenience of store-bought flatbreads is undeniable, embarking on the journey of making your own at home unveils a wealth of advantages that extend far beyond mere taste:
- Unmatched Freshness and Irresistible Flavor: There’s simply no comparison to the sublime taste and intoxicating aroma of freshly baked bread. The moment your basil-infused flatbread emerges from the grill or oven, its fragrant oils are at their peak, creating a sensory experience that pre-packaged alternatives can’t replicate.
- Complete Control Over Ingredients: When you bake from scratch, you gain full transparency regarding what goes into your flatbread. This allows you to consciously avoid unwanted preservatives, artificial flavors, or additives often found in commercial products. It’s a significant benefit, especially for those managing specific dietary preferences, allergies, or health-conscious lifestyles.
- Customization to Your Heart’s Content: Homemade truly means tailor-made. Craving a stronger basil presence? A subtle hint of garlic powder? Perhaps a whisper of red pepper flakes for a gentle kick? Making your own flatbread empowers you to precisely adjust the flavors and ingredients to suit your exact preferences, transforming a recipe into your signature creation.
- A Budget-Friendly Culinary Adventure: The core ingredients for bread making – flour, yeast, salt, and water – are remarkably inexpensive. This makes homemade flatbread a significantly more economical choice compared to often pricey, specialty store-bought versions, allowing you to enjoy gourmet flavors without breaking the bank.
- A Therapeutic and Rewarding Experience: The tactile process of kneading dough can be incredibly relaxing, meditative, and profoundly rewarding. It’s a wonderful opportunity to slow down, engage your senses, and connect intimately with the food you prepare. There’s immense satisfaction in transforming simple ingredients into something delicious with your own hands.
- Effortlessly Impress Your Guests: Serving warm, fragrant, homemade flatbread or crafting personalized flatbread pizzas will undoubtedly leave a lasting impression on family and friends. It elevates any meal, making casual gatherings feel special and demonstrating a thoughtful touch that store-bought items simply cannot convey.
The Star of the Show: The Magic of Fresh Basil
In this recipe, basil is far more than just a decorative garnish; it stands as a powerful flavor enhancer that imparts a distinctive sweet, yet savory and subtly peppery note to the flatbread. When fresh basil is finely chopped and thoughtfully incorporated into the dough, its volatile aromatic oils are released and gently infused throughout the bread during the baking process. This imbues every single bite with an unmistakable fragrance and a vibrant, fresh taste that sets this flatbread apart.
The beauty of basil lies in its versatility, allowing it to pair exquisitely with a wide spectrum of toppings. Imagine classic combinations like ripe tomatoes and creamy mozzarella, or venture into more innovative pairings such as the grilled peaches we mentioned earlier. The basil provides a perfect aromatic backdrop, enhancing without overpowering.
To ensure the best possible flavor and aroma for your flatbread, selecting high-quality fresh basil is paramount. Look for leaves that are brilliantly green, plump, and free from any signs of wilting, discoloration, or dark spots. For optimal freshness until you’re ready to use it, store your basil at room temperature by placing the stems in a glass of water, much like you would a bouquet of flowers. This simple tip will help preserve its vibrant flavor and potent aroma, ensuring your homemade basil flatbread is as delicious as possible.
Essential Ingredients for Your Basil Flatbread Masterpiece
Crafting this exceptionally delicious basil flatbread requires just a handful of fundamental ingredients. Each component plays a critical and distinct role in contributing to the perfect texture, structure, and most importantly, the incredible flavor of your finished bread:
- 1 package active dry yeast: This essential leavening agent is responsible for the flatbread’s delightful lift and airy, open crumb texture. Ensuring your yeast is fresh and active is the first step to a successful rise.
- ½ tsp granulated sugar: A small but mighty ingredient, sugar serves as immediate fuel for the yeast, helping to activate it quickly and encouraging a robust rise. It also contributes subtly to the browning of the crust.
- 1 ¾ cup bread flour: Opting for bread flour over all-purpose is key here. Its higher protein content facilitates the development of strong gluten networks, which are crucial for giving the flatbread its characteristic chewy resilience while still allowing for a wonderfully crisp exterior.
- 1 tsp kosher salt: Salt is indispensable not only for seasoning but also for enhancing the overall flavor profile of both the bread and the fresh basil within. Furthermore, it plays a vital role in regulating the yeast’s activity and strengthening the dough’s structural integrity.
- ¼ cup fresh basil, finely chopped: The vibrant heart of this recipe! Finely chopped fresh basil is distributed throughout the dough, infusing every single bite with its unmistakable, bright, and aromatic essence.
- ¾ cup warm water: The temperature of your water is critical. Aim for warm water, ideally between 105-115°F (40-46°C). This temperature range is perfect for activating the yeast effectively; water that’s too hot can kill the yeast, while water that’s too cold will inhibit its activation.
- 1 tbsp olive oil: Beyond its delicious flavor, olive oil contributes significantly to the dough’s texture, making the interior rich and tender while promoting a desirable crispy exterior. It also helps lubricate the dough, preventing it from sticking to the bowl during its crucial rising period.
Step-by-Step Instructions: Crafting Your Aromatic Basil Flatbread from Scratch
Follow these detailed instructions to create a homemade basil flatbread that will truly impress with its fresh flavor and perfect texture:
- Activate the Yeast and Combine Dry Ingredients: Begin by gathering your dry ingredients. In a large mixing bowl, combine the entire package of active dry yeast, the granulated sugar, bread flour, kosher salt, and the finely chopped fresh basil. Whisk these ingredients together thoroughly to ensure that the basil is evenly distributed throughout the flour mixture and all dry components are well-integrated.
- Form the Dough Ball: Gradually pour the pre-measured warm water into the bowl with the dry ingredient mixture. Using a sturdy wooden spoon, a dough whisk, or clean hands, begin to mix the ingredients. Continue to mix and gently work the dough within the bowl until a shaggy, cohesive ball of dough forms. At this initial stage, the dough might feel somewhat sticky to the touch, which is perfectly normal and expected for a well-hydrated dough.
- First Rise (Proofing): Prepare for the dough’s first rise by lightly coating another large mixing bowl with the specified 1 tablespoon of olive oil, ensuring the entire inner surface of the bowl is well-greased. Carefully transfer the freshly formed dough ball into this oiled bowl. Turn the dough once to ensure its entire surface is lightly coated with the olive oil; this crucial step prevents the dough from drying out and forming a crust during the rising process. Cover the bowl tightly with plastic wrap or a clean, damp kitchen towel. Place the covered bowl in a warm, draft-free location in your kitchen for approximately 1 hour. During this essential proofing period, the yeast will become active, and the dough should visibly expand, roughly doubling in its original size.
- Kneading and Shaping Preparations: Once your dough has successfully risen and doubled in size, gently “punch it down” to release the accumulated air. Transfer the dough from the bowl onto a clean, lightly floured work surface. Knead the dough vigorously for 5-7 minutes. This critical kneading process develops the gluten within the flour, which is essential for giving the flatbread its desirable chewy and elastic texture. As you knead, the dough will transform, becoming noticeably smoother, more pliable, and less sticky.
- Portion and Roll: Now, divide the thoroughly kneaded dough into 3 or 4 equal portions. The number of portions you choose will depend on your preference for the size of your final flatbreads; I personally find that 3 medium-sized flatbreads work perfectly. Take one portion of dough and, on your lightly floured surface, use a rolling pin to roll it out into a thin, even disc or an oval shape. Aim for a thickness of approximately ¼ inch. The thinner and more consistent you roll them, the crispier and more evenly cooked your flatbreads will be. Repeat this process with the remaining dough portions until all are shaped.
- Grilling the Flatbread: Prepare your grill by preheating it to a consistent medium-high heat. Once the grill is hot, carefully place one or two of your rolled flatbreads directly onto the clean grill grates. It’s important not to overcrowd the grill, as this can lower the temperature and hinder even cooking. Grill each side for approximately 8-10 minutes. During this phase, you should start to see beautiful golden-brown spots forming and the flatbread beginning to firm up.
- Second Side and Doneness: After the initial grilling, use tongs to carefully flip the flatbreads to the other side. Continue grilling for an additional 8-10 minutes. During this second phase, the flatbreads should develop more pronounced grill marks, achieve a rich golden-brown color, and excitingly, puff up slightly with delightful bubbles, indicating they are cooking beautifully. The interior should be cooked through, tender, and moist, while the exterior will develop that highly coveted, satisfying crispness.
- Serve Warm and Enjoy: Once perfectly grilled to your liking, carefully remove the basil flatbreads from the grill. They are truly at their best when served warm. You can enjoy them simply on their own, allowing the fresh basil flavor to shine, or immediately top them with your favorite ingredients to create a spectacular flatbread pizza, an inviting appetizer, or a delightful accompaniment to your main course.
Tips for Success: Achieve Perfect Basil Flatbread Every Single Time
Making homemade flatbread is a rewarding experience, and with a few key tips, you can ensure your basil flatbread turns out perfectly crisp and flavorful every time:
- Ensure Your Yeast is Active: The success of any yeast dough hinges on active yeast. If your warm water isn’t in the ideal temperature range (105-115°F or 40-46°C) – either too cold or too hot – your yeast may not activate properly, and your dough won’t rise. A simple test: combine the yeast with a pinch of sugar in warm water; it should become visibly foamy within 5-10 minutes if active.
- Find a Warm, Draft-Free Rising Place: A consistent warm environment is crucial for proper dough rising. Ideal spots include a sunny corner on your kitchen counter, near a pilot light on your stove, or even in a slightly warmed (then turned off) oven. Avoid cold drafts, which can significantly slow down or halt the proofing process.
- Avoid Over-Flouring During Kneading: While a lightly floured surface is necessary to prevent sticking while kneading and rolling, be cautious not to add excessive flour. Too much added flour can alter the dough’s hydration, resulting in a flatbread that is tough, dry, and less enjoyable. Use just enough to manage the stickiness.
- Roll Thin and Evenly for Best Texture: Strive for consistent thickness when rolling out each portion of dough. An even thickness ensures that your flatbreads cook uniformly, leading to that coveted balance of a tender interior and a uniformly crispy exterior. Uneven spots will cook inconsistently.
- Monitor Closely to Prevent Overcooking: Flatbreads cook relatively quickly, especially on a hot grill. Keep a close eye on them during the cooking process. Overcooking can lead to a dry, brittle, and hard texture, losing the desirable tender-crisp quality we’re aiming for. Look for golden-brown spots and slight puffing.
- Oven Baking Alternative for No-Grill Days: Don’t have an outdoor grill or prefer baking indoors? No problem! You can achieve fantastic results by baking these flatbreads in a preheated oven. Place them on a baking stone or a heavy baking sheet in an oven preheated to 450°F (230°C) for approximately 8-12 minutes, flipping halfway through, until they are golden, puffed, and cooked through.
Delicious Serving Suggestions: Beyond Just a Pizza Base
While this homemade basil flatbread is undeniably a stellar base for any flatbread pizza, its versatility extends far beyond that! Here are numerous ideas to inspire your culinary creativity and showcase this aromatic bread in diverse ways:
- Gourmet Flatbread Pizzas:
- Classic Margherita: A timeless combination of fresh mozzarella cheese, slices of ripe heirloom tomatoes, a delicate drizzle of extra virgin olive oil, and an abundance of fresh basil leaves added after cooking.
- Mediterranean Delight: Spread a generous layer of creamy hummus as the base, then top with an assortment of grilled vegetables (such as zucchini ribbons, colorful bell peppers, and red onion), crumbled feta cheese, and briny Kalamata olives.
- Spicy Chicken & Blue Cheese: Utilize shredded cooked chicken tossed in your favorite buffalo sauce, thinly sliced red onion, and a generous sprinkle of pungent blue cheese crumbles.
- Hearty Breakfast Flatbread: A unique twist for brunch! Top with fluffy scrambled eggs, your choice of crispy bacon or savory sausage, and a melting layer of sharp cheddar cheese.
- Pesto & Prosciutto: A vibrant pesto spread, thinly sliced prosciutto, fresh mozzarella, and a sprinkle of pine nuts.
- Appetizer or Elegant Side Dish:
- With a Trio of Dips: Serve the warm flatbread, cut into wedges, alongside a selection of flavorful dips such as creamy hummus, refreshing tzatziki, smoky baba ghanoush, or a decadent warm artichoke dip.
- Elevated Garlic Bread Style: Brush generously with a mixture of melted garlic butter, finely chopped fresh parsley, and a sprinkle of grated Parmesan cheese for an instant crowd-pleaser that rivals any garlic bread.
- Perfect Companion to Salads: Serve as a rustic and flavorful accompaniment to a fresh garden salad, a vibrant Greek salad, or a hearty Caesar salad, adding a satisfying texture.
- Soup Dipper Extraordinaire: Tear the warm flatbread into rustic pieces and use them to scoop up hearty stews, rich lentil soups, or creamy tomato bisque, adding substance and flavor.
- Unique Sandwich Wraps or Paninis: Use larger, more pliable flatbreads as a distinctive and delicious wrapper for gourmet grilled chicken sandwiches, flavorful falafel, or roasted vegetable paninis. Their soft yet structured texture holds fillings beautifully.
Storing Your Homemade Basil Flatbread for Lasting Enjoyment
While homemade basil flatbread is often devoured quickly, if you find yourself with any delicious leftovers (a rare but welcome occurrence!), here’s how to store them to maintain their freshness and flavor:
- At Room Temperature: Once your flatbreads have completely cooled down to room temperature, they can be stored in an airtight container or a large Ziploc bag. They will retain their best quality for up to 2-3 days on the counter.
- Refrigeration: For a slightly longer storage duration, you can refrigerate the cooled flatbreads for up to 5 days. When you’re ready to enjoy them again, reheat gently in a toaster oven, a conventional oven, or even briefly on a grill or in a dry skillet for a few minutes until they are warmed through and regain some of their original crispness.
- Freezing Unbaked Dough: If you’ve made a larger batch of dough, the unbaked portions can be individually wrapped tightly in plastic wrap, then placed in a freezer-safe bag. They can be frozen for up to 2-3 weeks. When you’re ready to use, thaw the dough overnight in the refrigerator before proceeding with the shaping and grilling instructions from step 5 onwards.
- Freezing Cooked Flatbreads: Cooked basil flatbreads can also be frozen for longer-term storage, up to 1 month. Allow them to cool completely, then wrap each flatbread individually in plastic wrap, and finally place them all together in a large freezer-safe bag. To reheat, you can place them directly from frozen into a hot oven (around 350°F/175°C) or on a preheated grill until warmed through and crispy.
Recipe Summary: Homemade Basil Flatbread
This fantastic recipe is designed to yield approximately 3 medium-sized, perfectly grilled basil flatbreads, making it ideal for a family meal, a small gathering, or for enjoying as delicious leftovers throughout the week. The active preparation time for this recipe is efficiently managed at around 20 minutes, while the total cooking time on the grill will take approximately another 20 minutes. Please remember to factor in the crucial 1-hour rising period for the dough, which brings the estimated total time from beginning to your first delicious bite to approximately 1 hour and 40 minutes.
Author: Whitney Bond
Course: Side Dish, Appetizer, Main Course (when topped)
Cuisine: Italian-Inspired
Ingredients
- ¼ oz active dry yeast (equivalent to 1 standard packet)
- ½ tsp granulated sugar
- 1 ¾ cup bread flour
- 1 tsp kosher salt
- ¼ cup fresh basil, finely chopped
- ¾ cup warm water (105-115°F / 40-46°C)
- 1 tbsp olive oil
Instructions
- In a large mixing bowl, combine the active dry yeast, granulated sugar, bread flour, kosher salt, and finely chopped fresh basil.
- Pour the warm water into the dry mixture and mix thoroughly until a solid, cohesive ball of dough forms.
- Lightly coat another large bowl with the olive oil, then transfer the dough inside, turning it once to coat the entire surface of the dough with oil.
- Cover the bowl tightly with plastic wrap and allow the dough to rise in a warm, draft-free place for 1 hour, or until it has roughly doubled in size.
- After the dough has risen, gently punch it down to release the air. Transfer the dough to a lightly floured surface and knead for 5-7 minutes until it becomes smooth and pliable.
- Divide the kneaded dough into 3 or 4 equal portions, then roll each portion out into a thin, even disc or oval, about ¼ inch thick.
- Preheat your grill to medium-high heat. Carefully place the rolled flatbreads onto the hot grill grates (without overcrowding) and grill for 8-10 minutes.
- Flip the flatbreads and continue to grill for an additional 8-10 minutes, or until they are golden brown, puffed with bubbles, and beautifully crisp.
- Remove the perfectly grilled basil flatbreads from the grill. Serve them warm, either plain or topped with your favorite ingredients to create a delicious flatbread pizza or appetizer. Enjoy!
Nutrition Facts (per serving, approximate, based on 3 servings)
- Calories: 315 kcal (16% Daily Value)
- Carbohydrates: 54g (18% Daily Value)
- Protein: 9g (18% Daily Value)
- Fat: 6g (9% Daily Value)
- Sodium: 781mg (33% Daily Value)
- Potassium: 95mg (3% Daily Value)
- Fiber: 2g (8% Daily Value)
- Vitamin A: 105mg (2% Daily Value)
- Vitamin C: 0.3mg
- Calcium: 14mg (1% Daily Value)
- Iron: 0.7mg (4% Daily Value)