
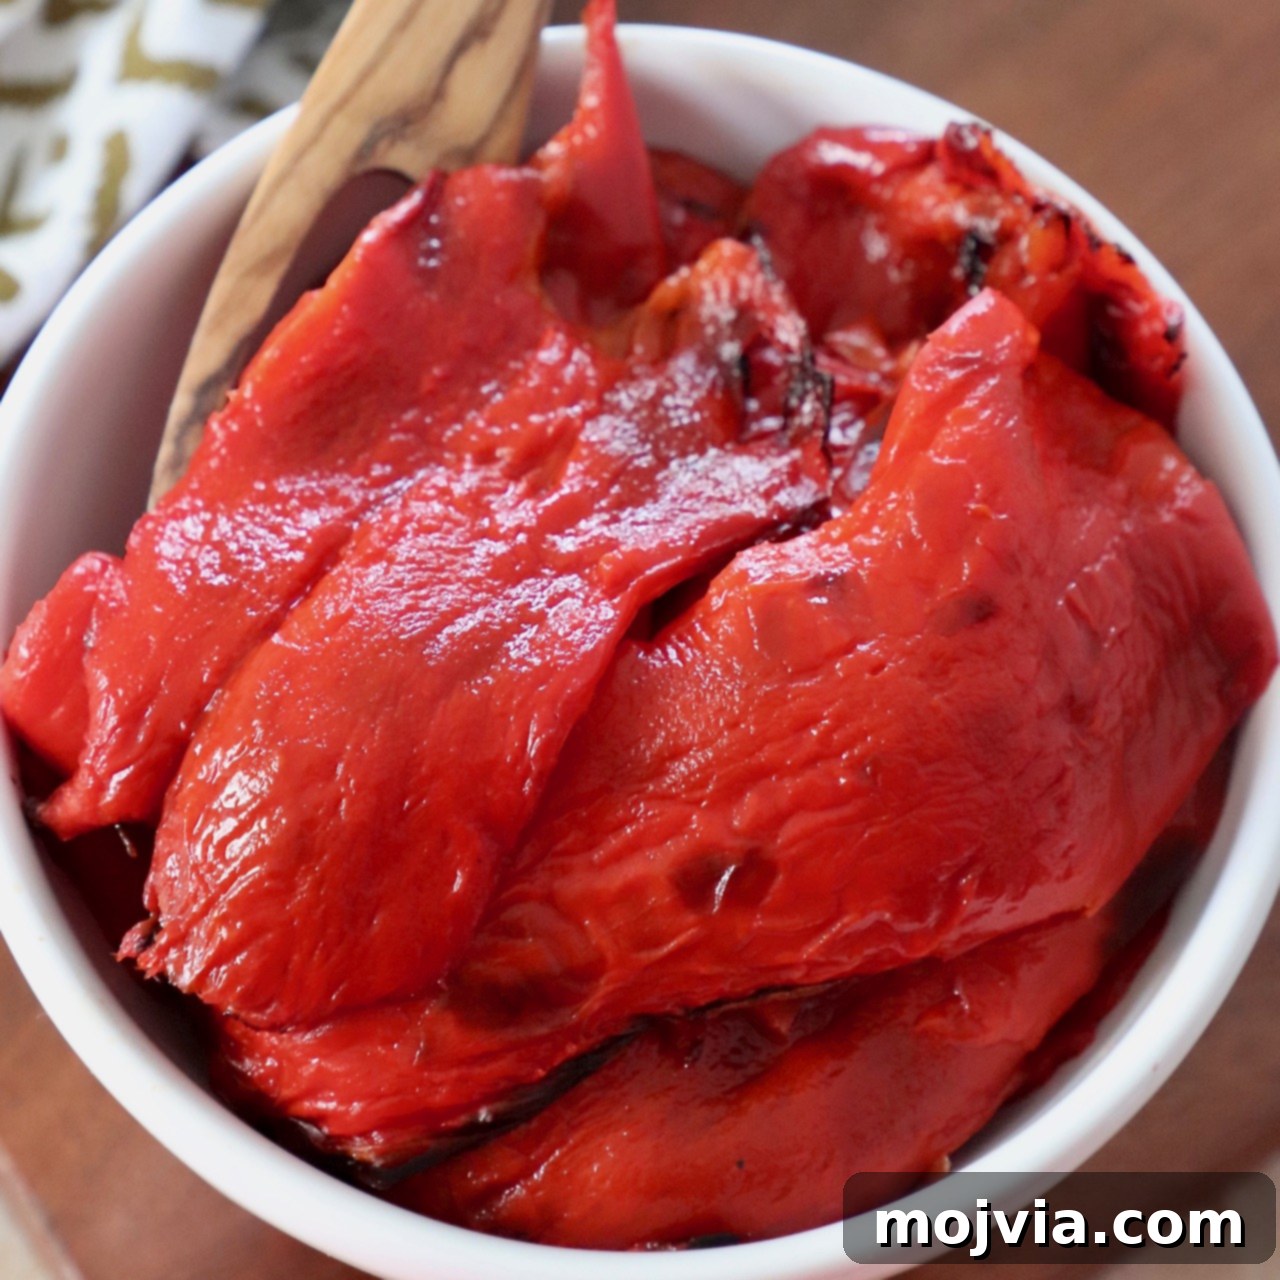
Homemade Roasted Red Peppers: Easy Recipe & Endless Flavor!
Tired of expensive, dull jarred peppers? Discover how incredibly simple it is to make your own Roasted Red Peppers at home with this foolproof recipe. Elevate everyday dishes by adding these sweet, smoky peppers to pasta, vibrant salads, hearty soups, or gourmet sandwiches for an unparalleled burst of flavor!
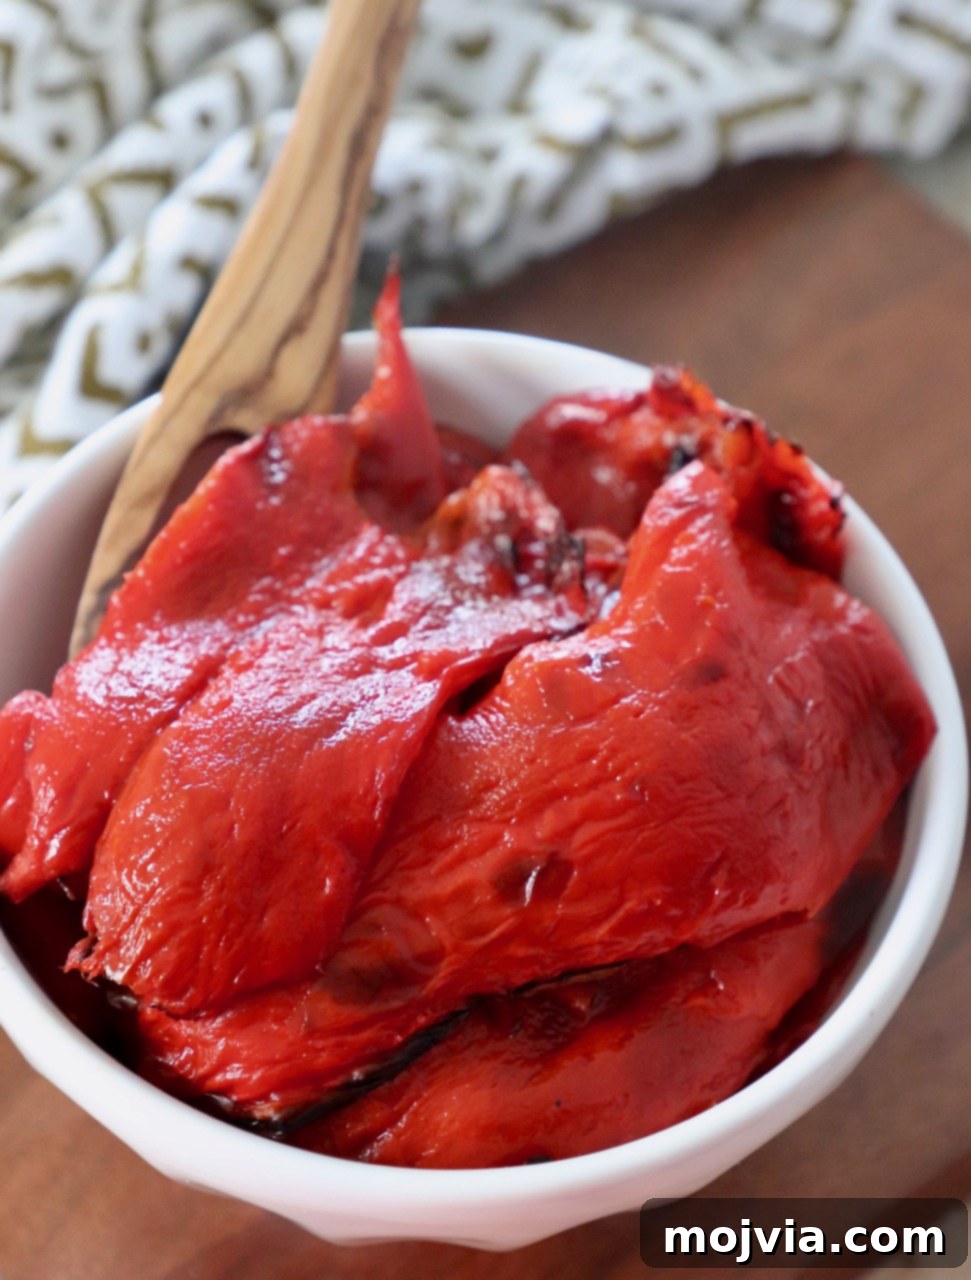
Table of Contents
- Why Roast Your Own Red Peppers?
- The Magic Behind Roasting Bell Peppers
- Essential Equipment & Ingredients
- Step-by-Step Instructions: How to Roast Red Peppers
- Expert Tips for Perfect Roasted Peppers
- Storage & Preservation Options
- Endless Culinary Uses for Roasted Red Peppers
- Flavor Enhancements & Variations
- Frequently Asked Questions (FAQ)
- More Kitchen Tutorials
- Printable Recipe Card
Why Ditch the Jar? The Unbeatable Benefits of Homemade Roasted Red Peppers
Roasted bell peppers are a culinary staple, cherished for their naturally sweet taste and deep, smoky undertones. While convenient, store-bought jars often fall short in flavor and can contain added preservatives or excessive sodium. Making your own roasted red peppers at home is surprisingly simple, incredibly rewarding, and yields a product far superior in taste and texture.
The roasting process itself is transformative. High heat coaxes out the inherent sweetness of the peppers, caramelizing their sugars and deepening their vibrant color. This creates a complex, rich flavor that can elevate almost any dish you add it to. Beyond the unparalleled taste, roasting your own peppers offers several compelling advantages:
- Superior Flavor & Texture: Homemade roasted peppers boast a freshness and depth of flavor that jarred versions simply can’t match. The texture is perfectly tender without being mushy, retaining a slight bite that’s often lost in processed alternatives.
- Cost-Effective: Bell peppers are often affordable, especially when in season. Roasting a batch at home is significantly cheaper than continuously buying jars of pre-roasted peppers, saving you money in the long run.
- No Unnecessary Additives: When you roast your own, you control the ingredients. There are no mysterious preservatives, excessive salts, or artificial flavors – just pure, natural goodness.
- Customizable: Want to add a hint of garlic, a sprinkle of herbs, or a dash of spice? When you make them yourself, you can customize the flavor profile to your exact preferences.
- Easy & Rewarding: The process is straightforward and requires minimal hands-on time. The satisfaction of transforming fresh bell peppers into a versatile gourmet ingredient is immense.
So, get ready to experience a whole new level of flavor by incorporating these homemade roasted red peppers into your cooking!
Unlocking Flavor: The Magic Behind Roasting Bell Peppers
Roasting isn’t just a cooking method; it’s a culinary alchemy that transforms simple bell peppers into a sweet, smoky, and intensely flavorful ingredient. When peppers are exposed to high heat, a few magical things happen:
- Caramelization: The natural sugars within the bell peppers begin to caramelize, leading to a profound sweetness and a rich, slightly smoky depth that wasn’t present in their raw state. This is where much of the signature roasted pepper flavor comes from.
- Softening of Texture: The fibrous cell walls of the peppers break down, resulting in a wonderfully tender, melt-in-your-mouth texture. Unlike boiling or steaming, roasting retains some structural integrity, preventing them from becoming overly watery or mushy.
- Concentration of Juices: As the peppers roast, some moisture evaporates, concentrating their natural juices and intensifying their inherent flavor.
- Charring for Smoky Notes: The blistering and blackening of the skin impart a delightful smoky aroma and taste. This char is not only visually appealing but also a key component of the roasted pepper’s complex flavor profile.
While some methods use a gas flame, grill, or broiler, oven roasting is my preferred technique. It’s hands-off, produces an even char, and ensures the peppers achieve that perfect balance of tenderness without losing their structural integrity. The result is a versatile ingredient ready to enhance countless dishes.
Essential Equipment and Simple Ingredients for Roasting
You’ll be delighted by how few items you need to create these flavor-packed roasted red peppers. Chances are, you already have everything on hand!
Key Ingredients:
- Bell Peppers: Red bell peppers are classic for roasting due to their inherent sweetness and beautiful color, but yellow or orange peppers also work wonderfully. Choose firm, blemish-free peppers.
- Optional: A touch of olive oil, salt, and black pepper to enhance the natural flavors.
Basic Equipment:
- Sharp Knife: Essential for efficiently cutting the peppers and removing membranes.
- Cutting Board: For safe and stable prep work.
- Rimmed Baking Sheet: A rimmed sheet prevents any juices from spilling into your oven.
- Parchment Paper or Aluminum Foil: To line the baking sheet, preventing sticking and making cleanup a breeze.
- Large Zip-Top Bag or Bowl with a Lid: Crucial for the steaming process after roasting, which helps loosen the skins for easy peeling.
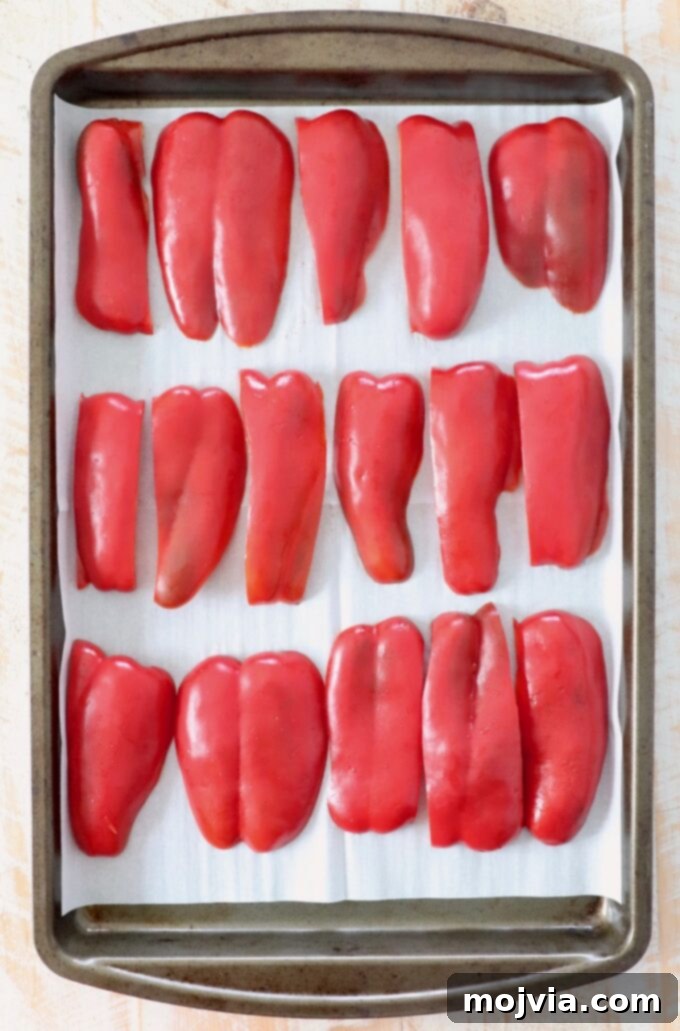
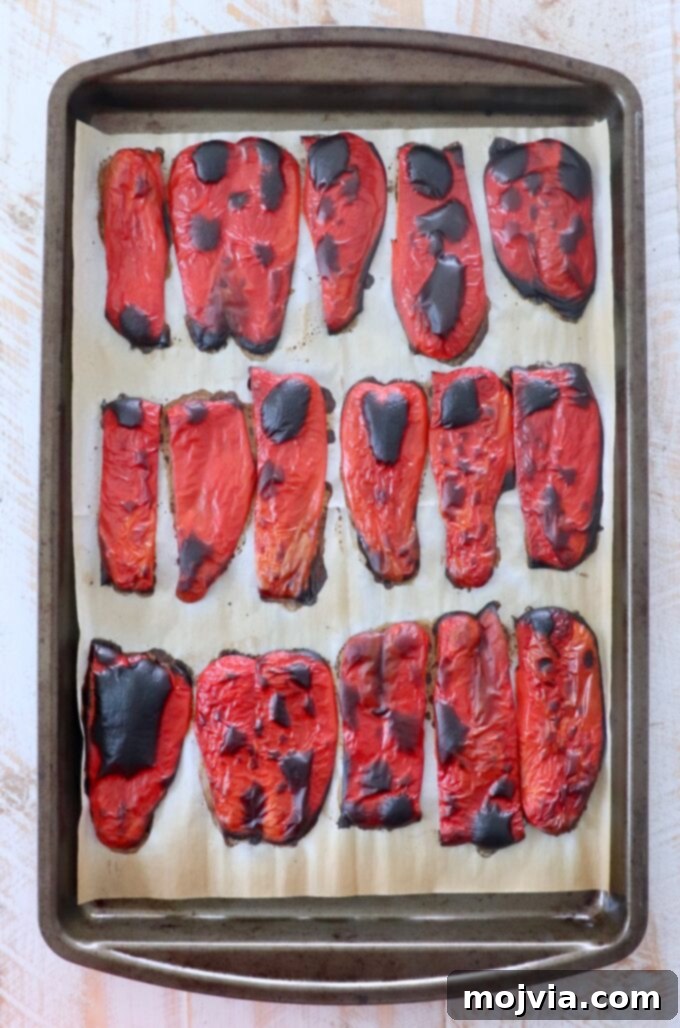
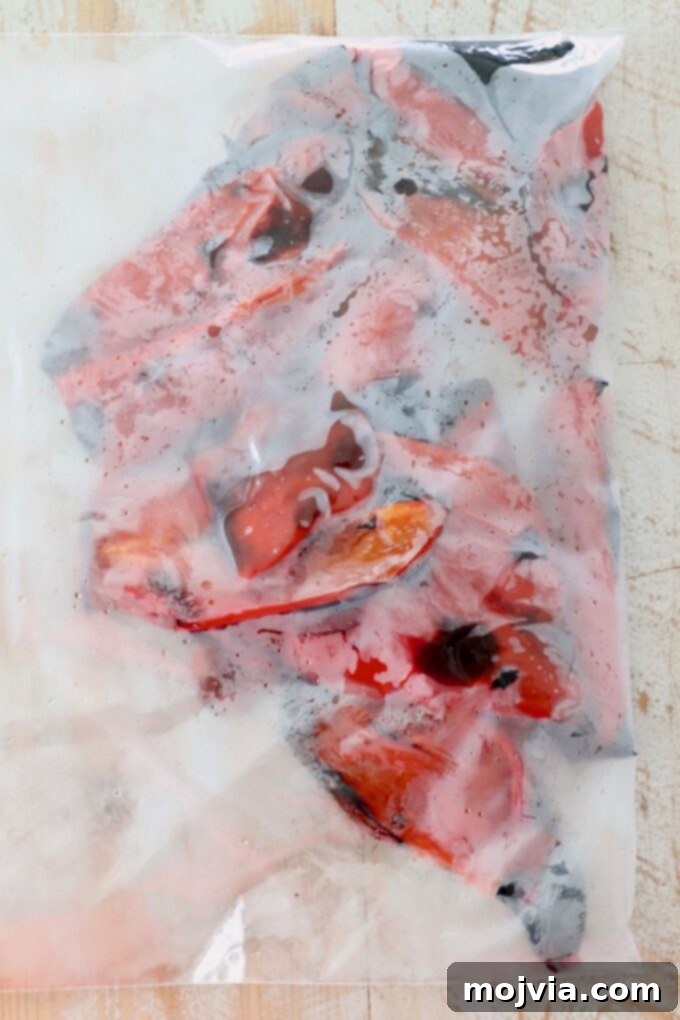
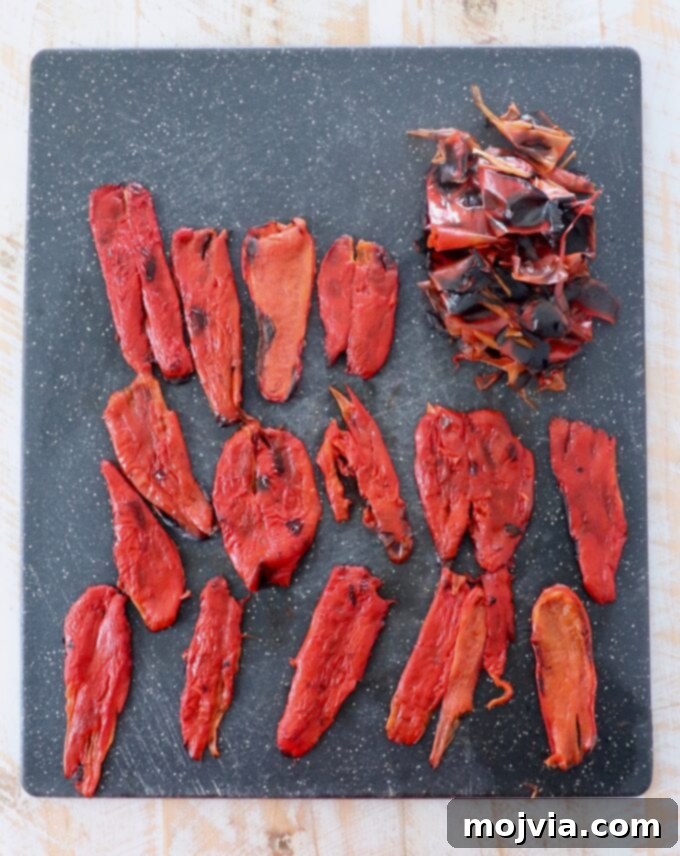
Step-by-Step Guide: How to Roast Red Peppers to Perfection
- Preheat Your Oven: Start by preheating your oven to a high temperature of 450°F (230°C). This high heat is essential for quickly charring the skins and tenderizing the flesh.
- Prepare the Baking Sheet: Line a rimmed baking sheet with parchment paper. This simple step is a game-changer for easy cleanup and ensures your peppers won’t stick. Aluminum foil can also be used.
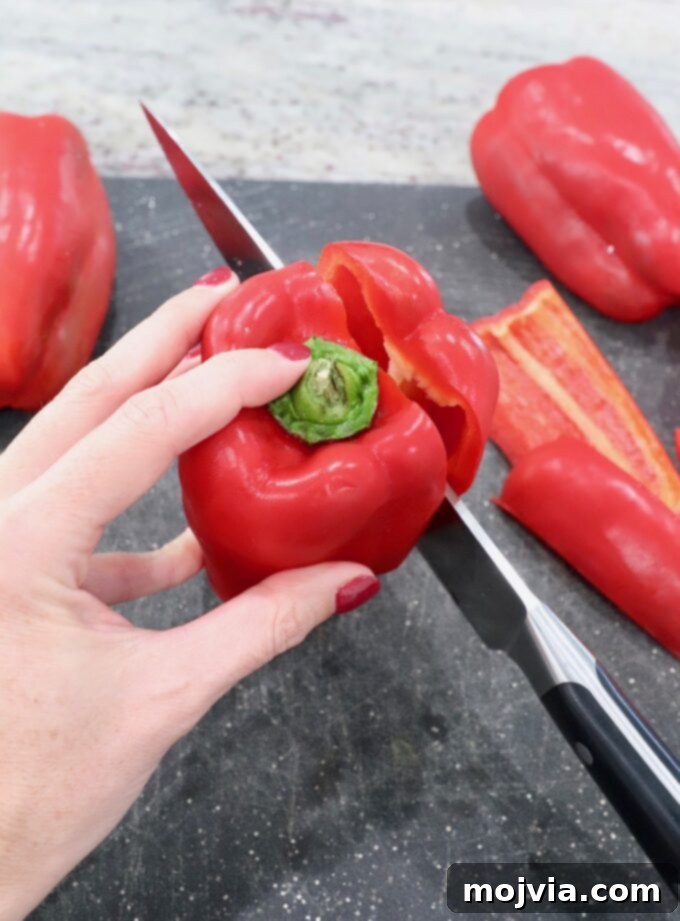
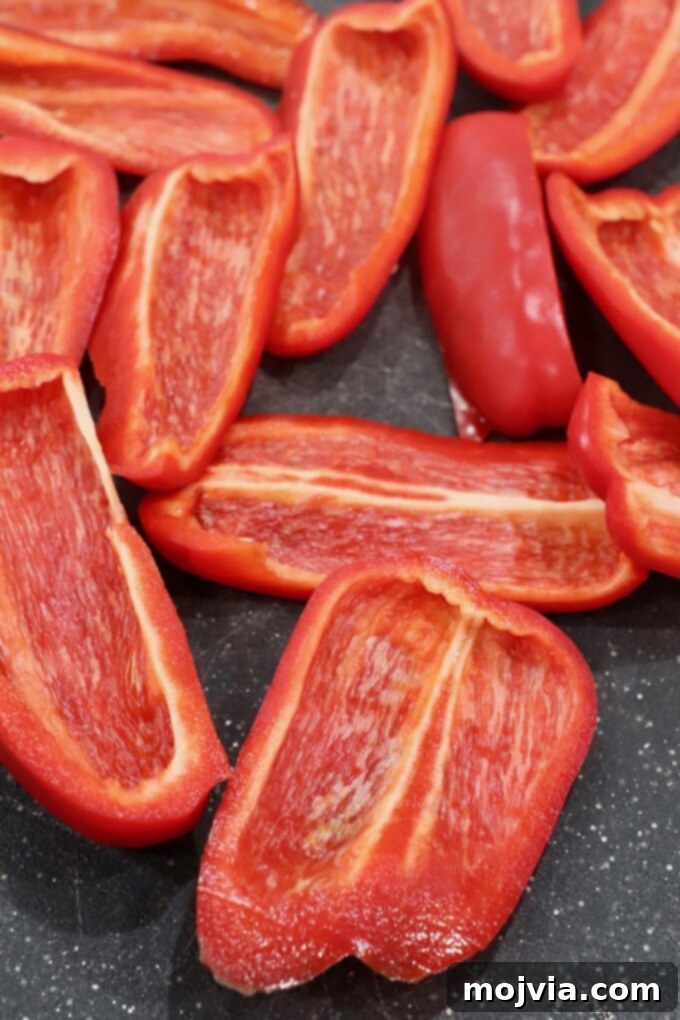
- Cut & Clean the Peppers: Using a sharp knife, carefully cut each bell pepper into 4 large slices. To do this, stand the bell pepper upright with the stem facing up. Make vertical cuts down each of the main ‘sides’ of the pepper, avoiding the core. Discard the stem and the inner white membrane (ribs) along with any seeds. Removing the membrane is important as it can be bitter.
- Arrange on Baking Sheet: Place the cut peppers on the lined baking sheet with the skin side facing up (or the cut side facing down). Arrange them in a single layer, ensuring they don’t overlap, which allows for even roasting and charring. For extra flavor, you can lightly brush the skin with a little olive oil and sprinkle with a pinch of sea salt and freshly ground black pepper.
- Roast Until Charred: Bake in the preheated oven for 25-30 minutes. Keep a close eye on them; the goal is for the skins to become completely blackened, blistered, and slightly shriveled. This charring indicates that the peppers are sweet and smoky, and their skins will be easy to peel.
- Steam for Easy Peeling: As soon as the peppers are done, carefully remove the baking sheet from the oven. Using tongs, immediately transfer the hot roasted peppers to a large zip-top bag and seal it tightly, or place them in a bowl and cover securely with a lid or plastic wrap. Let them steam for at least 15-20 minutes. This creates a moist environment that loosens the skins, making them incredibly easy to slip off.
- Peel & Enjoy: Once the peppers have steamed and are cool enough to handle, open the bag or lid. Gently peel the blackened skins from the peppers. The skins should come off effortlessly. Discard the peeled skins. Your homemade roasted red peppers are now ready to be used in your favorite recipes!
Expert Tips for Mastering Oven Roasted Red Peppers
- The Art of Steaming: Do not skip the steaming step! It’s the secret to effortlessly peeling the skins. If a zip-top bag isn’t handy, a bowl covered tightly with a lid, plate, or plastic wrap works just as well. You can also wrap them in aluminum foil or place them in a paper bag. The key is to trap the steam.
- Lining is Key for Cleanup: Always line your baking sheet with parchment paper or foil. This not only prevents the peppers from sticking to the pan but also makes cleanup a breeze, as charred bits can be tough to scrub off.
- Boost Flavor with Seasoning: While delicious on their own, a light drizzle of olive oil, a sprinkle of sea salt, and a dash of black pepper before roasting can significantly enhance the peppers’ natural sweetness and smoky depth. Consider adding a pinch of garlic powder or dried Italian herbs for an aromatic touch.
- Pre-Cut for Convenience: If you plan to use your roasted peppers in salads, on pizza, or as part of a dip, consider cutting them into strips or dicing them before storing. This foresight will save you precious time during meal prep later.
- Experiment with Other Peppers: This roasting method isn’t exclusive to red bell peppers! It works beautifully with yellow and orange bell peppers, offering varying degrees of sweetness. You can also apply this technique to other kinds of chili peppers for a spicier roasted element, just be mindful that cooking times may need to be adjusted based on the size and thickness of the pepper.
- Don’t Overcrowd the Pan: Ensure your pepper slices are in a single layer and not touching. Overcrowding will steam the peppers instead of roasting them, preventing them from developing that desirable char and sweetness.
Storage and Preservation: Keeping Your Roasted Peppers Fresh
Once you’ve gone to the effort of roasting these delicious peppers, you’ll want to ensure they stay fresh and flavorful for as long as possible. Proper storage is key!
Refrigerator Storage:
Peeled, roasted red peppers can be stored in an airtight container in the refrigerator for up to 10 days. For best results and to maximize their shelf life, you can submerge them in a small amount of their natural juices or cover them with a thin layer of olive oil. This not only helps preserve them but also infuses them with additional flavor, making them perfect for antipasto platters or gourmet sandwiches. Ensure they are completely cooled before storing.
Freezer Storage:
For longer-term preservation, roasted peppers freeze wonderfully. Place the cooled, peeled, and optionally sliced or diced peppers in a freezer-safe container, such as a zip-top bag (pressing out as much air as possible to prevent freezer burn) or a sturdy mason jar. Be sure to leave some headspace if using jars, as liquids expand when frozen. They can be stored in the freezer for up to 3 months. To use, simply transfer them from the freezer to the refrigerator to thaw overnight before incorporating them into your recipes. They’ll retain their delicious flavor and tender texture.
Unlock Flavor: Endless Culinary Uses for Roasted Red Peppers
The beauty of homemade roasted red peppers lies in their incredible versatility. Their sweet and smoky flavor profile makes them a fantastic addition to almost any meal. Here are countless ways to incorporate them, transforming everyday dishes into gourmet delights:
- Vibrant Salads: Add a pop of color and rich flavor to any green salad. They’re exceptional in a fresh mixed green salad, a robust Chicken Caesar Salad, a hearty Steak Salad, a refreshing Greek Orzo Salad, or a creamy Bacon Tomato Avocado Pasta Salad.
- Gourmet Sandwiches & Wraps: Layer them onto your favorite deli sandwiches, sub them into a Greek Chicken Salad Pita Sandwich, a savory Caprese Grilled Chicken Sandwich, or a classic Turkey Pesto Sandwich. Their soft texture and intense flavor elevate any handheld meal.
- Hearty Soups & Stews: Blend them into the base of a creamy tomato soup for added depth, or chop them and toss them into comforting dishes like Meatball Soup or Pasta Fagioli Soup.
- Delicious Pizzas & Flatbreads: As a topping, they add a gourmet touch to pizzas, from Kurt’s Famous Pan Pizza to fun Pizza Rolls. They’re also fantastic stuffed into a Calzone.
- Flavorful Pasta Dishes: Integrate them into pasta sauces or add them directly to dishes like Roasted Red Pepper Chorizo Mac And Cheese, or a light Caprese Pasta.
- Rich Sauces & Dips: They are the star ingredient in a creamy roasted red pepper sauce. Use them to create a decadent Roasted Red Pepper Turkey Bolognese, or blend them into Pasta Boscaiola Sauce, your favorite Spaghetti Sauce, or a robust Pork Ragu. Blend them into plain hummus or mix into Spicy Sriracha Hummus, or add to a zesty Greek Spicy Feta Dip.
- Elevated Burgers & Sliders: Top your favorite burgers or sliders with a generous layer of roasted red peppers. They’re also an incredible addition to Bruschetta Turkey Burgers, Juicy Lucy Burgers, or finely diced into Cheeseburger Egg Rolls.
- Breakfast & Brunch Delights: Dice and toss them into your morning scrambled eggs, Egg Muffins, a savory Caprese Avocado Omelette, or a rustic Mediterranean Vegetable Frittata.
- Comforting Casseroles & Baked Dishes: Add them to your favorite comfort food casseroles like Italian Polenta Ground Turkey Casserole, a flavorful Greek Breakfast Casserole, or a hearty Vegetarian Lasagna.
- Savory Meatloaf & Meatballs: Finely diced roasted peppers add moisture and a layer of sweet-smoky flavor to meatloaf recipes such as Italian Meatloaf, Mexican Meatloaf, or even a classic Bacon Wrapped Meatloaf.
- Appetizers & Spreads: Serve them simply with crusty bread and a drizzle of balsamic glaze. They’re also perfect diced into a classic Tomato Basil Bruschetta, a vibrant Greek Bruschetta, or a creamy Avocado Bruschetta.
Flavor Enhancements and Delicious Variations
While roasted red peppers are fantastic on their own, you can easily customize them to match your culinary desires. Here are a few ideas to add extra layers of flavor:
- Garlic Infusion: Roast whole garlic cloves alongside the peppers, then peel and blend them with the roasted peppers for a fragrant, savory puree or chop them for an aromatic addition to any dish.
- Herbal Notes: Toss the peppers with fresh or dried herbs like oregano, basil, thyme, or rosemary before roasting. This will infuse them with wonderful aromatic qualities.
- Spicy Kick: If you enjoy a bit of heat, drizzle the peppers with chili oil or sprinkle with red pepper flakes before roasting. You could even roast a jalapeño or serrano pepper alongside them (and steam/peel it too) for a spicier blend.
- Vinegar or Citrus Brightness: After peeling, marinate your roasted peppers in a mixture of olive oil, a splash of red wine vinegar or balsamic vinegar, and a squeeze of fresh lemon juice. This adds a lovely acidity that brightens their rich flavor.
- Smoked Paprika: For an even deeper smoky flavor without extra charring, sprinkle a touch of smoked paprika on the peppers before they go into the oven.
Frequently Asked Questions (FAQ) About Roasting Red Peppers
- Q: What kind of bell peppers are best for roasting?
- A: Red bell peppers are generally preferred for their sweetness and vibrant color, which intensifies during roasting. However, yellow and orange bell peppers also roast beautifully and offer a slightly milder sweetness. Green bell peppers are less common for roasting as they tend to be more bitter and less sweet.
- Q: Can I roast peppers without parchment paper or foil?
- A: Yes, you can. However, lining your baking sheet is highly recommended. Without it, the charred skins and juices will stick to the pan, making cleanup much more difficult. If you don’t have parchment or foil, ensure your baking sheet is well-oiled.
- Q: Is it necessary to steam the peppers after roasting?
- A: While not strictly “necessary,” it’s highly recommended for ease of peeling. The steaming process traps moisture, which loosens the tough outer skin from the tender flesh, allowing it to slip off effortlessly. Without steaming, peeling can be a frustrating and time-consuming task.
- Q: What if the skins don’t peel off easily after steaming?
- A: If the skins are still stubborn, it usually means the peppers weren’t charred enough or weren’t steamed long enough. You can try putting them back in the sealed bag or covered bowl for another 5-10 minutes. If they weren’t charred enough initially, consider roasting them a bit longer next time to ensure good blistering.
- Q: Can I leave the skins on?
- A: You can, but it’s not typically recommended. The skins of bell peppers become tough and chewy after roasting, and they are not very digestible. Removing them creates a much more pleasant texture, especially for sauces, dips, and purees.
- Q: How can I use the leftover juices from the roasted peppers?
- A: Don’t discard those flavorful juices! They’re liquid gold. Use them in dressings, marinades, soups, or even to add moisture and flavor when blending the peppers into a sauce. You can store the peppers in these juices for added flavor and moisture.
- Q: Can I roast peppers using a different method, like a grill or broiler?
- A: Absolutely! Grilling or broiling are excellent alternatives. For grilling, place whole peppers directly over medium-high heat, turning frequently until charred on all sides. For broiling, place whole or halved peppers skin-side up on a baking sheet close to the broiler element, turning as needed until blackened. The key is to achieve that good char on the skin, then steam as instructed.
Master More Kitchen Essentials: Our Top How-To Guides
Ready to level up your culinary skills? Don’t miss these other quick and easy kitchen tutorials and how-to guides that will make you a more confident cook!
- How To Cook Bacon in the Oven
- How To Hard Boil Eggs Perfectly Every Time
- 3 Easy Ways to Cook Sweet Potatoes
- How to Cook Spaghetti Squash
- How To Caramelize Onions to Sweet Perfection

Print Recipe
Pin Recipe
Rate this Recipe
Homemade Oven Roasted Red Peppers
Ingredients
- 4 medium red bell peppers
- Optional: 1-2 tablespoons olive oil, pinch of salt, pinch of black pepper
Instructions
-
Preheat the oven to 450°F (230°C).
-
Line a rimmed baking sheet with parchment paper for easy cleanup and to prevent sticking.
-
To prepare the peppers, stand each bell pepper stem-side up on a cutting board. Using a sharp knife, make 4 large, vertical slices around the core, avoiding the seeds and white membrane. Discard the stem and internal white ribs and seeds.
-
Place the sliced peppers, skin-side up (cut side down), in a single layer on the prepared baking sheet. For enhanced flavor, you can lightly brush them with olive oil and sprinkle with a pinch of salt and pepper before roasting.
-
Roast in the preheated oven for 25-30 minutes, or until the skins are completely blackened, blistered, and slightly shriveled. This charring is crucial for developing their sweet, smoky flavor.
-
Carefully remove the baking sheet from the oven. Transfer the hot roasted peppers immediately to a large zip-top bag and seal it, or place them in a bowl and cover tightly with a lid or plastic wrap. Let them steam for at least 15-20 minutes. This steaming process loosens the skins, making them incredibly easy to peel.
-
Once cooled enough to handle (after steaming), open the bag/cover and gently peel the skins from the peppers. The skins should slip off effortlessly. Discard the peeled skins.
-
Your homemade roasted red peppers are now ready to use! Store any unused peeled roasted peppers in an airtight container in the refrigerator for up to 10 days, preferably submerged in a small amount of their natural juices or a light olive oil.
Notes & Storage Tips
- To freeze the peppers: For longer storage, place cooled, peeled, and optionally sliced/diced roasted peppers in a freezer-safe container, such as a zip-top bag (remove as much air as possible) or a mason jar. Freeze for up to 3 months. Thaw in the refrigerator before using in your recipes.
- Alternative Steaming Methods: If a zip-top bag isn’t available, steaming the hot peppers in a covered bowl, sealed foil packet, or even a paper bag will achieve the same skin-loosening effect.
- Prepare for Future Use: Before storing, consider cutting your roasted peppers into strips or dicing them. This saves prep time later when adding them to salads, pizzas, or dips.
- Experiment with Colors and Varieties: This roasting method works beautifully for yellow and orange bell peppers too! Cooking times may vary slightly based on the size and thickness of the pepper. For spicier roasted peppers, you can also apply this method to other chili varieties, adjusting cook time as needed.
- Enhance the Flavor: A light drizzle of extra virgin olive oil and a pinch of salt and pepper before roasting can significantly enhance the final taste.
Nutrition Facts (Per serving, approximate)
Carbohydrates 4g (1% DV)
Protein 1g (2% DV)
Fat 0.2g
Saturated Fat 0.04g
Polyunsaturated Fat 0.1g
Monounsaturated Fat 0.004g
Sodium 2mg
Potassium 126mg (4% DV)
Fiber 1g (4% DV)
Sugar 2g (2% DV)
Vitamin A 1863mg (37% DV)
Vitamin C 76mg (92% DV)
Calcium 4mg
Iron 0.3mg (2% DV)
Did you make this recipe?
Tag @WhitneyBond on Instagram and hashtag it #WBRecipes!