
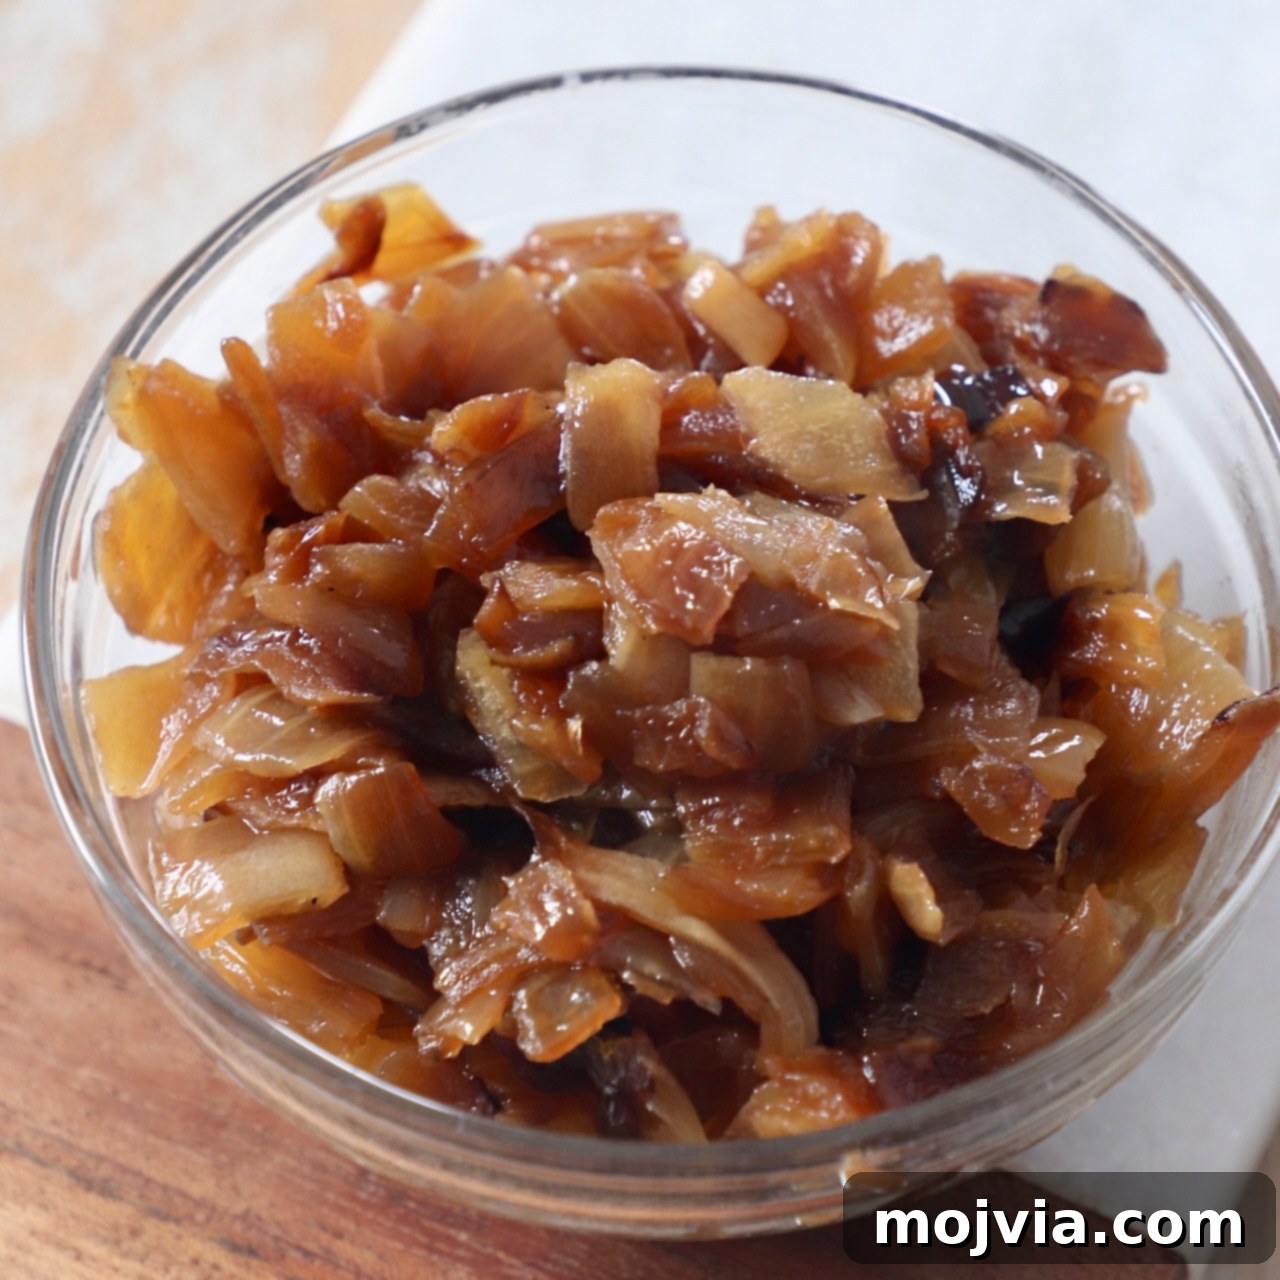
Discover the ultimate guide to creating perfectly caramelized onions on your stovetop! This easy, step-by-step tutorial demystifies the process, proving that while patience is key, the technique itself is wonderfully simple. The rich, sweet, and savory depth of flavor that develops is truly transformative, elevating everything from hearty soups and gourmet burgers to creamy dips and elegant entrees. Get ready to master this essential culinary skill and add an unparalleled layer of deliciousness to your cooking!
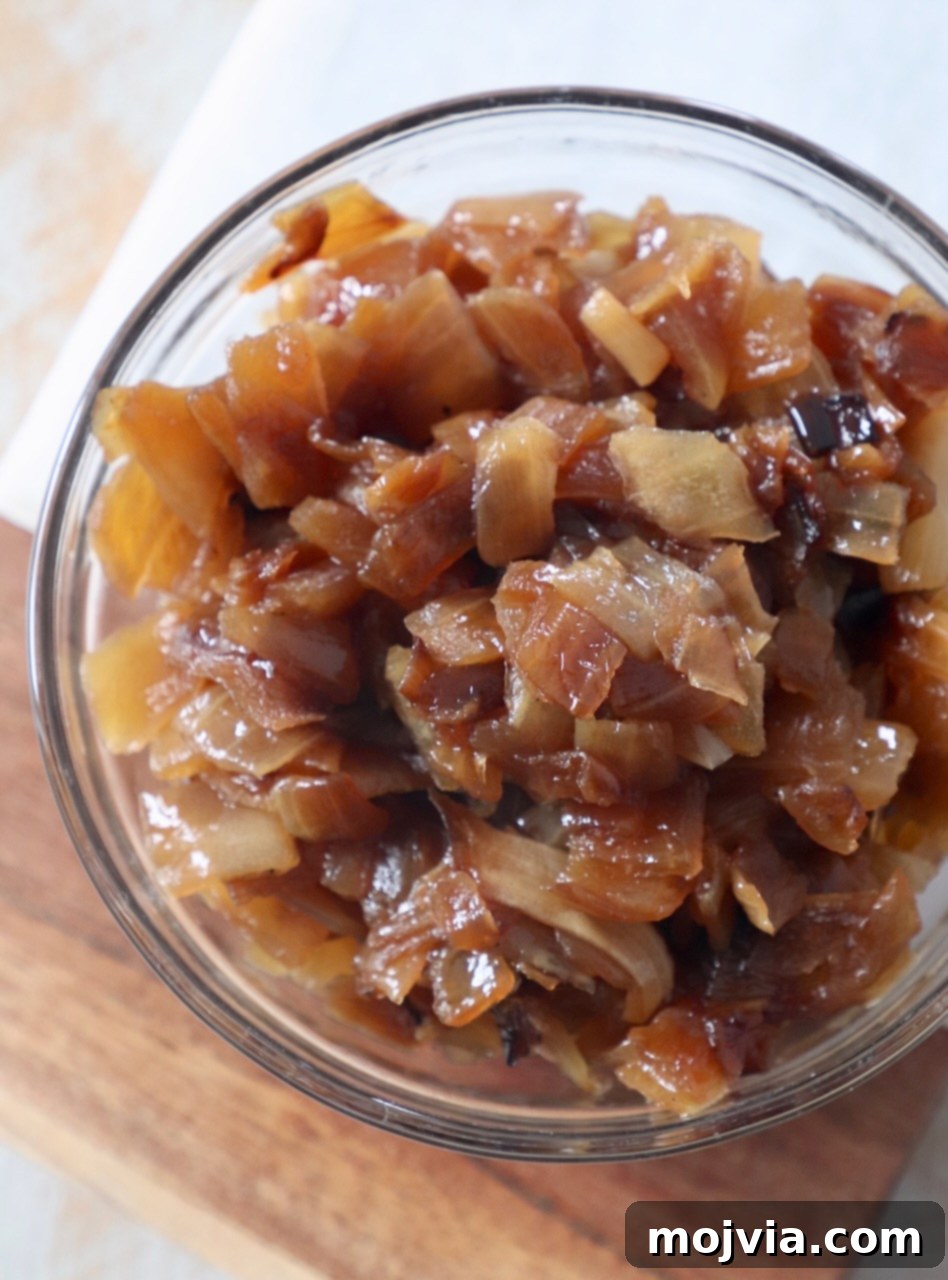
Table of Contents
- The Magic of Caramelized Onions
- Why Caramelize Onions?
- Essential Ingredients for Perfect Caramelized Onions
- How to Properly Cut Onions for Caramelizing
- Step-by-Step: How to Caramelize Onions on the Stovetop
- Frequently Asked Questions About Caramelizing Onions
- Expert Tips and Tricks for Caramelized Onions
- Creative Ways to Serve Caramelized Onions
- More Kitchen Tutorials to Master
The Magic of Caramelized Onions
There’s a culinary alchemy that occurs when humble onions are gently cooked over low heat for an extended period. What begins as pungent, crisp slices transforms into a soft, sticky, and profoundly sweet delicacy. This process, known as caramelization, draws out the natural sugars within the onion, creating an intense, complex flavor profile that is both savory and wonderfully sweet. It’s a fundamental technique that every home cook should master, as it unlocks a world of flavor possibilities.
Once you experience the depth and versatility of homemade caramelized onions, you’ll likely find yourself making them a weekly staple. They keep beautifully in the fridge, ready to be incorporated into a myriad of dishes, from upgrading simple sandwiches to enriching elaborate steak dinners, or even making breakfast eggs extraordinarily special. Their ability to elevate ordinary ingredients to extraordinary heights is truly remarkable.
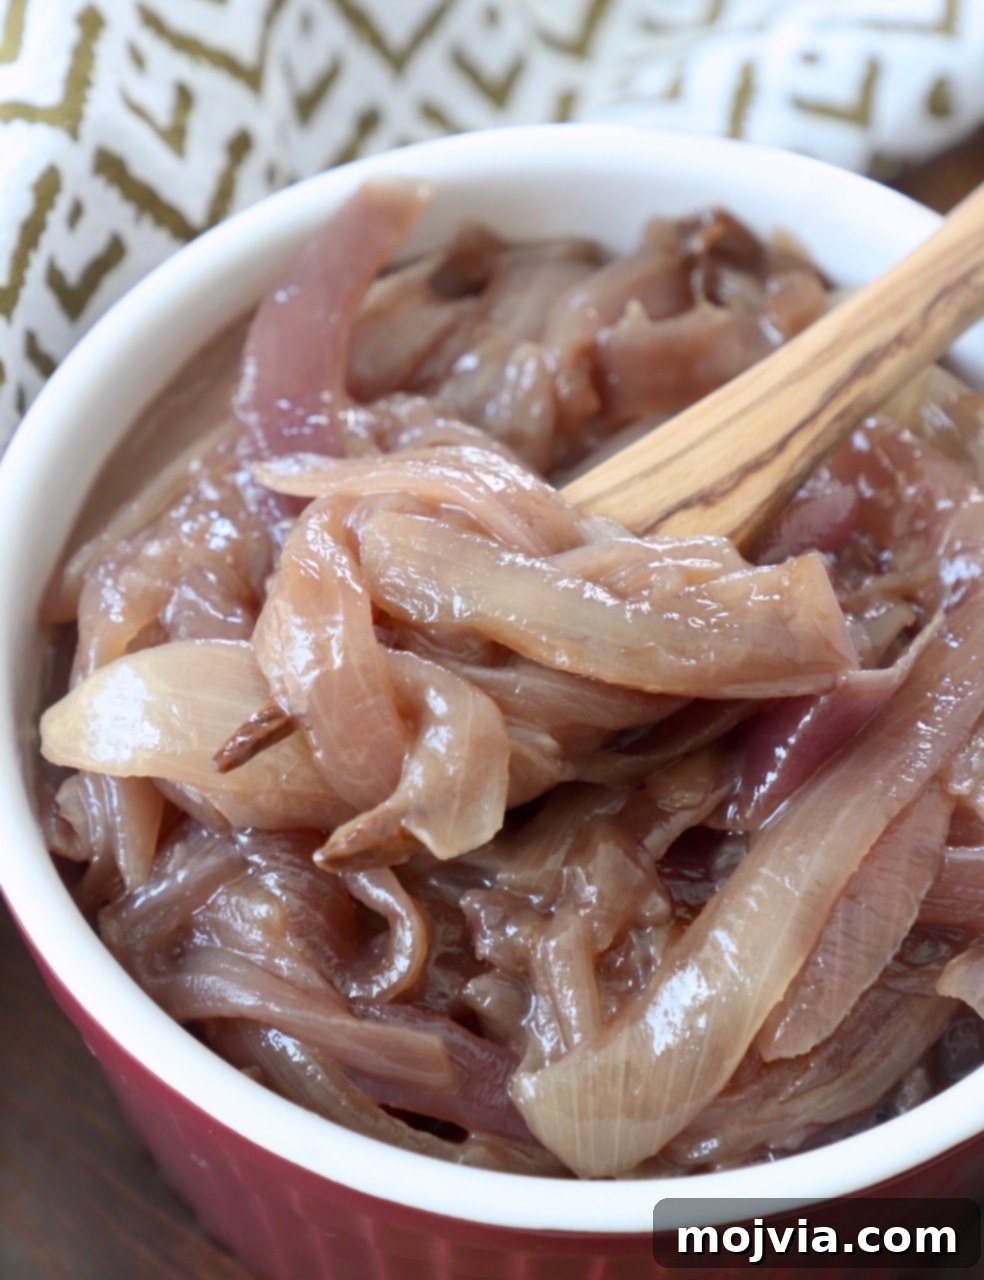
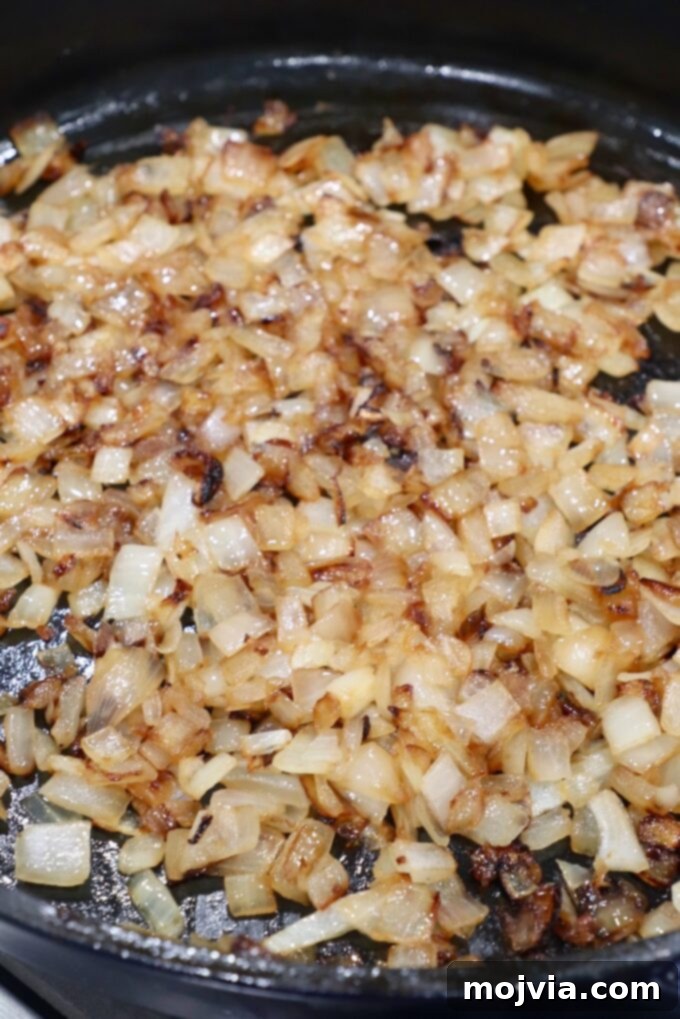
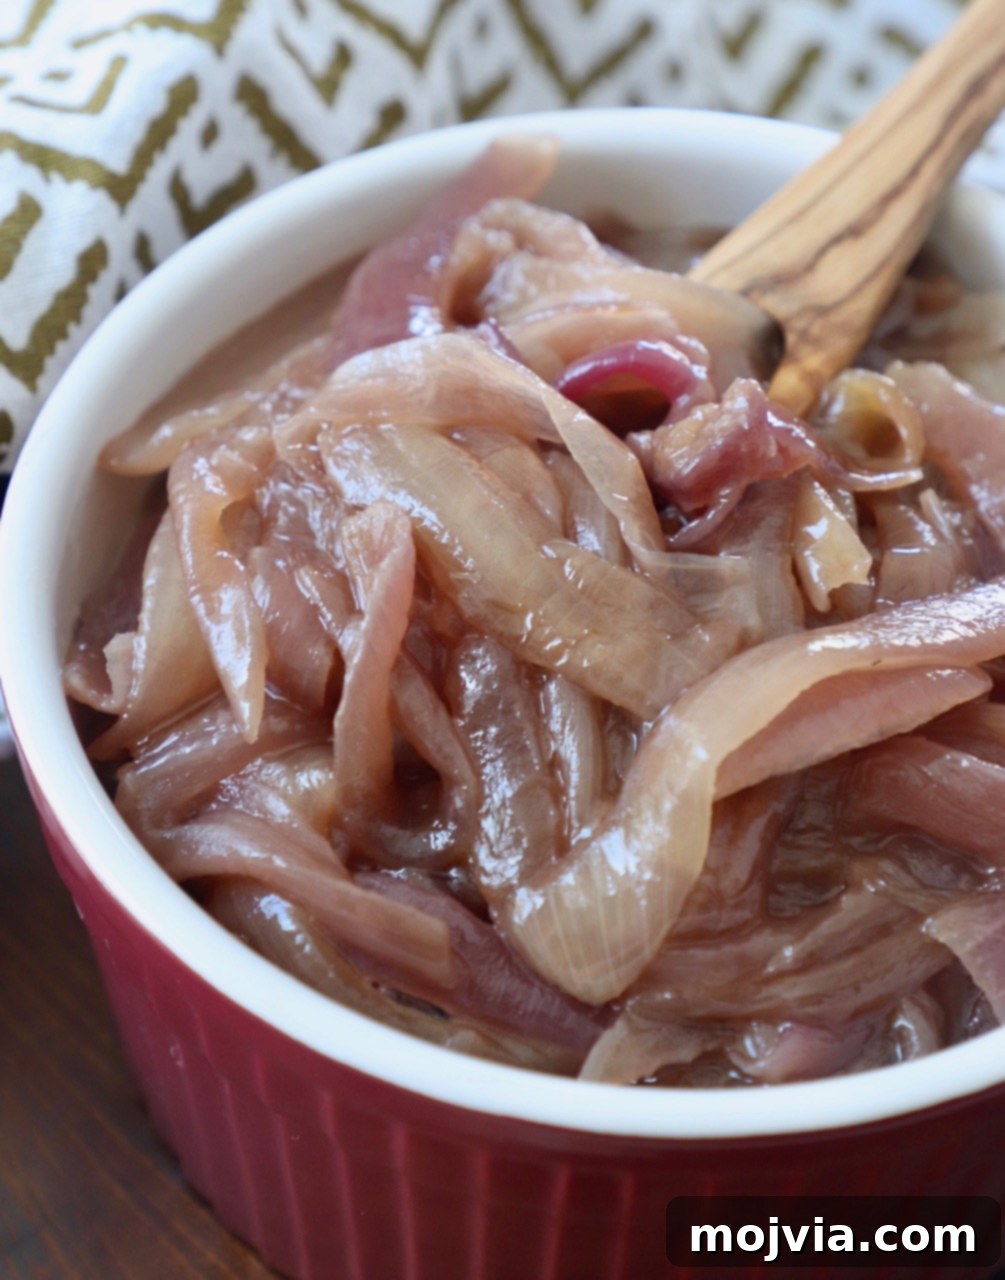
Throughout this guide, you’ll notice images featuring both sliced and diced caramelized onions. Both preparations are equally delicious, and your choice will largely depend on the intended use in your recipes. For instance, elegantly sliced caramelized onions are superb draped over a perfectly cooked steak, offering a luxurious garnish. Meanwhile, finely diced caramelized onions blend seamlessly into a savory burger patty or as a topping for an Animal Style Burger, ensuring every bite is infused with their rich flavor. Understanding how to adapt the cut for different applications will enhance your culinary repertoire.
Why Caramelize Onions?
The process of caramelizing onions is more than just cooking them until they’re soft and brown; it’s a chemical reaction called the Maillard reaction, which is responsible for the incredible depth of flavor. As onions cook slowly, their natural sugars break down and new flavor compounds are formed, resulting in that distinct sweet, savory, and slightly tangy taste. This is completely different from sautéing, where onions are cooked quickly to soften them and remove some of their raw bite. Caramelized onions offer a depth and richness that simply sautéed onions cannot match, making them a secret weapon in many culinary traditions, particularly French cuisine.
Investing the time in proper caramelization pays off immensely. The concentrated flavor adds a gourmet touch to otherwise simple dishes, transforming them into something truly special. It also allows you to make a large batch and store it, ensuring you always have this flavor enhancer on hand for spontaneous culinary creations.
Essential Ingredients for Perfect Caramelized Onions
While the star of the show is undoubtedly the onion, a few key supporting ingredients ensure optimal flavor and texture development. Simplicity is at the heart of this classic preparation.
- Butter or Oil: You’ll need a fat to coat the pan and the onions, facilitating even cooking and preventing sticking. Butter is often preferred for its rich, nutty flavor, which beautifully complements the sweetness of the caramelized onions. However, olive oil, vegetable oil, or a combination of butter and oil can also be used. Using oil can be beneficial as it has a higher smoke point than butter, reducing the risk of burning, especially if you’re new to caramelizing. For an extra layer of flavor, try a good quality extra virgin olive oil.
- Onions: The good news is that almost any onion variety can be caramelized successfully! Sweet onions (like Vidalia or Walla Walla) will yield a sweeter final product, while yellow onions offer a classic balance of sweet and savory. Red onions caramelize into a beautiful reddish-brown color with a slightly bolder flavor, and white onions work well too. Don’t hesitate to experiment with a mix of different types of onions to achieve a more complex and nuanced flavor profile in your finished dish. For this recipe, we recommend using 3 pounds of onions to yield about 3 cups of caramelized onions.
- Salt: A crucial ingredient, sea salt is highly recommended. Not only does it season the onions, but it also plays a vital role in the caramelization process. Salt helps draw out moisture from the onions, which prevents them from steaming and encourages browning. Fine-grained sea salt disperses more evenly over the onions compared to coarser grinds, ensuring consistent seasoning and efficient moisture extraction. Avoid adding sugar, as properly caramelized onions develop their own incredible sweetness naturally.
How to Properly Cut Onions for Caramelizing
The way you cut your onions is paramount to achieving uniform caramelization. Unevenly cut onions will cook at different rates, leading to some pieces burning while others remain undercooked. The classic method for caramelized onions involves slicing them, but dicing is also an excellent option depending on your intended use.
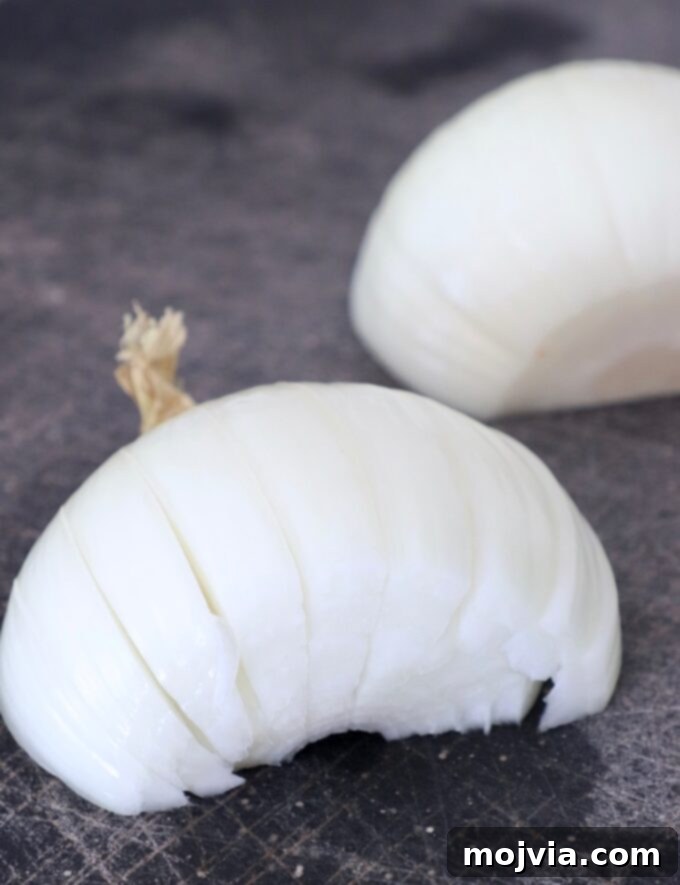
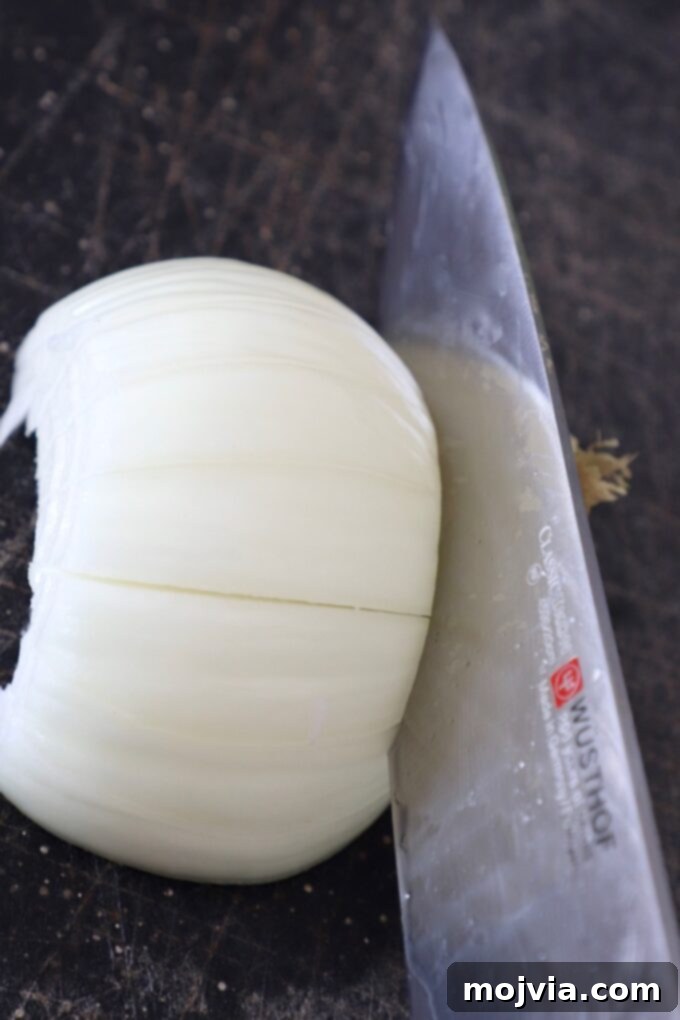
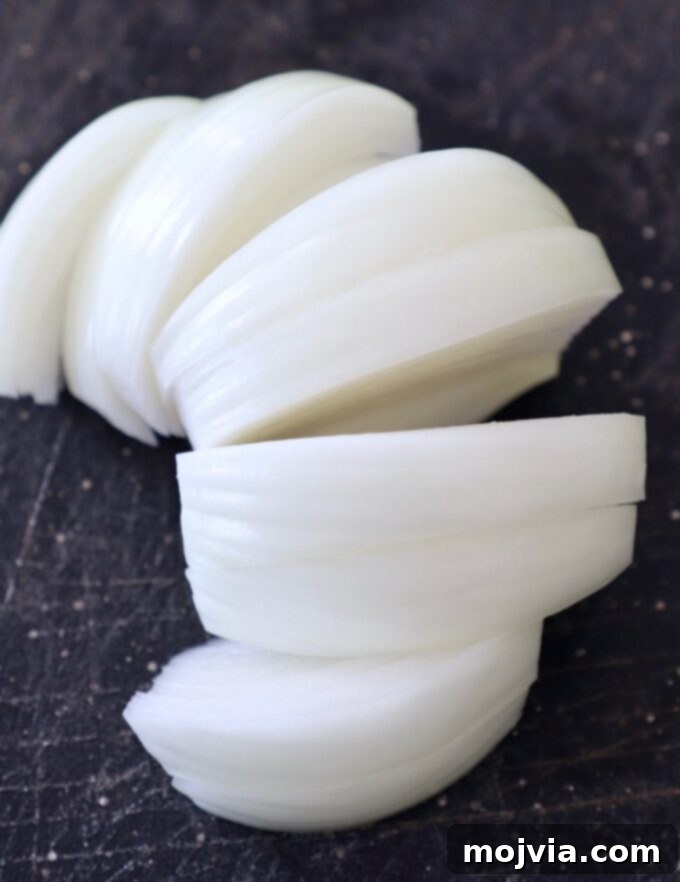
For Sliced Onions:
- Begin by trimming off the top stem end of the onion, but leave the root intact – this acts as a ‘handle’ to hold the onion together while slicing.
- Cut the onion in half lengthwise, from the stem end down through the root.
- Place one half of the onion flat-side down on your cutting board. Using a sharp knife, make even slices every 1/4 inch, cutting from the trimmed stem end towards the root, but without cutting all the way through the root. This keeps the slices attached at the root, making them easier to separate into individual rings later.
- Once sliced, simply cut off and discard the root end, and the slices will naturally separate into beautiful, even rings.
- Repeat with the other onion half.
For Diced Onions:
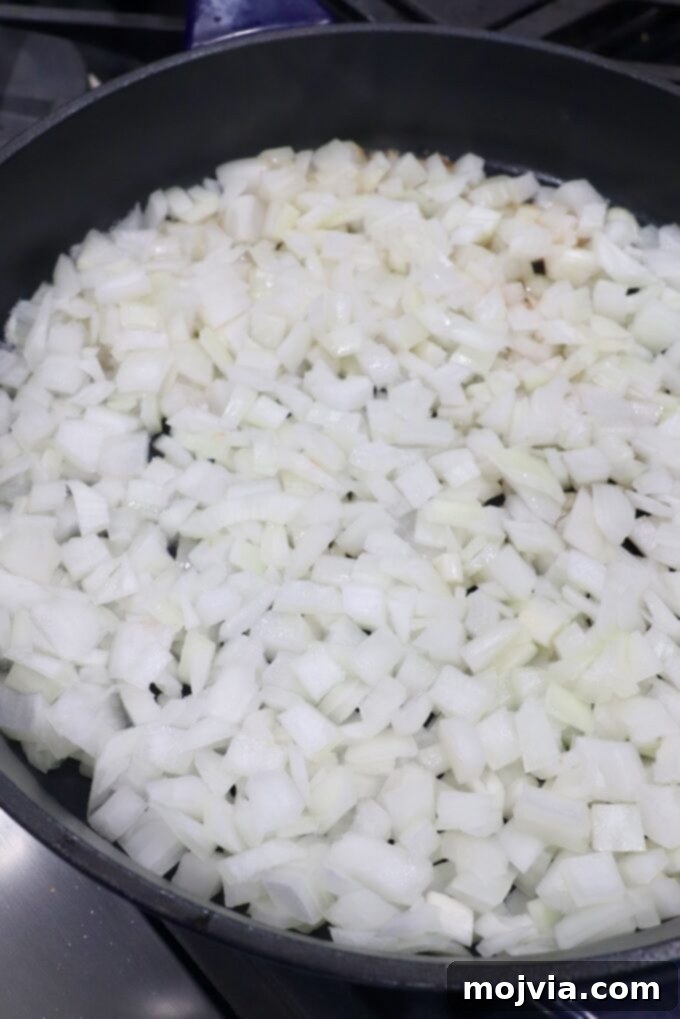
If you prefer diced caramelized onions for specific applications (like mixing into dips or burgers), simply dice the onions into 1/4-inch squares after peeling. The cooking method remains the same as for sliced onions, but the reduced surface area will mean they caramelize slightly faster.
The key takeaway here is consistency. Regardless of whether you slice or dice, ensuring your onion pieces are as uniform in size as possible is critical. This uniformity guarantees that every piece cooks at the same rate, resulting in a batch of perfectly tender, deeply caramelized onions without any raw or burnt bits.
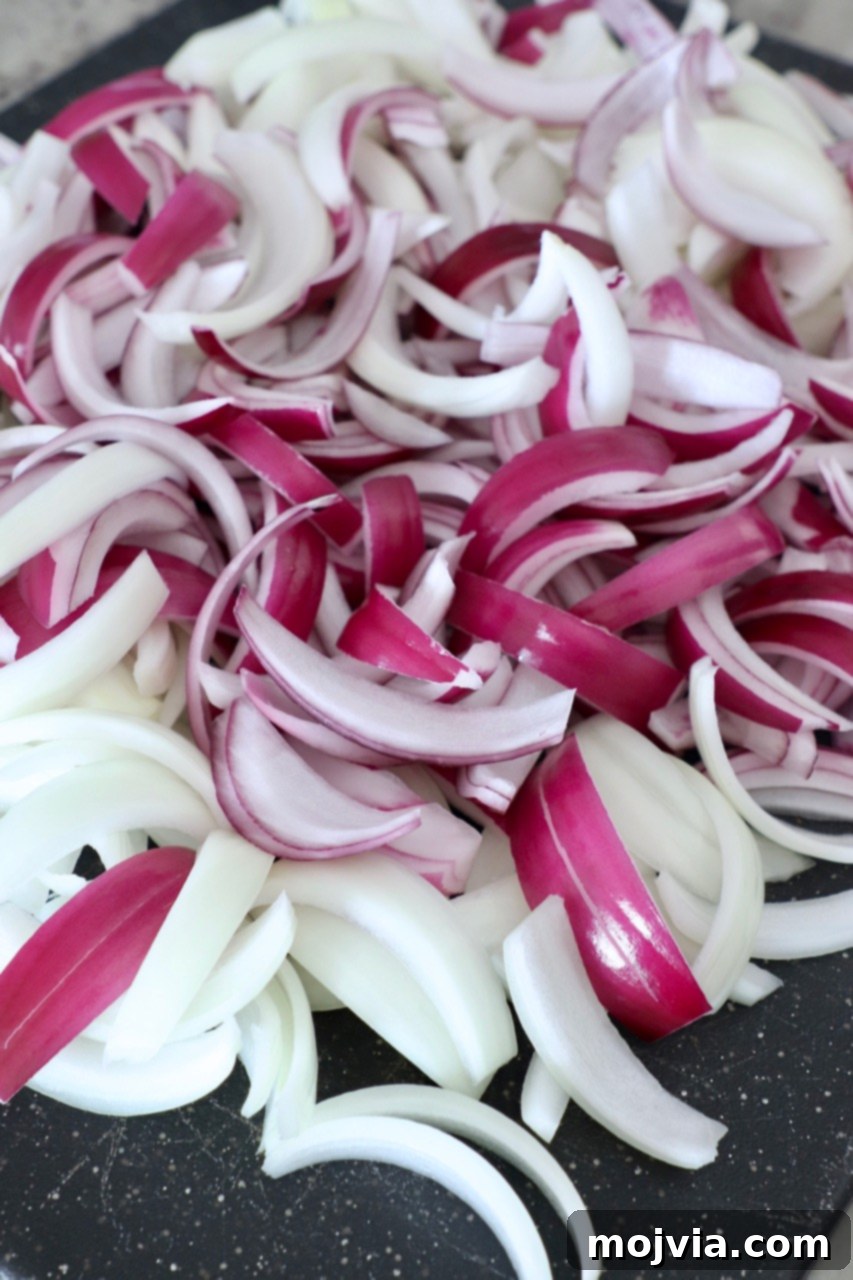
Step-by-Step: How to Caramelize Onions on the Stovetop
Mastering caramelized onions requires patience, but the process itself is straightforward. Follow this detailed step-by-step guide with accompanying images to achieve consistently perfect results every time. For precise ingredient quantities and further detailed instructions, refer to the full recipe card at the end of this article.
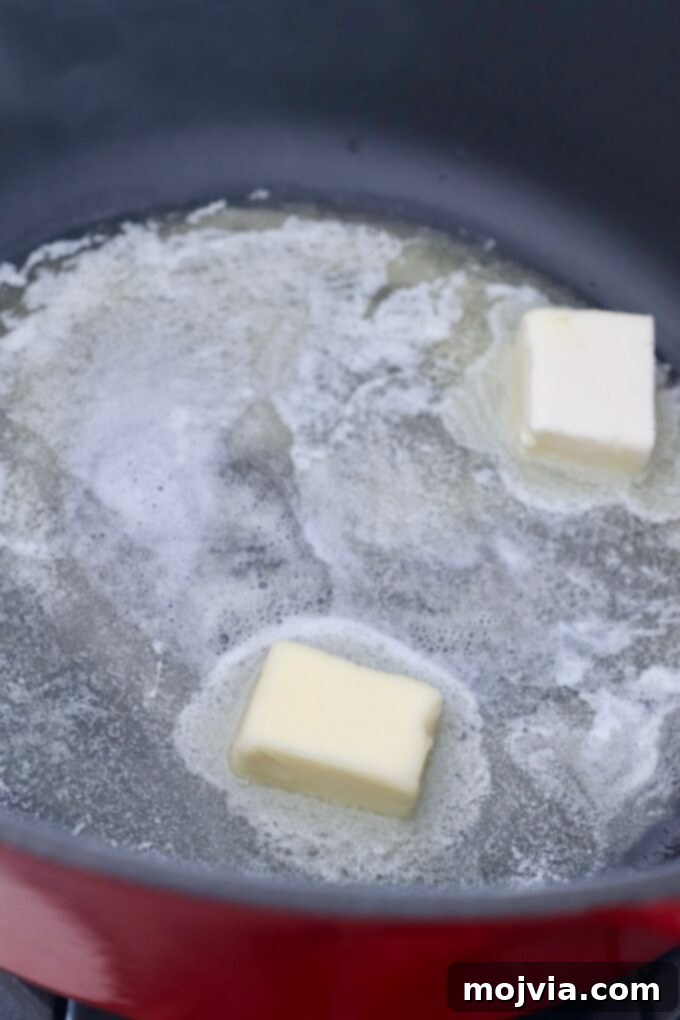
Step 1: Prepare the Pan. Place a heavy-bottomed skillet, ideally a cast iron skillet or Dutch oven (see tips below for why), on your stovetop over medium-high heat. Add your chosen fat—butter, olive oil, or a combination—and allow it to melt completely and shimmer. The heat should be enough to start warming the pan but not so high that the fat burns.
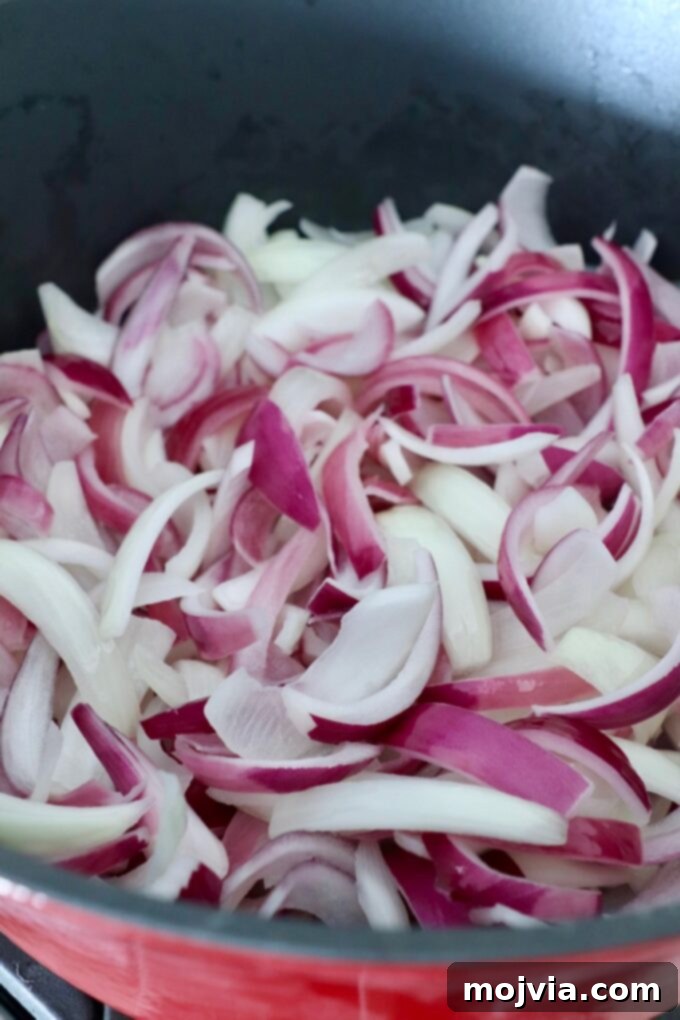
Step 2: Add the Onions. Once the fat is melted and slightly hot, carefully add your evenly sliced or diced onions to the skillet. Spread them out as much as possible in a single layer if your pan allows. This initial step helps to soften the onions and begin the process of moisture release. Do not overcrowd the pan; if you have too many onions for your skillet, caramelize them in batches. Overcrowding will cause the onions to steam rather than brown.
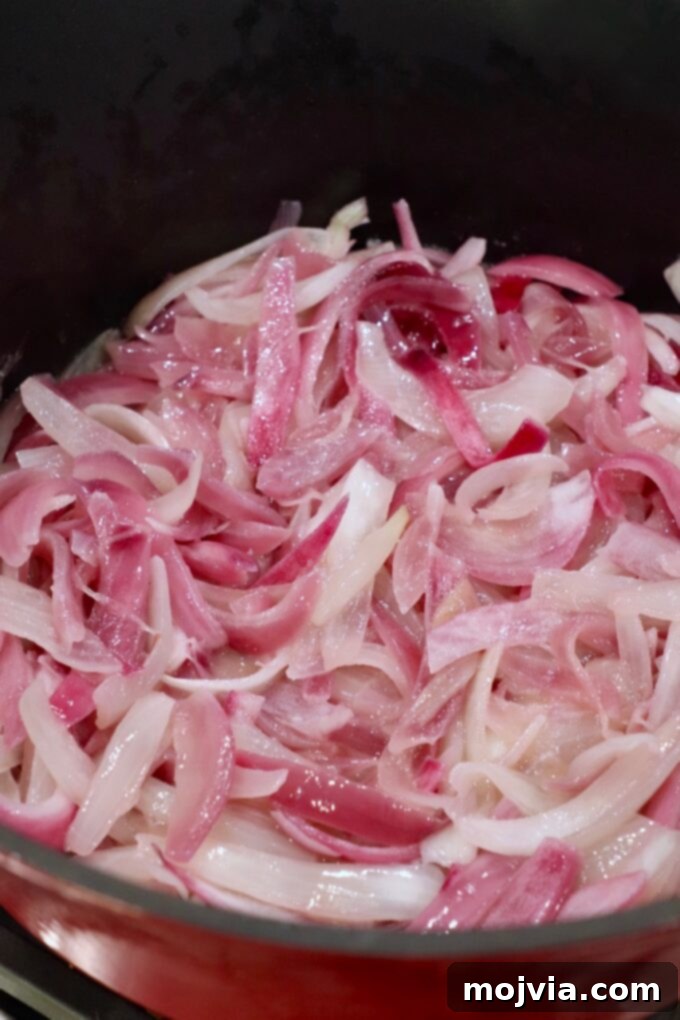
Step 3: Initial Cook and Season. Cook the onions over medium-high heat for about 5 minutes, stirring occasionally, until they start to soften and become translucent. At this point, sprinkle them generously with sea salt. The salt will help draw out additional moisture, which is essential for the onions to properly caramelize rather than simply steam. Immediately after salting, reduce the heat down to medium (or even medium-low if your stove runs hot). This is where the long, slow cooking begins.
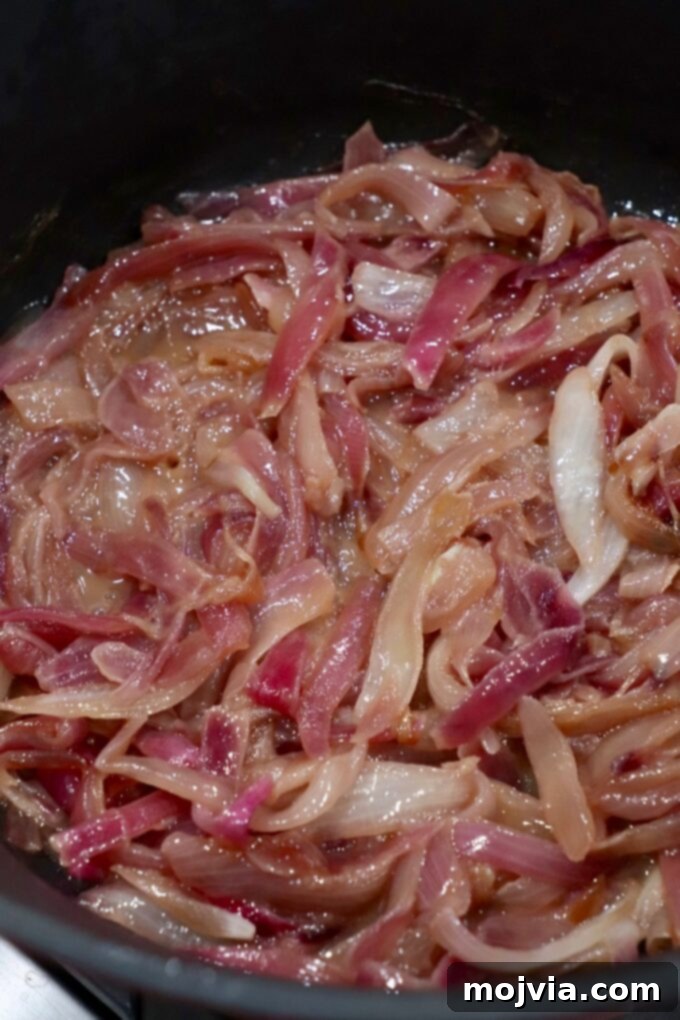
Step 4: Slow Caramelization. Continue to cook the onions for 45-60 minutes (for sliced onions) or approximately 35-45 minutes (for diced onions). The key here is patience and a watchful eye. Stir the onions only every 10 minutes or so. Frequent stirring prevents browning, as the onions need time to sit on the hot surface of the pan to develop that desired golden-brown color. They will gradually soften, reduce significantly in volume, and turn a beautiful deep amber color, becoming wonderfully sweet and tender. If at any point the onions seem to be cooking too quickly or sticking excessively, reduce the heat slightly.
Once the onions reach your desired level of caramelization—from a light golden-brown to a deep, rich mahogany—they are ready. Use them immediately to flavor your dishes, or store them for future use. Properly prepared caramelized onions can be stored in an airtight container in the refrigerator for up to one week, making them an excellent meal prep component.
For a batch of 1 pound of diced onions, follow the same steps, but expect the cooking time to be closer to 35-45 minutes due to their smaller size and increased surface area, which allows for quicker caramelization.
Frequently Asked Questions About Caramelizing Onions
- Can you use any color of onion for caramelizing? Absolutely! While yellow onions are a popular choice due to their balanced sweetness and pungency, sweet onions (like Vidalia or Walla Walla) will yield a notably sweeter result. Red onions caramelize beautifully into a deep reddish-brown with a slightly sharper, more robust flavor. For an even greater depth and complexity of flavor, we highly recommend using a mix of different onion varieties in a single batch. Each type brings its unique nuances to the final product.
- How long does it typically take to caramelize onions? The cooking time can vary significantly based on several factors, including the quantity of onions, the size of your pan, and the exact heat setting of your stove. Generally, plan for at least 45 to 60 minutes for a larger batch of sliced onions (e.g., 2-3 pounds). For smaller quantities or diced onions (around 1 pound or less), the process might be quicker, closer to 35-45 minutes. The key is to not rush it; slow and steady wins the caramelization race!
- Should I use oil or butter to caramelize onions? You have options! Both butter and oil work effectively, and many chefs even prefer a combination. Butter imparts a rich, creamy, and slightly nutty flavor that beautifully complements the sweetness of the caramelized onions. For this recipe, we suggest 3 tablespoons of butter for 3 pounds of onions. If you’re concerned about butter burning at higher temperatures, or simply prefer a lighter flavor, pure olive oil (or vegetable/canola oil) is an excellent alternative. A blend of 1 1/2 tablespoons butter and 1 1/2 tablespoons oil offers the best of both worlds: butter’s flavor with oil’s higher smoke point.
- Can I use vegetable oil to caramelize onions? Yes, absolutely! Vegetable oil, canola oil, and olive oil are all suitable fats for caramelizing onions. They have higher smoke points than butter, which can be advantageous, especially for beginners, as it reduces the risk of burning. While they won’t add the same nuanced flavor as butter, they will still allow the onions to achieve that beautiful golden-brown caramelization.
- Do you add salt or sugar to caramelize onions? Salt is a definite yes, but sugar is generally a no in my method. Adding salt early in the cooking process is essential. It helps draw out the onions’ natural moisture, preventing them from merely steaming in the pan. This moisture release is crucial for facilitating proper browning and caramelization. If you follow this recipe correctly, the onions will develop an incredible natural sweetness all on their own, making additional sugar unnecessary and potentially leading to a cloyingly sweet result.
- Can caramelized onions be frozen for later use? Yes, caramelized onions freeze wonderfully! This is a fantastic way to prepare a large batch and have it ready for future meals. I recommend freezing them in an ice cube tray or small, individual containers. This allows you to easily thaw only the amount you need for a specific recipe, preventing waste. They will maintain their quality in the freezer for up to 3 months. To use, simply transfer them to the refrigerator overnight to thaw before incorporating them into your desired dish.
Expert Tips and Tricks for Caramelized Onions
- Maintain Medium Heat and Constant Vigilance: The golden rule of caramelizing onions is “low and slow.” Always cook them over medium (or even medium-low) heat. The temptation to turn up the heat to speed up the process is strong, but resist it! High heat will burn the onions before they have a chance to properly caramelize their sugars. Keep a watchful eye on them throughout the entire cooking process, stirring every 10 minutes to ensure even browning and prevent scorching. If you notice them browning too quickly, don’t hesitate to reduce the heat further.
- Deglaze the Pan to Prevent Burning and Build Flavor: If you find the onions are starting to stick and dark bits are forming on the bottom of the pan, don’t despair! This is often flavor developing, but too much can lead to burning. Simply add 1-2 tablespoons of water (or a splash of wine or broth for added flavor) to deglaze the pan. Use a wooden spoon or spatula to scrape up any browned bits. This technique not only prevents burning but also incorporates those flavorful fond into your onions, enhancing their taste.
- Choose the Right Cookware: The type of pan you use makes a big difference. For optimal results, always use a heavy-bottomed skillet, such as a cast iron skillet or a Dutch oven. These materials excel at retaining and distributing heat evenly, which is crucial for consistent caramelization. Thin-bottomed pans are prone to hot spots, leading to uneven cooking and potential burning. If you don’t have cast iron, use the heaviest and largest pan available in your kitchen.
- Avoid Overcrowding the Pan: This is a common mistake that hinders proper caramelization. If your pan is too small and you overload it with onions, they will release their moisture and essentially steam rather than brown. This extends the cooking time considerably and results in soft, watery onions instead of deeply caramelized ones. For a recipe calling for 3 pounds of onions, a 12-inch skillet or a large Dutch oven is a minimum recommendation to allow the onions enough space to spread out. Cook in batches if necessary.
- Stir Infrequently: While “stirring every 10 minutes” might sound contradictory to constant vigilance, it’s about finding the right balance. Stirring too frequently prevents the onions from developing that lovely brown crust on the pan’s surface, which is where much of the rich flavor and color comes from. Allow them to sit and brown for a few minutes before stirring, then redistribute them. This allows the Maillard reaction to occur effectively.
- Slice Onions to the Correct Thickness: The thickness of your onion slices directly impacts cooking time and prevents burning. Never slice your onions thinner than 1/4 inch thick. Ultra-thin slices are much more prone to sticking to the pan, drying out, and burning before they can properly caramelize. Slices between 1/8 and 1/4 inch thick are ideal, providing enough body to cook slowly and evenly without disintegrating.
- Understand Yield Expectations: Raw onions shrink significantly during caramelization due to moisture loss. A good rule of thumb is that approximately 1 pound of raw onions will yield about 1 cup of rich, caramelized onions. This knowledge helps you gauge how much to cook based on your recipe needs. For instance, if you only need 1 cup of caramelized onions, starting with 1 pound of sliced raw onions and 1 tablespoon of butter or olive oil will be sufficient.
Creative Ways to Serve Caramelized Onions
The beauty of caramelized onions lies in their incredible versatility. Their sweet, savory, and umami-rich flavor profile makes them a fantastic addition to almost any meal. There’s truly no wrong way to enjoy them, whether as a sophisticated garnish, a key ingredient, or a flavorful mix-in. Here are some delicious ideas to inspire you:
- Elevate Your Burgers: Caramelized onions are the ultimate burger topping. They add a gourmet touch to any patty, transforming simple Smash Burgers or Animal Style Burgers into culinary masterpieces. They’re also fantastic on Cheeseburger Sliders, savory Air Fryer Hamburgers, flavorful Blue Cheese Burgers, and rich Mushroom Swiss Burgers, adding a layer of sweetness that cuts through the richness of the meat.
- Pair with Fries: Take your fries to the next level! These onions are an absolute must-have for classic Animal Style Fries, lending a deep, satisfying sweetness that complements the crispy potatoes.
- Garnish for Steaks: For a truly decadent finish, pile a generous spoonful of caramelized onions over a perfectly cooked Sous Vide Steak or a sizzling Grilled Steak. Their sweetness and tender texture create a harmonious balance with the rich, savory meat.
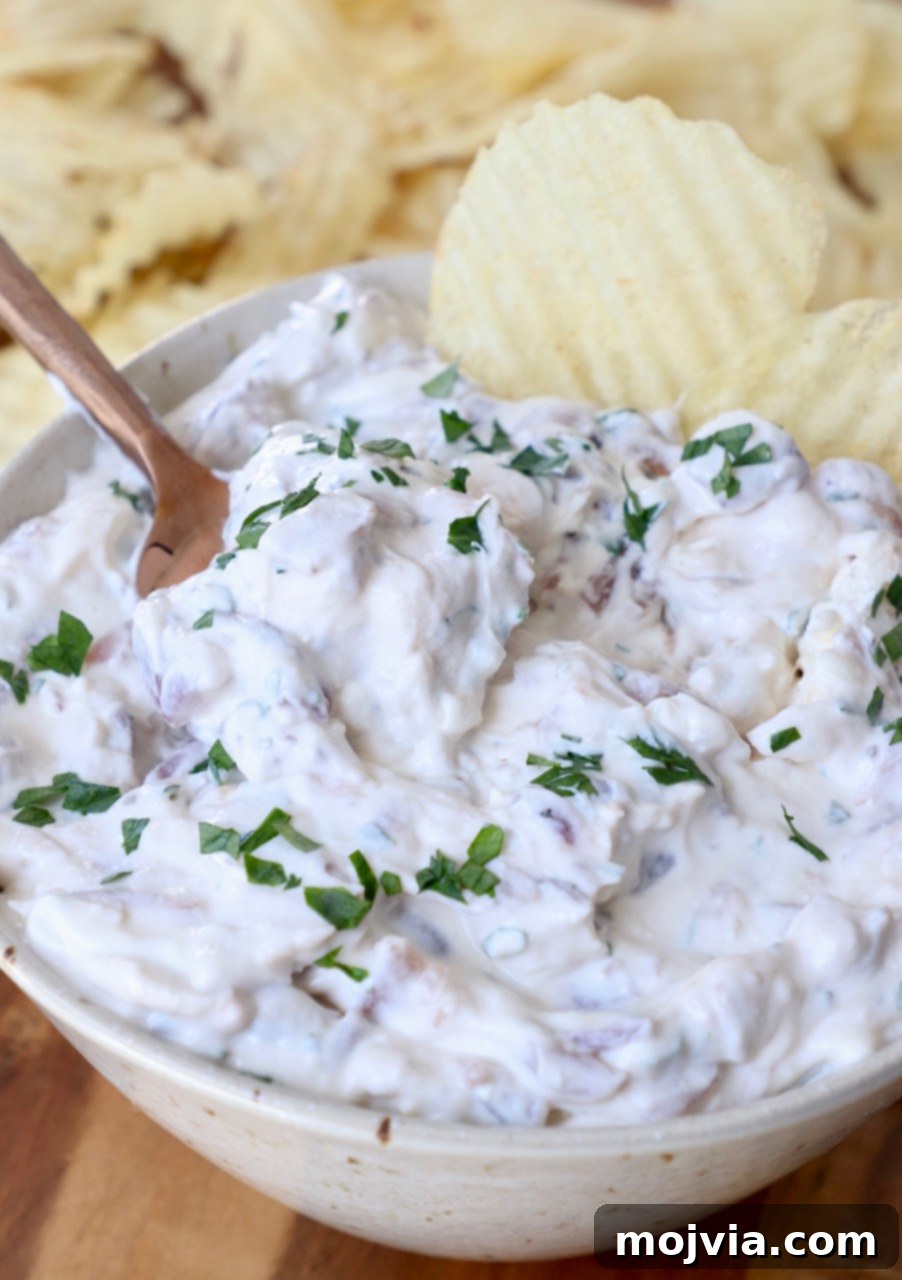
- Stir into Dips: Caramelized onions are the secret ingredient to the most flavorful dips. They are exceptionally delicious stirred into this French Onion Dip recipe (pictured above), providing an authentic, homemade taste far superior to store-bought versions. They can also enhance a Vegetable Dip with their subtle sweetness.
- Enhance French Onion Soup: The quintessential use! Caramelized onions are the very foundation of classic French Onion Soup. You can either mix them directly into the broth during cooking or use them as a luxurious topping before adding the cheesy crouton. Explore making your own soup with a French Onion Dip Mix or try something unique like this comforting Slow Cooker French Onion Meatball Soup.
- In Hearty Sandwiches: Elevate your hot sandwiches with caramelized onions. They are incredibly tasty in classic cheesesteaks, provide a sweet counterpoint in French Dip Sandwiches, and are a star ingredient in a traditional Patty Melt.
- Top Your Pizza: Add a gourmet touch to your homemade pizzas! Spread caramelized onions over the crust before adding cheese and other toppings for a burst of savory sweetness. Try them on your next Pan Pizza.
- Stuffed in Grilled Cheese: Transform a simple grilled cheese sandwich into a culinary delight. Load them into a classic grilled cheese, or really amp up the flavor in this indulgent Sriracha Candied Bacon Grilled Cheese or a Bacon Tomato Avocado Grilled Cheese.
- Complement Brats or Hot Dogs: Offer caramelized onions alongside other condiments for your brats and hot dogs. Their rich flavor adds a sophisticated twist to these casual favorites.
- Mix into Mac and Cheese: Introduce a layer of sweet and savory complexity to your macaroni and cheese. Stir them into the cheese sauce, or incorporate them into a crispy topping. They’re excellent in basic Mac and Cheese, fancy Creamy Cavatappi, smoky Smoked Mac and Cheese, or zesty BBQ Chicken Mac and Cheese.
- Enrich Pasta Sauces: Any of your favorite pasta sauces can benefit immensely from the addition of caramelized onions. Their deep flavor acts as a perfect base or a luxurious enhancer.
- Serve with Pierogis: Dress up store-bought frozen pierogis or incorporate them into homemade versions, like delicious Sweet Potato Pierogis, for an extra layer of savory goodness.
- Enhance Salads: Use caramelized onions as a flavorful topping for various salads. They add a sweet and soft texture to green salads, potato salads (like this Red White and Blue Cheese Potato Salad), vegetable salads, or pasta salads. They’re also a fantastic addition to a hearty Steak Salad.
- Spread on Bread: Much like roasted garlic, caramelized onions are excellent spread on toasted baguette slices or crostinis. Serve them as an elegant appetizer or a simple, satisfying snack.
- Breakfast Boost: Revolutionize your breakfast! Add caramelized onions to scrambled eggs for the best scramble you’ve ever tasted. Incorporate them into omelets, top biscuits and gravy, or mix them into Egg Muffins, savory Breakfast Burritos, or a hearty Easy Keto Spinach Frittata with Bacon.

More Kitchen Tutorials to Master
Ready to expand your culinary skills even further? Don’t miss these other practical and easy kitchen how-to guides designed to help you cook with confidence and efficiency!
Pin Recipe
How To Caramelize Onions
Learn how to caramelize onions on the stovetop with this easy, detailed guide! While it requires some time and patience, the technique is simple, and the resulting sweet, savory onions are incredibly delicious and versatile. Caramelized onions add a gourmet touch to countless dishes, from comforting soups and juicy burgers to rich dips.
Cook Time: 1 hr
Total Time: 1 hr 10 mins
Cuisine: American, French
Ingredients
- 3 tablespoons butter, or olive oil
- 3 pounds onions, cut into ¼ inch slices, or diced into ¼ inch squares
- ½ teaspoon sea salt
Instructions
- Add the butter (or olive oil) to a 12 inch (or larger) cast iron skillet or heavy-bottomed pan on the stove over medium-high heat. Allow butter to melt and shimmer.
- Once the butter is melted, add the prepared onion slices (or diced onions) to the skillet. Spread them out evenly in a single layer as much as possible to ensure consistent cooking.
- Cook for 5 minutes, stirring occasionally, until the onions begin to soften and become translucent. Sprinkle the sea salt evenly over the onions, then reduce the heat down to medium (or medium-low if your stove runs hot).
- Continue to cook for 45-60 minutes for sliced onions, or 35-45 minutes for diced onions, stirring only every 10 minutes. This slow cooking allows the natural sugars to caramelize and develop a deep golden-brown color and rich sweetness.
- If the onions start to stick excessively to the bottom of the pan, or if dark bits begin to form too quickly, lower the heat to medium-low and add 1-2 tablespoons of water or broth to deglaze the pan. Scrape up any browned bits with a spatula to incorporate the flavor.
- Once the onions have reached your desired level of tender, golden-brown caramelization, remove them from the heat. Use the caramelized onions immediately in your favorite recipes, or store them for future use.
Notes
- Yield: Approximately 1 pound of raw onions will yield about 1 cup of caramelized onions after cooking.
- Onion Variety: Any color of onion will work for making caramelized onions. For an enhanced depth of flavor, consider using a mix of different varieties.
- Storage: Caramelized onions can be stored in an airtight container in the refrigerator for up to one week. For longer storage, they can be frozen for up to 3 months. Freezing them in ice cube trays or small containers allows for convenient portioning. Thaw overnight in the refrigerator before using.
- Heat Control: Always caramelize onions over medium to medium-low heat. Patience is key; increasing the heat will likely lead to burning rather than caramelization. Stir them every 10 minutes to ensure even cooking and prevent scorching.
- Deglazing: If onions start to stick and brown too much on the pan’s bottom, deglaze with 1-2 tablespoons of water or broth. Scrape up the fond (browned bits) to incorporate flavor and prevent burning.
- Ideal Cookware: A heavy-bottomed pan, such as a cast iron skillet or a Dutch oven, is best for caramelizing onions. These pans provide even heat distribution and retention, crucial for successful caramelization. Ensure the pan is large enough to allow the onions to spread out without overcrowding, which can lead to steaming.
- Stirring Frequency: Avoid stirring the onions too often. Allowing them to rest on the hot surface for a few minutes between stirs helps them develop that beautiful golden-brown color and rich flavor.
- Slice Thickness: Aim for onion slices that are 1/8 to 1/4 inch thick. Slicing them too thinly increases the risk of them sticking and burning, while thicker slices might take excessively long to cook through.
Nutrition Facts
Calories: 282kcal (14%) | Carbohydrates: 42g (14%) | Protein: 5g (10%) | Fat: 12g (18%) | Saturated Fat: 7g (35%) | Polyunsaturated Fat: 1g | Monounsaturated Fat: 3g | Trans Fat: 0.5g | Cholesterol: 30mg (10%) | Sodium: 496mg (21%) | Potassium: 666mg (19%) | Fiber: 8g (32%) | Sugar: 19g (21%) | Vitamin A: 359mg (7%) | Vitamin C: 34mg (41%) | Calcium: 108mg (11%) | Iron: 1mg (6%)
Did you make this recipe? Tag @WhitneyBond on Instagram and hashtag it #WBRecipes!
Mastering the art of caramelizing onions is a rewarding experience that will undoubtedly elevate your home cooking. With just a few simple ingredients and a good dose of patience, you can transform ordinary onions into a sweet, savory, and incredibly versatile ingredient. Whether you’re topping a gourmet burger, enriching a classic French Onion Soup, or simply enjoying them spread on toast, these golden gems are sure to impress. So, grab your skillet, sharpen your knife, and embark on this delicious culinary journey – your taste buds will thank you!