
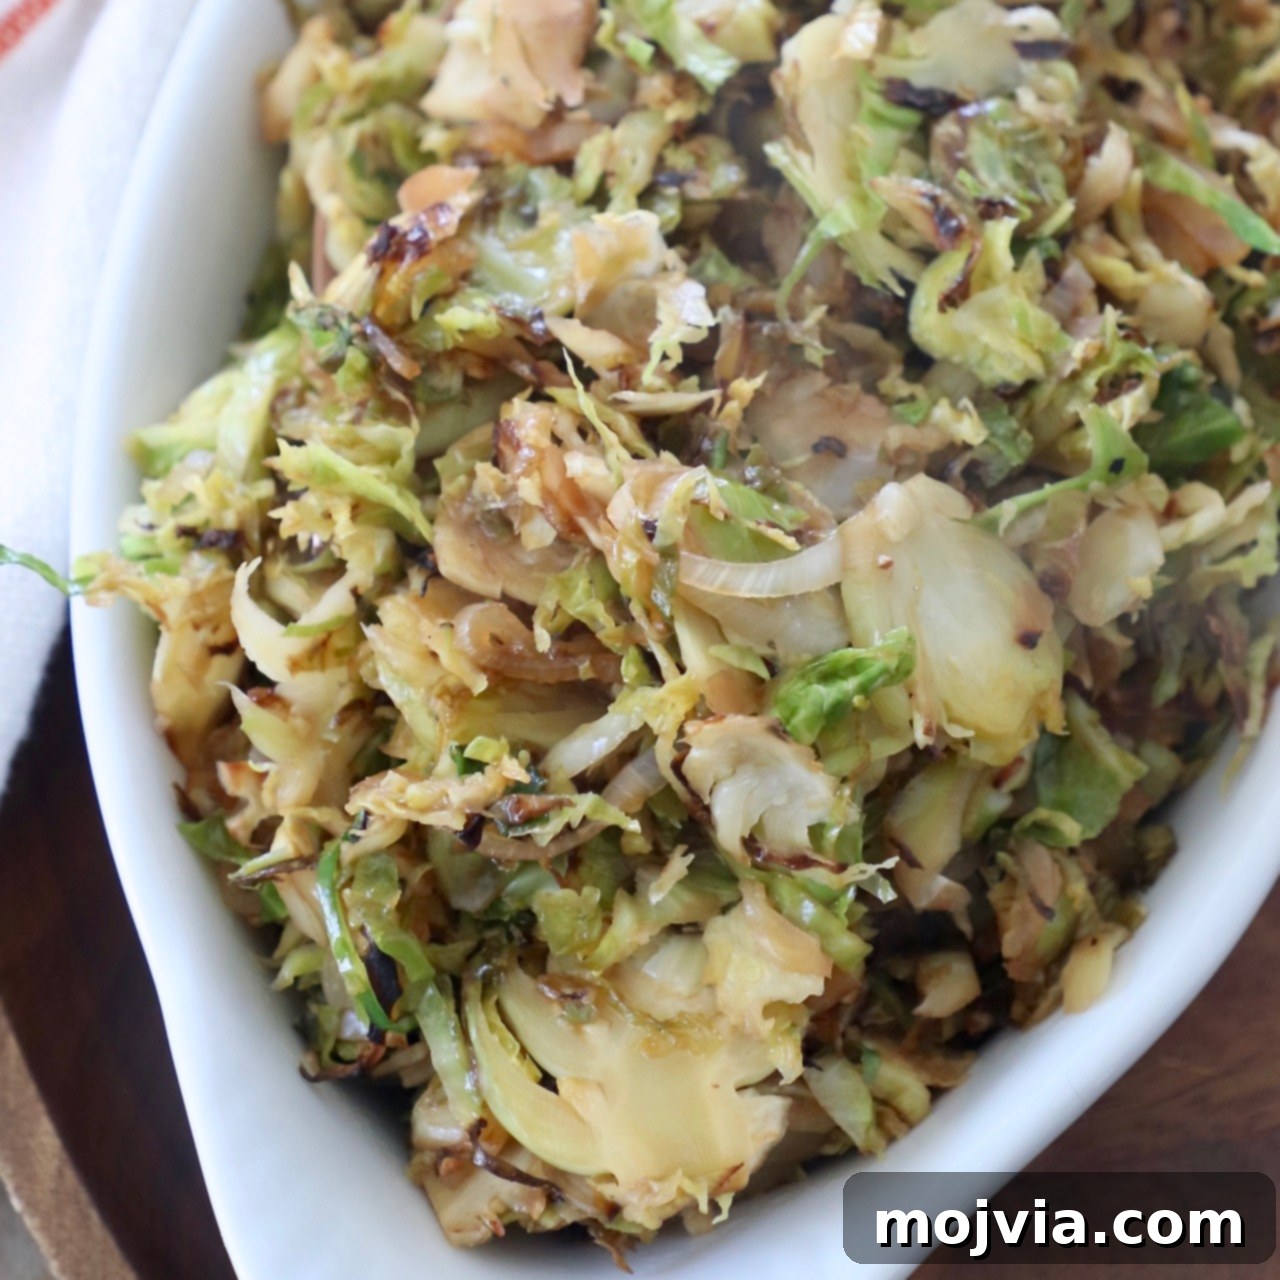
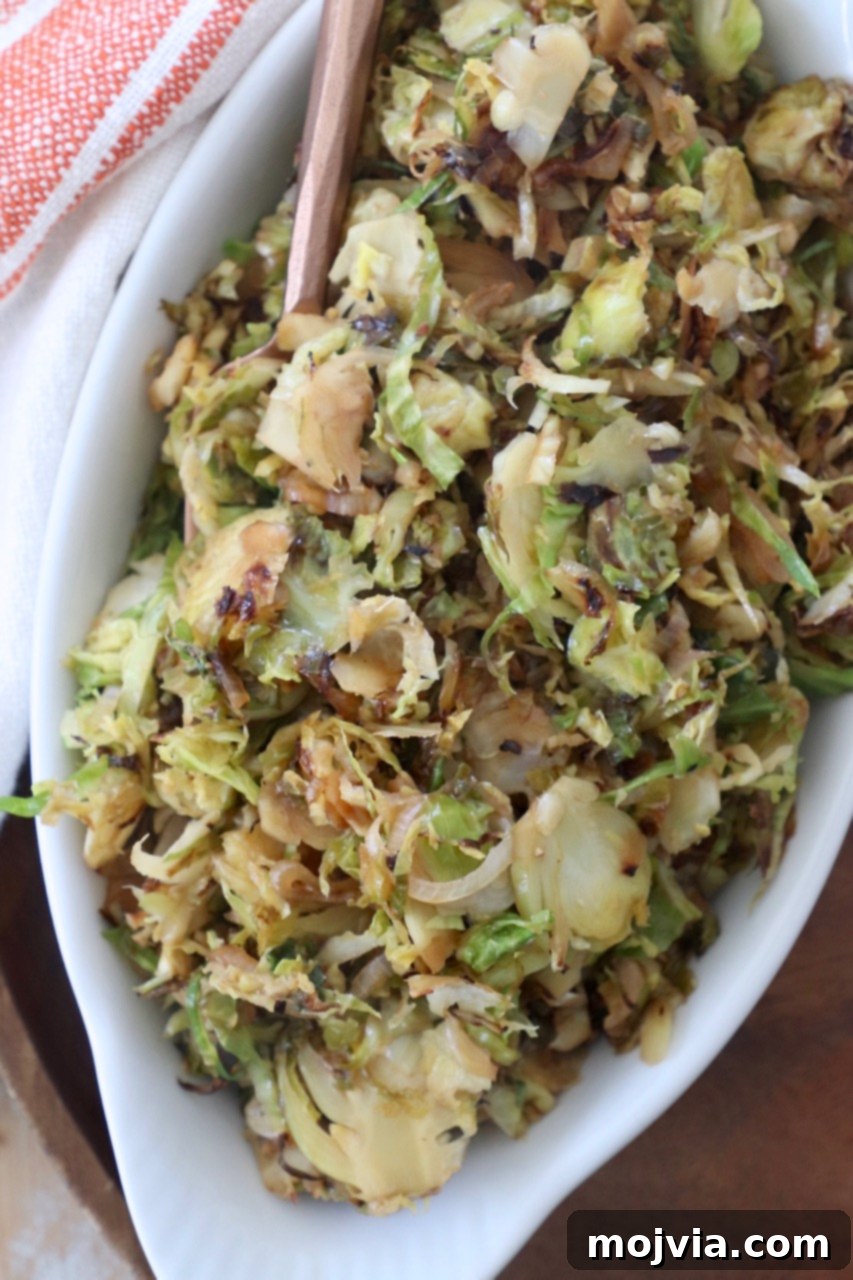
Discover how to make the most flavorful Sauteed Balsamic Shredded Brussels Sprouts right on your stovetop in just 15 minutes! This incredibly delicious side dish is not only naturally gluten-free and vegan, but it’s also wonderfully versatile. Simple enough for quick weeknight meals, yet elegant and impressive enough to grace any holiday table. Get ready to transform your perception of Brussels sprouts with this easy and rewarding recipe!
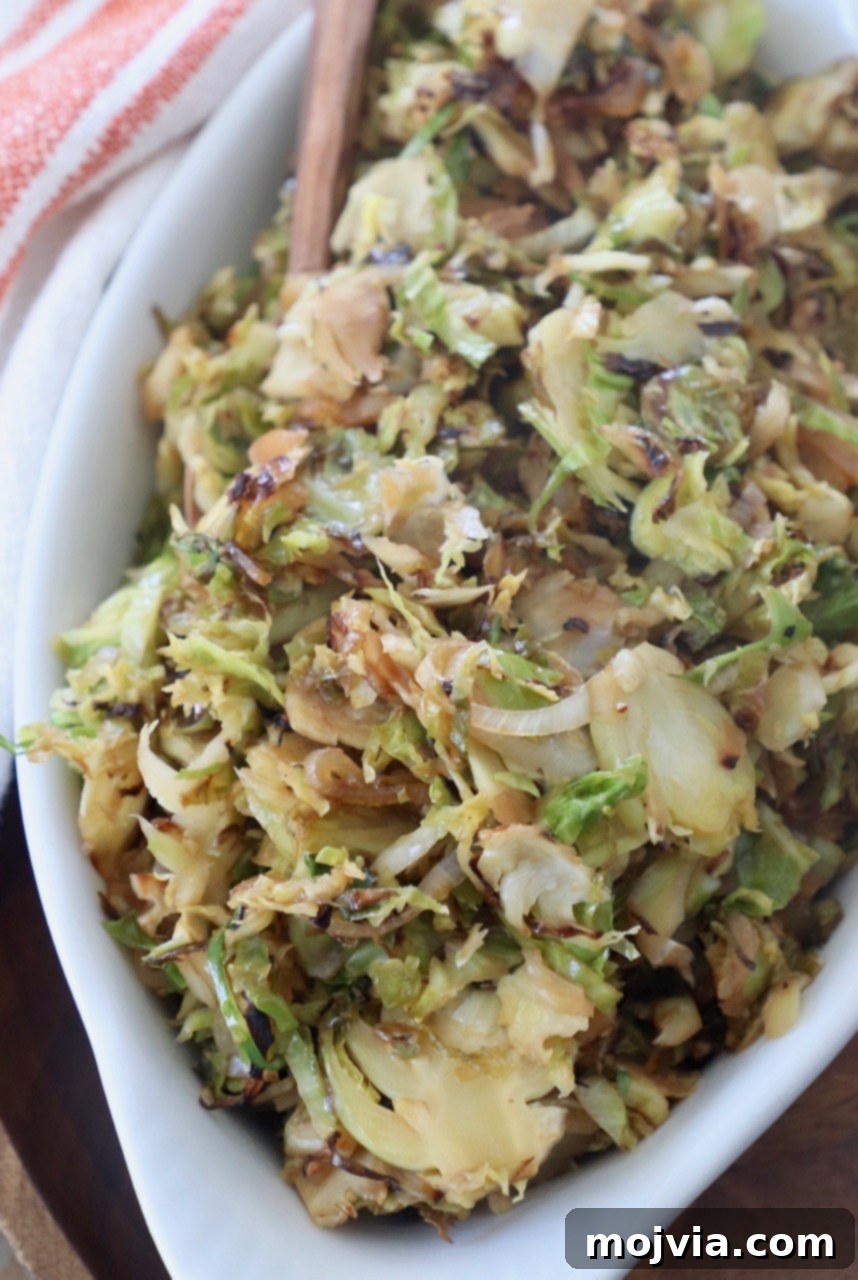
Once you unlock the simple technique of shredding Brussels sprouts at home, your culinary world will open up to a whole new realm of possibilities! This fundamental skill truly transforms these humble green gems into a kitchen staple, especially during the crisp autumn and winter months. Forget about tedious chopping or lengthy cooking times; shredded Brussels sprouts cook up remarkably fast, offering a delightful texture that’s hard to resist. You’ll find yourself incorporating them into everything from vibrant salads to hearty side dishes, thanks to their ease of preparation and incredible versatility. The best part? Once they’re shredded, you can sauté them on the stove in less than 15 minutes, yielding a quick, flavorful, and absolutely scrumptious side dish perfect for any occasion.
For this particular recipe, we elevate the natural flavors of the sprouts by finishing them with a rich balsamic vinegar and a touch of sweet maple syrup. This combination creates a beautiful balance, enhancing the sprouts’ inherent earthiness with a delightful tang and a subtle sweetness that masterfully cuts through any potential bitterness. The result is a well-rounded dish that is complex in flavor yet incredibly simple to achieve. But don’t let our preferred combination limit your creativity! The beauty of this recipe lies in its adaptability. You can easily experiment with other finishing touches such as a bright squeeze of fresh lemon juice, a generous sprinkle of savory Parmesan cheese, or even by cooking the sprouts alongside crispy bacon or caramelized onions for added depth. The foundational method for perfectly cooking shredded Brussels sprouts on the stove is your canvas, and the flavor possibilities are truly endless.
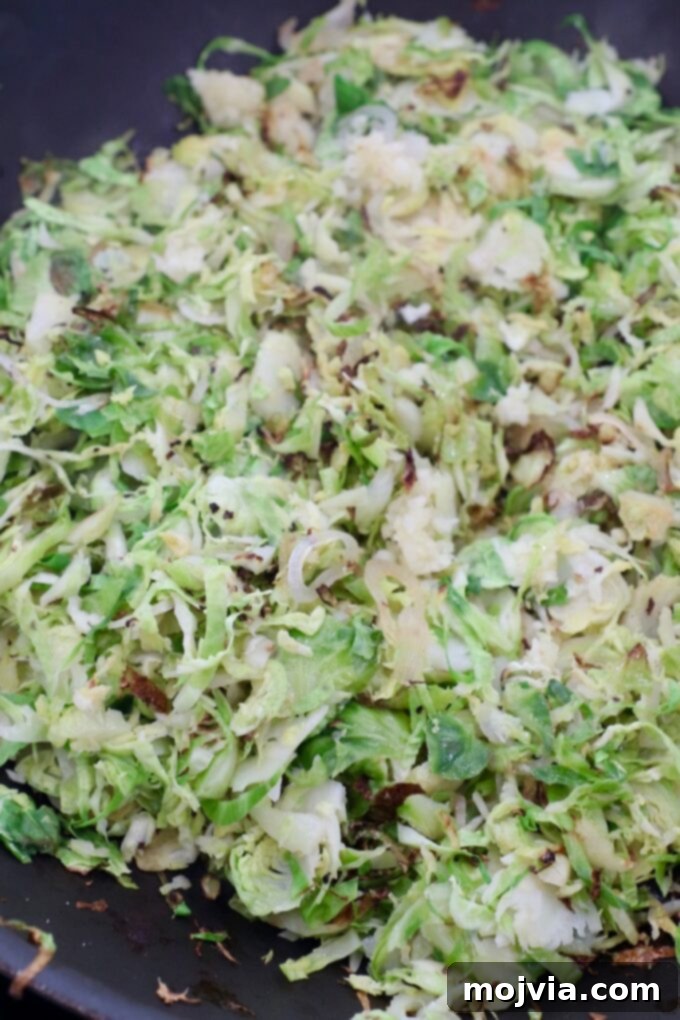
Achieving perfectly caramelized Brussels sprouts that boast a delightful crispy exterior and tender interior isn’t just a matter of luck; it’s a technique that’s easy to master once you know the secret. The key to unlocking that irresistible golden-brown caramelization lies in giving them ample time to develop a crust without interruption. Start by ensuring your skillet is nice and hot with oil before adding the shredded sprouts. Once they hit the pan, resist the urge to stir them constantly. Instead, allow them to cook undisturbed for at least 6 minutes. This crucial period allows the bottom layer of sprouts to make consistent contact with the hot surface, leading to a beautiful, deeply flavorful caramelization. If you’re perpetually moving them around in the pan, they simply won’t have the opportunity to form that coveted crispy layer. Trust the process, let them sizzle, and you’ll be rewarded with a side dish that’s far beyond the ordinary. Apply this golden rule, and let’s get cooking these sensational shredded Brussels sprouts!
Table of Contents
- The Magic of Shredded Brussels Sprouts
- Ingredients for Perfection
- Step-by-Step Instructions
- Creative Substitutions and Variations
- Essential Tips and Tricks
- Recommended Kitchen Tools
- Health Benefits of Brussels Sprouts
- More Irresistible Brussels Sprout Recipes
- Frequently Asked Questions
The Magic of Shredded Brussels Sprouts
Shredding Brussels sprouts isn’t just a different way to cut them; it’s a game-changer that completely alters their texture and how they interact with heat and flavor. When whole, Brussels sprouts can be dense and require longer cooking times, sometimes resulting in a slightly bitter taste for those not accustomed to it. Halved sprouts are a step up, but shredded sprouts take efficiency and flavor absorption to a whole new level.
By shredding them, you create more surface area, which is key for two main reasons:
- **Faster Cooking:** The thinner strands cook much more quickly and evenly, ensuring a tender bite in a fraction of the time. This is invaluable for busy weeknights when you need a healthy side dish on the table fast.
- **Enhanced Caramelization:** The increased surface area allows for maximum contact with the hot pan, promoting the Maillard reaction more effectively. This is the chemical process responsible for the delectable browning and complex flavors that make perfectly sautéed vegetables so appealing. Each tiny shred gets a chance to develop a slightly crispy edge, transforming the sprout into something truly special.
Furthermore, shredded Brussels sprouts absorb dressings and seasonings more readily, making them incredibly flavorful. This preparation method makes them ideal for raw salads, quick stir-fries, or, as in this recipe, a wonderfully caramelized sautéed dish. If you’ve ever been hesitant about Brussels sprouts, preparing them shredded might just make you a true believer!
Ingredients for Perfection
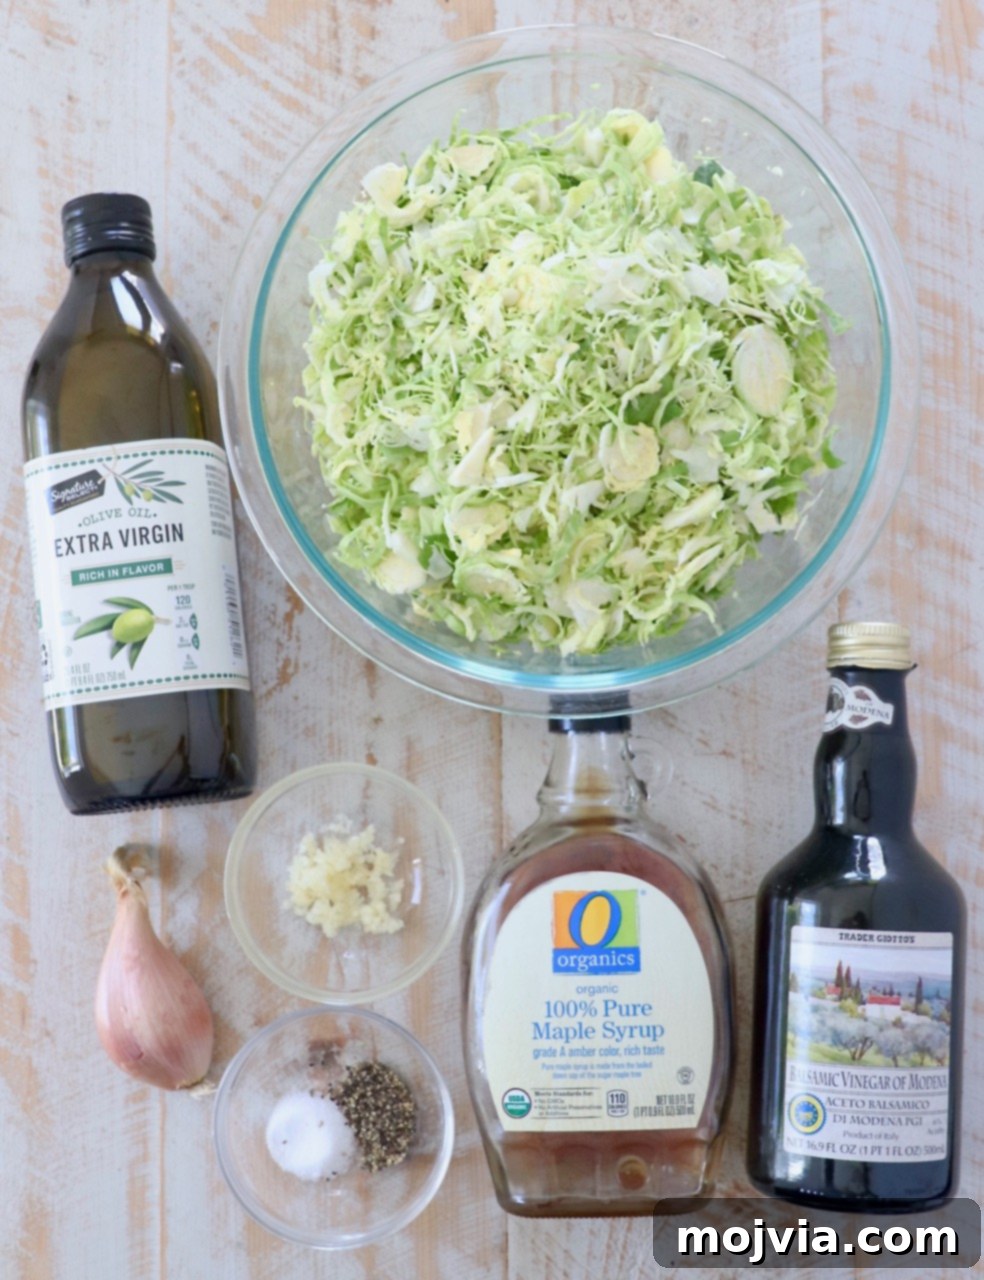
Crafting these delectable shredded Brussels sprouts requires just a handful of simple ingredients, each playing a vital role in achieving that perfect balance of sweet, savory, and tangy. Here’s a closer look at what you’ll need and why:
- Olive Oil: The foundation for our sauté. Olive oil provides a wonderful flavor base and has a sufficiently high smoke point to withstand the medium-high heat needed for proper caramelization. For alternatives, you can confidently use avocado oil, canola oil, or sunflower oil, all of which are excellent choices due to their high smoke points (above 400°F). This ensures your sprouts cook without burning the oil, giving you that desirable crispy crust.
- Shredded Brussels Sprouts: The star of our show! While pre-shredded sprouts are available at grocery stores, taking a few extra minutes to shred them yourself at home is significantly more cost-effective and often results in fresher, more vibrant sprouts. We’ve got a comprehensive guide on how to shred Brussels sprouts using a knife, mandoline, or food processor, making the process quick and easy for anyone. Homemade shredding gives you full control over the thickness and texture.
- Shallot: A culinary workhorse, the thinly sliced shallot introduces a delicate, sweet, and aromatic onion flavor without overpowering the sprouts. Shallots are milder and more nuanced than regular onions, adding a touch of sophistication. If you don’t have shallots on hand, a thinly sliced sweet onion, such as a Vidalia or Walla Walla, makes for an excellent substitute.
- Kosher Salt & Black Pepper: These fundamental seasonings are crucial for enhancing the natural flavors of the Brussels sprouts as they cook. Kosher salt provides a clean, even salinity, while freshly ground black pepper adds a subtle kick and aromatic depth. Seasoning throughout the cooking process ensures every shred is perfectly flavored.
- Garlic: Freshly minced garlic cloves are non-negotiable for the best possible flavor in this dish. Its pungent, aromatic qualities infuse the sprouts with an irresistible warmth and depth. While garlic powder can work in a pinch, fresh garlic offers a brightness and complexity that truly elevates the overall taste profile.
- Balsamic Vinegar: This rich, dark, and slightly sweet vinegar brings a beautiful tang and a hint of fruitiness to the dish. It contributes to the lovely caramelized glaze and helps to cut through the richness of the cooked sprouts, adding a sophisticated finish. Choose a good quality balsamic for the best results.
- Maple Syrup: A natural sweetener that perfectly complements the balsamic vinegar, maple syrup adds a depth of sweetness and a hint of earthy caramel notes. It’s an ideal partner to balance the slight bitterness often associated with Brussels sprouts, creating a harmonious flavor profile. Real maple syrup is always preferred for its complex taste compared to artificial pancake syrups.
Step-by-Step Instructions
Follow these detailed steps to achieve perfectly caramelized and flavorful shredded Brussels sprouts every time. Precision in timing and technique is key for this simple yet rewarding dish.
- Prepare Your Skillet: Begin by placing a large, heavy-bottomed skillet over medium-high heat on your stovetop. Cast iron is highly recommended for this recipe, and for good reason. Its superior heat retention and even heat distribution are unmatched, allowing for a consistent temperature across the cooking surface. This consistency is vital for developing that coveted caramelized crust on the Brussels sprouts. If you don’t have cast iron, opt for the heaviest skillet you own to best mimic this effect. Add the olive oil to the dry, hot skillet, allowing it to shimmer slightly, indicating it’s ready for the vegetables.
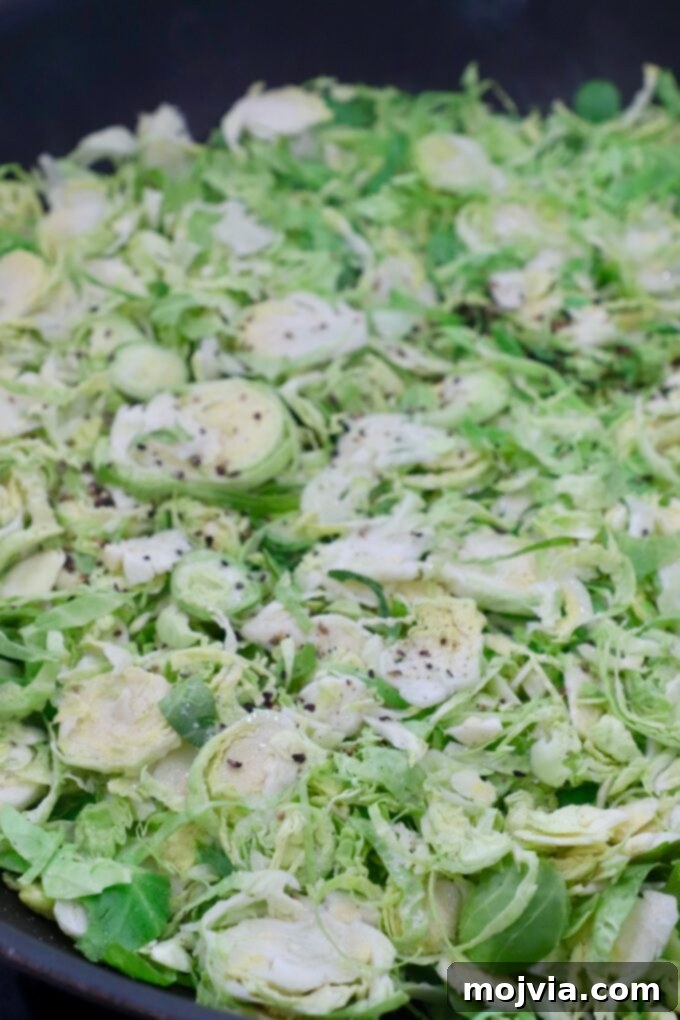
- Initiate Caramelization: Once your oil is visibly hot and shimmering, carefully add the shredded Brussels sprouts and thinly sliced shallot to the skillet. Spread them out as much as possible to ensure maximum contact with the hot surface. Immediately season generously with kosher salt and freshly ground black pepper. Now comes the most crucial step for achieving that crispy caramelization: let them cook, completely untouched, for precisely 6 minutes. It is incredibly important that you resist the urge to stir or toss the sprouts during this period. Setting a timer for these 6 minutes will help ensure you don’t interrupt the browning process. If the sprouts are constantly moving, they won’t form that delicious, deeply flavorful crispy layer on the bottom. Trust the heat and the time to work their magic.
- Infuse with Garlic: After the initial 6 minutes of undisturbed cooking, add the minced garlic to the skillet. At this point, you can gently stir the Brussels sprouts to incorporate the garlic evenly and to flip the sprouts, allowing other sides to crisp up. Continue cooking for an additional 4 minutes, stirring occasionally to prevent sticking and ensure the garlic becomes fragrant without burning. The garlic will infuse the sprouts with its pungent aroma, adding another layer of savory deliciousness to the dish.
- Finish with Flavor: Once the sprouts are beautifully tender-crisp and caramelized, remove the skillet from the heat. This is the perfect moment to stir in the balsamic vinegar and maple syrup. The residual heat in the pan will help the liquids coat the sprouts evenly, creating a glistening glaze that is both sweet and tangy. This combination offers a wonderful balance to the natural slight bitterness of the Brussels sprouts. However, as noted in our variations section below, feel free to get creative with your finishing touches! Explore different flavor combinations to find your favorite way to enjoy these versatile shredded Brussels sprouts. Serve immediately to enjoy them at their peak of flavor and texture.
Creative Substitutions and Variations
While the balsamic and maple syrup combination is a classic for a reason, the beauty of these sautéed shredded Brussels sprouts lies in their incredible adaptability. Don’t hesitate to experiment with different flavor profiles to suit your taste, your meal, or whatever ingredients you have on hand. Here are some exciting alternatives to transform your dish:
- Lemon & Parmesan Bliss: For a bright, tangy, and savory twist, skip the balsamic and maple. Instead, stir in 1-2 tablespoons of fresh lemon juice (adjusting to your preference for tartness) and a generous 1/4 cup of freshly shredded Parmesan cheese directly after removing the skillet from the heat. The warmth will slightly melt the cheese, creating a delightful coating.
- Zesty Lemon Pepper: Elevate the citrus notes by using lemon pepper seasoning in place of traditional black pepper. Season your Brussels sprouts with 1 teaspoon of lemon pepper during the initial cooking phase. To finish, stir in 1 tablespoon of fresh squeezed lemon juice just before serving for an extra burst of zest.
- Irresistible Bacon Maple: For a richer, more indulgent side, start by cooking 1/4 cup of diced bacon in your skillet until it’s wonderfully crispy. Remove the bacon using a slotted spoon and set it aside on a paper towel-lined plate to drain. Crucially, cook the Brussels sprouts in the rendered bacon grease instead of olive oil. The bacon fat imparts an incredible smoky depth. Finish the dish by stirring in 1/4 cup of maple syrup and tossing with the reserved crispy bacon bits.
- Spicy Buffalo Blue Cheese: If you love a kick, toss the hot sautéed sprouts with 1/4 cup of your favorite buffalo sauce. Then, generously top them with 1/4 cup of crumbled blue cheese for a creamy, piquant counterpoint. These spicy and tangy sprouts would be an absolutely perfect pairing with a hearty dish like our Buffalo Cheesy Meatloaf!
- Sweet Sesame Asian Flair: For an umami-rich and subtly sweet Asian-inspired version, toss the cooked sprouts with a delicious sweet sesame sauce. This type of sauce, often made with soy sauce, sesame oil, ginger, and a touch of sweetness, is typically both gluten-free and vegan, making it a fantastic alternative for dietary needs.
- Harvest Nuts & Berries: Embrace the flavors of fall and winter by adding textural complexity. In addition to 1/4 cup of maple syrup, stir in 1/4 cup of your favorite chopped nuts (walnuts, pecans, pistachios, or almonds work wonderfully) and 1/4 cup of dried cranberries. This combination creates a delightful sweet and savory dish with a satisfying chew.
- Tangy Honey Mustard: For a classic flavor pairing that’s both sweet and sharp, whisk together 2 tablespoons of Dijon mustard with 2 tablespoons of honey (or maple syrup if preferred for a vegan option). Stir this mixture into the hot sprouts just after removing them from the heat.
Essential Tips and Tricks
Mastering this shredded Brussels sprouts recipe is simple, and these additional tips will help you achieve perfect results every time, saving you time and ensuring deliciousness.
- Advance Preparation is Your Friend: Life can get busy, but that doesn’t mean sacrificing fresh, healthy meals. The beauty of shredded Brussels sprouts is that they can be prepared up to 2 days in advance. Simply shred your sprouts as directed, store them in an airtight container or a sealed bag in the refrigerator, and they’ll be ready to hit the skillet when you are. This prep-ahead strategy ensures you can have this amazing side dish on the table in under 15 minutes, even on the busiest of weeknights or when hosting a holiday gathering.
- Storing and Reheating Leftovers: If you happen to have any leftover sautéed shredded sprouts (which is a rare occurrence in our kitchen!), they can be safely stored in an airtight container in the refrigerator for up to 5 days. When you’re ready to enjoy them again, there are two excellent reheating methods. For best results, reheat them in a skillet over medium-high heat on the stove for 3-5 minutes, stirring occasionally. This method helps to crisp them up again. Alternatively, for a quicker option, microwave them for about 2 minutes, though they may not regain the same crispy texture.
- Adjusting Serving Sizes with Ease: This recipe is perfectly scaled to serve 4 people as a generous side dish. However, if you’re preparing for a larger crowd, such as for a holiday feast, or simply want to cook a smaller batch, adjusting the recipe is straightforward. In many modern recipe cards, you can simply hover over the “servings” amount and digitally increase or decrease it (e.g., from 4 to 8, or to 12). The ingredient quantities will automatically update to reflect the new serving amount, eliminating guesswork and making meal planning a breeze. For static recipes, simply double or triple the ingredient amounts manually.
Recommended Kitchen Tools
Having the right tools can make all the difference in the kitchen, turning cooking into a seamless and enjoyable experience. For this shredded Brussels sprouts recipe, a few key items will ensure efficiency and the best possible results:
- Sharp Knife, Food Processor, or Mandoline: These are your primary options for efficiently shredding the Brussels sprouts. A sharp chef’s knife allows for precise, thin cuts. A food processor with a slicing disk is incredibly fast for larger batches. A mandoline offers uniform, paper-thin shreds with ease, but always use its safety guard. Choose the tool that best suits your comfort and desired shred thickness.
- Cast Iron Skillet: As emphasized in the instructions, a large cast iron skillet is the ideal vessel for cooking these sprouts. Its ability to retain and distribute heat evenly is crucial for achieving that perfect caramelization and crispy texture. If you don’t own one, a heavy-bottomed stainless steel pan is the next best choice, though you may need to adjust cooking times slightly.
- Spatula or Tongs: Essential for moving and stirring the sprouts (after the initial undisturbed cooking phase) and for serving. A sturdy, heat-resistant spatula or a pair of tongs will make maneuvering the shredded sprouts in the hot pan much easier.
Health Benefits of Brussels Sprouts
Beyond their delicious taste and incredible versatility, Brussels sprouts are nutritional powerhouses, making them an excellent addition to a healthy diet. These mini cabbages are packed with essential vitamins, minerals, and fiber, contributing to overall well-being. Here’s why you should embrace them:
- Rich in Vitamins: Brussels sprouts are an outstanding source of Vitamin K, vital for blood clotting and bone health, and Vitamin C, a powerful antioxidant that supports immune function and collagen production. They also provide good amounts of Vitamin A, Folic Acid, and Vitamin B6.
- High in Fiber: The significant fiber content in Brussels sprouts promotes digestive health, helps regulate blood sugar levels, and contributes to a feeling of fullness, which can aid in weight management.
- Antioxidant Powerhouse: Like other cruciferous vegetables, Brussels sprouts are loaded with antioxidants that combat oxidative stress and may reduce the risk of chronic diseases.
- Anti-inflammatory Properties: They contain compounds known for their anti-inflammatory effects, which can be beneficial for overall health.
- Low in Calories: With relatively few calories, Brussels sprouts offer a nutrient-dense option that can be enjoyed generously without guilt.
Incorporating shredded Brussels sprouts into your meals is a tasty and simple way to boost your daily nutrient intake and enjoy a host of health benefits.
More Irresistible Brussels Sprout Recipes
If you’ve fallen in love with these shredded Brussels sprouts, you’re in for a treat! Brussels sprouts are incredibly versatile and can be prepared in countless delicious ways. Explore these other fantastic recipes to further expand your repertoire and enjoy this healthful vegetable in new and exciting forms:
- Maple Bacon Brussels Sprouts: A classic combination of smoky bacon and sweet maple syrup, roasted to perfection.
- Stuffed Acorn Squash with Cranberries & Brussels Sprouts: A beautiful and flavorful fall dish, perfect for a cozy meal or holiday centerpiece.
- Brussels Sprout Salad with Dijon Dressing: A fresh and vibrant salad showcasing raw, thinly sliced Brussels sprouts with a zesty dressing.
- Brussels Sprout Casserole with Mushrooms: A comforting and hearty casserole that transforms Brussels sprouts into a rich and savory dish.
- Grilled Brussels Sprouts: For smoky, charred perfection, this recipe brings out a unique flavor profile that’s perfect for outdoor cooking.
Frequently Asked Questions
Here are some common questions about making shredded Brussels sprouts:
- Q: Can I use frozen Brussels sprouts for this recipe?
A: While technically possible, frozen Brussels sprouts typically contain more water, which can hinder the caramelization process and result in a softer, less crispy texture. Fresh Brussels sprouts are highly recommended for the best results in this sautéed recipe. - Q: What’s the best way to shred Brussels sprouts quickly?
A: For small batches, a sharp chef’s knife will work well. For larger quantities, a food processor with a slicing disc is incredibly efficient, producing uniform shreds in seconds. A mandoline can also create beautiful, thin shreds, but always use the safety guard. - Q: My sprouts aren’t getting crispy, what am I doing wrong?
A: The most common culprit is overcrowding the pan or stirring too soon. Ensure your skillet is hot, use enough oil, and spread the sprouts in a single layer if possible. Most importantly, allow them to cook undisturbed for at least 6 minutes to form a crust before stirring. Cooking in batches if your pan is too small can also help. - Q: Can I prepare the sauce in advance?
A: Yes, you can whisk together the balsamic vinegar and maple syrup (and any other liquid flavorings) in advance and keep it in a small container. Add it to the hot sprouts immediately after removing them from the heat. - Q: Are these sprouts good for meal prepping?
A: Absolutely! You can shred the Brussels sprouts up to 2 days in advance. Once cooked, leftovers store well in the fridge for up to 5 days, making them a great addition to your meal prep rotation. Reheat in a skillet for best texture.
Enjoy this delightful and easy-to-make shredded Brussels sprouts recipe, a perfect blend of convenience, flavor, and nutrition!
Print Recipe
Pin Recipe
Rate this Recipe
Shredded Brussels Sprouts
Ingredients
- 1 tablespoon olive oil
- 1 pound shredded brussels sprouts
- 1 shallot, thinly sliced
- ½ teaspoon salt
- ½ teaspoon black pepper
- 2 cloves garlic, minced
- 2 tablespoons balsamic vinegar
- 2 tablespoons maple syrup
Instructions
-
Add the olive oil to a large cast iron skillet on the stove over medium-high heat.
-
Once the oil is hot, add the brussels sprouts and shallot, season with the salt and black pepper.
-
Cook, untouched for 6 minutes.
-
Add the minced garlic, stir and cook for an additional 4 minutes, stirring occasionally.
-
Remove from the heat and stir in the balsamic vinegar and maple syrup.
-
Serve immediately.
Notes
- The brussels sprouts can be shredded up to 2 days in advance, so you can toss them in the skillet and have this side dish on the table in less than 15 minutes!
- Leftover sauteed shredded sprouts can be stored in the fridge for up to 5 days. Reheat them over medium-high heat in a skillet on the stove for 3-5 minutes, or in the microwave for 2 minutes.
- This recipe serves 4 as a side dish. If you want to double, or triple, the recipe for a holiday meal, simply adjust the ingredient amounts (e.g., from 4, to 8, or to 12 servings).
Nutrition Facts
Carbohydrates 20g (7%)
Protein 4g (8%)
Fat 4g (6%)
Saturated Fat 1g (5%)
Polyunsaturated Fat 1g
Monounsaturated Fat 3g
Sodium 323mg (13%)
Potassium 503mg (14%)
Fiber 5g (20%)
Sugar 10g (11%)
Vitamin A 857mg (17%)
Vitamin C 97mg (118%)
Calcium 67mg (7%)
Iron 2mg (11%)
Did you make this recipe?
Tag @WhitneyBond on Instagram and hashtag it #WBRecipes!