
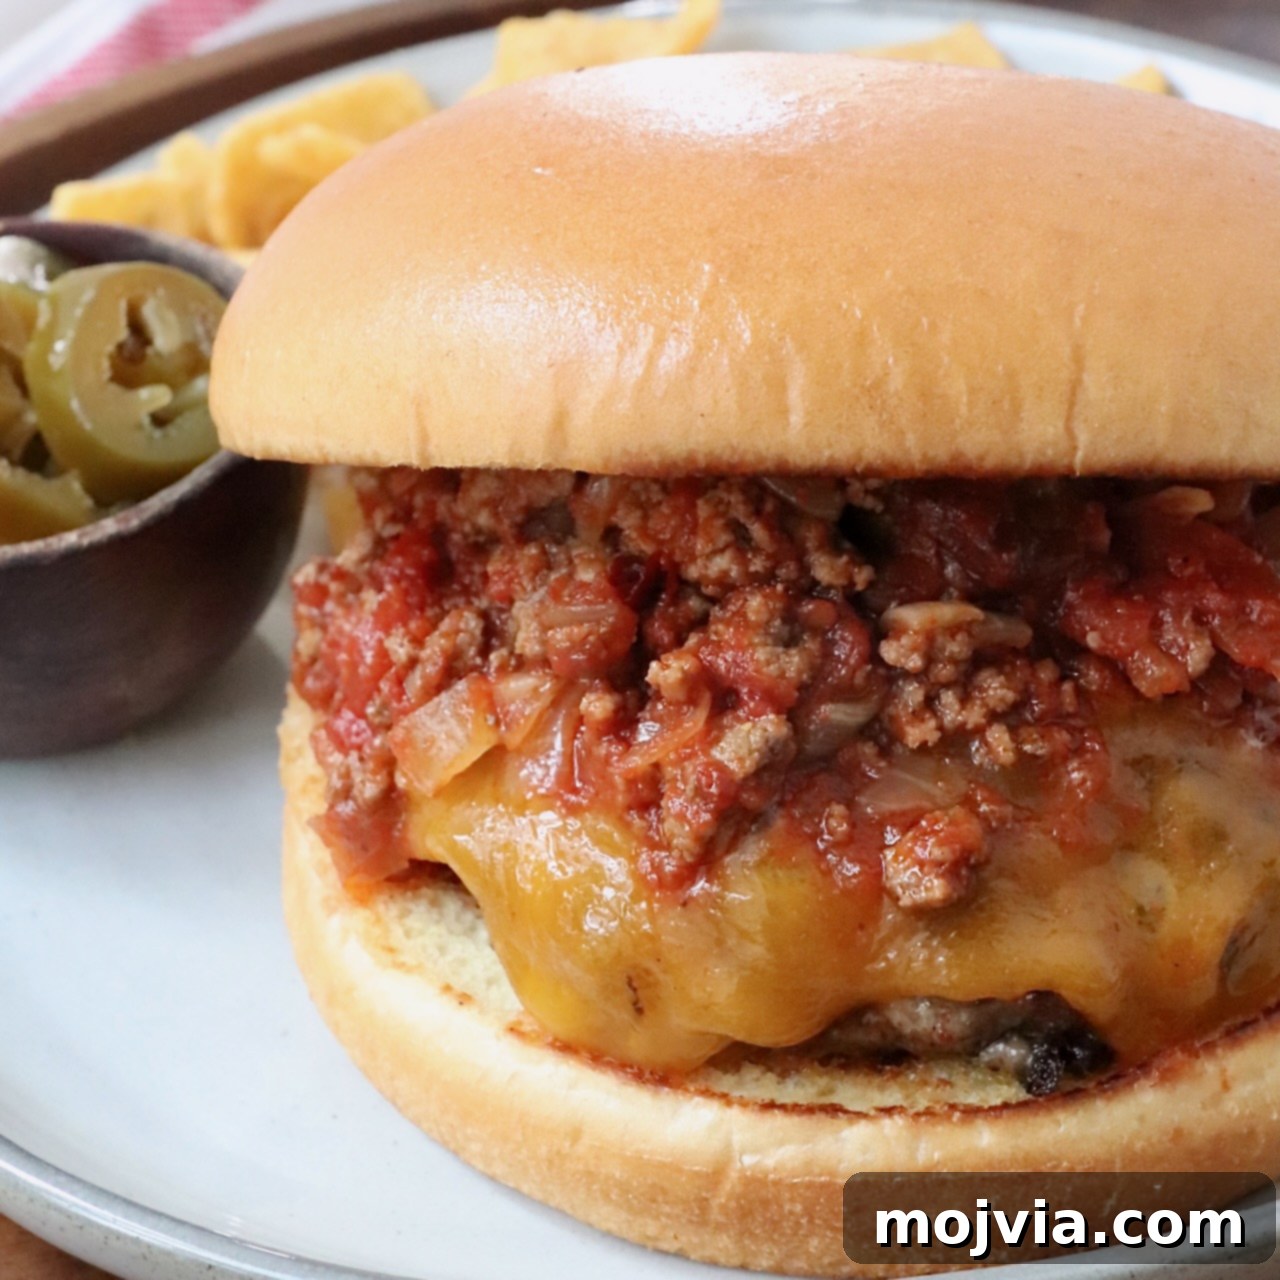
Welcome to the definitive guide for crafting the ultimate traditional Chili Burger with cheese, a culinary delight that promises to elevate your burger game! This easy-to-follow recipe unlocks the secrets to a truly unforgettable experience, centered around a rich, homemade chili sauce generously spooned over perfectly seasoned, expertly grilled burger patties. Crowned with a slice of sharp cheddar cheese, each bite delivers an explosion of flavors and textures, transforming a classic cheeseburger into an incredibly satisfying, hearty meal. Prepare to master the art of the chili burger, a dish that’s much more than just a meal; it’s a celebration of comfort food at its finest.
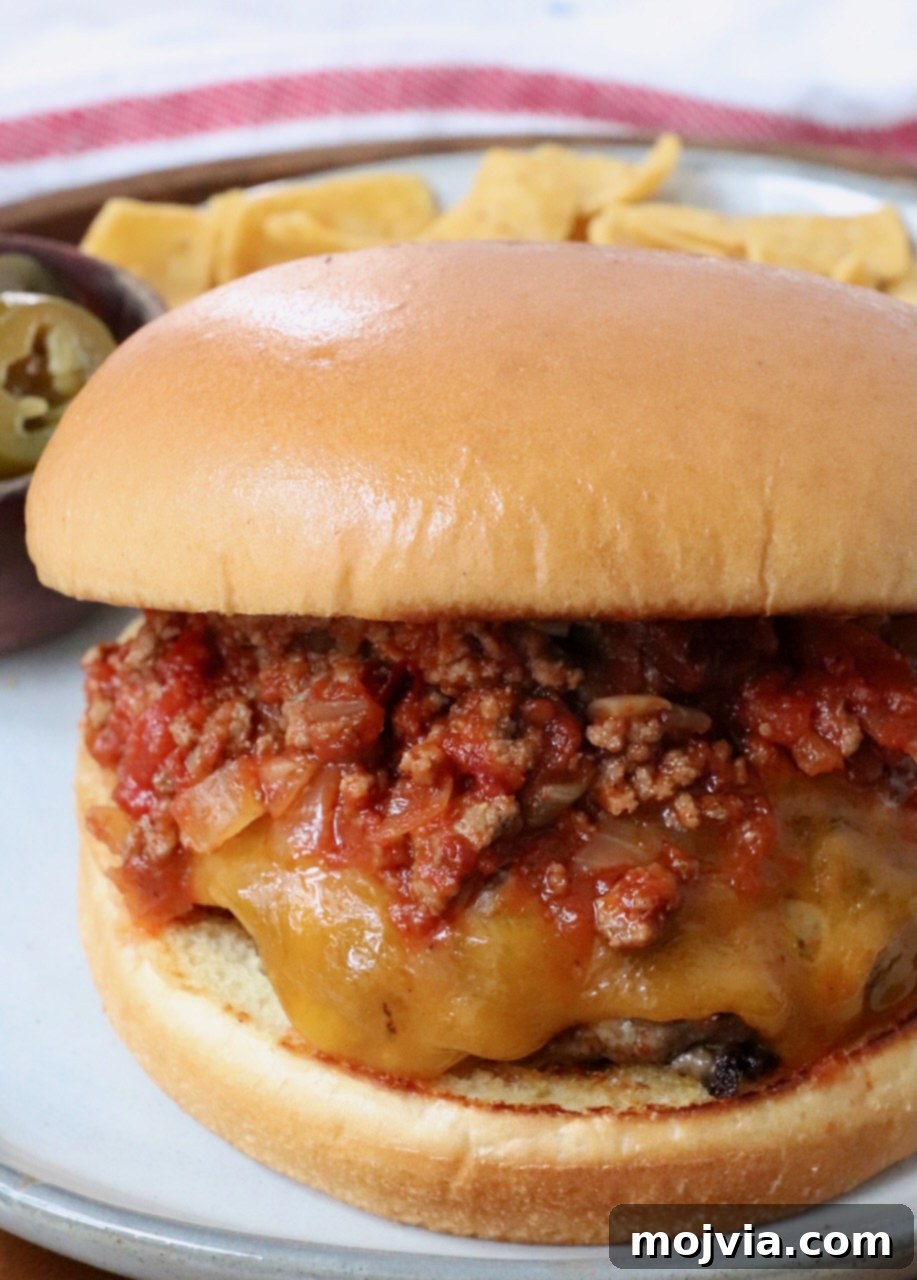
Table of Contents
- The Legacy of the Chili Burger
- Why Homemade Chili is Key
- Ingredients
- Instructions
- Optional Toppings
- Recipe Tips for Perfection
- Make Ahead, Storage, and Reheating
- What to Serve with Your Chili Burgers
- More Burger Recipes
The Legacy of the Chili Burger
Growing up in Oklahoma, the chili burger wasn’t just a meal; it was a regional institution. Many local diners offered their versions, but none captured the essence quite like the legendary Johnnie’s Charcoal Broiler. Their chili burger, often paired with their equally famous onion rings, was a staple that defined a generation of casual dining.
On a recent nostalgic trip back home, I had the pleasure of introducing my husband, Kurt, to his very first Johnnie’s chili burger. Watching him experience that unique blend of flavors brought back a flood of memories and reignited my passion for recreating that magic in my own kitchen. I was reminded of just how truly distinctive and utterly delicious this burger could be, a taste experience that goes far beyond your average patty and bun.
Why Homemade Chili is Key
The secret to a truly exceptional chili burger lies unequivocally in the chili itself. A mere average chili won’t cut it; you need a homemade sauce that’s bursting with flavor and, crucially, boasts the perfect consistency. This is where many attempts fall short. A chili that’s too watery will simply run off the burger, creating a messy and unfulfilling experience. Conversely, a chili that’s too thick can turn your chili burger into little more than a regular cheeseburger with a dense, heavy topping, losing that signature chili-infused character.
My journey to perfect this chili sauce involved several trials, meticulously adjusting spices and simmering times. The goal was to achieve a sauce that was not only incredibly flavorful but also clung beautifully to the burger patty, providing a balanced, juicy, and spicy coating without overpowering the meat. The result? The absolute best chili sauce for topping a burger – one that’s also incredibly versatile, lending its deliciousness to chili cheese fries or hot dogs. It’s remarkably easy to make, offers a delightful hint of spice, and possesses the ideal texture that makes every bite of your chili burger a memorable one.
When it comes to toppings for this masterpiece, I generally advocate for simplicity. The robust flavor of the juicy burger combined with the rich, aromatic chili sauce often needs little else. However, for those who enjoy an extra layer of texture or a zesty kick, a few pickled jalapeños or a sprinkling of crispy fried onion strings are welcome additions. They complement the core flavors without overshadowing them, ensuring the star of the show—the chili burger—shines brightest.
Ingredients
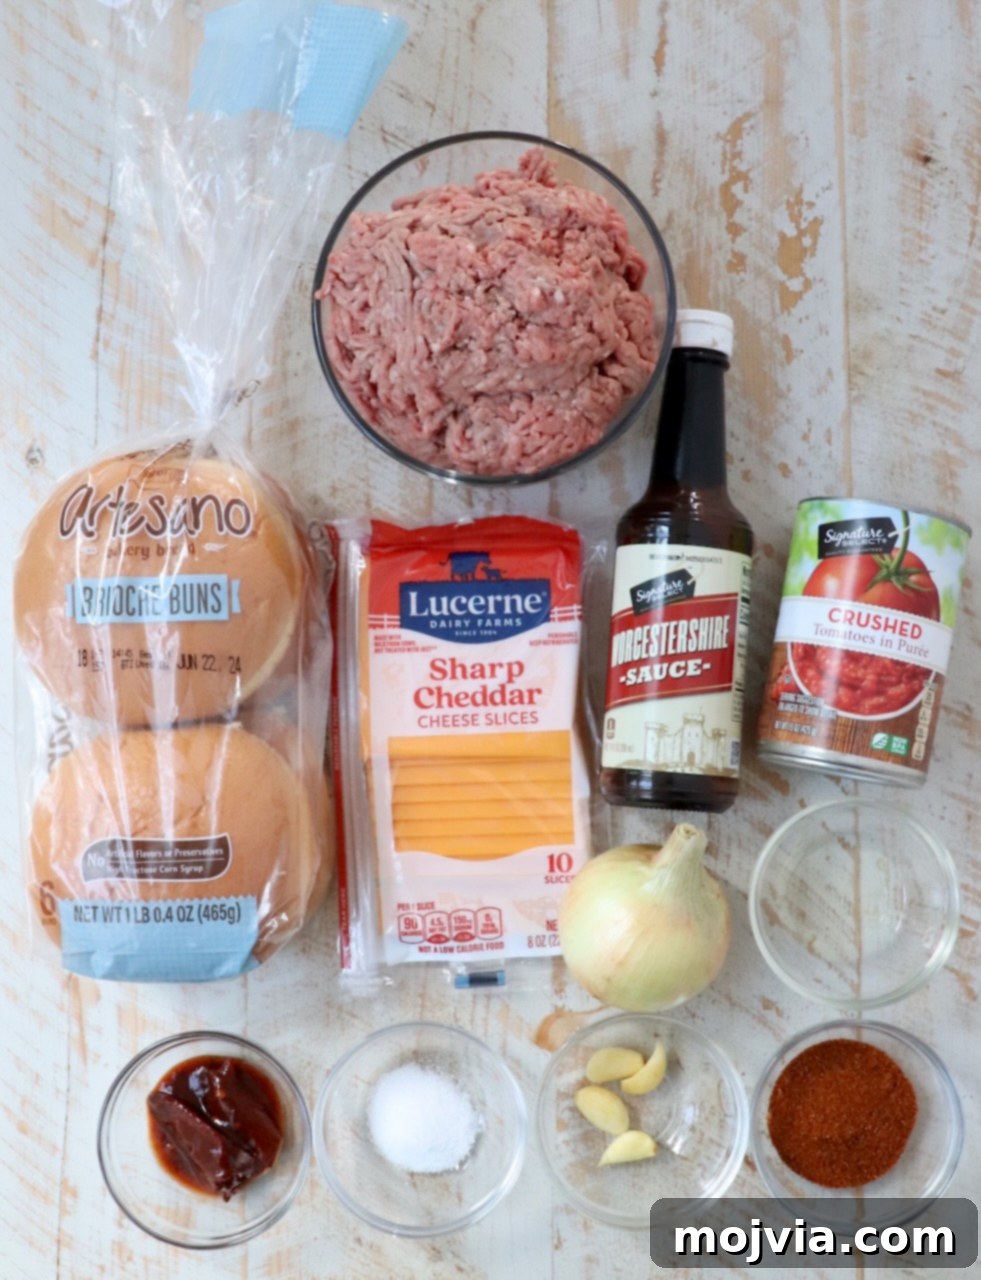
Creating the perfect chili burger starts with selecting high-quality ingredients. Here’s a breakdown of what you’ll need and why each component is vital:
- Ground Beef: For both the chili and the burger patties, an 80/20 lean-to-fat ratio is highly recommended. This blend strikes the ideal balance, providing enough fat to ensure tender, juicy burgers and a rich, flavorful chili, without being excessively greasy.
- Chili Seasoning: While pre-made packages from the spice aisle are an option, my homemade chili seasoning blend is a game-changer. It combines pantry staples like chili powder, paprika, onion powder, and ground cumin, creating a depth of flavor that’s unparalleled and easily customizable. It takes just 5 minutes to mix!
- Worcestershire Sauce: This is truly a secret weapon for adding an incredible umami depth to both the ground beef for the chili and the burger patties. Its savory complexity elevates the overall flavor profile. If you find yourself without it, soy sauce can be used as a suitable substitute.
- Cheddar Cheese: For these burgers, I prefer sharp cheddar for its robust flavor and excellent melt. However, if you’re aiming for a classic diner feel, slices of creamy American cheese also work wonderfully, melting into a deliciously gooey layer.
- Hamburger Buns: The bun is more than just a holder; it’s an integral part of the burger experience. Brioche buns are highly recommended for their slightly sweet, buttery flavor and soft texture, which complements the rich chili and beef beautifully. Any sturdy burger bun, however, will suffice.
- Vegetable Oil: A neutral-flavored oil such as vegetable, canola, or avocado oil is perfect for sautéing the aromatics for the chili, ensuring the other flavors shine through.
- Onion: You’ll need approximately one cup of finely diced yellow onion for the chili, which typically amounts to about half of a large onion. Onions provide a foundational sweetness and aromatic base for the chili.
- Garlic: Freshly minced garlic cloves are essential for the best flavor in your chili. Avoid pre-minced garlic in a jar for this recipe; the fresh aroma and pungency are irreplaceable.
- Chipotle Peppers in Adobo Sauce: These are crucial for adding a distinctive smoky flavor and a mild-to-medium spice level to the chili. You’ll find them canned in the Hispanic foods aisle. For this recipe, two minced peppers and a teaspoon of the adobo sauce are used to impart that signature depth.
- Salt: Essential for seasoning both the chili and the burger patties, balancing and enhancing all the other flavors.
- Crushed Tomatoes: A 15-ounce can of crushed tomatoes forms the body of the chili, providing a rich, savory base with a texture that is neither too watery nor too chunky, perfect for a burger topping.
Instructions
Follow these detailed step-by-step instructions with accompanying photos to master this recipe at home. For precise ingredient quantities and a printable version, refer to the recipe card at the very bottom of this post.
Prepare the Chili
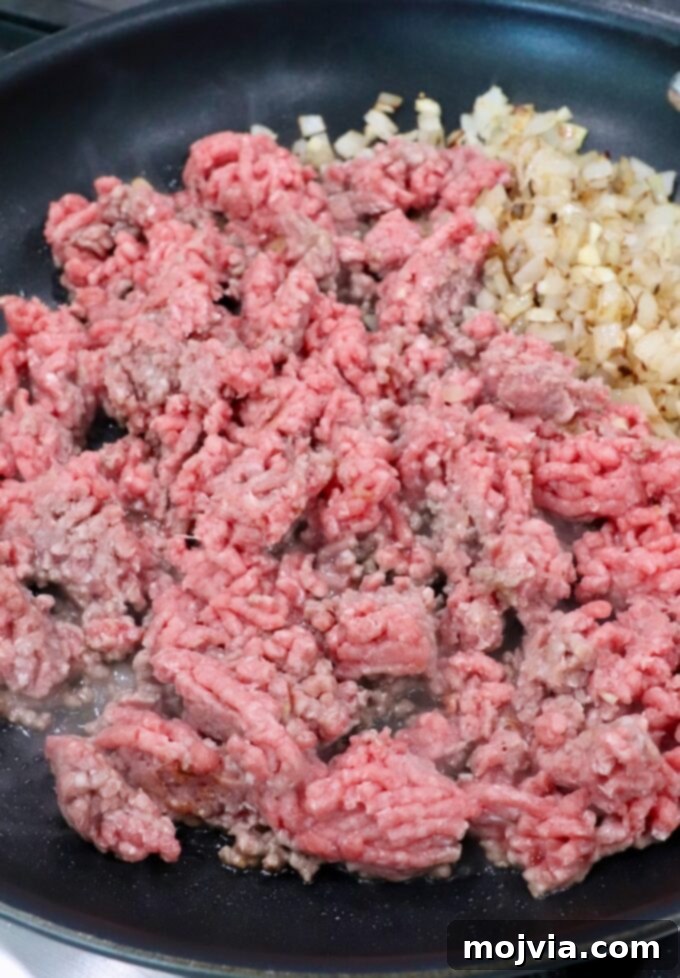
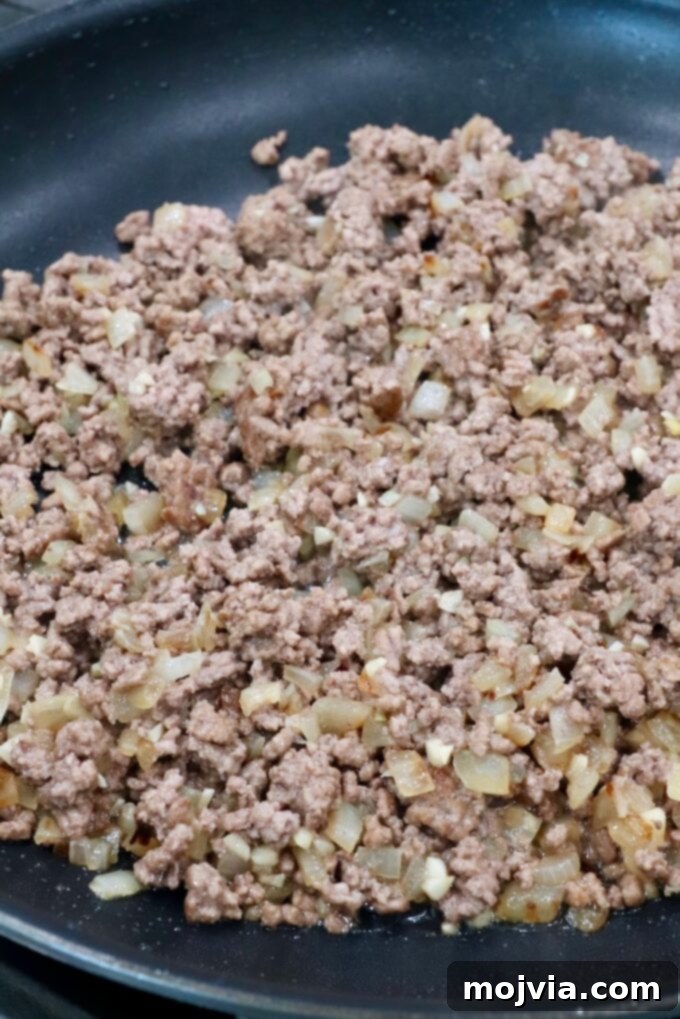
- Sauté Aromatics & Cook Ground Beef: Begin by adding vegetable oil to a large skillet set over medium-high heat. Once shimmering, add the diced onions and cook for 4-5 minutes until they begin to soften and turn translucent. Stir in the minced garlic and continue cooking for an additional minute until fragrant. Next, add the ground beef to the skillet, breaking it apart with a spoon as it cooks. Continue to cook, crumbling the beef, for 6-8 minutes until it is thoroughly browned. Carefully drain any excess grease from the skillet to ensure your chili isn’t too oily.
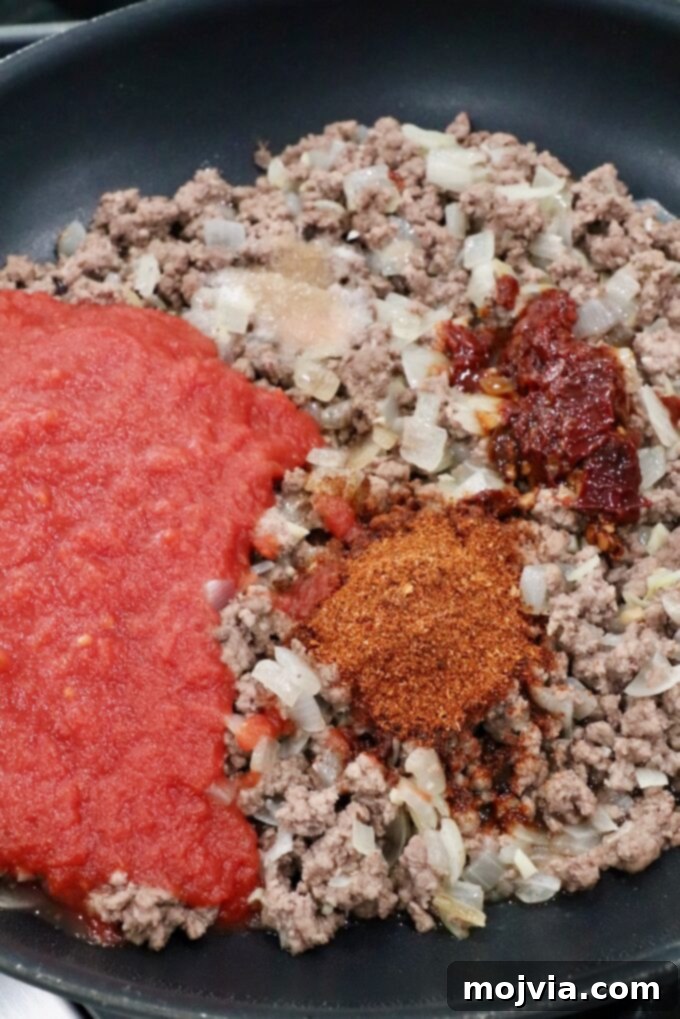
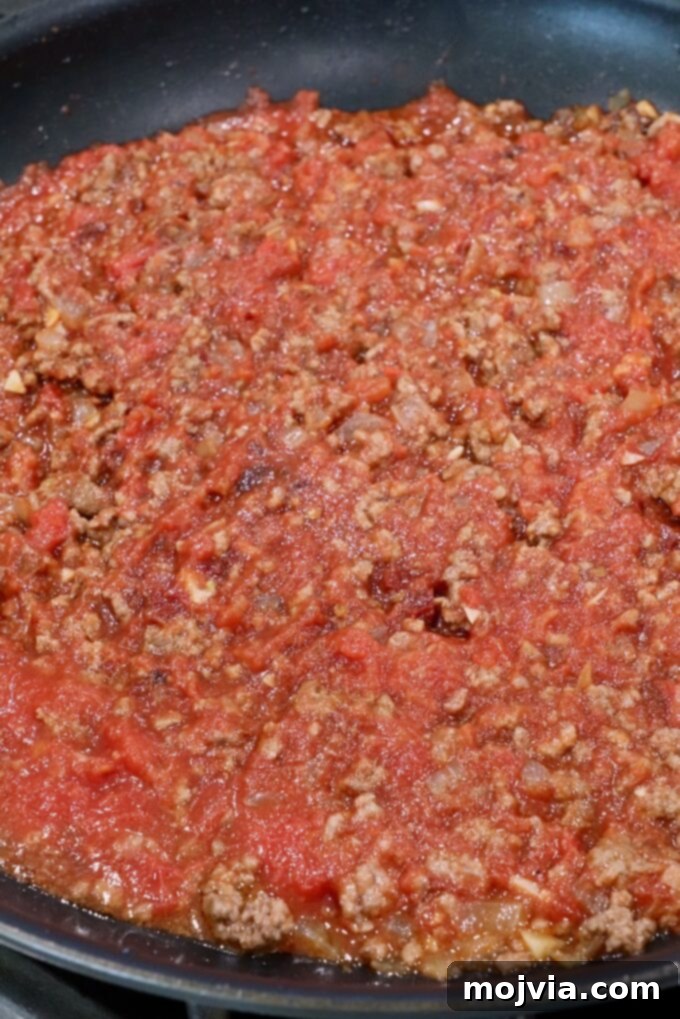
- Season and Simmer the Chili: Into the browned ground beef mixture, add the minced chipotle chiles, the teaspoon of adobo sauce, Worcestershire sauce, your chosen chili seasoning, and salt. Stir these ingredients thoroughly to combine, ensuring the beef is well coated with the spices. Finally, pour in the can of crushed tomatoes. Bring the mixture to a gentle simmer, then reduce the heat to medium-low and let it simmer for at least 15 minutes. This simmering time is crucial for allowing the flavors to meld and deepen, and for the chili to thicken to the perfect consistency that will beautifully cling to your burger patties. While the chili simmers, you can move on to preparing and cooking your burger patties.
Prepare and Cook the Burger Patties
Cook the burger patties simultaneously while your chili is simmering to ensure everything is hot and ready for assembly.
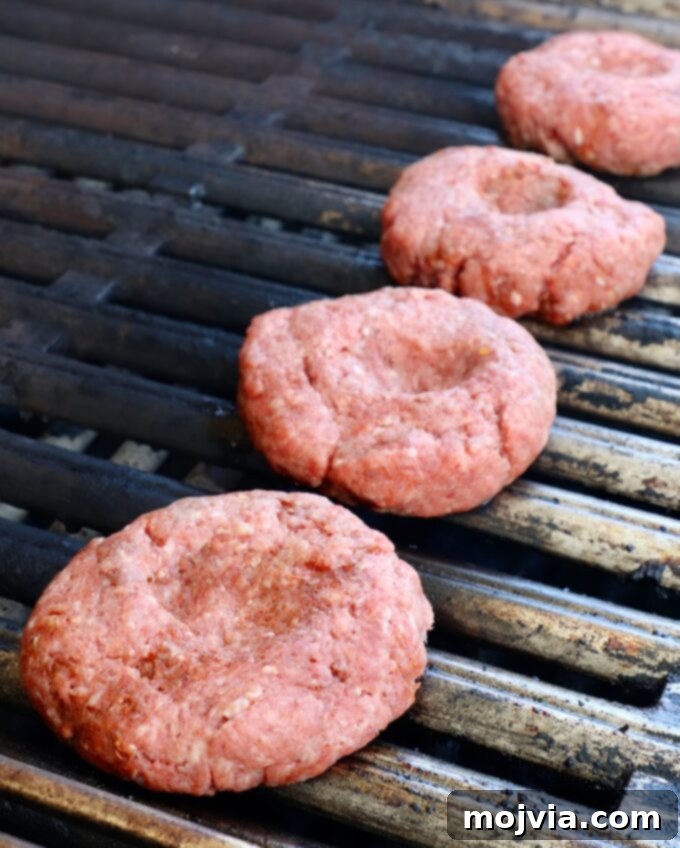
- Form the Burger Patties: In a large bowl, gently combine the ground beef, chili seasoning, and Worcestershire sauce. Be careful not to overmix, as this can lead to tough burgers. Divide the mixture into four equal 4-ounce portions. Form each portion into a patty, approximately 1 inch thick. Crucially, use your thumb or the back of a spoon to press a shallow indentation in the center of each patty. This simple trick helps prevent the burgers from bulging in the middle and shrinking excessively as they cook, ensuring an even patty shape.
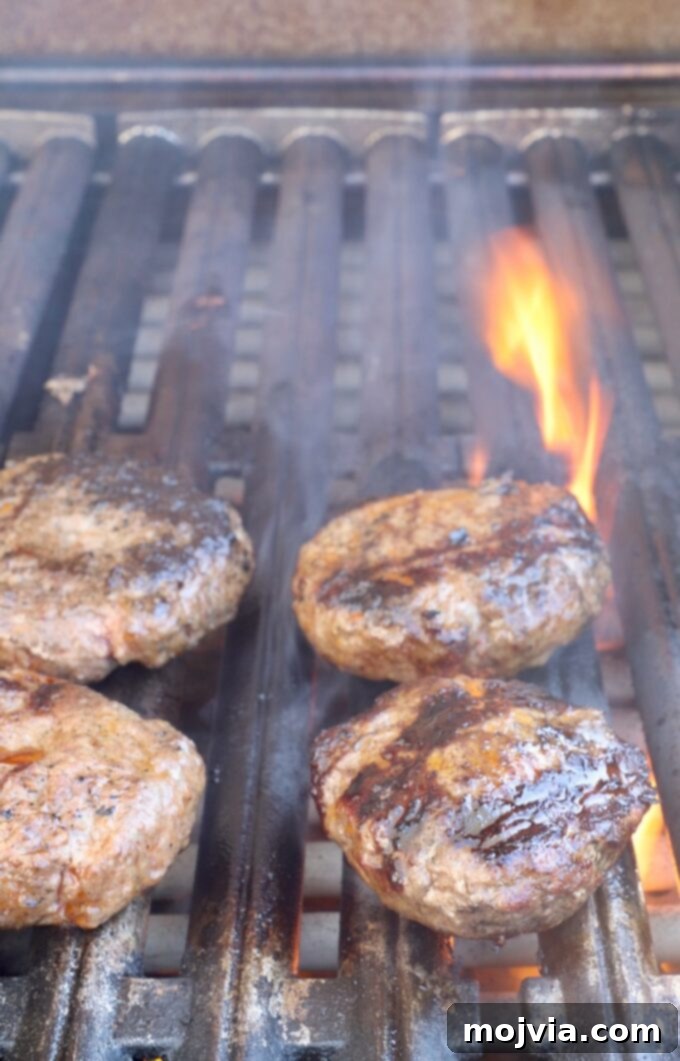
- Grill the Patties to Perfection: Preheat your grill to a medium-high heat setting. It’s vital that the grill is hot before adding the burgers for a good sear. Once the grill is hot (ideally between 350-400°F), place the seasoned burger patties directly on the grates. Cook for 4-5 minutes per side for a medium doneness. Adjust cooking time for your preferred doneness: add 1 minute per side for medium-well, or 6-7 minutes per side for well-done. During the final 1-2 minutes of cooking, place a slice of sharp cheddar cheese on top of each burger patty. Close the grill lid to allow the cheese to melt into a wonderfully gooey layer over the hot burger.
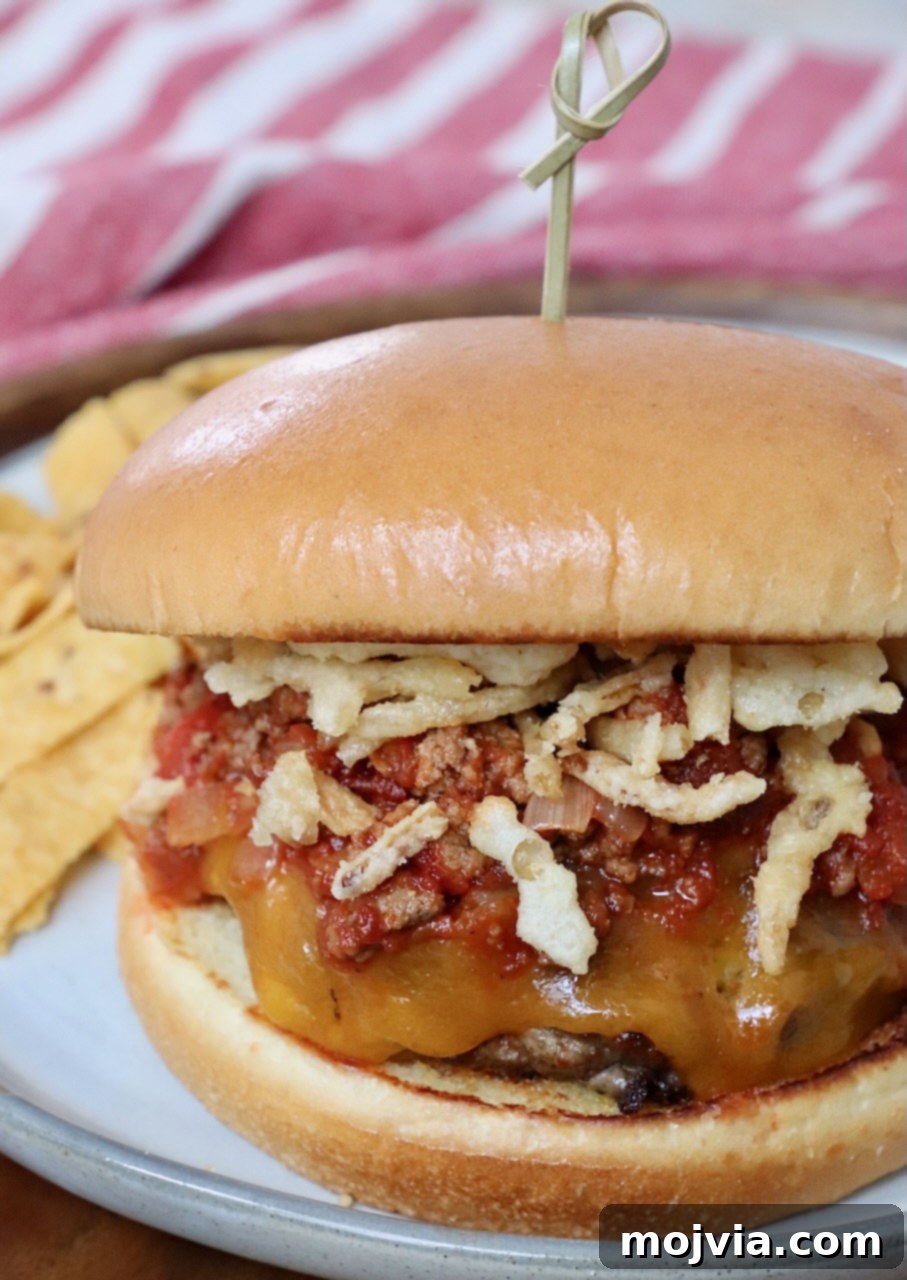
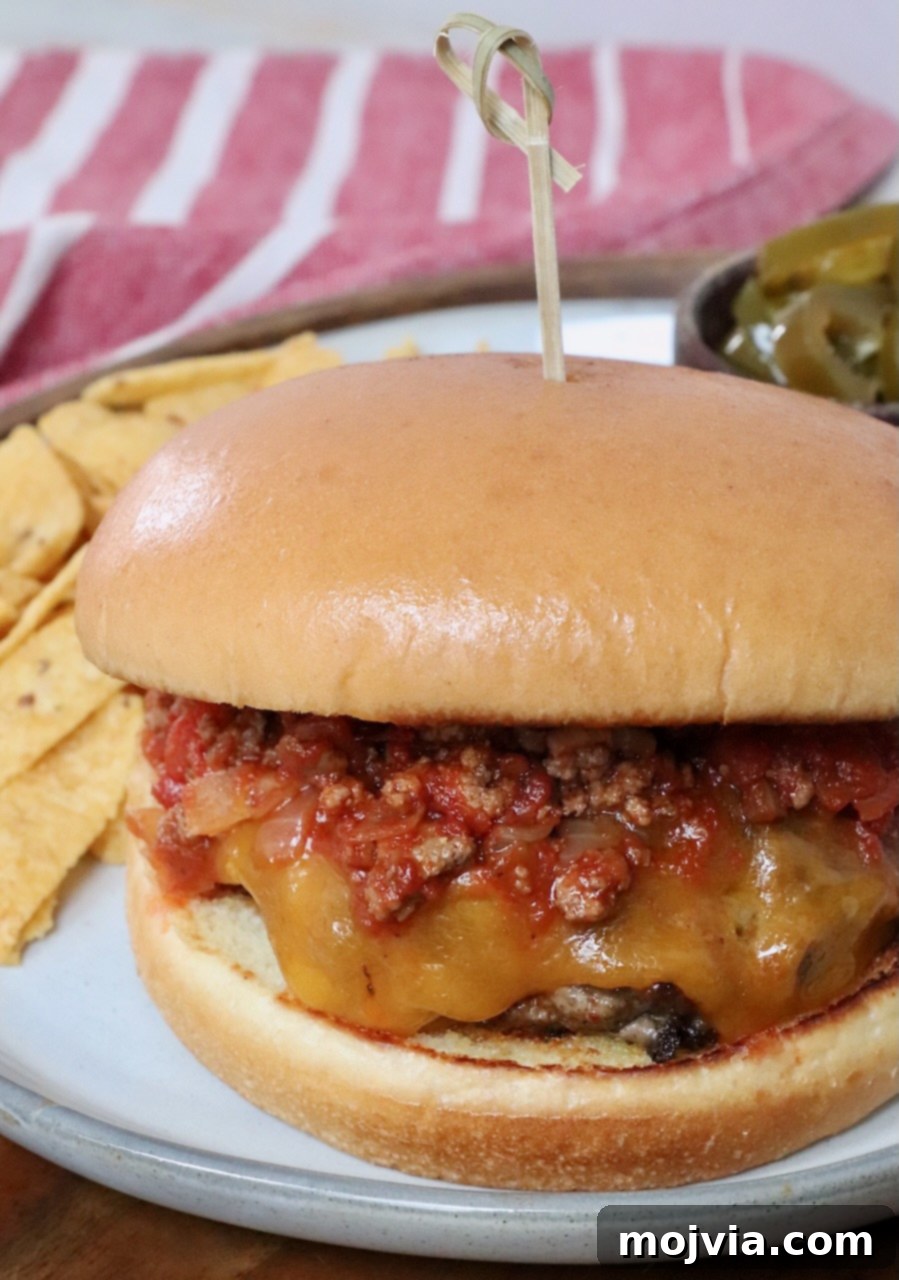
- Rest, Toast, and Assemble: Once cooked to your liking and the cheese is perfectly melted, remove the burgers from the grill and transfer them to a clean cutting board or plate. Allow them to rest for 3-5 minutes. This resting period is critical; it allows the juices to redistribute throughout the patty, resulting in a more succulent and flavorful burger. While the burgers rest, place your hamburger buns on the grill, cut-side down, and lightly toast them for 30-60 seconds until golden brown. Remove the buns, then assemble your chili burgers by placing a rested patty on the toasted bottom bun, generously spooning your homemade chili sauce over the cheese, and adding any other desired toppings before crowning it with the top bun.
Optional Toppings
While the chili and cheese are the stars, a few carefully chosen toppings can elevate your chili burger to new heights, adding layers of flavor and texture:
- Fried Onion Strings (pictured above): These are the same crispy, savory strings you’d find for green bean casserole. They provide a delightful, irresistible crunch and are typically located in the grocery store’s salad topping aisle. Their texture contrasts beautifully with the soft bun and gooey chili.
- Caramelized Onions: For a sophisticated sweetness and depth, replace crispy strings with slow-cooked, deeply flavored caramelized onions. While they require a bit of time to prepare, they are incredibly easy and can be made well in advance. Store them in the fridge for up to a week or freeze for up to three months. Check out my easy step-by-step guide via the link above.
- Raw Onions: For a sharp, pungent bite and a fresh crunch that cuts through the richness, simply add thinly sliced raw red or white onions. This classic burger topping offers a straightforward way to add zest.
- Pickled Jalapeños: If you crave an extra kick of spice and a tangy counterpoint to the rich chili, a few slices of pickled jalapeños are perfect. They also add a satisfying, crisp texture.
- Pickles: For those who appreciate tang but prefer to skip the heat, dill pickle slices are a fantastic choice. Their briny flavor provides a refreshing contrast. For an extra special touch, consider making homemade pickles to crown your burgers.
- Mustard, Mayonnaise or Burger Sauce: Given the chili acts as a rich, flavorful sauce, additional condiments aren’t strictly necessary. However, if you enjoy a creamy or tangy base, a light spread of mustard, mayonnaise, or a specialized burger sauce on the bottom bun can add another dimension.
- Lettuce and Tomato: Traditional burger toppings like crisp lettuce and juicy tomato slices can also be added. To prevent a soggy bun, I recommend placing the lettuce directly on the bun first, creating a barrier for the tomato’s moisture.
Recipe Tips for Perfection
Achieving burger perfection goes beyond just grilling. Incorporate these expert tips into your cooking process for a truly outstanding chili burger:
- Always Rest Your Burgers! This is perhaps the most crucial yet overlooked step in burger preparation. After removing the grilled patties from the heat, resist the urge to immediately place them on the buns. Just like a steak, resting allows the internal juices, which rush to the center during cooking, to redistribute evenly throughout the patty. This results in a significantly juicier, more flavorful burger and prevents the bun from becoming soggy. Aim for a 5-minute resting period on a cutting board or plate before assembly.
- Understand Burger Doneness: For a 1-inch thick burger patty, grilling for 4-5 minutes per side over medium-high heat typically yields a medium-cooked burger (pink in the center). If you prefer your burger medium-well, add an extra minute of cooking time per side. For well-done burgers, extend cooking to 6-7 minutes per side. For precise results, use an instant-read thermometer: 135-140°F for medium-rare, 140-145°F for medium, 145-150°F for medium-well, and 155-160°F for well-done.
- Preheat Your Grill Thoroughly: A properly preheated grill is non-negotiable for both food safety and achieving that coveted sear and juicy interior. Ensure your grill reaches a consistent temperature of 350-400°F (medium-high heat) before placing the burgers on the grates. This hot surface immediately caramelizes the exterior of the patty, locking in moisture and flavor.
- Never Flatten Your Burgers: Resist the common temptation to press down on your burger patties with a spatula while they’re cooking on the grill. This action, often done to speed up cooking or reduce thickness, actually squeezes out all the precious juices and fat, leading to a dry, less flavorful burger. Let the heat do its work naturally.
- No Grill? No Problem! You don’t need an outdoor grill to make fantastic chili burgers. This recipe adapts beautifully to indoor cooking. Simply use a cast-iron skillet, a grill pan, or any heavy-bottomed skillet you have. Place the skillet over medium-high heat on your stovetop. Cook the burgers for 4-5 minutes per side, just as you would on a grill. Add the cheese during the last minute of cooking, covering the skillet if needed to help it melt perfectly.
- Don’t Overmix the Meat: When combining the ground beef with seasonings, mix just enough to incorporate the ingredients. Overworking the meat can break down the protein fibers, resulting in a tougher, less tender burger patty.
Make Ahead, Storage, and Reheating
Preparation doesn’t have to be a last-minute rush. This recipe offers excellent make-ahead options to simplify your cooking process and enjoy delicious chili burgers with minimal effort:
The homemade chili is a fantastic component for meal prepping. It can be prepared up to 5 days in advance. Once cooled completely, transfer it to an airtight container and store it in the refrigerator. This allows the flavors to deepen even further, making for an even more robust chili when you’re ready to assemble your burgers.
To reheat the chili, you have a couple of convenient options. For stovetop reheating, simply place the chili back in a skillet over medium heat, stirring occasionally, for 5-7 minutes until thoroughly hot. If using a microwave, transfer the chili to a microwave-safe bowl, cover it (leaving a small vent), and reheat for 2-3 minutes, stirring halfway through to ensure even heating.
Your burger patties can also be prepped in advance. Form the patties up to 24 hours before cooking and store them, covered, in the refrigerator. This saves time on grilling day. Cooked burger patties will remain fresh and delicious in the refrigerator for up to 5 days. To reheat cooked patties, gently sear them in a hot skillet for 1-2 minutes per side, or place them back on a hot grill for the same amount of time, just until warmed through. This method helps retain their juiciness and flavor, ensuring a fresh-tasting burger every time.
What to Serve with Your Chili Burgers
A phenomenal chili burger deserves equally scrumptious side dishes to complete the meal. From classic crispy textures to fresh, vibrant accompaniments, there are countless options to elevate your dining experience. For the simplest approach, a bag of your favorite potato chips makes an easy and satisfying pairing. However, if you’re looking to enhance your side dish game, consider these fantastic recipes that beautifully complement the rich flavors of a chili burger:
- Chili Cheese Fries: A natural pairing, echoing the chili theme with crispy fries and gooey cheese.
- Air Fryer French Fries: Achieve perfectly crispy fries with less oil, a lighter alternative to balance the richness.
- Animal Style Fries: Take your fries to the next level with a special sauce, onions, and cheese.
- Truffle Fries: An elegant upgrade, offering an earthy, aromatic twist to classic fries.
- Air Fryer Tater Tots: Crispy on the outside, fluffy on the inside, and incredibly satisfying.
- Air Fryer Onion Rings: Golden and crunchy onion rings, a perfect textural contrast.
- BBQ Baked Beans: Sweet and smoky baked beans offer a comforting, savory side.
- Air Fryer Baked Potato: A quick and easy way to get a perfectly tender baked potato with a crispy skin.
- Cheesy Grilled Potatoes: Hearty and flavorful, these grilled potatoes are a crowd-pleaser.
- Broccoli Slaw: A light, crunchy, and tangy salad that provides a refreshing contrast to the rich burger.
- Corn on the Cob (Grilled, Boiled or Roasted): Sweet corn is a quintessential summer side that pairs wonderfully.
- Grilled Zucchini: A healthy and flavorful vegetable option, adding freshness to your meal.
More Burger Recipes
If you’ve enjoyed perfecting the chili burger, you’ll love exploring other exciting burger creations. Expand your grilling repertoire with these delicious recipes and be sure to check out my Top 10 Grilling Tips to truly master your grill and impress your guests!

Print
Pin
Rate this Recipe
Chili Burger
Ingredients
Chili
- 1 teaspoon vegetable oil
- 1 cup onion, diced
- 4 cloves garlic, minced
- 1 pound ground beef, 80/20
- 2 chipotle chiles, minced + 1 teaspoon adobo sauce from the can
- 1 tablespoon worcestershire sauce
- 1 tablespoon chili seasoning, click link for the recipe
- 1 teaspoon salt
- 15 ounce can crushed tomatoes
Burgers
- 1 pound ground beef, 80/20
- 1 tablespoon chili seasoning, click link for the recipe
- 1 teaspoon worcestershire sauce
- 4 slices sharp cheddar cheese
- 4 hamburger buns, recommended: brioche buns
Instructions
How To Make The Chili
-
Add the vegetable oil to a large skillet on the stove over medium-high heat.
-
Add the onions, cook 4-5 minutes, add the garlic and cook for an additional minute.
-
Add the ground beef, crumble and cook through for 6-8 minutes, or until the beef is browned, then drain any grease from the skillet.
-
Add the minced chipotle chilies, adobo sauce, worcestershire sauce, chili seasoning, salt, and crushed tomatoes.
-
Reduce the heat on the stove to medium and simmer the chili for 15 minutes, or until it’s thickened. In the meantime, prepare and cook the burger patties.
How To Make The Burgers
-
Combine the ground beef, chili seasoning and worcestershire sauce in a large bowl. Form into four 4 ounce patties and use your finger to indent the middle of each patty.
-
Heat a grill to medium-high heat. Once the grill is hot, add the burgers and grill for 4-5 minutes per side.
-
During the last 1-2 minutes of cooking time, place a slice of cheddar cheese on each burger patty. Remove the burgers from the grill and place on a cutting board, or plate, to rest for 5 minutes.
-
Place the buns on the grill to toast for 30-60 seconds. Remove the buns from the grill and assemble the chili burger.
-
Place the burgers on the toasted buns, top with the chili, and add any other optional toppings of your choice.
Notes
- Cooking a one inch thick burger for 4-5 minutes per side over medium high heat will result in a medium burger. If you’d like your burger medium-well, add 1 minute per side. If you’d like well-done burgers, cook them for 6-7 minutes per side.
- Always make sure your grill is hot before adding the burgers. Adding burgers (or any food for that matter) to a hot grill is important for cooking safety.
- This recipe can be made on the stove. No grill? No problem! Simply cook the burgers on a grill pan, cast iron skillet, or the heaviest skillet you have available. Place the skillet on the stovetop over medium-high heat and cook for the burgers for 4-5 minutes per side. Add sliced cheese on top during the last minute of cook time.
- The chili can be made up to 5 days in advance and stored in the fridge in an airtight container until you’re ready to prepare the burgers. To reheat the chili, place it back in a skillet on the stove over medium heat for 5-7 minutes. To reheat the chili in the microwave, place it in a microwave-safe bowl, cover and reheat for 2-3 minutes, stirring halfway through the time.
- The burger patties can be prepared up to 24 hours in advance and stored in the fridge until you’re ready to toss them in the grill.
- Cooked burger patties will stay good in the refrigerator for up to 5 days. Reheat the burgers by searing them in a hot skillet on each side for 1-2 minutes, or by searing them on a hot grill for 1-2 minutes per side.