
Grilling the perfect steak is an art that anyone can master. Forget intimidation and embrace the sizzle! I’m here to guide you through my proven steps, ensuring you learn how to grill steak perfectly every single time. Whether you’re a novice backyard chef or a seasoned grill veteran, these comprehensive tips and tricks apply to all your favorite cuts, from the robust Ribeye to the magnificent T-bone.
Special thanks to the California Beef Council for their generous sponsorship of today’s insightful post!
Embarking on your steak grilling journey might initially feel daunting. After all, a premium steak is often an investment in both money and culinary anticipation, and nobody wants to botch that experience with an under-seasoned or overcooked result. However, armed with the right knowledge and techniques, you’ll quickly transform from an apprehensive beginner into the ultimate grill-master, confidently searing steaks to succulent perfection.
I understand the frustration of eyeing that beautifully marbled Ribeye, only to watch it succumb to the merciless flames of an improperly managed grill. I’ve walked that path myself. My initial attempts at grilling steaks were far from flawless, but through consistent practice and adherence to a few fundamental principles, I’ve developed a foolproof method. Now, I can assure you that by following the detailed tips and tricks laid out in this guide, you too will achieve the perfect steak every single time, delighting your taste buds and impressing your guests.
Table of contents
- Top 5 steak grilling tips
- Essential Grilling Tools for Steak
- Frequently asked questions
- Steak temperature chart
- How to grill top sirloin
- How to grill a t-bone steak
- How to grill tri tip
- How to grill ribeye
- Learn about where your steak comes from
- Delicious steak recipes to try
Top 5 Steak Grilling Tips for Unforgettable Flavor
Achieving grilling greatness isn’t about magic; it’s about mastering a few fundamental techniques. These five essential tips are the cornerstone of consistently producing perfectly grilled steaks:
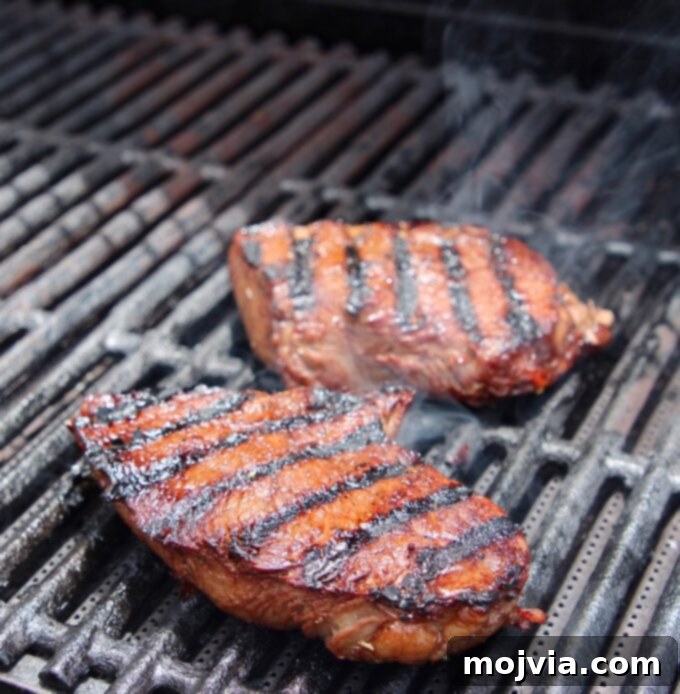
- Always Preheat Your Grill to High Heat. This is perhaps the most critical first step. A blazing hot grill ensures that when your steak hits the grates, it immediately forms a beautiful, savory crust – a process known as the Maillard reaction. This quick searing locks in juices and develops deep, complex flavors, preventing the steak from sticking and ensuring those coveted grill marks. If your grill isn’t hot enough, you’ll end up steaming your steak rather than searing it, leading to a dull, gray exterior and less flavor. Aim for a temperature between 400-450°F (200-230°C).
- Season Your Steaks Generously Before Grilling. Proper seasoning is paramount for enhancing the natural flavor of the beef. While a well-marbled cut like a Ribeye might require less additional seasoning due to its inherent richness, leaner cuts such as Sirloin benefit immensely from a robust rub. Simple, high-quality ingredients like coarse sea salt or flaky kosher salt and freshly ground black pepper are often all you need. For an extra layer of flavor, consider a good Montreal steak seasoning or your favorite dry rub. Apply the seasoning evenly and gently press it into the meat just before grilling; this helps it adhere and infuse the steak with flavor as it cooks on the hot surface.
- Cook Steaks with the Grill Lid Down. Once your steaks are on the hot grill, resist the urge to constantly lift the lid. Keeping the lid closed helps maintain a consistent, high internal temperature within the grill, effectively cooking the steak from all sides, not just from the bottom. This method promotes even cooking and helps achieve your desired internal doneness more efficiently, while simultaneously developing that perfect, crispy crust on the exterior. Think of your grill as an oven with a direct heat source below.
- Always Use an Instant-Read Meat Thermometer. This tool is your best friend for precision grilling. Guessing internal temperature often leads to either an undercooked steak (a food safety concern) or, more commonly, an overcooked one (a flavor and texture tragedy). An instant-read thermometer provides an accurate reading, allowing you to remove the steak from the grill at precisely the right moment, ensuring it reaches your preferred level of doneness every time without fail. Insert the thermometer into the thickest part of the steak, avoiding any bones.
- Rest Your Steaks for At Least 5 Minutes After Grilling. Patience is a virtue, especially after grilling! Removing the steak immediately after cooking and slicing into it will cause all those delicious, flavorful juices to spill out onto your cutting board, leaving you with a dry, less tender steak. Resting allows the muscle fibers to relax and the internal juices, which have been driven to the center during cooking, to redistribute throughout the entire steak. This results in a much juicier, more flavorful, and tender bite. Remember that carryover cooking will cause the internal temperature of the steak to rise by an additional 5-10 degrees Fahrenheit during this resting period, so factor that into your removal temperature. For larger cuts, a rest of 10-15 minutes is even better.
Essential Grilling Tools for Steak Perfection
While the steak itself is the star, having the right tools makes the grilling process smoother and more enjoyable, contributing to a better final product:
- Instant-Read Meat Thermometer: As mentioned above, this is non-negotiable for accuracy and safety. Don’t leave your steak’s fate to guesswork.
- Long-Handled Tongs: Essential for safely turning steaks without piercing them (which can release juices). Look for sturdy, spring-loaded tongs.
- Grill Brush: A clean grill is a happy grill. Use a good quality brush to clean grates before and after each use, preventing sticking and imparting off-flavors.
- Oiled Paper Towel & Tongs: For oiling the grates. Fold a paper towel, dip it in high-smoke-point oil (like canola or grapeseed), and use tongs to rub it over the hot grates.
- Large Cutting Board with a Juice Groove: Crucial for resting and slicing your steak, catching any precious juices that might escape.
- Heat-Resistant Gloves: Optional but highly recommended for handling hot grates or moving coals if using a charcoal grill.
Frequently Asked Questions About Grilling Steak
Here are answers to some of the most common questions aspiring grill masters have:
- What is marbling in steak? Marbling refers to the intramuscular fat that appears as white flecks and streaks within the lean red muscle of beef. It’s a key indicator of quality, flavor, and tenderness. During cooking, this fat renders, melting into the meat and basting it from the inside out, which creates a juicy, rich, and incredibly flavorful eating experience. More marbling generally means a more premium and delicious steak.
- Should you slice steak against the grain? Absolutely, yes! The “grain” refers to the direction in which the muscle fibers run. By slicing steak against the grain, you are cutting these long, tough fibers into shorter segments. This dramatically tenderizes the meat, making each bite easier to chew and more enjoyable. Take a moment to observe the steak’s surface; you’ll see the distinct lines of the muscle fibers. Always cut perpendicular to these lines.
- Should you grill steak on a gas or charcoal grill? Both gas and charcoal grills are perfectly capable of producing fantastic grilled steaks, and the choice often comes down to personal preference and convenience.
- Gas Grill: Offers convenience, quick heating, and precise temperature control. It’s ideal for busy weeknights and consistent results.
- Charcoal Grill: Imparts a distinct smoky flavor that many grill enthusiasts crave. While requiring more effort to set up and manage temperature, the unique taste can be incredibly rewarding. Experiment with wood chunks (like oak or hickory) for additional smoky notes.
- What temperature do you cook steak on a gas grill? For most steaks, particularly those you want to achieve a good sear on, a high temperature is recommended, typically between 400-450 degrees Fahrenheit (200-230°C). Specific temperatures and cooking times will vary depending on the thickness and cut of the steak, as well as your desired level of doneness. I’ve provided detailed guidelines for popular cuts like Top Sirloin, T-bone, Ribeye, and Tri-Tip further below.
- Should I oil the grill grates before adding steak to the grill? Yes, clean and properly oiled grill grates are essential. Oiling prevents the steak from sticking to the grates, which can tear the crust you’ve worked hard to create and leave bits of meat behind. After preheating your grill, thoroughly clean the grates with a grill brush, then carefully oil them using a paper towel lightly soaked in a high-smoke-point oil (like canola, grapeseed, or vegetable oil), held with tongs. This creates a non-stick surface, one of my Top 10 Grilling Tips.
- How often should I flip my steak? For a traditional sear, many chefs advocate flipping only once to achieve a solid crust on each side. However, modern techniques, like frequent flipping (every 30-60 seconds), can result in a more evenly cooked interior and a beautiful crust all around, especially for thicker steaks. Both methods have their proponents; experiment to see what you prefer!
- Should I pat my steak dry before seasoning? Absolutely! Moisture on the surface of your steak will prevent a proper sear. Pat your steaks thoroughly dry with paper towels before seasoning. A dry surface allows the Maillard reaction to occur effectively, leading to a much better crust and more intense flavor.
Steak Temperature Chart: Achieving Your Perfect Doneness
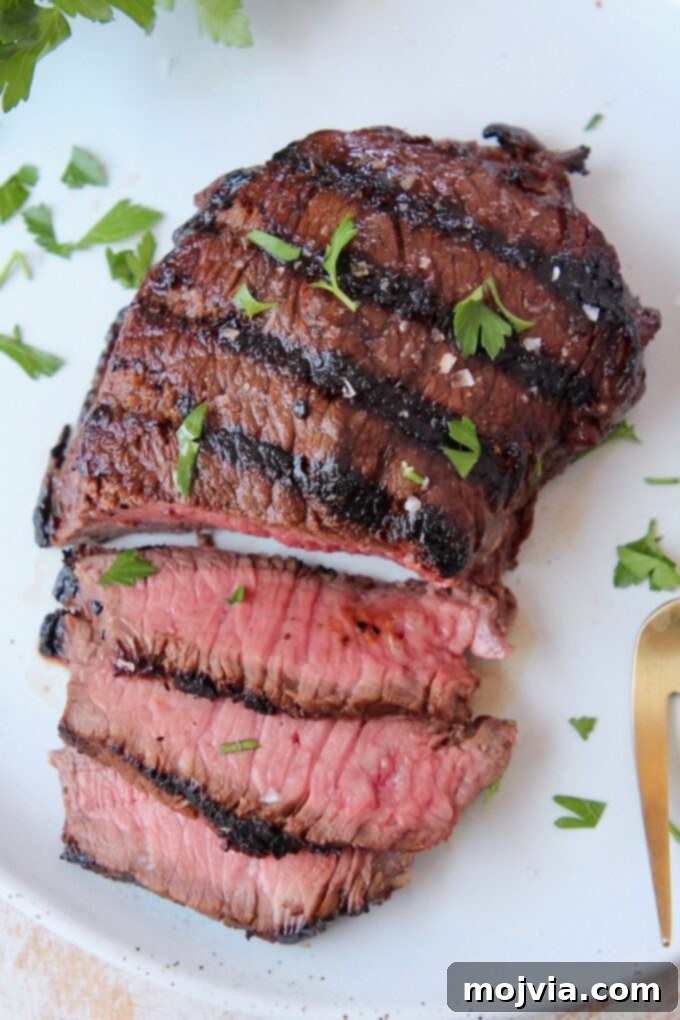
Understanding internal temperatures is key to consistently grilling your steak exactly how you like it. While I personally champion the exquisite balance of a medium-rare steak (as beautifully pictured above, offering a tender texture and rich, warm red center), your preference is paramount. This comprehensive chart will serve as your essential guide to ensuring your steak reaches your desired level of doneness with absolute precision.
A crucial detail to remember is carryover cooking: the steak will continue to cook after it’s removed from the grill, rising approximately 5-10 degrees Fahrenheit during its 5-15 minute resting period. Therefore, I highly recommend pulling your steak off the grill when it reaches the lower end of your preferred temperature range to avoid overcooking.
- Rare Steak: 125-130°F (52-54°C) – Characterized by a cool, deep red center, offering a soft and exceptionally tender texture. Ideal for those who enjoy their beef very close to its natural state.
- Medium-Rare Steak: 130-135°F (54-57°C) – Features a warm red center that transitions to a pinkish-red towards the edges, providing a tender, succulent texture. This is often considered the optimal doneness for maximum flavor and juiciness by many connoisseurs.
- Medium Steak: 135-145°F (57-63°C) – Boasts a hot pink center with minimal red, and a slightly firmer texture. Still very juicy and flavorful, this is a popular choice for those who prefer less redness than medium-rare.
- Medium-Well Steak: 145-155°F (63-68°C) – Presents a barely pink center, moving towards a gray-brown, with a noticeably firmer texture. While still retaining some moisture, the tenderness begins to diminish compared to less cooked stages.
- Well-Done Steak: 155-165°F (68-74°C) – Exhibits no pink whatsoever throughout the steak, resulting in an extra firm texture. While some prefer this doneness, be aware that it can lead to a drier, less tender eating experience.
How to Grill Top Sirloin: A Flavorful and Versatile Cut
The Top Sirloin stands out as an excellent value steak, offering robust flavor and remarkable versatility without the premium price tag of a Ribeye or Filet Mignon. This lean cut is fantastic grilled whole, or cubed and skewered to create delicious kabobs. Given that sirloin has less marbling compared to fattier cuts, I highly recommend employing a quick, acidic marinade to tenderize the meat and infuse it with additional moisture and flavor.
- Marinate the Sirloin for Enhanced Tenderness: Submerge your top sirloin in THE BEST Steak Marinade for at least 20 minutes, or up to 2-4 hours for deeper flavor. This marinade, rich in acidic components, will work wonders in breaking down the muscle fibers, resulting in a more tender and juicy steak.
- Preheat Your Grill to Medium-High Heat: Aim for a consistent temperature between 350-400 degrees Fahrenheit (175-200°C). This ensures a good sear without overcooking the leaner sirloin.
- Prepare and Place the Steak on the Grill: Remove the sirloin from its marinade, allowing any excess to drip off (do not wipe completely dry, as some marinade will caramelize nicely). Carefully place the steak onto the hot, oiled grill grates.
- Grill to Desired Doneness: For a perfect medium-rare, a 1-inch thick sirloin will typically require 4-5 minutes per side. If you’re grilling a thicker steak, approximately 1 1/2 inches, add an additional 1-2 minutes per side to the cooking time. Remember, these are guidelines; use your thermometer!
- Monitor Internal Temperature with Precision: Insert an instant-read thermometer into the thickest part of the steak, away from any bone. Remove the steaks from the grill immediately once they reach your desired internal temperature, consulting the steak temperature chart above.
- Allow the Steak to Rest: Transfer the grilled sirloin to a cutting board and let it rest for a minimum of 5 minutes before slicing. This crucial step allows the juices to redistribute, guaranteeing a moist and tender steak.
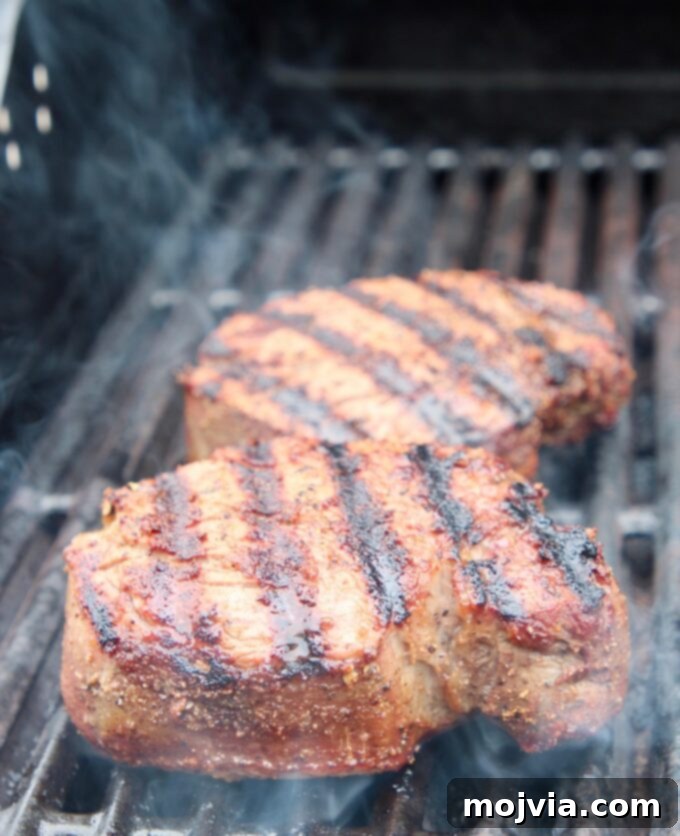
How to Grill a T-Bone Steak: The Best of Both Worlds
The T-bone steak is a carnivorous dream, delivering a magnificent combination of two distinct cuts separated by a signature T-shaped bone: the robust, richly flavored New York strip on one side and the buttery, fork-tender filet mignon on the other. While slightly smaller than its cousin, the Porterhouse, the T-bone offers the same incredible tenderness and profound beefy flavor. Due to its naturally abundant marbling and inherent tenderness, this majestic cut typically doesn’t require a marinade; a simple, quality seasoning is all you need to highlight its magnificent qualities before it hits the grill.
- Bring Steak to Room Temperature for Even Cooking: Given the substantial size of a T-bone steak, it’s highly recommended to remove it from the refrigerator approximately 30 minutes before you plan to season and grill it. Allowing the steak to come closer to room temperature ensures more even cooking throughout the entire cut, preventing the exterior from overcooking before the center reaches your desired doneness.
- Season Simply to Accentuate Natural Flavor: Because the T-bone is inherently packed with flavor, a minimalist approach to seasoning is often best. Generously season both sides of the steak with coarse salt and freshly ground black pepper, or opt for a classic blend like Montreal steak seasoning. The goal is to enhance, not overpower, the steak’s natural richness.
- Preheat Your Grill to a High Temperature: Ignite your grill and bring it up to a high heat setting, aiming for a temperature between 400-450 degrees Fahrenheit (200-230°C). This intense heat is crucial for developing a spectacular crust and achieving perfect grill marks.
- Grill to Achieve Perfect Medium-Rare (or Desired Doneness): For a T-bone that is approximately 1 inch thick, grill each side for 4-5 minutes to reach a beautiful medium-rare. If your steak is thicker, around 1 1/2 inches, extend the cooking time by an additional 1-2 minutes per side. Adjust cooking times based on your preferred doneness level.
- Precisely Check Internal Temperature: When using an instant-read thermometer on a T-bone, insert the probe into the filet mignon side of the cut. The filet is leaner and will typically reach its desired temperature more quickly than the New York strip side. Remove the steak from the grill as soon as it reaches your target internal temperature, referring to the temperature chart.
- Rest for Optimal Juiciness and Tenderness: Transfer the grilled T-bone to a clean cutting board and allow it to rest undisturbed for at least 10 minutes. This longer resting period is particularly beneficial for larger cuts like the T-bone, as it ensures maximum juice redistribution throughout both distinct sections of the steak.
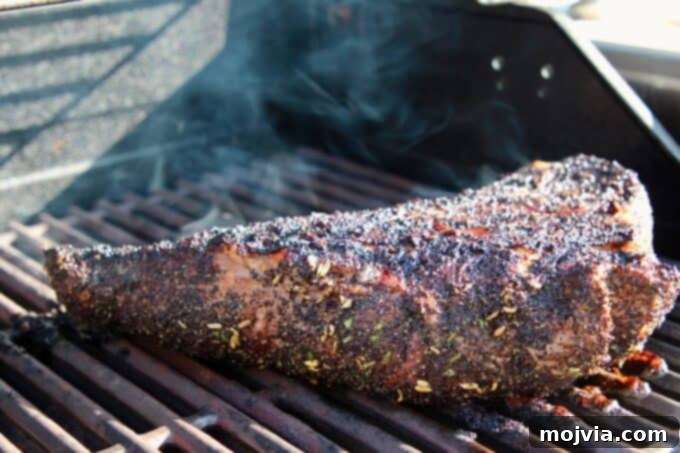
How to Grill Tri-Tip: The Santa Maria Specialty
The Tri-Tip, a distinctive triangular cut originating from the bottom sirloin, rose to culinary fame in central California during the 1950s, often earning it the affectionate moniker “Santa Maria Tri-Tip.” This generous, boneless cut of beef is celebrated for its impressive tenderness and deep, satisfying flavor. It’s exceptionally delicious whether adorned with a bold rosemary coffee rub or tenderized and infused with flavor in a rich red wine black pepper marinade.
When grilling a Tri-Tip, the key technique to master is using indirect heat. This involves setting up your grill so that one half is heated to high, while the other half remains unheated. After an initial high-heat sear to lock in juices and flavor, the Tri-Tip is then moved to the cooler, unheated side of the grill to finish cooking gently over indirect heat, ensuring a perfectly cooked interior without burning the exterior.
- Choose Your Flavor Profile: Rub or Marinade: Decide whether you prefer a dry rub or a wet marinade for your Tri-Tip. If opting for a rub, generously apply your chosen blend all over the meat, pressing it firmly to adhere. If marinating, prepare your marinade and allow the Tri-Tip to soak for a substantial 6-8 hours for optimal flavor penetration and tenderness.
- Prepare Your Grill for Two-Zone Cooking: Configure your grill for indirect heat. Light half of your grill to achieve high heat, between 400-450 degrees Fahrenheit (200-230°C), while leaving the other half completely unheated. This creates distinct hot and cool zones.
- Initial High-Heat Sear: Once the heated side of your grill is screaming hot, place the seasoned or marinated Tri-Tip directly over the high heat. Sear each side for 1-2 minutes. This crucial step develops a beautiful crust and intensifies the beef’s flavor.
- Finish with Indirect Heat: Immediately after searing, transfer the Tri-Tip to the unheated side of the grill. Keep the lid closed, maintaining the high heat on the active side, and allow the Tri-Tip to continue cooking over indirect heat for approximately 10-15 minutes per side, or until it approaches your desired doneness.
- Verify Internal Temperature Accurately: Use an instant-read thermometer to check the internal temperature of the Tri-Tip, inserting it into the thickest part of the meat. Remove the Tri-Tip from the grill once it reaches your desired internal temperature, consulting the steak temperature chart.
- Crucial Resting Period: Transfer the cooked Tri-Tip to a cutting board and allow it to rest for at least 15 minutes, and up to 20 minutes for very large cuts. This extended resting period is vital for allowing the juices to thoroughly redistribute throughout the meat, ensuring an exceptionally juicy and tender Tri-Tip.
- Slice Against the Grain for Maximum Tenderness: Slicing a Tri-Tip requires a keen eye, as its muscle grains run in two different directions. You’ll typically observe an intersection point where the grains change direction. Slice off the long, triangular tip from the rest of the cut where this intersection occurs. Then, slice each of these two resulting pieces against their respective grain patterns to achieve the most tender bites of beef.
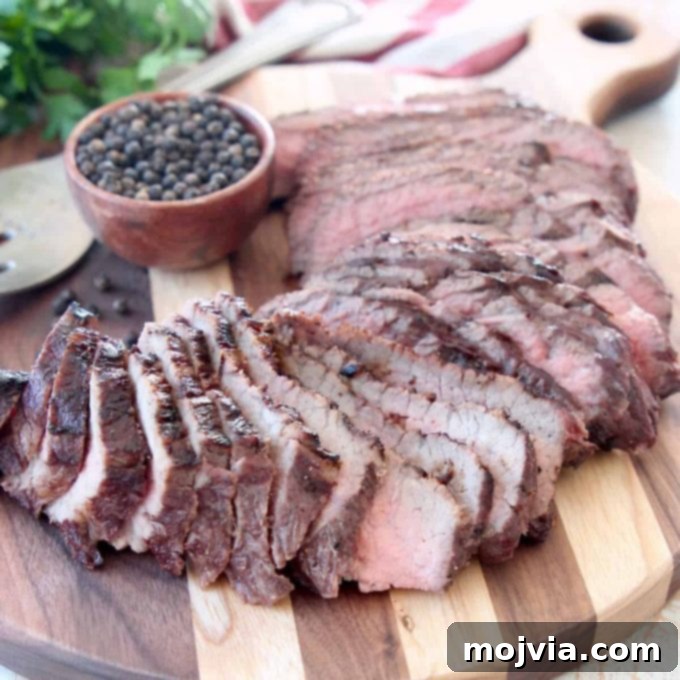
How to Grill Ribeye: The King of Flavor and Tenderness
The Ribeye steak is undeniably a classic and beloved cut for grilling, revered for its generous marbling and rich, beefy flavor. It’s often referred to as the “king of steaks” because its intramuscular fat melts during cooking, basting the meat from within, resulting in unparalleled juiciness, exceptional tenderness, and a profoundly satisfying taste. Given its inherent deliciousness, a Ribeye requires very little fuss; a simple seasoning of salt and pepper is usually all that’s needed to let its magnificent natural qualities shine on the grill!
- Season Simply to Enhance Natural Richness: Given the incredible flavor profile of a Ribeye, avoid over-seasoning. A generous coating of coarse sea salt and freshly ground black pepper on both sides is often all it takes to bring out its best. You can also opt for a quality steak rub, but keep it minimal to allow the beef to be the star.
- Preheat Your Grill to Intense High Heat: It’s essential to get your grill scorching hot for a Ribeye, typically between 400-450 degrees Fahrenheit (200-230°C). This high heat creates a rapid, beautiful sear, caramelizing the exterior and locking in the steak’s abundant juices.
- Grill for Perfect Medium-Rare (or Preferred Doneness): For a Ribeye that is approximately 1 inch thick, grill each side for 4-5 minutes to achieve a delightful medium-rare doneness. If you’re working with a thicker cut, around 1 1/2 inches, add an extra 1-2 minutes per side to the cooking time. Always remember that these times are estimates; use a thermometer for precision.
- Confirm Internal Temperature with Accuracy: Insert an instant-read thermometer into the thickest part of the Ribeye, ensuring it’s not touching any bone or large pockets of fat. Remove the steaks from the grill the moment they hit your desired internal temperature, using the steak temperature chart as your guide.
- Crucial Resting Period for Juiciness: Transfer the perfectly grilled Ribeye to a clean cutting board and let it rest, uncovered, for at least 5 minutes. For thicker Ribeyes, a 7-10 minute rest is even better. This vital step allows the heat to equalize throughout the steak and the savory juices to redistribute, guaranteeing a moist, tender, and incredibly flavorful experience with every slice.
Learn About Where Your Steak Comes From: From Pasture to Plate
Gain a deeper appreciation for the journey of your steak in this illuminating video. Join me as I chat with Brooke Helsel, a fourth-generation rancher, on her family-owned central California ranch. Discover the dedication and care involved in raising premium cattle for beef and hear about Brooke’s inspiring experiences as a female rancher. Following our conversation on the ranch, Brooke joins me in the kitchen, where I’m excited to share all of my top tips for grilling the perfect steak, bringing the story full circle from pasture to plate.
Delicious Steak Recipes to Try and Master
Now that you’re equipped with all the essential knowledge and techniques for grilling the perfect steak, it’s time to put your newfound skills to the test! These delicious steak recipes offer fantastic opportunities to practice and showcase your grilling prowess, guaranteeing mouth-watering results every time.
- Grilled Ribeye Steak Kabobs: Perfect for a party or a fun weeknight meal, these skewers make the most of tender ribeye.
- Steak Salad: A refreshing and hearty option, combining perfectly grilled steak with fresh greens and vibrant dressings.
- Chipotle Lime Carne Asada: Master this flavorful Mexican classic, ideal for tacos, burritos, or served simply with rice and beans.
- Grilled New York Strip Steak with Peppercorn Crust: Elevate a classic New York strip with a bold, aromatic peppercorn crust.
- Buffalo Cheesesteak Foil Packs: An easy and fun way to grill up a cheesy, spicy steak dinner with minimal cleanup.
- Grilled Cajun Steak Tacos: Infuse your steak with vibrant Cajun spices for an exciting twist on taco night.
For even more invaluable beef nutrition insights, extensive resources, a plethora of recipe ideas, and much more, be sure to visit CalBeef.org! Happy grilling!