
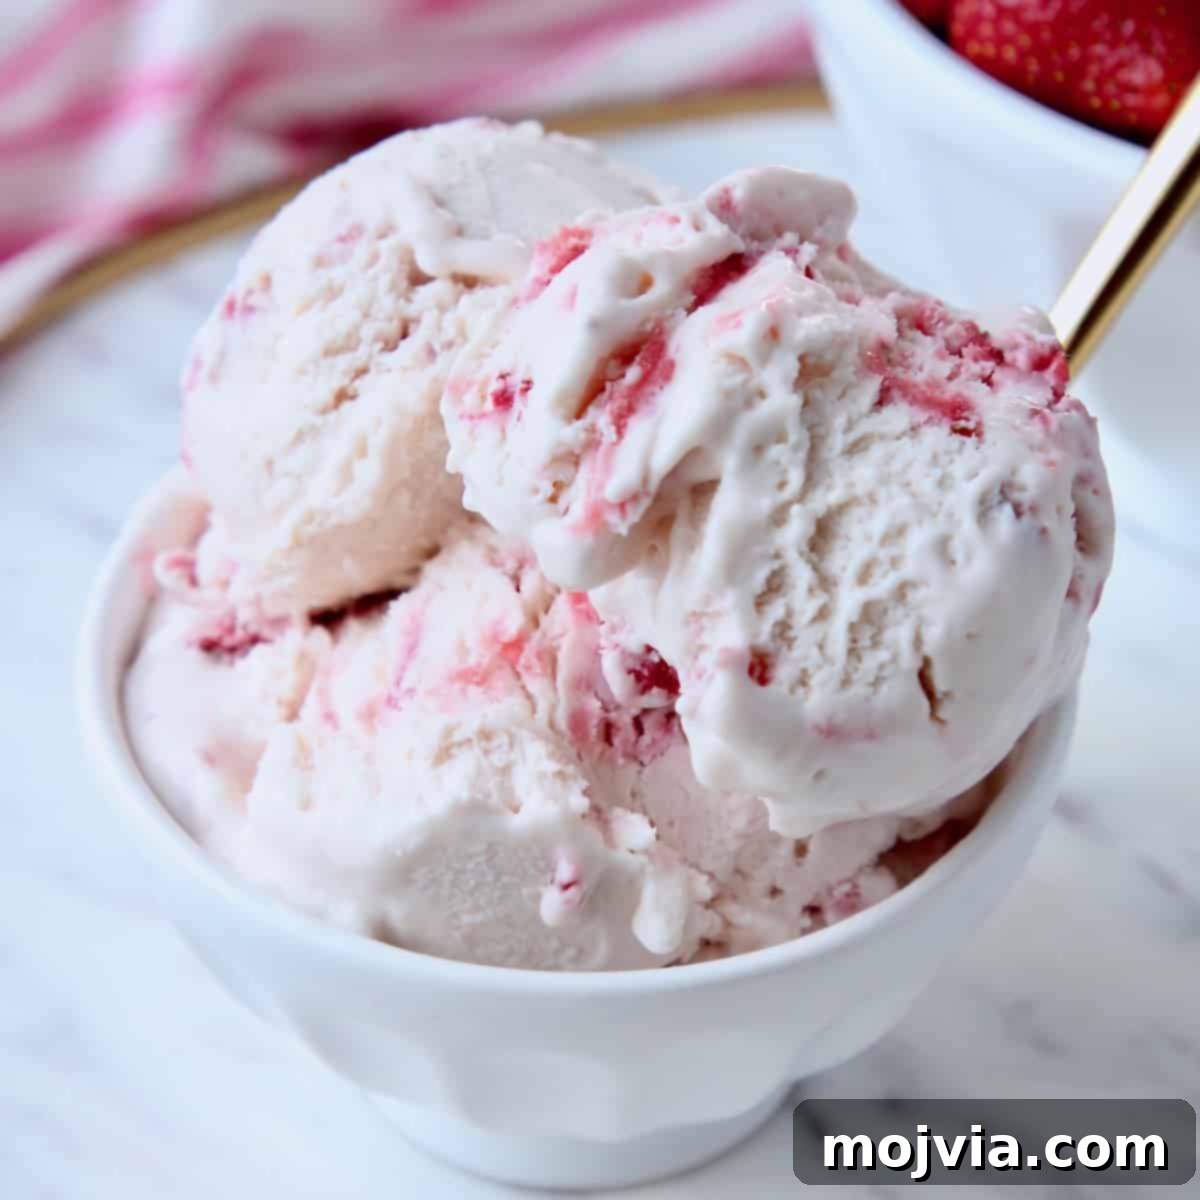
Experience the delight of crafting the BEST Homemade Strawberry Ice Cream right in your kitchen, even without an ice cream maker! This remarkably simple recipe requires just 20 minutes of active preparation, making it perfect for busy days or impromptu sweet cravings. Our secret to an unparalleled, rich strawberry flavor lies in combining a cherished family recipe – my Mom’s famous strawberry pie filling – with a classic no-churn ice cream base. This heavenly blend of heavy cream and sweetened condensed milk results in a perfectly sweet, incredibly creamy dessert that is truly ice cream perfection. Ideal for a sun-drenched afternoon or a delightful after-dinner treat, this refreshing strawberry ice cream promises to be a summer favorite!
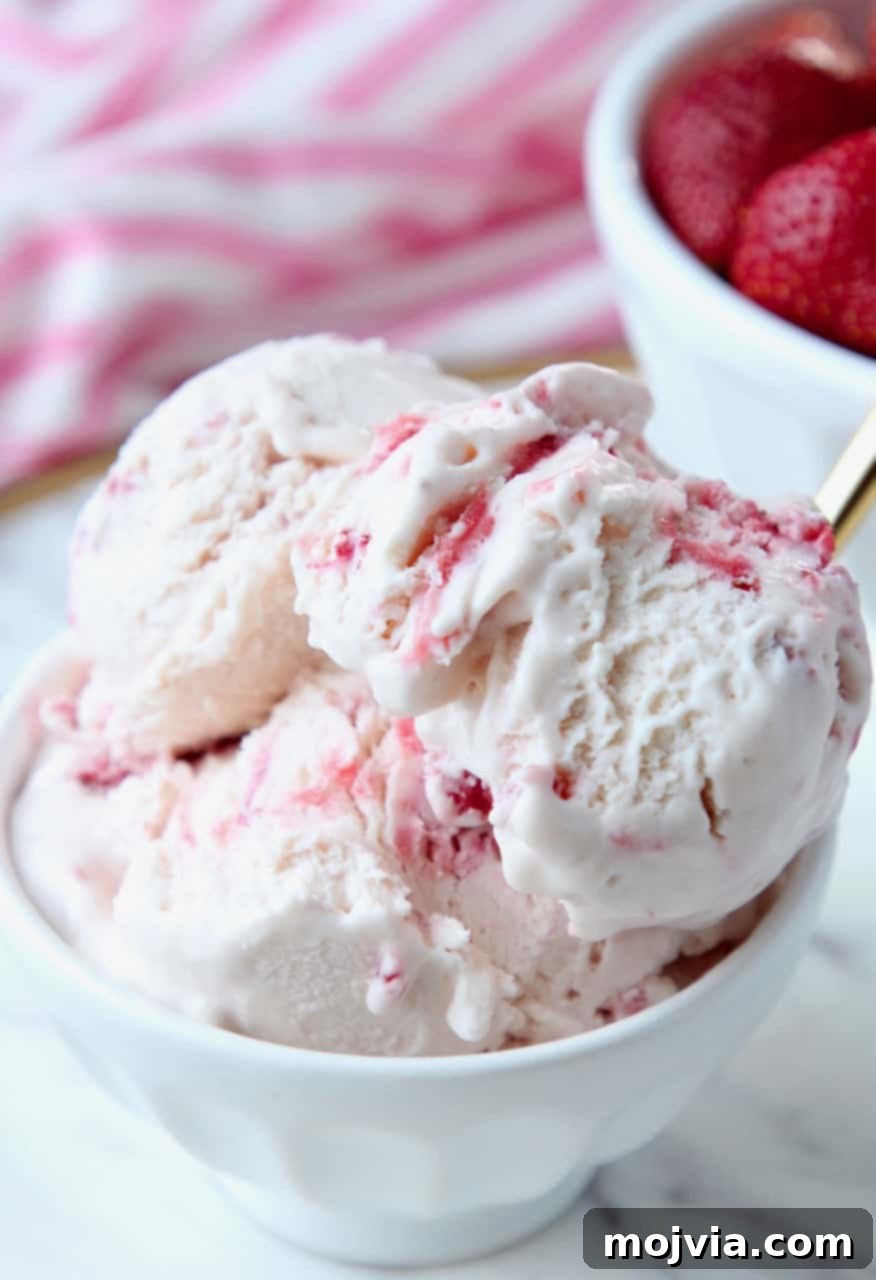
“Extremely quick and straightforward to prepare. I garnished mine with elegant chocolate-covered strawberries and fresh mint leaves, and it was an absolute hit with everyone!”
-Nikki
Strawberry ice cream holds a special place in the hearts of dessert lovers worldwide, standing proudly alongside chocolate and vanilla as one of the three quintessential ice cream flavors. Consistently ranking among the top 10 most popular ice cream flavors in the US, it’s a personal indulgence for many. This widespread adoration fueled my quest to develop the perfect strawberry ice cream recipe, one that truly captures the vibrant, fresh essence of strawberries in every spoonful.
Many recipes for homemade strawberry ice cream often fall short. Some suggest simply folding raw, sliced strawberries into a vanilla ice cream base. The problem with this approach is that strawberries are largely composed of water. When frozen directly, these water molecules expand and turn into hard, icy chunks, resulting in an unpleasant texture and a diluted strawberry flavor within what essentially becomes vanilla ice cream with frozen berry bits. This method fails to deliver the authentic, smooth strawberry experience we crave.
On the other end of the spectrum are recipes that rely on artificial strawberry flavoring. While convenient, these often lack the natural depth and brightness that only real fruit can provide. For those who yearn for the genuine taste of real, fresh strawberries in their ice cream, artificial alternatives simply won’t do. That’s why I devised a brilliant compromise: incorporating my Mom’s famous strawberry pie filling. This technique transforms fresh berries into a concentrated burst of flavor.
The magic happens when the strawberries are gently cooked down. This process effectively releases their excess water content, intensifying their natural sweetness and robust berry flavor. As the strawberries simmer, they break down into a slightly chunky, rich puree. This cooked puree then seamlessly integrates into the ice cream base, creating a truly authentic strawberry ice cream that is consistently smooth and bursting with flavor, free from any unwelcome frozen berry chunks. This method is the key to achieving strawberry ice cream perfection, where every scoop is a testament to natural, intense fruit flavor and sublime creaminess.
Worried about needing special equipment? No ice cream maker? No problem at all! My innovative no-churn method makes this homemade strawberry ice cream recipe accessible to everyone. All you need are a few basic kitchen tools: a stovetop for the strawberry puree, a large mixing bowl for the base, and a mixer to achieve that essential light and airy texture. It’s designed for simplicity without compromising on taste or quality.
The beauty of this no-churn ice cream extends beyond its easy preparation. It boasts a wonderfully soft-serve like consistency, meaning you don’t need to let it thaw for ages after pulling it from the freezer. This immediate scoop-ability is a game-changer, allowing you to go straight from the freezer, to spoon, to mouth, enjoying instant gratification with every creamy bite. It’s truly one of the most convenient and delicious ice cream recipes you’ll ever make.
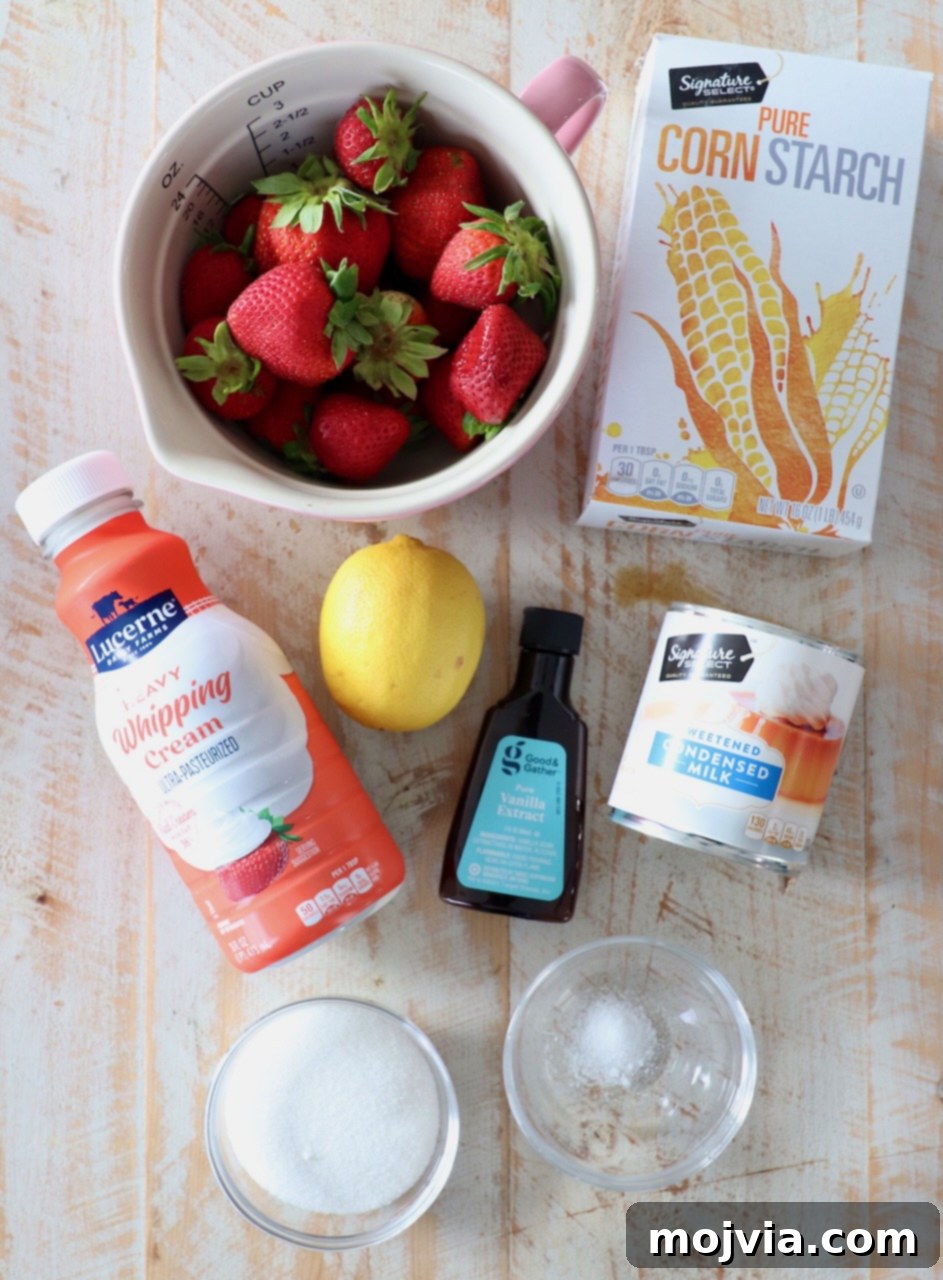
Ingredients for the Ultimate No-Churn Strawberry Ice Cream
Crafting the perfect no-churn strawberry ice cream begins with understanding the role each ingredient plays. Below, I’ll guide you through the best choices for this recipe, explaining their function and offering helpful substitution options. For precise measurements, please refer to the recipe card conveniently located at the bottom of this post.
- Fresh Strawberries: The heart of our ice cream! Summertime strawberries are at their peak sweetness and flavor, making them the ideal choice. However, if fresh berries are out of season, frozen strawberries work beautifully. Remember to thaw them completely before starting. You can even add frozen berries directly to a skillet over medium heat to defrost them quickly, then mash them using a muddler or fork. Once mashed, proceed with the recipe as instructed, adding sugar and cornstarch, and cooking them down to a luscious puree.
- Cornstarch: This essential ingredient acts as a thickening agent for our strawberry puree. It ensures the puree has the perfect consistency to blend seamlessly into the ice cream base, preventing it from becoming too watery and icy when frozen.
- Granulated Sugar: A simple yet crucial component, granulated sugar sweetens both the strawberry puree and contributes to the overall delightful sweetness of the ice cream. It balances the tartness of the strawberries, creating a harmonious flavor profile.
- Lemon Juice: A splash of fresh lemon juice is a secret weapon in this recipe! It brightens and enhances the natural strawberry flavor, adding a subtle tang that prevents the ice cream from being overly sweet. Freshly squeezed lemon juice will always yield the best results.
- Sweetened Condensed Milk: This is the magical ingredient that makes our ice cream “no-churn.” Sweetened condensed milk provides both sweetness and a creamy texture, eliminating the need for an ice cream maker. You’ll find this canned milk in the baking aisle of most major grocery stores.
- Vanilla Extract: A classic flavor enhancer, vanilla extract adds depth and warmth to the ice cream base, complementing the vibrant strawberry notes without overpowering them. Use good quality pure vanilla extract for the best taste.
- Sea Salt: Just a pinch of sea salt makes a significant difference. It acts as a flavor amplifier, bringing out the sweetness of the strawberries and balancing all the flavors, making the ice cream taste even more vibrant and complete.
- Heavy Cream: Also known as heavy whipping cream, this is the foundation of our rich and airy ice cream base. When whipped to stiff peaks, it incorporates air, giving the no-churn ice cream its signature light and creamy texture. Both “heavy cream” and “heavy whipping cream” can be used interchangeably in this recipe. Ensure it’s very cold for optimal whipping.
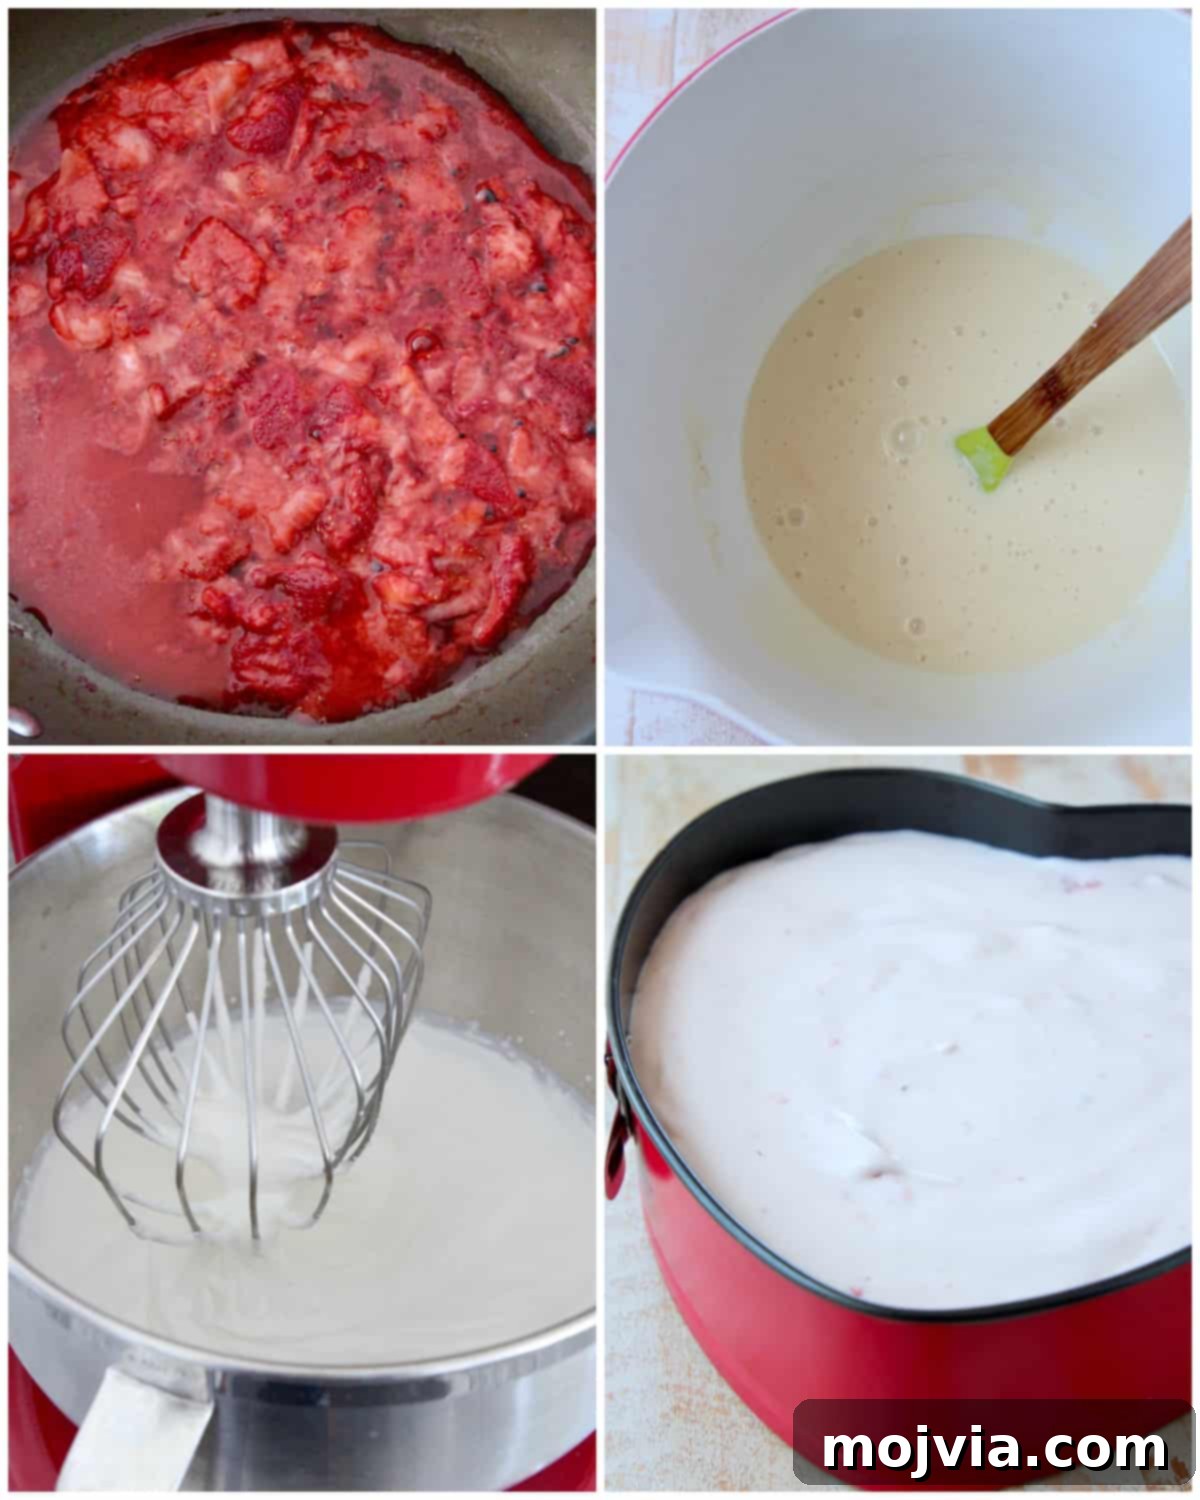
Simple Instructions for Creamy No-Churn Strawberry Ice Cream
Creating this delightful strawberry ice cream is incredibly straightforward, broken down into three easy steps. For complete, detailed instructions and to see a step-by-step video of the process, scroll down to the recipe card at the bottom of this page.
- Prepare the Strawberry Puree: Begin by adding your sliced strawberries to a large skillet. Before placing it on the stove, use a muddler, potato masher, or a sturdy fork to mash the strawberries. Aim for a thick consistency with some delightful small chunks remaining for added texture. Next, stir in the cornstarch and granulated sugar until well combined with the mashed berries. Now, move the skillet to your stovetop and set the heat to medium. As the strawberry mixture starts to bubble, reduce the heat slightly to medium-low. Allow the berries to cook down for approximately 5-7 minutes, stirring occasionally, until they reach a thick, jam-like consistency. Remove the skillet from the heat and immediately stir in the fresh squeezed lemon juice. Transfer this vibrant strawberry puree to a separate container and place it in the refrigerator to cool completely while you prepare the ice cream base. This cooling step is crucial for the best results.
- Craft the Ice Cream Base: In a large mixing bowl, combine the sweetened condensed milk, vanilla extract, and sea salt. Stir these ingredients together until they are thoroughly blended. In a separate, very cold bowl (chilling the bowl beforehand can help), use a stand mixer fitted with a whisk attachment or an electric hand mixer to whip the heavy cream. Beat the cream on medium-high speed until stiff peaks form. This typically takes about 3-4 minutes, but watch it carefully to avoid over-whipping. Once stiff peaks are achieved, gently fold the condensed milk mixture into the whipped cream using a rubber spatula. Use a light hand to preserve the airiness of the whipped cream, mixing only until just combined and no streaks remain.
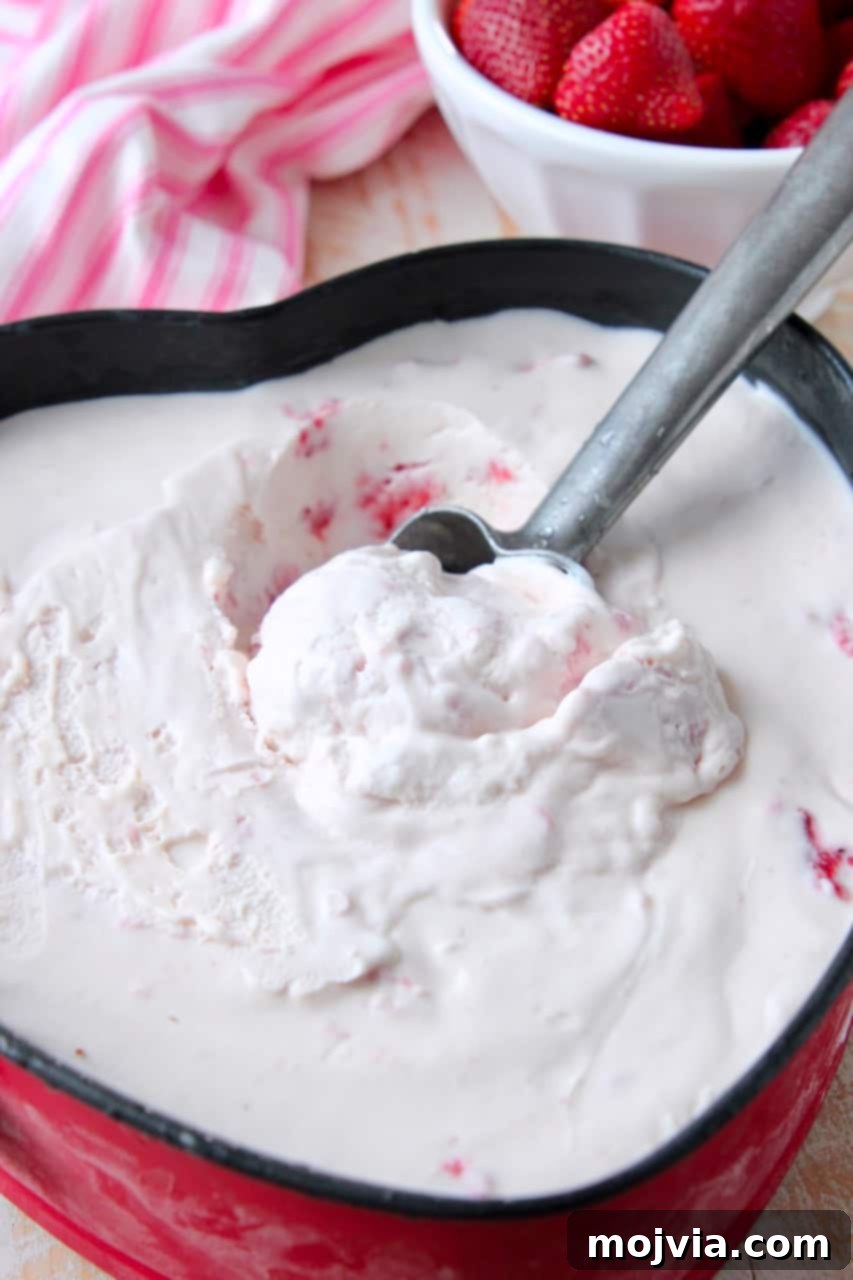
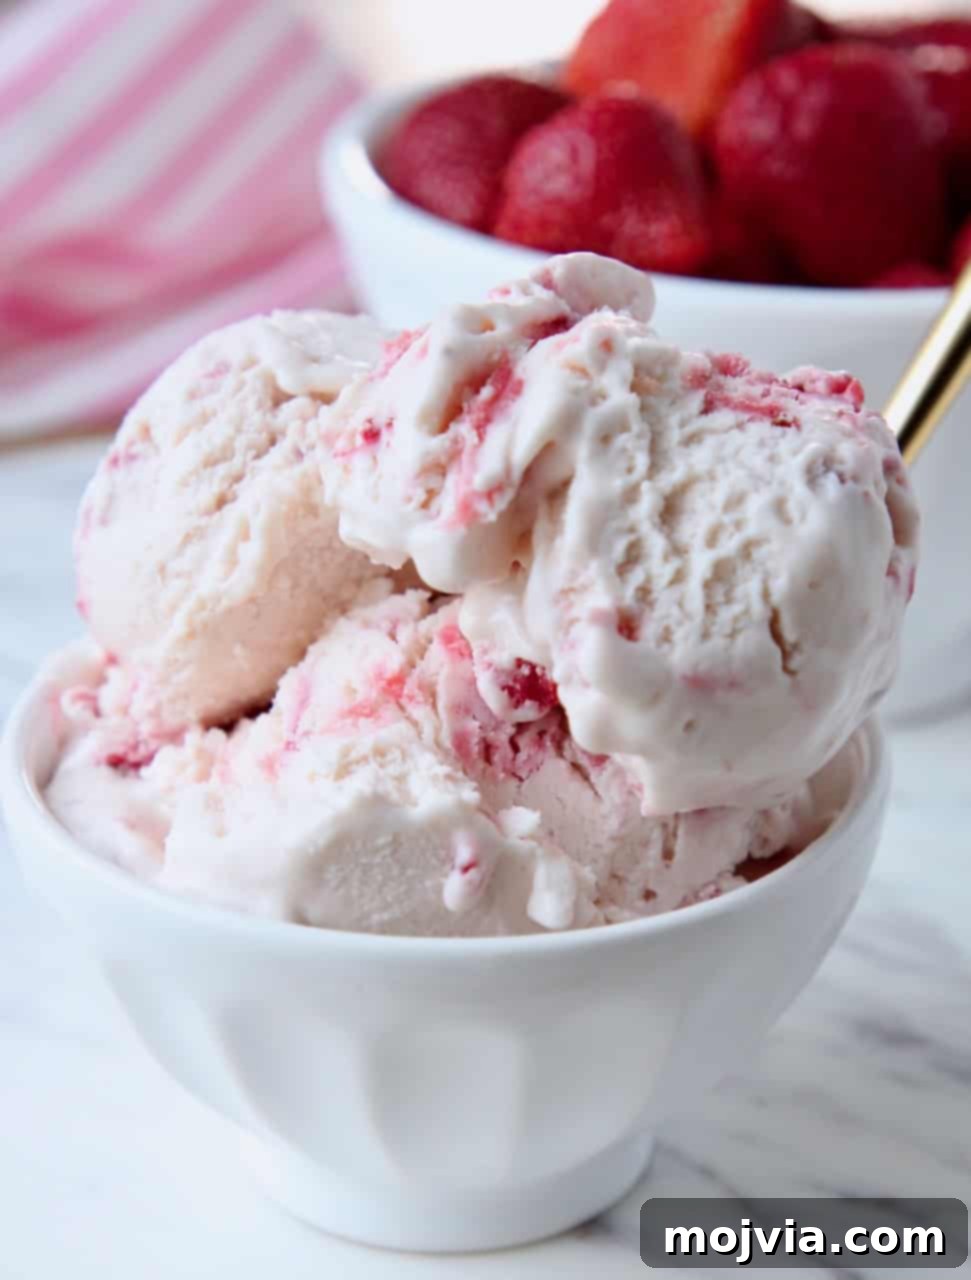
- Assemble and Freeze the Ice Cream: With both components ready, it’s time to bring them together. Carefully fold the cooled strawberry puree into the prepared ice cream base. Swirl it gently to create beautiful ribbons of strawberry, or mix it in more thoroughly if you prefer a uniform color. Pour the combined ice cream mixture into a 2-quart container. While a metal container can help the ice cream freeze faster, a glass or plastic freezer-safe container will also work perfectly. Ensure the container is covered tightly with plastic wrap or an airtight lid to prevent ice crystals from forming. Place the container in the freezer for a minimum of 5 hours, or ideally, overnight, to allow the ice cream to set completely and achieve its perfect creamy texture.
Chef’s Note: For those who prefer an ultra-smooth strawberry ice cream without any fruit chunks, simply puree the cooked strawberry mixture in a blender or food processor until perfectly smooth before folding it into the ice cream base.
Irresistible Flavor Variations and Toppings
While our classic homemade strawberry ice cream is divine on its own, it also serves as a fantastic canvas for creative customizations. Elevate your dessert experience with these exciting flavor variations and delightful topping ideas:
- Chocolate Chip Strawberry: For a classic pairing, simply fold one cup of mini chocolate chips into the ice cream mixture along with the strawberry puree. The tiny chocolate morsels provide a delightful contrast in texture and flavor.
- Strawberry Shortcake Ice Cream: Transform your ice cream into a beloved classic! Mix in 1 cup of crushed shortbread cookies or even a few crumbled pieces of actual shortcake with the strawberry puree. This adds a buttery, crumbly texture that mimics the traditional dessert.
- Strawberry Cheesecake Ice Cream: Indulge in a rich, tangy twist. First, use your stand mixer or electric hand mixer to combine the sweetened condensed milk, vanilla extract, and salt with 4 ounces of softened cream cheese. Whip until smooth and fully incorporated, then continue with the recipe as instructed. At the very end, gently mix in 1/2 cup of crushed graham crackers along with the strawberry puree for that authentic cheesecake crust flavor and texture.
- Fresh Mint & Balsamic Swirl: For an elevated, gourmet touch, finely chop fresh mint leaves and sprinkle them into the ice cream. For a truly unique flavor, reduce a few tablespoons of balsamic vinegar until syrupy, then drizzle it into the strawberry puree before folding into the ice cream base. The balsamic adds a sophisticated depth that complements strawberries beautifully.
- Customize with Toppings: The possibilities are endless! Drizzle your scoops with warm caramel sauce or rich chocolate syrup. Top with a cloud of freshly whipped cream, more fresh berries, a sprinkle of crushed graham crackers, or a handful of toasted nuts like pecans or almonds for added crunch. A few fresh mint leaves make for an elegant garnish.
Expert Storage Tips for Homemade Ice Cream
Proper storage is key to maintaining the creamy texture and delicious flavor of your homemade strawberry ice cream. Follow these tips to keep your dessert fresh and free from freezer burn:
You can store this homemade ice cream for an impressive period of up to 6 months in the freezer. To achieve this longevity and prevent the formation of ice crystals (which lead to freezer burn), it’s crucial to use an appropriate container.
Always place your freshly made ice cream in a high-quality freezer-safe container with an airtight lid. Glass containers are my preferred choice because they offer excellent insulation, prevent flavor transfer, and are generally more eco-friendly. For an extra layer of protection, press a piece of plastic wrap directly onto the surface of the ice cream before securing the lid. This minimizes air exposure, which is the primary cause of freezer burn.
When placing the container in the freezer, aim for the back. The rear of your freezer tends to be the coldest and most temperature-stable spot, away from the frequent temperature fluctuations that occur when the freezer door is opened. Storing ice cream in the door is generally not recommended, as it’s the warmest area and can lead to a less desirable texture. By following these simple storage guidelines, you’ll be able to enjoy your perfectly creamy, homemade strawberry ice cream for months to come!
Frequently Asked Questions (FAQs)
Here are answers to some common questions about making and enjoying no-churn strawberry ice cream:
- How do I prevent ice crystals in my no-churn ice cream?
To minimize ice crystals, ensure your heavy cream is whipped to stiff peaks, incorporate the sweetened condensed milk gently, and cool the strawberry puree completely before folding it in. Also, store the ice cream in an airtight container with plastic wrap pressed directly onto the surface, and place it in the coldest part of your freezer (usually the back).
- Can I reduce the amount of sugar in the recipe?
You can slightly reduce the granulated sugar in the strawberry puree if your strawberries are very sweet, or if you prefer a less sweet ice cream. However, sweetened condensed milk is crucial for the no-churn aspect and provides essential sweetness, so it cannot be reduced without impacting the texture. Remember that sugar also plays a role in keeping the ice cream from freezing too hard.
- What if my heavy cream won’t whip to stiff peaks?
Make sure your heavy cream is very cold. Chill your mixing bowl and whisk attachment in the freezer for 10-15 minutes before whipping. If it’s still not working, check the cream’s fat content; it needs to be at least 36% for proper whipping. Over-whipping can also cause it to separate, so watch carefully for stiff peaks.
- Can I use frozen strawberries directly without thawing?
While the recipe suggests thawing, you can add frozen strawberries directly to a skillet over medium heat to begin softening and mashing them. The cooking process will ensure they break down properly into a puree, preventing icy chunks in the final product.
- How long does it take for the ice cream to freeze?
Typically, this no-churn ice cream needs at least 5 hours to freeze to a scoopable consistency. For best results and a firmer texture, freezing it overnight (8-12 hours) is recommended.
Tips for Perfect No-Churn Ice Cream Every Time
Achieving perfectly creamy and flavorful no-churn ice cream is easy with a few simple tricks. Keep these expert tips in mind for the best results:
- Start with Cold Ingredients: Ensure your heavy cream is as cold as possible. Chilling your mixing bowl and whisk attachment for 15-20 minutes in the freezer before whipping can significantly help the cream whip faster and achieve firmer peaks, which is crucial for the ice cream’s texture.
- Don’t Over-Whip the Cream: Whip the heavy cream until it forms stiff peaks, meaning when you lift the whisk, the peak stands up firmly. Be careful not to over-whip, as it can turn granular or separate, affecting the final texture of your ice cream.
- Cool the Strawberry Puree Completely: This step cannot be stressed enough! Adding warm or even slightly warm strawberry puree to your whipped cream base will melt the cream, deflating it and leading to an icy, less creamy ice cream. Make sure the puree is chilled thoroughly in the refrigerator.
- Fold Gently: When combining the condensed milk mixture and the strawberry puree into the whipped cream, use a gentle folding technique with a rubber spatula. The goal is to incorporate everything without deflating the air you’ve whipped into the cream, which contributes to the light and airy texture of no-churn ice cream.
- Use an Airtight Container: To prevent freezer burn and ice crystal formation, always store your ice cream in a freezer-safe container with a tight-fitting lid. For extra protection, press a piece of plastic wrap directly onto the surface of the ice cream before sealing.
- Freeze in the Coldest Spot: The back of your freezer is typically the coldest and most consistent temperature zone. Storing your ice cream here helps it freeze faster and more evenly, resulting in a smoother consistency. Avoid storing it in the freezer door, which is subject to temperature fluctuations.
- Patience is Key for Freezing: While tempting to taste early, allow the ice cream to freeze for the recommended minimum of 5 hours, or ideally overnight. This ensures it sets properly and develops its full creamy texture.
More Irresistible No-Churn Ice Cream Creations
Why stop at strawberry? Expand your dessert repertoire and stock up your freezer with all your favorite ice cream flavors! Each of these delightful recipes is incredibly easy to make, no ice cream maker required, ensuring a creamy, homemade treat every time.
And for those fortunate enough to own an ice cream maker, don’t miss out on trying my family’s famous Old-Fashioned Vanilla Ice Cream! It’s a classic for a reason.
Print Recipe
Pin Recipe
Rate this Recipe
Homemade Strawberry Ice Cream (No-Churn)
Video
Ingredients
- 2 cups fresh or thawed frozen strawberries, stems removed, hulled, sliced in half
- 1 tablespoon cornstarch
- ⅓ cup granulated sugar
- ½ tablespoon fresh lemon juice
- 14 ounce can sweetened condensed milk
- 2 teaspoons vanilla extract
- ¼ teaspoon sea salt
- 2 cups heavy cream, very cold
Instructions
-
Place the hulled and halved strawberries in a large skillet, off the stove. Use a muddler, potato masher, or fork to mash the strawberries into a thick, slightly chunky consistency.
-
Add the cornstarch and granulated sugar to the mashed berries. Mix them together thoroughly.
-
Move the skillet to the stovetop over medium heat. Once the strawberry mixture begins to bubble, reduce the heat slightly to medium-low. Allow the berries to cook down to a thick, jam-like consistency for about 5-7 minutes, stirring occasionally.
-
Remove the mixture from the heat and stir in the fresh lemon juice.
-
Transfer the strawberry puree to a separate bowl and place it in the refrigerator to cool completely while you prepare the ice cream base. This step is crucial.
-
In a medium bowl, combine the sweetened condensed milk, vanilla extract, and sea salt. Stir until well blended.
-
In a separate, very cold large bowl, whip the heavy cream with a stand mixer or electric hand mixer on medium-high speed until firm, stiff peaks form (about 3-4 minutes). Be careful not to over-whip.
-
Gently fold the condensed milk mixture into the whipped cream using a rubber spatula until just combined. Be careful not to deflate the whipped cream.
-
Gently fold in the cooked, completely cooled strawberry puree. Swirl it in or mix until just combined, depending on your preference for a marbled or uniform look.
-
Pour the ice cream mixture into a 2-quart freezer-safe container (metal, glass, or plastic all work).
-
Cover the container with an airtight lid or press plastic wrap directly onto the surface of the ice cream before sealing.
-
Place in the coldest part of the freezer (usually the back) for at least 5 hours, or preferably overnight, until firm.
Notes
- Optimal Freezing Location: For the quickest and best freeze, always place your homemade ice cream as far back in the freezer as possible. The freezer door is the warmest part of the freezer and should be avoided for ice cream storage. Placing it in the back ensures consistent, very cold temperatures, which helps prevent ice crystals and promotes a smoother texture.
- Recipe Yield: This recipe yields approximately 1/2 gallon of delicious ice cream. This quantity is equivalent to 4 pints, or roughly 12 generous scoops of ice cream, perfect for sharing (or not!).
- Long-Term Storage: This homemade ice cream will maintain its quality and flavor for up to 6 months when stored correctly in the freezer. To prevent freezer burn, always seal the ice cream in an airtight container. I highly recommend using these glass containers for storage, as they provide excellent insulation and are durable. This recipe is perfectly sized to fit into two of these containers.