
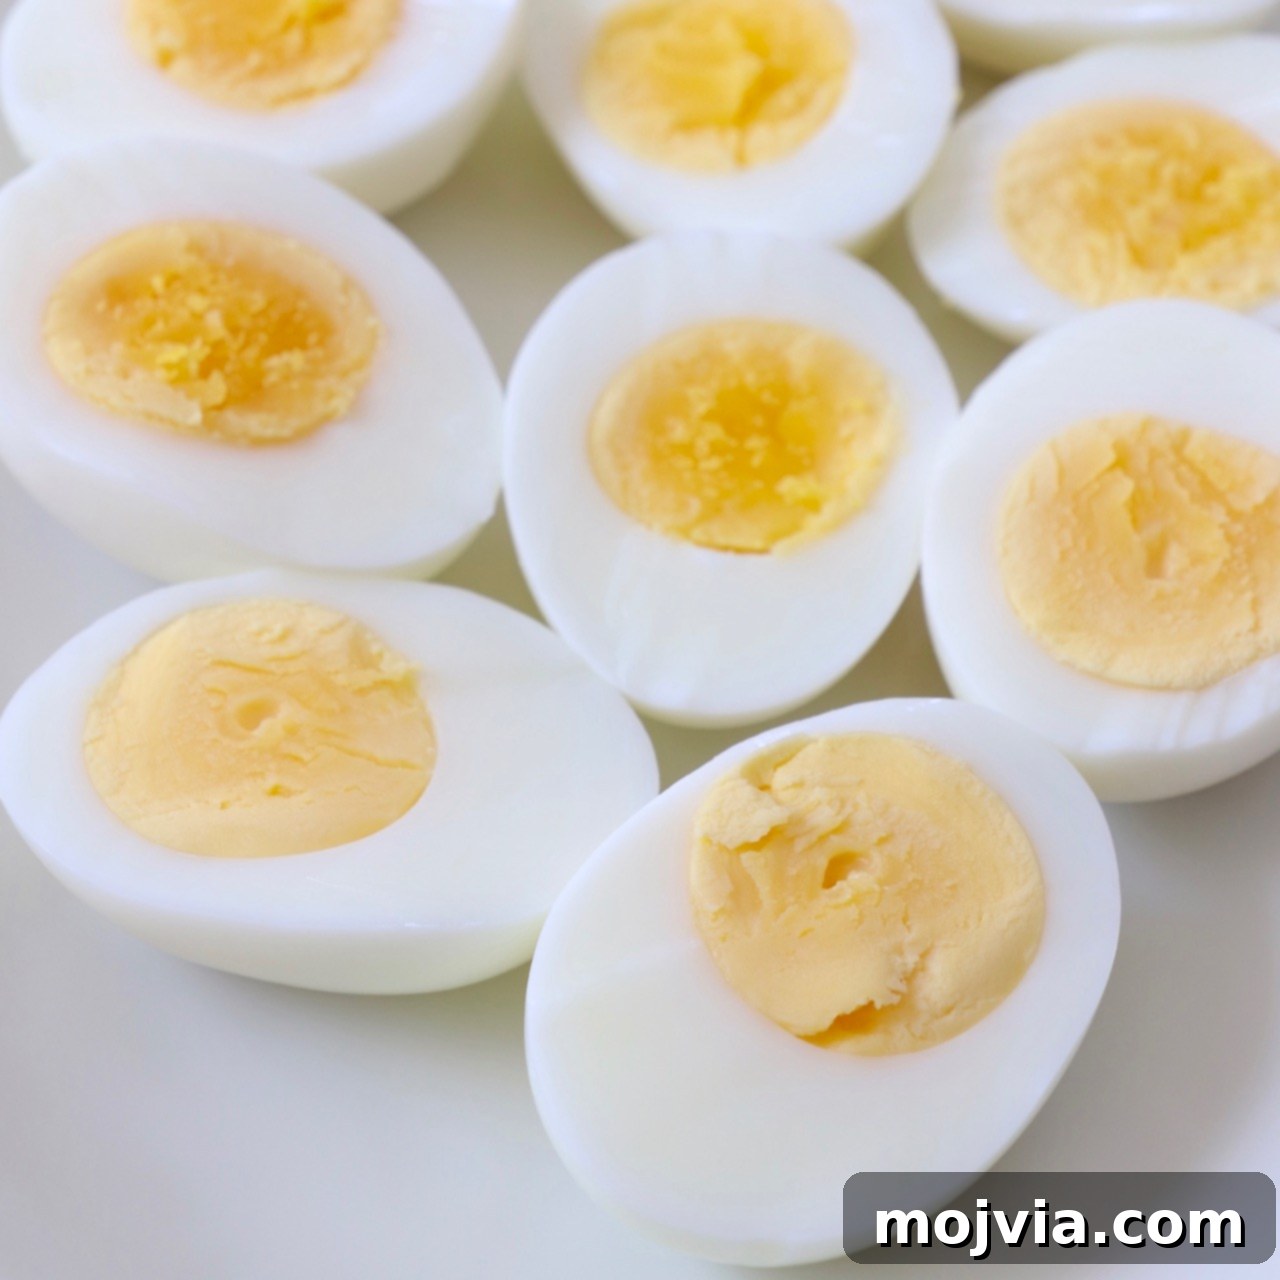
Discover the secrets to cooking **perfect hard-boiled eggs** every single time with our tried-and-true stovetop method! This comprehensive guide ensures you achieve eggs with beautifully creamy yolks and tender, easy-to-peel whites, making them ideal for delectable Deviled Eggs, a rich Egg Salad, or a vibrant Cobb Salad. Get ready to master this kitchen staple!
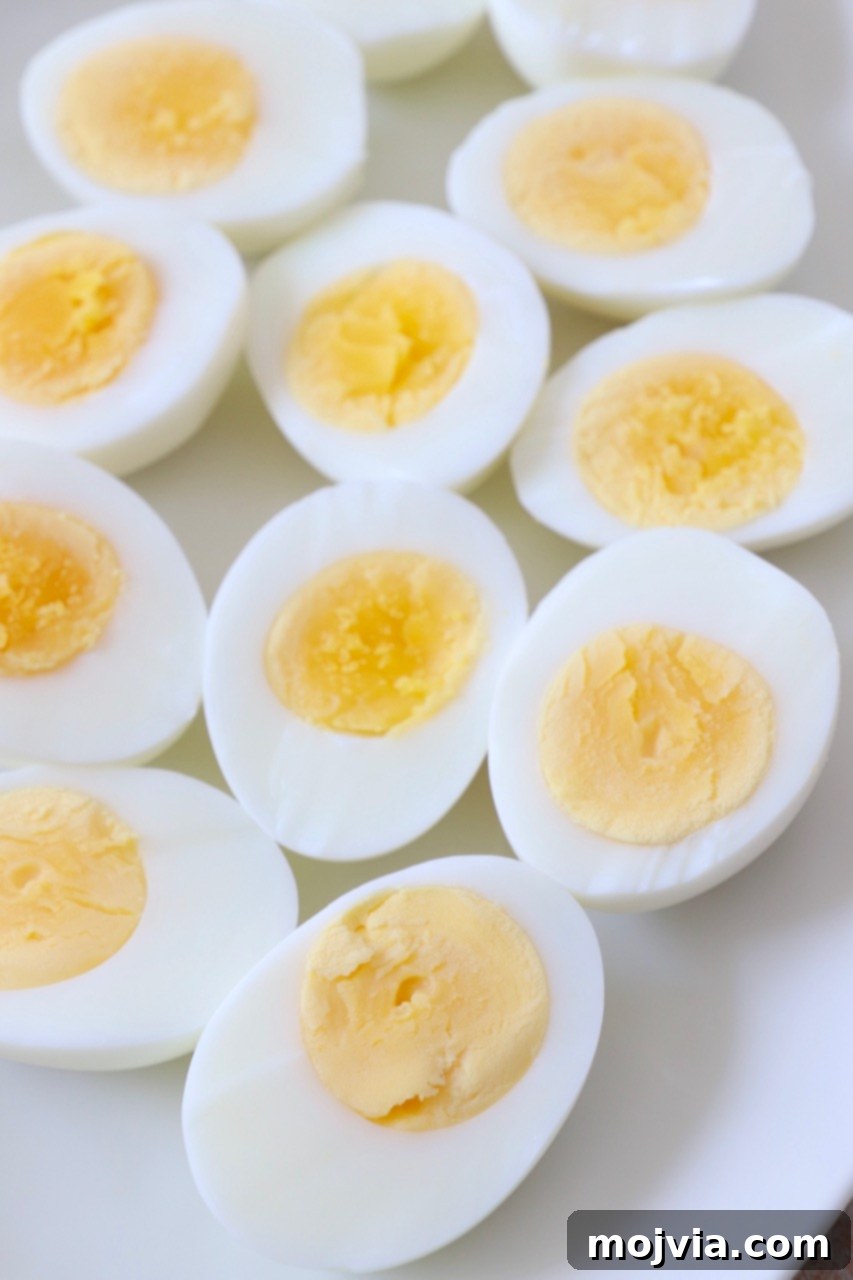
Table of Contents
- Mastering Hard-Boiled Eggs
- Why Perfect Hard-Boiled Eggs Matter
- Essential Tools for Boiling Eggs
- Step-by-Step Instructions: How to Hard Boil Eggs
- The Secret to Effortless Peeling
- Expert Tips for Flawless Eggs
- Storage and Shelf Life
- Creative Ways to Enjoy Hard-Boiled Eggs
- Frequently Asked Questions (FAQs)
Mastering Hard-Boiled Eggs: A Kitchen Essential
Hard-boiled eggs are far more than just a simple food item; they are a versatile and nutritious powerhouse that deserves a permanent spot in your kitchen repertoire. Whether you find yourself with an abundance of eggs from a recent grocery haul or simply looking for a healthy, quick protein source, cooking up a batch of perfectly hard-boiled eggs is an excellent solution. They are incredibly convenient, budget-friendly, and packed with essential nutrients, making them a go-to for busy individuals and families alike.
However, the journey to achieving that “perfect” hard-boiled egg can often be fraught with frustration. Many people struggle with common issues like shells that refuse to peel cleanly, leaving behind ragged whites, or yolks that are either undercooked and runny, or overcooked with an unsightly greenish-gray ring. These minor imperfections can significantly detract from the overall enjoyment and presentation of your dish. But fret not! With our tested and perfected methods, you’ll learn how to consistently produce hard-boiled eggs with a smooth, tender white and a vibrant, creamy yellow yolk every single time. The secret lies in understanding a few simple, yet crucial, steps.
Why Perfect Hard-Boiled Eggs Matter
Beyond aesthetics, the texture and flavor of a perfectly cooked hard-boiled egg are unparalleled. A creamy yolk offers a delightful richness, while a tender white provides a satisfying bite. These qualities are fundamental to making truly exceptional dishes. Imagine slicing into an egg, only to find a crumbly, dry yolk or an albumin (egg white) that sticks stubbornly to the shell. It’s a culinary disappointment that can ruin the experience of even the simplest snack or salad. By following our guide, you’ll avoid these pitfalls and ensure your eggs are always at their peak, ready to elevate any meal.
Eggs are an incredibly nutritious addition to your weekly menu, offering a complete protein source, healthy fats, and a wealth of vitamins and minerals. From a quick breakfast grated over avocado toast to a satisfying snack sprinkled with your favorite seasoning, chopped for hearty salads, or layered in delicious sandwiches, the culinary possibilities are genuinely endless. Learning to hard boil them flawlessly opens up a world of healthy and delicious meal options.
Essential Tools for Boiling Eggs
While the process of hard-boiling eggs is relatively simple, having the right equipment can make a significant difference in ease and outcome. Here’s what you’ll need:
- Large Pot with Lid: Choose a pot large enough to comfortably hold your eggs in a single layer and accommodate enough water to fully submerge them. A tight-fitting lid is crucial for maintaining a consistent temperature and cooking efficiency.
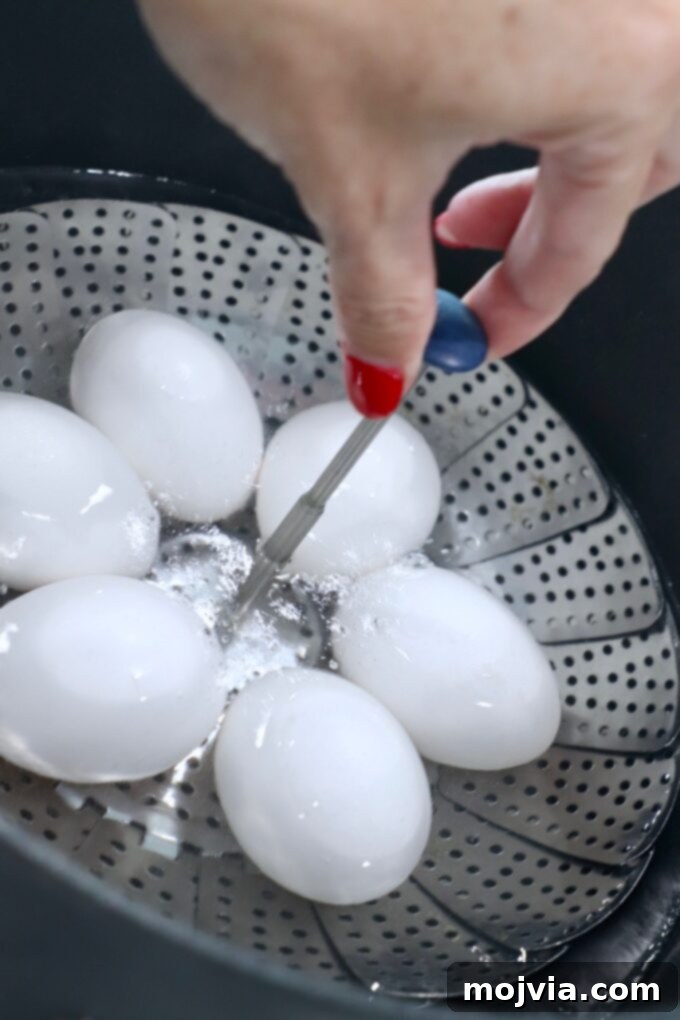
- Slotted Spoon or Steamer Basket: A slotted spoon is invaluable for gently lowering and retrieving individual eggs, preventing cracks. For larger batches, a steamer basket is a game-changer, allowing you to add and remove multiple eggs simultaneously with minimal fuss and risk of breakage. This method is highly recommended for its convenience and effectiveness.
- Large Bowl for Ice Bath: An immediate ice bath is a non-negotiable step for perfect hard-boiled eggs. Ensure your bowl is large enough to hold all the cooked eggs and plenty of ice and water.
- Timer: Precision in cooking time is key. A reliable kitchen timer will help you achieve your desired yolk consistency.
Step-by-Step Instructions: How to Hard Boil Eggs Perfectly
Follow these precise steps to cook hard-boiled eggs with creamy yolks and smooth, crack-free whites.
- Prepare the Water: Fill a large pot with water. You’ll need approximately 6-8 cups, or enough water to ensure the eggs will be fully submerged. Place the pot on the stovetop over high heat and bring the water to a vigorous, rolling boil.
- Add Baking Soda (Optional but Recommended): Once the water is boiling, add 1 teaspoon of baking soda to the water. While some debate its necessity, our experiments (detailed below) consistently show that baking soda significantly aids in easier peeling, producing more aesthetically pleasing eggs.
- Introduce the Eggs: Carefully lower your eggs into the boiling water in a single layer. You can do this one by one using a slotted spoon to prevent cracking, or for ultimate ease, load them all into a steamer basket and gently lower the entire basket into the pot. This method is highly recommended for safety and efficiency.
- Cook the Eggs: Immediately cover the pot with its lid. Reduce the heat on the stove down to medium, maintaining a gentle simmer, and cook the eggs for precisely 11 minutes for perfectly hard-boiled large eggs with creamy yolks.
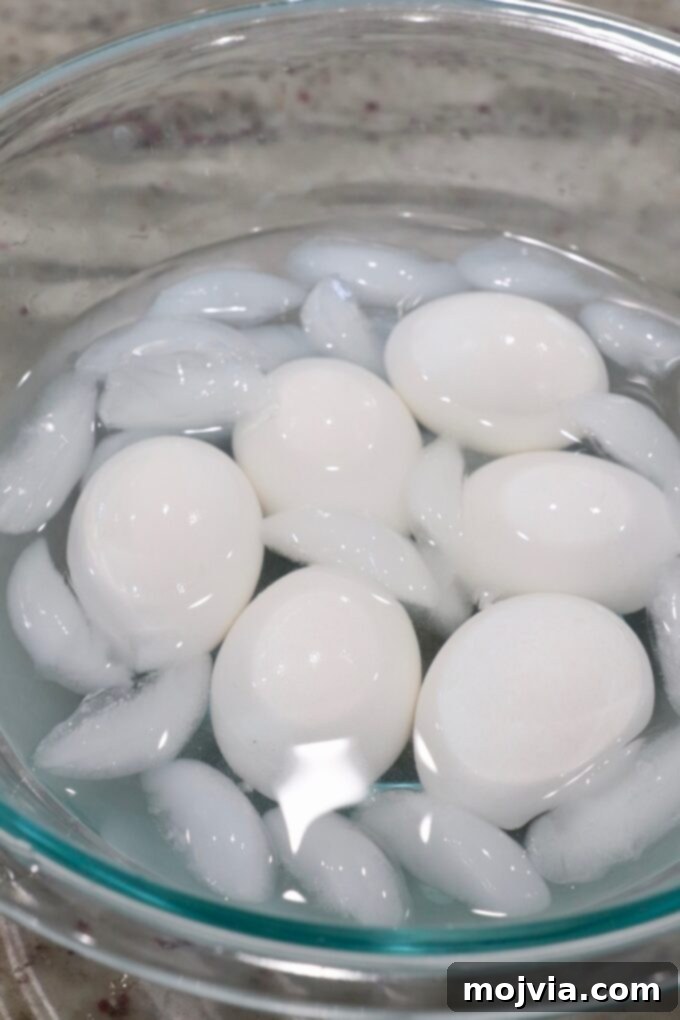
- Shock the Boiled Eggs: As soon as the 11 minutes are up, remove the pot from the heat. Using a slotted spoon or by lifting the steamer basket, carefully transfer all the eggs from the hot water into a large bowl filled with ice water. This crucial step, known as an ice bath, immediately halts the cooking process.
- Rest in Ice Bath: Allow the eggs to rest in the cold water for a full 15 minutes. This ensures the cooking is completely stopped and prepares them for easy peeling.
- Store or Enjoy Immediately: Once the eggs have cooled in the ice bath, you can either peel and enjoy them right away or store them. Unpeeled hard-boiled eggs can be refrigerated for up to one week.
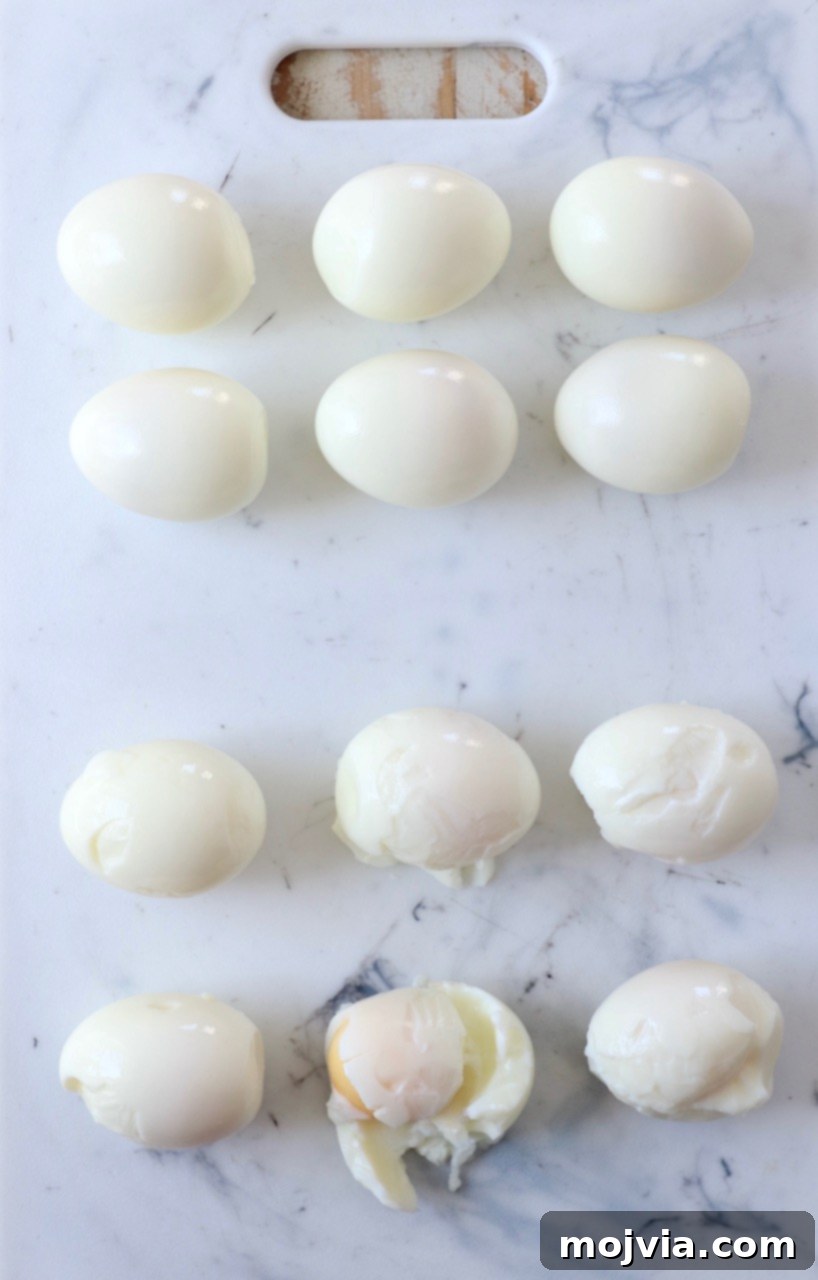
The Secret to Effortless Peeling: Why Baking Soda Makes a Difference
One of the most common complaints about hard-boiled eggs is the stubborn shell that takes chunks of the precious egg white with it. This frustration often leads to misshapen, unappealing eggs. Our extensive testing has revealed a simple yet incredibly effective solution: adding baking soda to the boiling water.
While some culinary experts may dismiss baking soda as an unnecessary ingredient, our own side-by-side experiment proved its value. We cooked eggs from the same carton, simultaneously and at the same temperature, with one batch including baking soda and the other without. The results were stark and undeniable.
As illustrated in the accompanying image (referencing “the picture above”), the eggs cooked with a small amount of baking soda peeled off effortlessly, yielding beautifully smooth, perfect hard-boiled eggs. In contrast, the eggs boiled without baking soda were significantly more challenging to peel, resulting in noticeable loss of egg white on almost every single egg. This phenomenon occurs because baking soda, an alkaline ingredient, raises the pH of the water, which in turn helps to denature the protein in the egg white just beneath the shell. This slight chemical change makes the egg white less likely to bond with the inner membrane of the shell, thus facilitating a much cleaner peel.
Therefore, let our experiment serve as a clear lesson: for consistent, easy-to-peel eggs every time, **always toss a teaspoon of baking soda into your boiling water.**
Simple Steps for Peeling Hard-Boiled Eggs
Once your eggs have had their vital 15-minute ice bath, follow these instructions for a smooth peeling experience:
- Remove Eggs: Take the cooled eggs one by one from the ice bath.
- Crack the Shell: Gently tap the egg against a hard surface (like a countertop) on both the top and bottom ends. Then, tap it lightly on one side to create an initial crack pattern all around.
- Begin Peeling: Starting from one of the cracked ends, gently peel the shell away. We recommend doing this over a colander in the sink. This allows you to rinse the egg under cool, running water as you peel, which helps to wash away small shell fragments and separates the membrane more easily. It also conveniently collects the discarded shells for easy disposal.
- Rinse and Inspect: After peeling, quickly rinse the egg under cool water to ensure all tiny bits of shell and membrane are completely removed.
Troubleshooting Stubborn Shells: If you encounter a particularly stubborn shell, even after using baking soda, try placing the cracked egg in a bowl of water for a few minutes. The water will work its way under the membrane, making it easier to separate. Peeling under a gentle stream of running water can also achieve this effect.
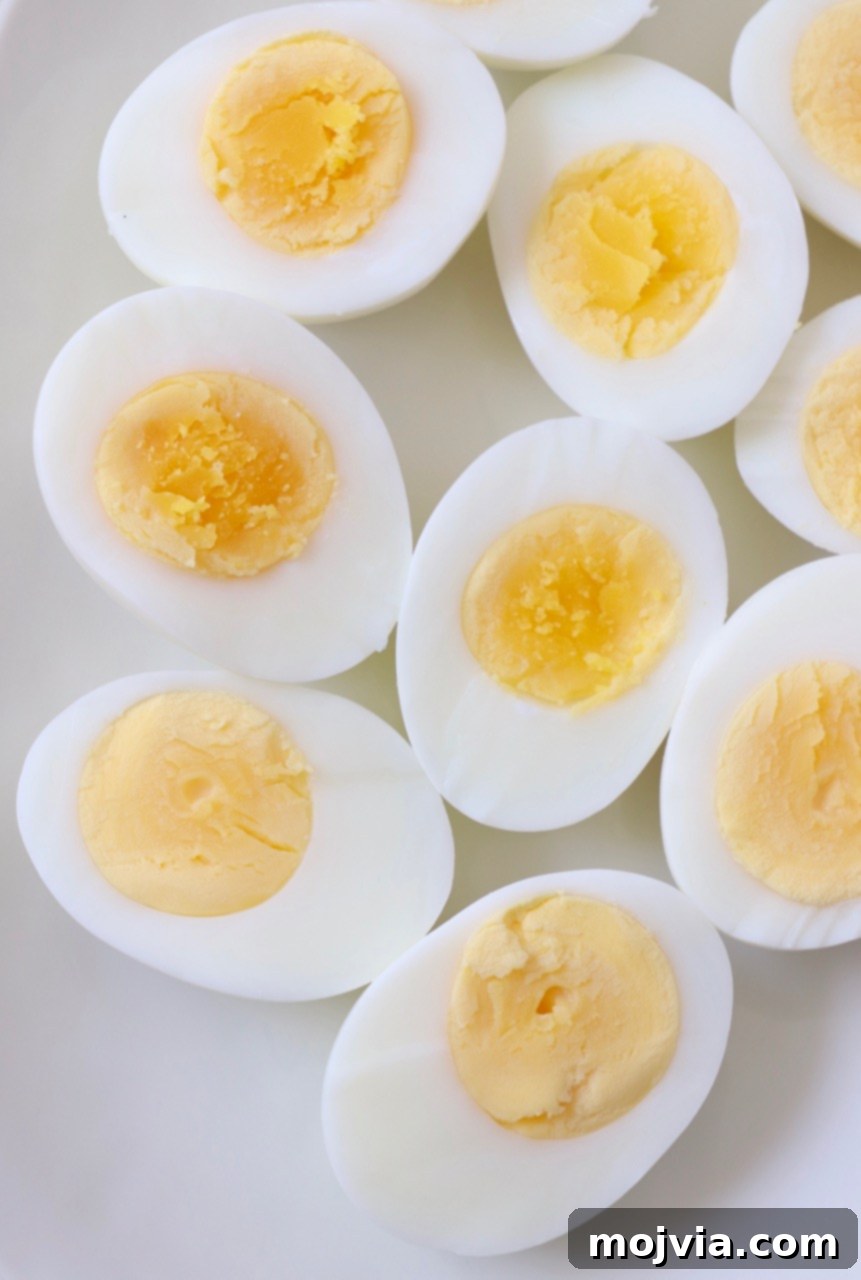
Expert Tips for Flawless Hard-Boiled Eggs
Beyond the core instructions, these additional insights will help you achieve consistent perfection with your hard-boiled eggs, avoiding common pitfalls and ensuring the best possible outcome.
- Bring Eggs to Room Temperature (Slightly): Before you even start boiling water, remove your eggs from the refrigerator and let them sit at room temperature for about 5-10 minutes. This slight warming helps prevent the shells from cracking when they are introduced to the hot boiling water, ensuring a smooth, intact egg.
- Adjust for Egg Size: Our recommended cooking time of 11 minutes is optimized for large eggs. If you are using medium, extra-large, or jumbo eggs, you will need to adjust the cooking time accordingly. Medium eggs might need 9-10 minutes, while extra-large could require 12-13 minutes. A little experimentation might be needed for perfect results with different sizes.
- The Indispensable Ice Bath: Do not, under any circumstances, skip the ice bath! This step is critical for two primary reasons. Firstly, it immediately halts the cooking process. Overcooked eggs are identifiable by that greenish-gray ring around the yolk, a result of sulfur and iron reacting from excessive heat. The ice bath prevents this discoloration, preserving the vibrant yellow color of the yolk. Secondly, the rapid temperature change from hot to cold helps to contract the egg whites, separating the membrane from the shell, which is key to effortlessly peeled eggs.
- Choose Older Eggs for Easier Peeling: Counterintuitively, older eggs (not spoiled!) are much easier to peel than very fresh ones. The pH of an egg’s albumen (white) increases over time, making it less likely to adhere to the inner shell membrane. Most eggs purchased from a grocery store are already about a week old, so they are typically ideal for hard boiling. If you’re fortunate enough to receive farm-fresh eggs, we highly recommend waiting at least one week before hard-boiling them for optimal peeling results.
- Master Soft-Boiled Eggs Too: This versatile stovetop method can also be used to create perfectly soft-boiled eggs. Simply adjust the simmering time. For a runny yolk and firm white, set your timer for 6 minutes instead of 11 minutes. This will give you a delicious soft-boiled egg, perfect for toast or ramen.
- Avoid Crowding the Pot: Ensure your eggs are arranged in a single layer in the pot. Overcrowding can lead to uneven cooking and increase the risk of eggs bumping into each other and cracking during the boil.
- Monitor the Simmer: After bringing the water to a boil and adding the eggs, reduce the heat to a gentle simmer. A vigorous, continuous boil can cause eggs to bounce around excessively, leading to cracks. A gentle simmer provides consistent heat without rough handling.
Storage and Shelf Life: Keeping Your Hard-Boiled Eggs Fresh
Proper storage is essential to maintain the freshness and safety of your hard-boiled eggs. Knowing how long they last, both peeled and unpeeled, will help you maximize their shelf life and avoid waste.
- Unpeeled Eggs Last Longer: For optimal freshness and extended shelf life, it is always best to store hard-boiled eggs with their shells intact. The shell acts as a natural protective barrier, safeguarding the egg from bacteria and moisture loss. Unpeeled hard-boiled eggs will remain fresh for up to 1 week when stored properly in the refrigerator.
- Peeled Eggs: If you decide to peel your hard-boiled eggs immediately, they should be consumed within 2-3 days. Once peeled, they lose the protection of their natural shell and are more susceptible to drying out and absorbing odors.
- Airtight Container is Key: Whether peeled or unpeeled, always store hard-boiled eggs in an airtight container in the coldest part of your refrigerator. This prevents them from absorbing any strong odors from other foods in the fridge and helps maintain their freshness.
- Freezing Hard-Boiled Eggs: While technically possible to freeze hard-boiled eggs, it’s generally **not recommended to freeze them whole**. The texture of the egg white tends to become rubbery and unappetizing once defrosted due to changes in its protein structure. However, the yolks freeze exceptionally well! If you have leftover yolks from a recipe (like deviled eggs), you can easily separate them and seal them in an airtight, freezer-safe container. They can be defrosted in the refrigerator when you’re ready to use them, perfect for crumbling over salads or adding to spreads.
- Odor Check: Always give your hard-boiled eggs a quick smell test before eating, especially if they’ve been stored for a few days. A sulfuric or unusual odor is a clear sign that they are no longer fresh and should be discarded.
Creative Ways to Enjoy Hard-Boiled Eggs
Hard-boiled eggs are incredibly versatile and can be enjoyed in countless ways. They’re not just for breakfast anymore! Here are some of the best and most creative ways to incorporate them into your meals and snacks.
Quick & Easy Snacks
For a simple, protein-packed snack, just slice your perfect hard-boiled eggs in half and top them with any of these delicious additions:
- A simple sprinkle of salt and freshly ground black pepper.
- Creamy mashed avocado or zesty guacamole.
- A dollop of hummus – elevate it with this Spicy Sriracha Hummus for a kick!
- Flavorful Everything Bagel Seasoning for a savory crunch.
- Homemade Ranch Seasoning for a familiar and delicious taste.
- A dab of your favorite mustard for a classic zing.
- A few drops of hot sauce for those who love a bit of heat.
- Fresh herbs like chives, dill, or parsley for added freshness.
- A sprinkle of smoked paprika for a hint of smoky flavor.
Mealtime Integrations & Recipes
Elevate your main dishes, salads, and sides with the addition of perfectly cooked hard-boiled eggs:
- Salad Toppers: Slice or chop them and add to your favorite green salad for an extra boost of protein and texture. Try them in a hearty Cajun Turkey Cobb Salad, a crisp Crispy Chicken Salad, or our wholesome Healthy Cobb Salad.
- Egg Salads & Spreads: The quintessential use! Create a creamy Avocado Egg Salad to serve on toast, in lettuce wraps, or as delicious sandwiches.
- Potato Salads: Hard-boiled eggs are a beloved ingredient in classic potato salads. Add them to our Cheddar Ranch Instant Pot Potato Salad for a delightful twist.
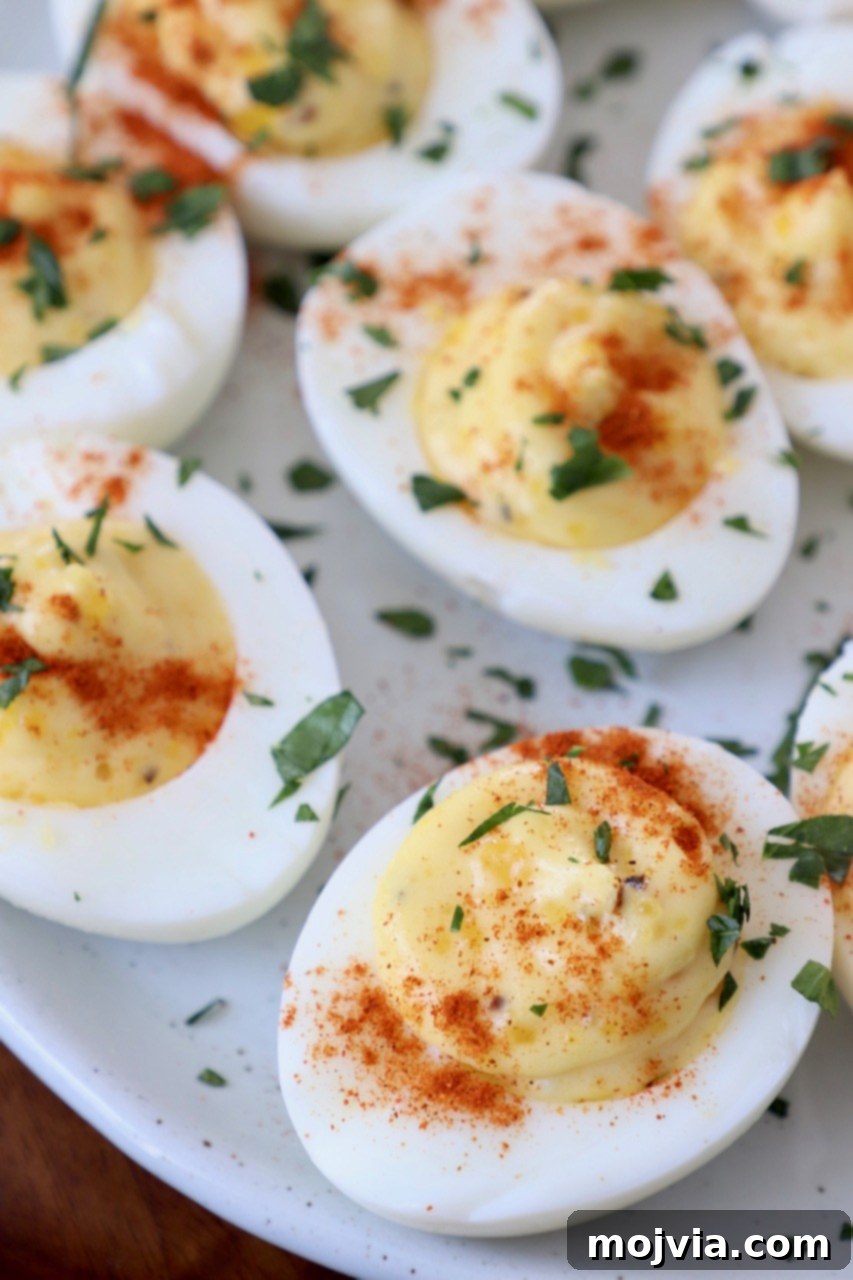
- Deviled Eggs Extravaganza: The ultimate party appetizer! Experiment with variations like Classic Deviled Eggs (as pictured above), tangy Deviled Eggs with Relish, spicy Buffalo Deviled Eggs, vibrant Beet Deviled Eggs, or savory Bacon and Blue Deviled Eggs.
- Grilled Asparagus Garnish: Dice them finely and sprinkle on top of flavorful Garlic Lemon Grilled Asparagus with Feta Cheese for an elegant side dish.
- Sandwich Enhancer: Add slices of hard-boiled egg to your deli sandwiches for added protein and richness.
- Ramen Topping: For a restaurant-quality experience, place medium or hard-boiled egg halves on top of your favorite Miso Ramen soup.
- Pasta Salads: Transform your pasta salads with a creamy, egg-rich dressing. Our Deviled Egg Pasta Salad is a must-try!
- Curries and Stews: In some cuisines, whole or halved hard-boiled eggs are simmered in rich curries and stews, absorbing the flavors and adding substance.
- Breakfast Bowls: Slice and add to quinoa or grain bowls with roasted vegetables for a fulfilling start to your day.
Frequently Asked Questions (FAQs) About Hard-Boiled Eggs
Here are answers to some of the most common questions about cooking and handling hard-boiled eggs:
Q: How long does it take to hard boil an egg?
A: For a perfectly hard-boiled large egg with a creamy yolk, our method recommends simmering for 11 minutes after the water reaches a rolling boil and the eggs are added. Remember to follow with an immediate ice bath.
Q: Why do my hard-boiled eggs have a green ring around the yolk?
A: A greenish-gray ring around the yolk is a clear sign of overcooked eggs. This happens when the sulfur in the egg white reacts with iron in the yolk, creating iron sulfide. The ice bath is crucial to stop the cooking process promptly and prevent this discoloration.
Q: Can I hard boil fresh eggs?
A: Yes, you can, but they are notoriously difficult to peel due to the stronger bond between the albumen and the inner membrane of the shell in very fresh eggs. For easier peeling, it’s best to use eggs that are at least a week old. Most store-bought eggs are already aged enough.
Q: What if my eggs crack while boiling?
A: Cracking can occur if cold eggs are added directly to very hot water, or if the water is boiling too vigorously. To prevent this, let eggs sit out for a few minutes before boiling, and ensure you lower them gently into the water. Maintaining a gentle simmer, rather than a rapid boil, also helps.
Q: Can I make soft-boiled eggs with this method?
A: Absolutely! To achieve soft-boiled eggs with a runny yolk, simply reduce the simmering time to 6 minutes instead of 11. The same ice bath method applies afterward to stop the cooking.
Q: How can I tell if a hard-boiled egg is still good?
A: Fresh hard-boiled eggs should have a very mild, slightly sulfuric smell. If you notice any strong, unpleasant, or foul odors, or if the egg feels slimy or chalky, it’s best to discard it. Always check the expiration date if the eggs are unpeeled and stored in their original carton.
Did you master this recipe?
Tag @WhitneyBond on Instagram and use the hashtag #WBRecipes! We’d love to see your perfect hard-boiled eggs!