

Irresistible Creamy Dill Pickle Roll Ups: Your New Favorite Easy Appetizer
Imagine a luscious, creamy dill pickle filling, perfectly enveloped in a golden, flaky crescent roll crust. These Creamy Dill Pickle Roll Ups are an absolute sensation, guaranteed to be a hit at any gathering! Crafted with just six simple ingredients, this recipe is a breeze to prepare, making it the ultimate party appetizer, game day snack, or a delightful addition to an epic Pickle Board. Get ready to impress your guests with this uniquely flavorful and incredibly addictive treat!

Table of contents
- The Ultimate Party Snack: Creamy Pickle Roll Ups
- Ingredients for Perfect Pickle Roll Ups
- Step-by-Step Instructions: How to Make Creamy Pickle Roll Ups
- Expert Recipe Tips for Success
- How to Store and Reheat Your Pickle Roll Ups
- More Irresistible Crescent Roll Dough Recipes
The Ultimate Party Snack: Creamy Pickle Roll Ups
Following the massive success and viral sensation of our Jalapeno Popper Crescent Rolls, I was inspired to create another crowd-pleasing appetizer that celebrates a beloved flavor: dill pickles! These Creamy Pickle Roll Ups take all the savory, tangy goodness of a classic dill pickle and combine it with a rich, velvety cream cheese filling, all encased in a warm, buttery crescent roll crust. It’s a flavor combination that simply can’t be beaten, especially for pickle enthusiasts.
What makes this recipe truly stand out is its incredible simplicity. You only need six common ingredients to bring these delightful bites to life, making it an ideal choice for busy hosts or anyone looking for a quick yet impressive snack. The distinctive dill flavor, which we all know and adore, shines through, creating an appetizer that’s both comforting and exciting.
Whether you’re hosting a sophisticated soirée, a casual game day get-together, or simply looking for a delicious snack to enjoy with your family, these pickle roll ups are guaranteed to be a hit with both adults and children alike. Their universal appeal makes them perfect for any occasion, from Super Bowl parties to holiday gatherings or spontaneous snack attacks. Plus, you can easily prepare the creamy filling in advance, cutting down your prep time to a mere 10 minutes when you’re ready to bake. This flexibility ensures you spend less time in the kitchen and more time enjoying the company of your guests.
So, gather your ingredients, call all the pickle lovers in your life, and grab a couple of cans of crescent roll dough. Let’s dive into making these unbelievably tasty Creamy Pickle Roll Ups!
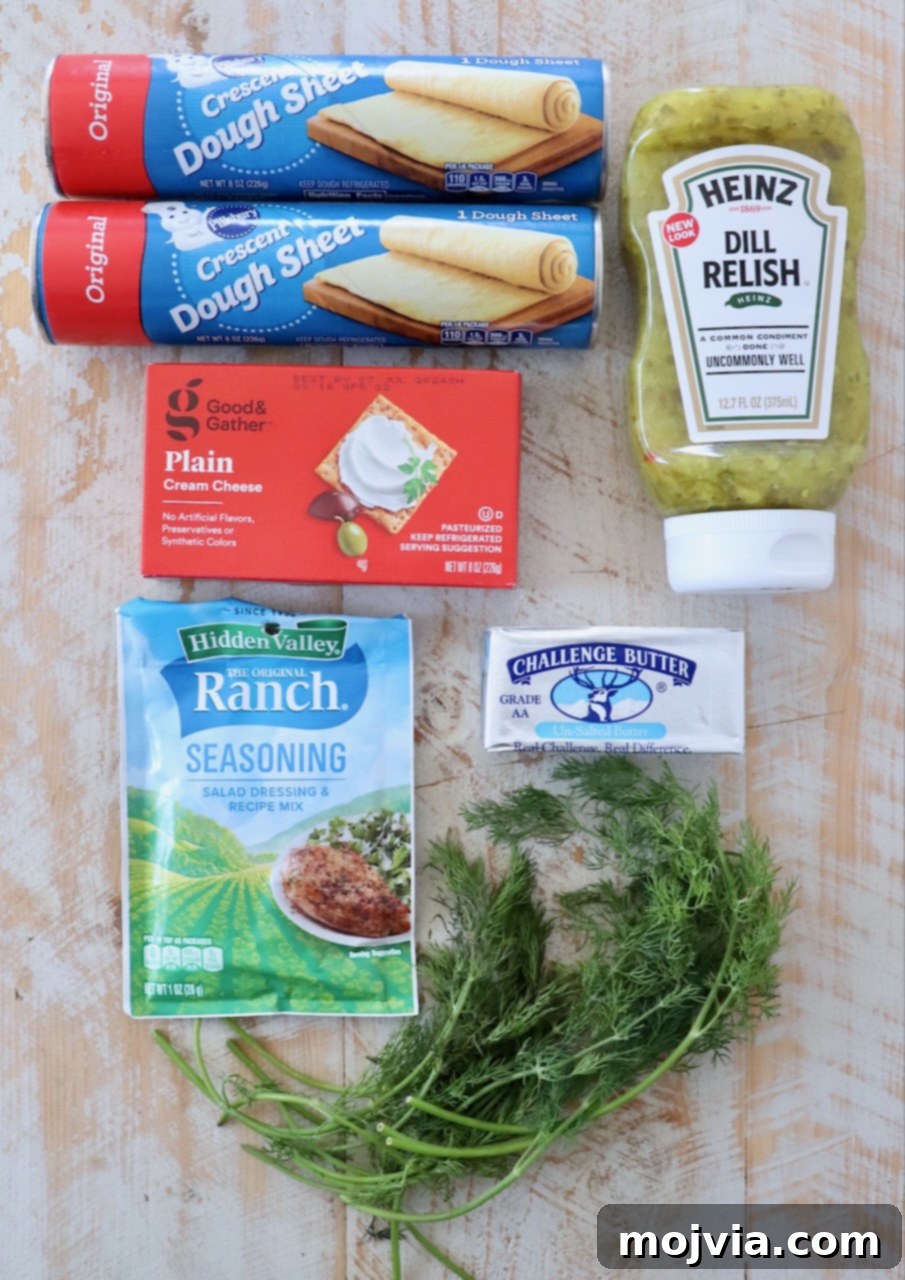
Ingredients for Perfect Pickle Roll Ups
Crafting these delicious Creamy Pickle Roll Ups requires just a handful of accessible ingredients. Each component plays a crucial role in achieving the perfect balance of creamy, tangy, and savory flavors. Here’s a detailed look at what you’ll need and some tips for best results:
- Cream Cheese: For the silkiest, most spreadable filling, it’s essential to start with softened cream cheese. To achieve the ideal consistency, simply leave your block of cream cheese out at room temperature for about 30 minutes before you begin. If you’re short on time, a quick microwave session (about 30 seconds on a microwave-safe plate) will do the trick. We recommend using full-fat cream cheese for the richest flavor and creamiest texture, though a lighter version can be used if preferred.
- Ranch Seasoning: This versatile seasoning is the secret weapon that perfectly complements the sharp dill flavor in our rolls. Its herbaceous and savory notes elevate the cream cheese mixture, adding depth and a familiar, comforting taste. You can either whip up your own homemade ranch seasoning mix for a fresher, customizable blend, or easily grab a packet of ranch seasoning dressing mix from the salad dressing aisle at your local grocery store. Both options yield fantastic results.
- Dill Pickle Relish: The star of the show! Dill pickle relish provides that unmistakable tangy crunch and vibrant dill flavor. While relish is incredibly convenient, you can certainly use finely chopped dill pickle spears as an alternative. If opting for spears, ensure they are minced very finely to integrate smoothly into the cream cheese mixture. A crucial tip: avoid using sweet relish, as its sugary profile will drastically alter the intended savory flavor of these rolls. Drain any excess liquid from the relish or chopped pickles to prevent a watery filling.
- Crescent Rolls: The foundation of our flaky crust! Canned crescent roll dough is a fantastic shortcut that keeps this recipe quick and simple, delivering a buttery, tender texture every time. You have two main options: canned crescent dough sheets or individual crescent rolls. If using crescent rolls, you’ll need to gently press the perforations together to create a solid sheet of dough. This ensures a uniform base for spreading the filling and allows for neat rolling and slicing. Any reputable brand of canned crescent dough will work beautifully.
- Butter: A brush of melted butter on top of the rolls before baking is what gives them that irresistible golden-brown hue and contributes to their wonderfully flaky, rich crust. It not only enhances the flavor but also helps the rolls achieve that perfect crispy exterior. We suggest using unsalted butter to better control the overall sodium content, but salted butter works fine too, just be mindful of the seasoning elsewhere.
- Fresh Dill: While the pickle relish provides a good dose of dill, a sprinkle of fresh dill after baking or mixed into the butter truly brightens the flavor and adds a beautiful aromatic finish. Fresh dill offers a more vibrant, herbaceous note that dried dill simply can’t replicate. If fresh dill isn’t available, you can substitute with dried dill, but use about one-third of the amount (e.g., 1 teaspoon dried dill for 1 tablespoon fresh) as dried herbs are more concentrated. For the best dried dill flavor, look for freeze-dried options like Litehouse freeze-dried dill.
Step-by-Step Instructions: How to Make Creamy Pickle Roll Ups
Making these creamy pickle roll ups is surprisingly straightforward, even for novice bakers. Follow these detailed steps to ensure perfectly golden, flavorful results every time. We’ve included step-by-step photos below to guide you visually through the process. For the full detailed recipe instructions and ingredient quantities, scroll down to the recipe card at the bottom of this post.
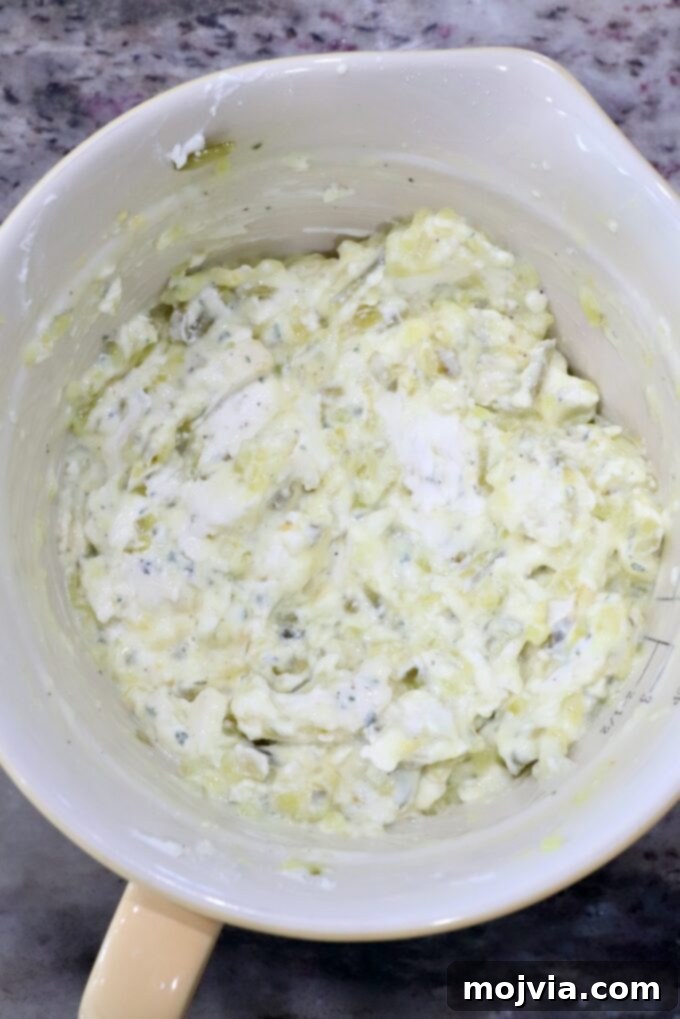
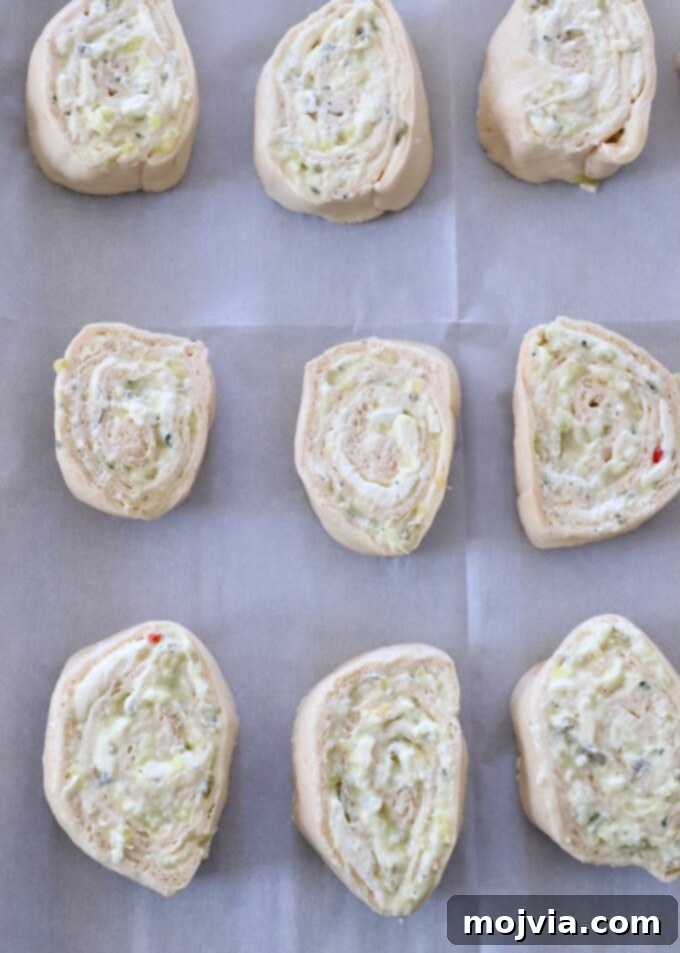
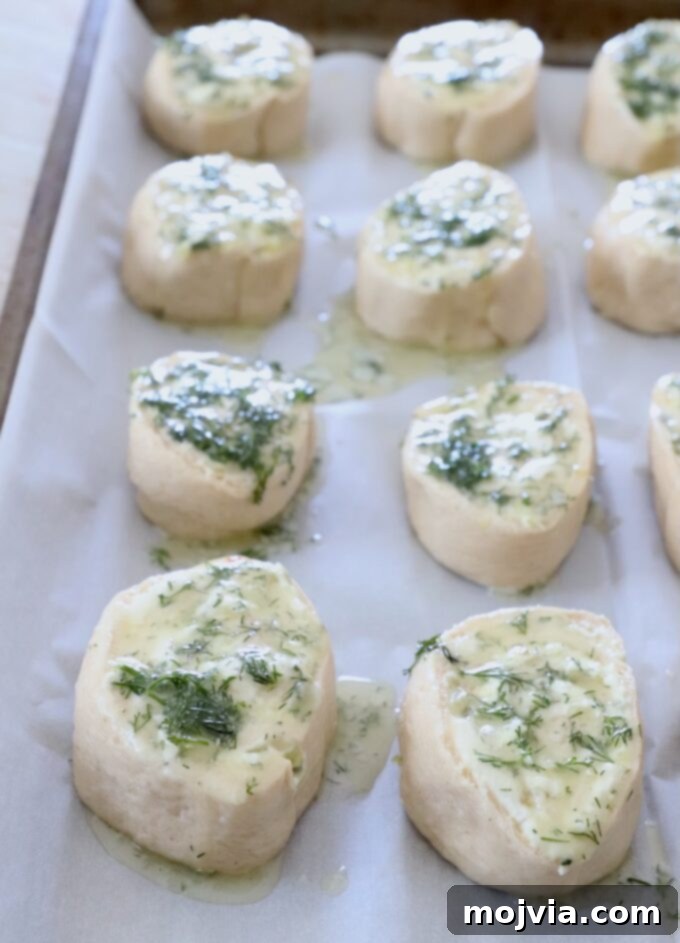
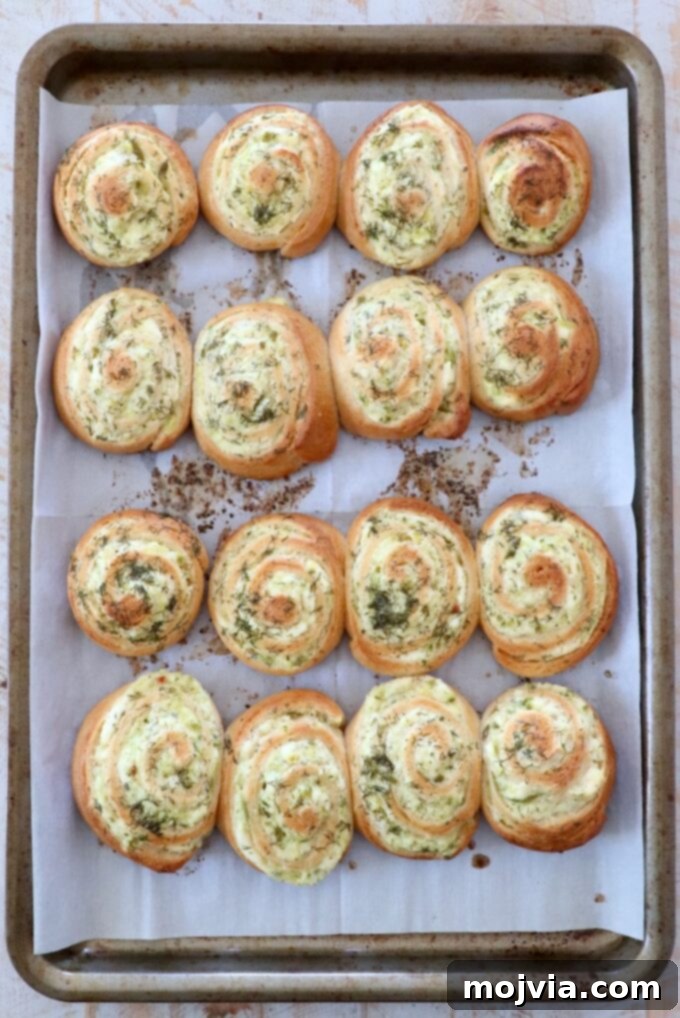
- Prepare the Creamy Pickle Filling: Begin by adding a softened block of cream cheese to a medium-sized mixing bowl. As mentioned, allowing the cream cheese to soften for 30 minutes at room temperature is ideal for a smooth mixture, or a 30-second microwave zap if you’re in a hurry. Next, add the ranch seasoning and the dill pickle relish. Stir all these ingredients together thoroughly until the mixture is completely combined and smooth, with no lumps of cream cheese remaining. This creamy base is the heart of your pickle roll ups.
- Prepare the Crescent Roll Dough: Carefully unroll both cans of crescent roll dough onto a large, clean cutting board or a lightly floured surface. If you’re using individual crescent rolls, you’ll notice perforations separating the triangles. Gently but firmly press these perforations together with your fingers to form two solid, rectangular sheets of dough. This creates a seamless canvas for your filling and prevents it from leaking during rolling and baking.
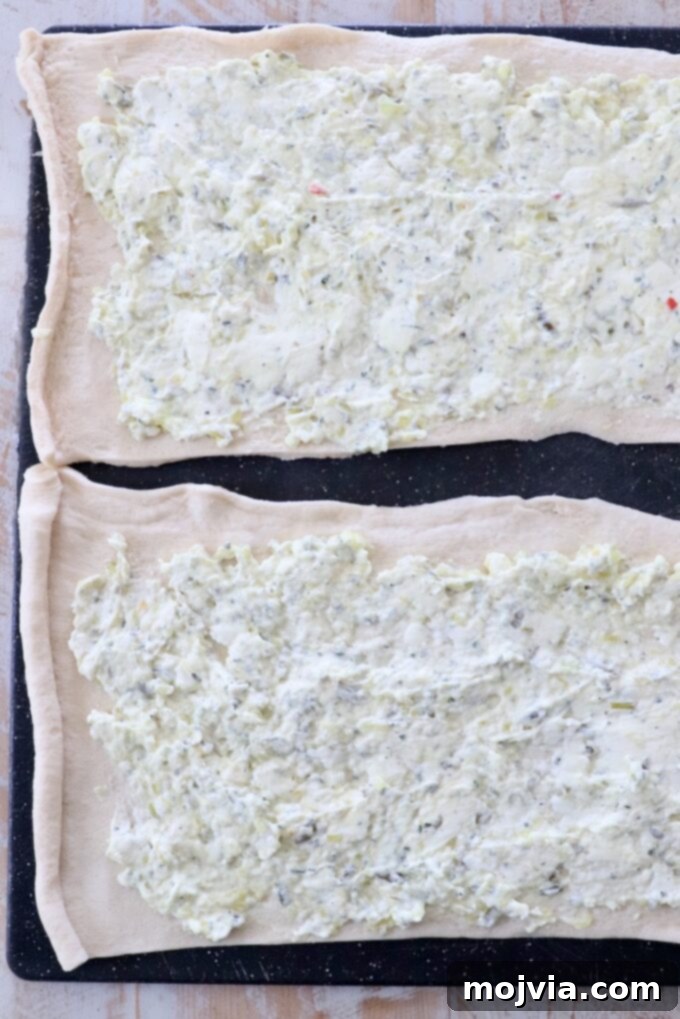
- Spread the Filling Evenly: Once your dough sheets are ready, take the creamy pickle mixture and spread it evenly over each of the two crescent roll dough sheets. Ensure the filling covers the dough completely from edge to edge. This is key to getting that wonderful pickle flavor in every bite. Use an offset spatula or the back of a spoon for smooth and easy spreading.
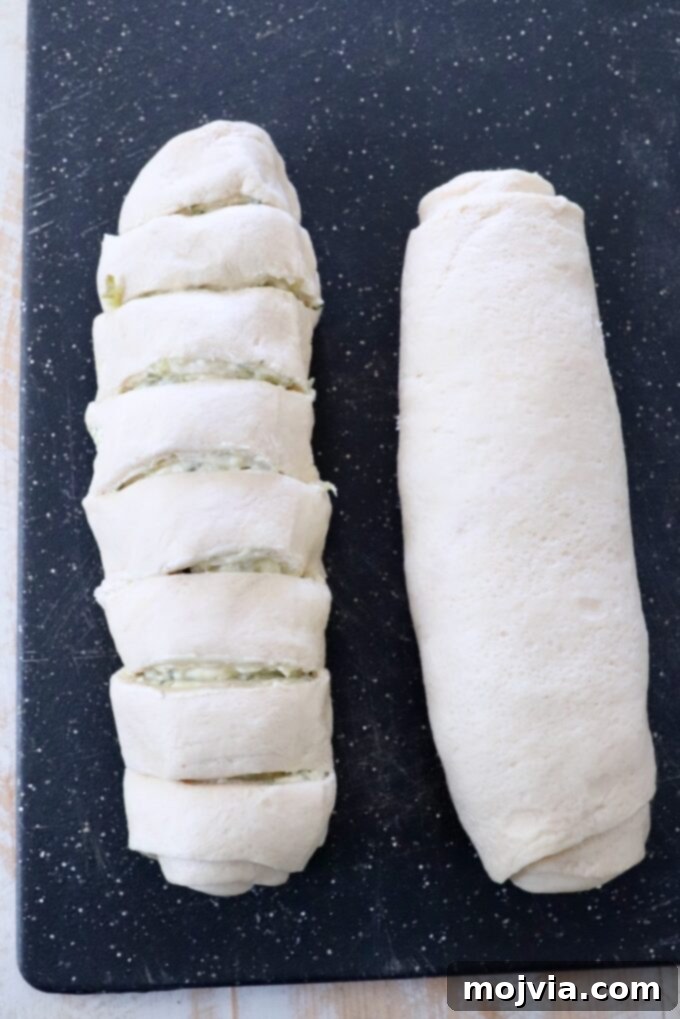
- Roll Up the Dough: Now for the fun part! Starting with the shorter side of each dough sheet, carefully and tightly roll up the dough over the cream cheese mixture. The goal is to create a snug roll, so press gently as you go to eliminate any air pockets. Once both sheets of dough are rolled up, you should have two long, cylindrical logs on your cutting board.
- Slice the Rolls: Using a sharp serrated knife, slice each long dough roll into 8 individual rolls. Each roll should be approximately 1 inch thick. This will give you a total of 16 beautifully portioned pickle roll ups. A serrated knife helps to cut through the layers without squishing the dough or displacing the filling, ensuring nice, clean edges.
- Arrange on Baking Sheet: Place the sliced rolls onto a large rimmed baking sheet, ensuring the cut side is facing up. It’s crucial to line your baking sheet with parchment paper or foil for easy cleanup and to prevent sticking. A 12 inch x 18 inch baking sheet is ideal, as you want to leave about 1/2 to 1 inch of space around each roll. This allows them to expand and bake evenly, achieving that perfect golden-brown crispness without crowding.
- Prepare and Brush with Dill Butter: In a small, microwave-safe bowl, melt the butter. Once melted, stir in the fresh dill. This dill-infused butter is going to add another layer of flavor and promote beautiful browning. Using a pastry brush, generously brush this mixture over the top of each pickle roll up on the baking sheet. Don’t skimp on this step – it makes a big difference!
- Bake to Golden Perfection: Place the baking sheet with your prepared rolls into a preheated 375°F (190°C) oven. Bake for approximately 20-22 minutes, or until the rolls are puffed up and have turned a glorious golden brown. Keep an eye on them towards the end of the baking time, as oven temperatures can vary. Once baked, remove them from the oven and allow them to cool slightly before serving.
These pickle roll ups are fantastic on their own, offering a delightful burst of creamy, tangy flavor. For an extra treat, consider serving them alongside a bowl of creamy ranch dressing for dipping. And if you find yourself utterly captivated by this recipe, be sure to explore our equally delightful recipes for pickle dip and pickle pasta salad – they’re sure to become new favorites!

Expert Recipe Tips for Success
To ensure your Creamy Pickle Roll Ups turn out perfectly every time, and to make your cooking experience as smooth as possible, here are some expert tips and tricks:
- Prepare the Filling in Advance: One of the best time-saving strategies for this recipe is to prepare the creamy pickle filling ahead of time. Mix the cream cheese, ranch seasoning, and dill pickle relish, then store it in an airtight container in the refrigerator for up to 3 days. This way, when you’re ready to bake, all you have to do is roll out the dough, spread the filling, slice, and bake!
- Boost the Pickle Power: If you’re a true pickle connoisseur and crave an even more intense pickle flavor, try adding 1-2 tablespoons of pickle juice directly from a jar of dill pickles to your cream cheese mixture. Start with one tablespoon, mix, and taste before adding more. This will enhance the tanginess and dill essence without altering the texture too much.
- Make Ahead and Reheat: These rolls are fantastic when served warm and fresh, but they also reheat beautifully. You can prepare and bake the rolls entirely ahead of time, then simply warm them up before serving at your party. For the best texture – crispy on the outside and warm and creamy on the inside – we highly recommend reheating them using an air fryer or a conventional oven. Avoid microwaving for reheating if you want to preserve the flaky crust.
- Baking Sheet Alternatives: While a 12-inch x 18-inch baking sheet is ideal for baking all 16 rolls with adequate spacing, don’t fret if you don’t have one. You can easily use two smaller baking sheets or even two small casserole dishes. The key is to ensure that each roll has about 1/2 to 1 inch of space around it. This prevents them from steaming instead of baking, allowing them to brown evenly and achieve that desirable flaky texture.
- Scaling the Recipe: This recipe yields 16 delicious pickle rolls, which is perfect for a party. However, if you’re making them for a smaller family snack or a dinner appetizer, it’s incredibly easy to cut the recipe in half. Simply use one can of crescent roll dough (8 ounces) and halve all the other ingredients proportionally. This flexibility makes it a great recipe for any occasion, big or small.
- Add a Touch of Spice: For those who enjoy a little kick, consider adding a pinch of cayenne pepper or a tiny amount of finely minced fresh jalapeño (seeds removed for less heat) to the cream cheese filling. This adds a subtle warmth that can be a pleasant surprise.
- Cheese Please! While not in the original recipe, a tablespoon or two of finely shredded sharp cheddar or Monterey Jack cheese mixed into the cream cheese filling can add an extra layer of savory goodness.
How to Store and Reheat Your Pickle Roll Ups
Proper storage and reheating are key to enjoying your Creamy Pickle Roll Ups long after they’ve come out of the oven. Since these rolls contain dairy, it’s important to handle them correctly to maintain freshness and safety.
- Storing Leftovers: Any leftover baked Creamy Pickle Roll Ups should be stored in an airtight container. Place them in the refrigerator as soon as they have cooled to room temperature. They will remain fresh and delicious for up to 5 days. Due to the cream cheese filling, these rolls should never be stored on the counter at room temperature for extended periods.
- Reheating in an Air Fryer (Recommended for Crispiest Results): The air fryer is your best friend for reheating these rolls, as it helps restore their wonderfully crispy exterior while ensuring the filling gets perfectly warm. Simply transfer the rolls directly from the refrigerator to your air fryer basket in a single layer (work in batches if necessary). Reheat them at 400°F (200°C) for about 5 minutes. They’ll emerge with a beautifully golden, crispy crust and a deliciously warm, creamy center, tasting almost as good as fresh!
- Reheating in the Oven: If you don’t have an air fryer, the oven is the next best option for retaining that desirable crispness. Preheat your oven to 400°F (200°C). Place the leftover pickle roll ups in a single layer on a baking sheet. Heat for 6-8 minutes, or until they are warmed through and the crust is crisp again. Keep an eye on them to prevent over-browning.
- Reheating in the Microwave: While the microwave is the quickest method, it will soften the crescent roll crust, resulting in a less crispy texture. However, it’s still a convenient option for a quick warm-up. Place the rolls in a single layer on a microwave-safe plate. Reheat for 30-60 seconds, or until they are warmed through to your liking. Be cautious not to overheat, as the filling can become too hot.

More Irresistible Crescent Roll Dough Recipes
If you’ve discovered the magic of using canned crescent roll dough for quick and easy appetizers and meals, you’re in for a treat! This versatile ingredient is a true kitchen hero, transforming simple fillings into flaky, delicious creations with minimal effort. Explore these other fantastic recipes that leverage the convenience and buttery goodness of crescent roll dough:

Print
Pin
Rate this Recipe
Creamy Pickle Roll Ups
Ingredients
- 8 ounces cream cheese, softened to room temperature
- 2 tablespoons ranch seasoning, store-bought or homemade
- ½ cup dill pickle relish, ensure it’s dill, not sweet, or finely chopped dill pickles
- 16 ounces crescent roll dough, two 8-ounce cans of crescent rolls or dough sheets
- ¼ cup butter, melted for brushing
- 1 tablespoon fresh dill, finely chopped, or 1 teaspoon dried dill
Instructions
-
Preheat your oven to 375°F (190°C). Line a 12×18 inch baking sheet with parchment paper for easy cleanup.
-
In a mixing bowl, combine the softened cream cheese, ranch seasoning, and dill pickle relish. Stir vigorously until the mixture is completely smooth and well incorporated.
-
Unroll both cans of crescent roll dough onto your clean work surface. If using individual crescent rolls, firmly press together the perforations to create two seamless dough sheets.
-
Evenly spread the creamy pickle mixture over the entire surface of both crescent roll dough sheets, extending to the edges.
-
Starting from the short side of each dough sheet, carefully and tightly roll up the dough over the creamy pickle mixture to form two long logs.
-
Using a serrated knife, slice each rolled log into 8 individual rolls, approximately 1 inch thick. You will have a total of 16 rolls.
-
Arrange the sliced rolls, cut side up, on the prepared parchment-lined baking sheet. Ensure there is about 1/2 to 1 inch of space between each roll for even baking.
-
In a small bowl, whisk together the melted butter and chopped fresh dill. Brush this fragrant dill butter evenly over the tops of all the rolls on the baking sheet.
-
Place the baking sheet in the preheated oven and bake for 20-22 minutes, or until the rolls are beautifully golden brown and puffed. Remove from oven and let cool slightly before serving.
Notes
- Prepare Filling Ahead: The creamy pickle filling can be made up to 3 days in advance and stored in an airtight container in the refrigerator. This allows for quick assembly when you’re ready to bake.
- Enhanced Pickle Flavor: For a stronger pickle kick, add 1-2 tablespoons of pickle juice to the cream cheese mixture. This adds an extra layer of tangy depth.
- Bake Ahead Option: You can bake these rolls entirely in advance. To reheat for optimal texture, use an air fryer (400°F for 5 minutes) or oven (400°F for 6-8 minutes) for a crispy exterior and warm interior.
- Baking Sheet Size: If you don’t have a 12×18 inch baking sheet, use two smaller sheets or casserole dishes. Ensure rolls have 1/2-1 inch space around them for proper expansion and even baking.
- Adjust Servings: This recipe yields 16 rolls. To make 8 rolls for a smaller gathering, simply halve all the ingredients, using only one can of crescent roll dough.
- Storage & Reheating: Store leftover rolls in an airtight container in the refrigerator for up to 5 days. Reheat using an air fryer, oven, or microwave.