
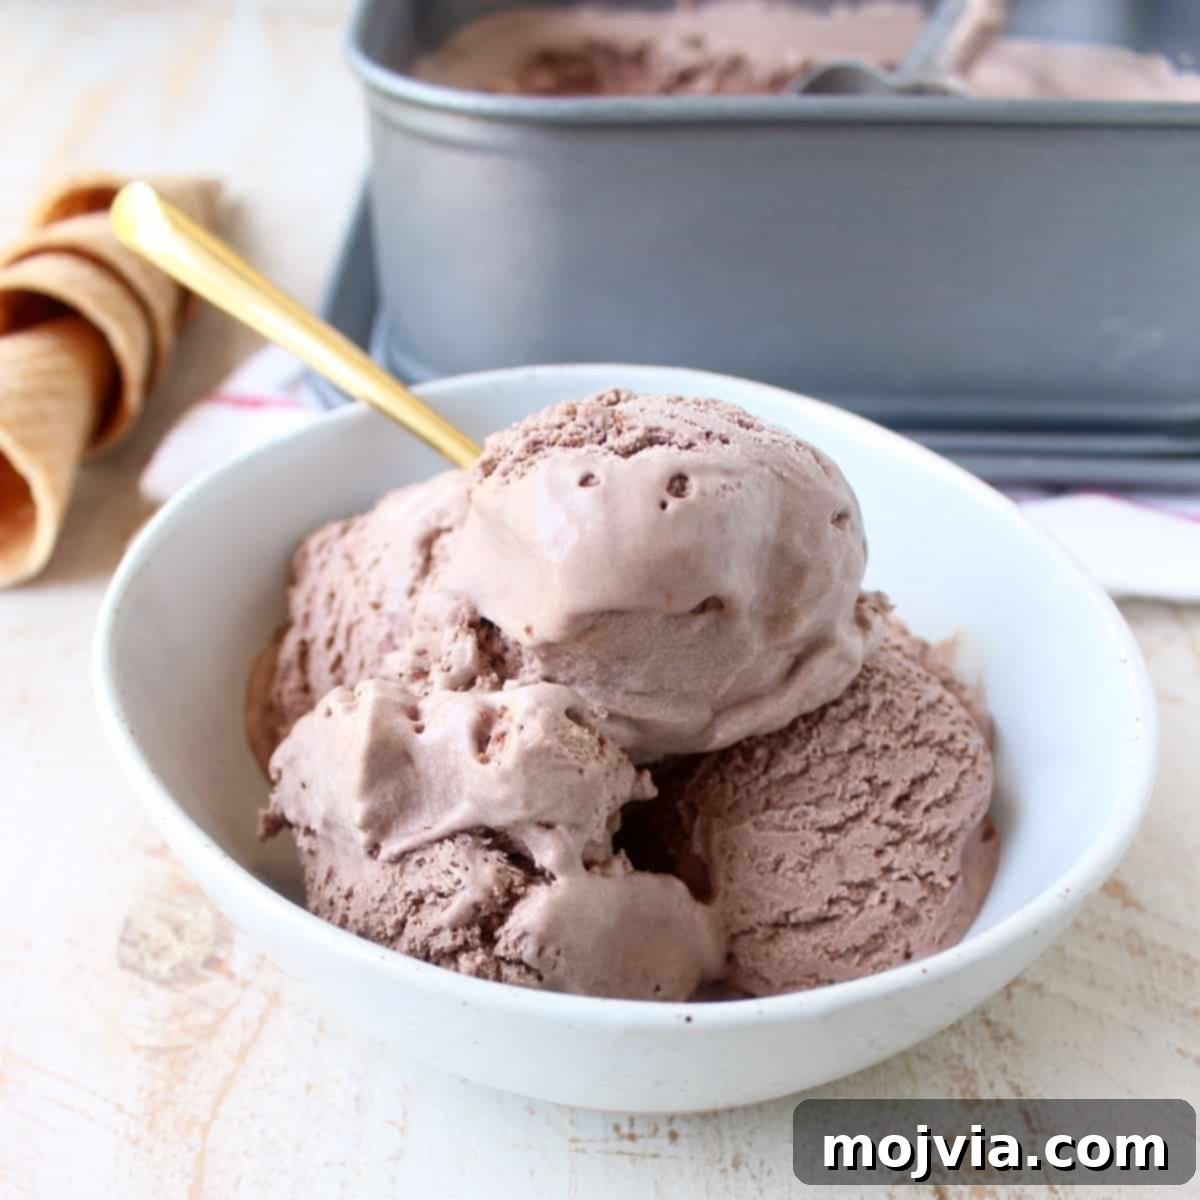
Homemade Chocolate Ice Cream is so easy to make without an ice cream maker! This no churn recipe only requires a couple of steps & a couple of ingredients!
Stock up your freezer with all of your favorite ice cream flavors! Be sure to check out these recipes for No Churn Peanut Butter Ice Cream, Strawberry Ice Cream and No Churn Salted Caramel Ice Cream!
Indulge in Creamy Bliss: The Ultimate No-Churn Homemade Chocolate Ice Cream Recipe
There’s nothing quite like the irresistible allure of a scoop (or three!) of rich, velvety chocolate ice cream. And what if we told you that achieving this decadent delight in your own kitchen doesn’t require any fancy equipment? Forget the bulky ice cream maker; this revolutionary no-churn chocolate ice cream recipe empowers you to create perfectly creamy homemade chocolate ice cream with minimal effort and just a handful of simple ingredients. Get ready to transform your dessert game and satisfy those sweet cravings with a treat that’s smoother, richer, and more satisfying than anything you can buy at the store.
Embrace Summer with Effortless Homemade Desserts
As the days grow longer and the sun shines brighter, summer officially arrives, bringing with it a bounty of culinary delights. While the season is perfect for savory backyard barbecues featuring dishes like Bruschetta Turkey Burgers, Spicy Macaroni Salad, and Grilled Tomato Basil Chicken Skewers, no summer feast is complete without a refreshing dessert. And when it comes to cooling off, nothing beats a frozen treat. Move beyond your usual choices and explore delights like Frozen Strawberry Cheesecake Bars, Pink Lemonade Pie, and of course, this incredible homemade chocolate ice cream that’s perfect for warm weather.
The Magic of No-Churn Ice Cream: Simple & Delicious
If you’ve ever yearned to make your own ice cream but felt intimidated by specialized equipment or complex techniques, then today is your lucky day. The no-churn ice cream method is a revelation, allowing anyone to whip up luscious, creamy ice cream with just a few basic steps and common kitchen staples. This approach relies on whipping heavy cream to create a light, airy base that, when combined with sweetened condensed milk, freezes into a smooth, scoopable texture without the need for constant churning.
This particular easy chocolate ice cream recipe was even featured on “Morning Extra on News 8” in San Diego, where its simplicity and incredible flavor wowed viewers. It’s a testament to how straightforward and foolproof this method truly is. Get ready to impress your family and friends with a dessert that tastes gourmet but comes together with surprising ease.
Why You’ll Love This No-Churn Chocolate Ice Cream Recipe
- Effortlessly Simple: No elaborate cooking or specialized machinery required. If you can whisk and whip, you can make this ice cream without a machine!
- Rich & Creamy Texture: The combination of heavy cream and sweetened condensed milk results in an incredibly smooth and luxurious consistency, rivaling premium store-bought brands. This method minimizes ice crystal formation, giving you a consistently delicious texture.
- Deep Chocolate Flavor: Using unsweetened natural cocoa powder ensures a robust, authentic chocolate taste that isn’t overly sweet. It’s the perfect balance for true chocolate lovers.
- Endless Customization: While this recipe focuses on classic chocolate, the no-churn base is a blank canvas for your creativity. Think S’mores, mint chocolate chip, coffee, or even a spicy chili chocolate variation!
- Perfect for Any Occasion: A fantastic dessert for summer gatherings, birthday parties, or simply a sweet treat after dinner. It’s a crowd-pleaser that requires minimal effort.
No-Churn Homemade Chocolate Ice Cream Recipe
This best chocolate ice cream recipe yields approximately 12 scoops of pure chocolate indulgence, perfect for sharing or savoring over several days. With just 10 minutes of active prep time and 5 hours of freezing, you’ll have a dessert masterpiece that tastes like it came from an artisanal creamery.
Ingredients:
- 14 oz can sweetened condensed milk
- ½ cup unsweetened natural cocoa powder
- 1 tsp vanilla extract
- ¼ tsp sea salt
- 2 cups heavy cream (very cold)
Instructions:
- In a large mixing bowl, combine the entire can of sweetened condensed milk, the unsweetened natural cocoa powder, vanilla extract, and sea salt. Whisk these ingredients together vigorously until the mixture is completely smooth and no lumps of cocoa powder remain. This creates your rich chocolate base. Set this bowl aside for a moment.
- In a separate, chilled large bowl (or the bowl of a stand mixer), pour the cold heavy cream. Using an electric mixer (either a handheld mixer or a stand mixer with a whisk attachment) on medium-high speed, whip the heavy cream until firm peaks form. This means the cream should hold its shape and not collapse when the whisk is lifted. This usually takes about 3 to 5 minutes. Be careful not to over-whip, as it can quickly turn into butter.
- Now, gently fold the prepared chocolate condensed milk mixture into the whipped cream. Use a rubber spatula and a light, sweeping motion, folding from the bottom up. Continue folding just until the two mixtures are fully combined and no white streaks of cream are visible. The key here is to be gentle to maintain the airiness of the whipped cream, which contributes to the light texture of your no-churn homemade chocolate ice cream.
- Pour the beautifully combined chocolate ice cream mixture into a 2-quart freezer-safe container. This could be a sturdy plastic container with a lid, a glass loaf pan, or even a metal baking pan.
- Cover the container tightly with a lid or plastic wrap. If using plastic wrap, press it directly onto the surface of the ice cream mixture to prevent ice crystals from forming. Freeze for a minimum of 5 hours, or ideally overnight, until the ice cream is firm enough to scoop effortlessly.
Approximate Nutrition Facts (per serving, 12 servings total):
- Calories: 252 kcal
- Carbohydrates: 21g
- Protein: 4g
- Fat: 18g
- Saturated Fat: 11g
- Cholesterol: 66mg
- Sodium: 106mg
- Potassium: 207mg
- Fiber: 1g
- Sugar: 18g
- Vitamin A: 671mg
- Vitamin C: 1mg
- Calcium: 124mg
- Iron: 1mg
Tips for the Best No-Churn Chocolate Ice Cream
Achieving that perfect, creamy texture with homemade ice cream without a machine is simpler than you think, especially with a few key tips:
- Use Very Cold Heavy Cream: This is non-negotiable! Chilled cream whips faster and achieves greater volume and stability, which is essential for the structure of no-churn ice cream. For best results, chill your mixing bowl and whisk attachment in the freezer for 10-15 minutes before whipping.
- Don’t Over-Whip the Cream: While firm peaks are desired, be cautious not to over-whip the heavy cream. Once it forms soft, distinct peaks that hold their shape, stop. Over-whipped cream can become grainy or separate, leading to a less desirable texture in your finished ice cream.
- Fold Gently: When combining the chocolate base with the whipped cream, use a light hand and a rubber spatula. The goal is to incorporate the ingredients without deflating the airy whipped cream. Aggressive stirring will push out the air, resulting in denser, icier ice cream.
- Choose Quality Ingredients: Since this recipe uses so few ingredients, the quality of each really shines through. Use good quality unsweetened natural cocoa powder for a deep, rich chocolate flavor. A good vanilla extract and a pinch of sea salt can also enhance the overall taste.
- Use an Airtight Container: To prevent freezer burn and the formation of ice crystals on the surface, always store your ice cream in an airtight container. If you’re using a loaf pan or a container without a tight-fitting lid, press plastic wrap directly onto the surface of the ice cream before covering the container.
- Allow Adequate Freezing Time: Patience is key! While 5 hours is a minimum, freezing your ice cream overnight (8-12 hours) often yields the best, most scoopable texture. Resist the urge to check it too soon.
Creative Variations & Flavor Boosters
While classic chocolate is a masterpiece on its own, the beauty of easy homemade ice cream lies in its adaptability. Once you’ve mastered the basic recipe, the possibilities for customization are endless. Here are some ideas to inspire your next batch of no-churn deliciousness:
- Double Chocolate Delight: For an extra layer of chocolatey goodness, fold in ½ cup of your favorite chocolate chips (mini or regular), chocolate chunks, or even finely chopped dark chocolate bars into the mixture before freezing.
- Mint Chocolate Chip: Add ½ to 1 teaspoon of pure peppermint extract along with the vanilla for a refreshing and classic flavor pairing. Green food coloring is optional but fun!
- Mocha Madness: Dissolve 1-2 teaspoons of instant espresso powder or strong instant coffee granules in a tablespoon of hot water, then stir it into the condensed milk mixture for a rich coffee kick that perfectly complements the chocolate.
- Nutty Crunch: Incorporate ½ cup of chopped toasted pecans, walnuts, almonds, or peanuts for added texture and a delightful nutty flavor.
- Salted Caramel Swirl: Gently fold in ribbons of homemade or good quality store-bought salted caramel sauce just before pouring into the container. Swirl it lightly with a knife for beautiful marbling.
- Spicy Mexican Chocolate: For a subtle and intriguing warmth, add a pinch of cayenne pepper or chili powder to the cocoa mixture. This unexpected kick elevates the chocolate flavor beautifully.
- S’mores Inspiration: Swirl in mini marshmallows, graham cracker crumbles, and chocolate shavings for a campfire-inspired treat. A S’mores Ice Cream is definitely on the horizon for many!
- Orange Chocolate Zest: Add 1-2 teaspoons of finely grated orange zest for a bright, citrusy note that perfectly complements the richness of the chocolate.
- Coconut Chocolate Dream: Fold in ½ cup of toasted shredded coconut for a tropical twist. You could even add a few drops of coconut extract.
Storage & Serving Suggestions
Once your no-churn chocolate ice cream is perfectly frozen, it’s ready to be enjoyed! For best results, allow it to sit at room temperature for 5-10 minutes before scooping, especially if it’s been frozen solid overnight. This brief softening period makes for easier scooping and ensures a creamier mouthfeel.
Store any leftover ice cream in the airtight container in the freezer for up to 2-3 weeks. While it will still be delicious beyond that, the texture might start to change over time due to the gradual formation of ice crystals. To minimize this, always ensure the container is tightly sealed and that the plastic wrap (if used) is pressed directly onto the surface of the ice cream.
Serve your best chocolate ice cream in a classic cone, a charming bowl, or as an exquisite accompaniment to other desserts like warm fudgy brownies, fruit pies, or crumbles. A drizzle of extra chocolate syrup, a sprinkle of flaky sea salt (which enhances chocolate flavor beautifully), or a dollop of fresh whipped cream can elevate the experience even further! Consider adding a cherry on top for a truly nostalgic touch.
Frequently Asked Questions about No-Churn Ice Cream
Can I use light cream instead of heavy cream for this no-churn recipe?
For the creamiest, most authentic ice cream texture, heavy cream (or heavy whipping cream) is absolutely essential. Its high fat content is what allows it to whip into stable, voluminous peaks and contributes significantly to the rich, smooth mouthfeel of the finished product. Lighter creams, such as half-and-half or light cream, do not contain enough fat to whip properly and will result in an icy, less satisfying ice cream.
Why is my homemade no-churn ice cream icy?
Icy ice cream can often be attributed to a few factors: not using heavy cream, not whipping the heavy cream to firm enough peaks, or not storing it in an airtight container. Ensuring the heavy cream is very cold and properly whipped traps air, which helps prevent large ice crystals. Storing it in an airtight container prevents moisture evaporation and re-freezing, which causes iciness. Follow all steps carefully for the best results!
How long does no-churn ice cream last in the freezer?
Properly stored in an airtight container, your homemade no-churn ice cream can last for 2 to 3 weeks in the freezer. Beyond that, it might start to develop more noticeable ice crystals and lose some of its optimal creamy texture, though it would still be safe to eat. For the freshest taste and texture, consume within the first two weeks.
Can I reduce the amount of sugar in this recipe?
Sweetened condensed milk is crucial to this recipe, not only for its sweetness but also for its thick, viscous consistency. This density helps to keep the ice cream soft and creamy by preventing large ice crystals from forming during freezing. Significantly reducing the amount of sweetened condensed milk would alter the texture and likely result in a harder, icier product. While you can’t reduce the condensed milk, you can slightly adjust the overall sweetness by choosing a less sweet cocoa powder (if available) or by being mindful of any additional sweet mix-ins you add.
What if I don’t have an electric mixer to whip the cream?
While an electric mixer (either handheld or a stand mixer with a whisk attachment) is highly recommended for efficiently whipping the heavy cream to the desired consistency, it is possible to do it by hand with a sturdy whisk and a large bowl. Be prepared for a significant arm workout and a longer whipping time, typically 10-15 minutes of continuous, vigorous whisking, but it is certainly achievable!
Conclusion: Your New Favorite Dessert Awaits!
This no-churn homemade chocolate ice cream recipe truly proves that gourmet desserts don’t need to be complicated or require special equipment. With just a few basic ingredients and a surprisingly simple process, you can create a frozen treat that will delight your senses and quickly become a staple in your kitchen. So, gather your ingredients, whip up a batch, and prepare to enjoy the richest, creamiest ice cream without a machine you’ve ever tasted. Happy scooping!
Don’t forget to explore other fantastic no-churn flavors like Salted Caramel Ice Cream to keep your freezer stocked with delightful options all summer long and beyond!
If you’ve tried this incredible recipe, we’d absolutely love to hear from you and see your delicious creations! Tag @WhitneyBond on Instagram and use the hashtag #WBRecipes. Your feedback and photos inspire us!