
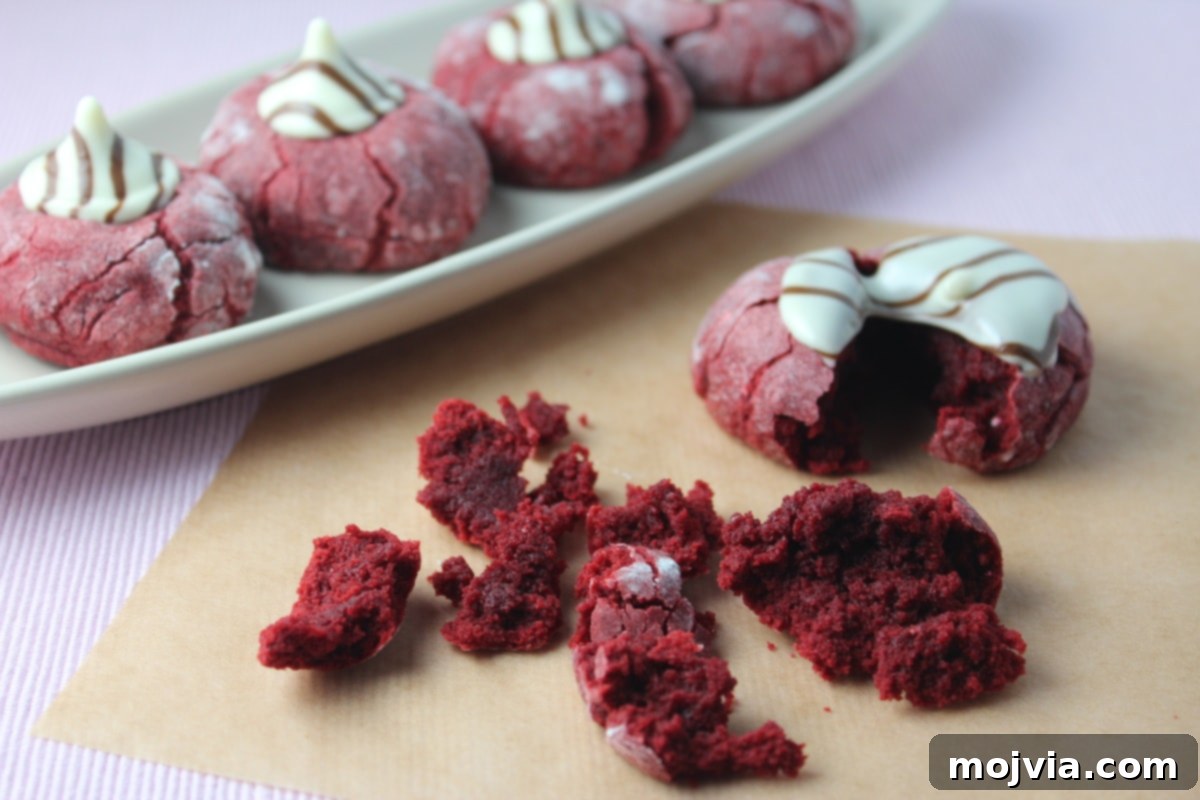
Welcome to the delightful world of Red Velvet Kiss Cookies! These irresistible treats combine the rich, distinct flavor of red velvet with the joy of a crinkle cookie, finished with a luscious Hershey’s Hug or Kiss. They are truly a treat for the senses – vibrant in color, soft in texture, and bursting with a sweet chocolatey surprise. While perfect for any occasion when you crave something special, these cookies shine brightest as a festive Valentine’s Day dessert, bringing a touch of romance and homemade charm to your celebrations.

Red Velvet Kiss Cookies: The Ultimate Valentine’s Day Treat
There’s something undeniably magical about Red Velvet. Its signature deep red hue, subtle cocoa flavor, and hint of tanginess create a dessert experience unlike any other. When transformed into a cookie, rolled in a delicate dusting of powdered sugar to create beautiful crinkles, and crowned with a melting chocolate candy, it becomes an absolute masterpiece. These Red Velvet Kiss Cookies aren’t just cookies; they’re tiny expressions of love, making them an ideal choice for Valentine’s Day, anniversaries, or simply to show someone you care.
This recipe is designed to be straightforward and rewarding, even for novice bakers. The result is a batch of soft, chewy cookies with a beautiful contrast of crimson and white, each hiding a creamy chocolate center. Imagine sinking your teeth into a tender cookie, followed by the soft, melty chocolate – pure bliss in every bite!
Why You’ll Adore These Red Velvet Crinkle Cookies
- Stunning Visual Appeal: The striking red color against the white powdered sugar, combined with the classic chocolate kiss, makes these cookies incredibly photogenic and a feast for the eyes.
- Irresistible Flavor Profile: They offer the beloved balance of rich cocoa, a hint of vanilla, and a slight tang that defines red velvet, perfectly complemented by the creamy chocolate topping.
- Perfectly Themed for Holidays: Their vibrant red makes them a go-to for Valentine’s Day, Christmas, or any celebration where a pop of color is desired.
- Easy to Make: With simple ingredients and clear instructions, this recipe is accessible to bakers of all skill levels.
- Crowd-Pleaser: Everyone loves a good cookie, and these unique red velvet creations are sure to be a hit at parties, gatherings, or as a thoughtful homemade gift.
- Unique Texture: The crinkled exterior, soft interior, and gooey chocolate center provide a delightful multi-textured experience.
The Secret to Perfect Red Velvet Flavor and Color
Traditional red velvet cake achieves its characteristic color and subtle tang through a chemical reaction between cocoa powder, baking soda, and an acidic ingredient like vinegar or buttermilk. In this cookie recipe, we use a touch of white vinegar to activate the baking soda, helping to create a tender crumb and enhance the red hue from the food coloring. Unsweetened cocoa powder contributes that mild chocolate depth, which is distinct from a heavily chocolate cookie. The combination of granulated and brown sugar ensures a balanced sweetness and a wonderfully chewy texture that you’ll crave. Using melted butter also plays a crucial role in achieving that desirable chewiness, while vanilla extract ties all the flavors together with its warm, comforting aroma.
Ingredients for Red Velvet Kiss Cookies
Gathering your ingredients is the first step to creating these beautiful cookies. Each component plays a vital role in achieving the perfect flavor, color, and texture.
- Flour (1 1/2 cups): All-purpose flour provides the structure for our cookies.
- Unsweetened Cocoa (1/4 cup): Gives that classic red velvet depth without making the cookies overly chocolatey.
- Kosher Salt (1/2 teaspoon): Balances the sweetness and enhances all the other flavors.
- Baking Soda (1 teaspoon): A leavening agent that reacts with the vinegar to create lift and contributes to the red velvet tang.
- Melted Butter (1/4 cup): Using melted butter helps achieve a chewier cookie texture compared to creamed butter.
- Granulated Sugar (1/2 cup): Provides sweetness and contributes to the cookie’s crisp edges.
- Brown Sugar (1/2 cup): Adds moisture and a delicious molasses flavor, enhancing chewiness.
- Egg (1): Binds the ingredients together and adds richness.
- Red Food Coloring (1 tablespoon): Essential for that iconic vibrant red color. You can adjust this amount to your desired shade.
- Vanilla Extract (1/2 teaspoon): A crucial flavor enhancer that complements the cocoa and sweetness.
- White Vinegar (1 teaspoon): Reacts with the baking soda to create a tender texture and helps bring out the red color.
- Powdered Sugar (1/4 cup): Used for rolling the dough, creating the beautiful “crinkle” effect on the baked cookies.
- Hershey’s Hugs Candies (12, or Kisses): The signature “kiss” on top, melting into a creamy chocolate puddle.
Step-by-Step Baking Guide: How to Make Red Velvet Kiss Cookies
Follow these detailed instructions to bake a batch of perfect Red Velvet Kiss Cookies that will impress everyone.
- Prepare Your Oven and Dry Ingredients: Begin by preheating your oven to 325°F (160°C). In a small mixing bowl, whisk together the flour, unsweetened cocoa, kosher salt, and baking soda. Set this dry mixture aside.
- Combine Wet Ingredients: In a large mixing bowl, combine the melted butter, granulated sugar, and brown sugar. Mix thoroughly until the mixture is smooth and creamy. Next, crack in the egg and beat until well incorporated, ensuring a uniform consistency.
- Add Color and Flavor: Introduce the red food coloring, vanilla extract, and white vinegar to the wet ingredients. Mix everything together until the color is evenly distributed and the mixture takes on a beautiful, vibrant red hue.
- Incorporate Dry into Wet: Gradually add the reserved dry ingredient mixture to the wet ingredients. Mix on low speed or by hand until just combined and a solid, cohesive dough forms. Be careful not to overmix, as this can lead to tough cookies.
- Form and Sugar-Coat the Cookies: Once the dough is ready, take a heaping tablespoon of dough and roll it into a smooth ball between your palms. Then, generously roll each dough ball in the powdered sugar until it is thoroughly coated. This step is crucial for achieving the characteristic crinkled appearance. Place the coated dough balls about 2 inches apart on a baking stone or a parchment-lined baking sheet. Repeat this process for the remaining dough.
- Bake to Perfection: Bake the cookies in your preheated oven for 12-14 minutes. The edges should be set, but the centers should still look slightly soft. Remember that cookies continue to cook slightly after being removed from the oven.
- Add the Chocolate Kiss: Immediately after taking the red velvet cookies out of the oven, gently press a Hershey’s Hug or Kiss into the center of each warm cookie. Allow the chocolate to melt partially into the cookie, creating a gooey, delightful topping. Let the cookies cool on the baking sheet for a few minutes before transferring them to a wire rack to cool completely.
Tips for Red Velvet Kiss Cookie Success
Achieving bakery-quality Red Velvet Kiss Cookies at home is easier than you think with these expert tips:
- Measure Flour Correctly: For accurate results, spoon your flour into the measuring cup and level it off with a straight edge. Don’t scoop directly from the bag, as this can pack the flour and lead to dry, dense cookies.
- Do Not Overmix the Dough: Once you add the dry ingredients to the wet, mix only until no streaks of flour remain. Overmixing develops gluten, which can result in tough, less tender cookies.
- Ensure Vibrant Color: Red food coloring is key. If you want a truly deep red, don’t be shy with the food coloring. Liquid gel food coloring often provides a more intense hue than traditional liquid coloring.
- The Perfect Crinkle: Generously rolling the dough in powdered sugar is what gives these cookies their signature crinkled appearance. Don’t skimp on the sugar coating!
- Mind the Baking Time: Keep a close eye on your cookies while they bake. They should be set around the edges but still slightly soft in the center. Overbaking will make them dry.
- Warm Cookies for Melty Kisses: For the best results, place the Hershey’s Hugs or Kisses on the cookies immediately after they come out of the oven. The residual heat will soften the chocolate, creating that irresistible gooey center.
- Cooling is Crucial: Allow the cookies to cool for a few minutes on the baking sheet before transferring them to a wire rack. This helps them set and prevents them from breaking apart.
Variations and Customizations
While the classic Red Velvet Kiss Cookie is perfect as is, feel free to get creative and customize them to your liking:
- Chocolate Choices: Instead of Hershey’s Hugs, use classic Hershey’s Kisses (milk chocolate, dark chocolate, or even flavored Kisses like caramel or mint). White chocolate Kisses would also be a lovely contrast.
- Add-ins: Fold in 1/2 cup of white chocolate chips or mini chocolate chips into the dough for an extra layer of chocolatey goodness.
- Extract Experiments: A tiny drop of almond extract or even a hint of peppermint extract could add an interesting twist to the red velvet base.
- Color Adjustments: For different holidays, you can adapt the food coloring. Use green for Christmas, orange for Halloween, or even blue for a patriotic touch.
- Cream Cheese Glaze: For an extra layer of indulgence, drizzle a simple cream cheese glaze over the cooled cookies instead of, or in addition to, the chocolate kiss.
Serving and Storage Suggestions
These delightful cookies are perfect for sharing or savoring yourself!
- Serving: Enjoy them warm with a glass of cold milk, a cup of coffee, or a cozy mug of hot cocoa. They also make an excellent addition to any dessert platter or a thoughtful homemade gift packaged in a pretty box.
- Storage: Store cooled Red Velvet Kiss Cookies in an airtight container at room temperature for up to 3-4 days to maintain their freshness and soft texture.
- Freezing: You can freeze baked cookies (without the Kisses) in an airtight container for up to 3 months. Thaw at room temperature and add the Kisses after a brief warm-up in the oven if desired. Alternatively, you can freeze the raw dough balls (after rolling in powdered sugar) for up to 2-3 months. Bake from frozen, adding a couple of minutes to the baking time, then press in the Kisses.
Frequently Asked Questions (FAQs)
Here are some common questions about making Red Velvet Kiss Cookies:
- What gives red velvet its distinct flavor? The unique taste comes from a combination of cocoa powder, a slight tang from buttermilk (or vinegar and baking soda in our case), and vanilla. The red color traditionally came from a reaction between these ingredients, but modern recipes use food coloring for vibrancy.
- Can I skip the food coloring? Yes, you can. The cookies will still have a delicious cocoa flavor and a subtle reddish-brown hue, but they won’t have the signature vibrant red color.
- Why are my cookies flat/hard? Flat cookies can result from overmixing the dough, using butter that’s too warm, or using too much leavening. Hard cookies usually indicate overbaking. Ensure you measure ingredients accurately and don’t overmix.
- Can I use unsalted butter? Absolutely! If using unsalted butter, you might want to increase the kosher salt slightly to 3/4 teaspoon, but the recipe already accounts for the salt content well.
- How long do the cookies stay fresh? When stored in an airtight container at room temperature, these cookies will stay fresh and delicious for about 3-4 days.
- Do I have to use Hershey’s Hugs? No, you can use Hershey’s Kisses or any other small, meltable chocolate candy you prefer.
These cookies are truly perfect for Valentine’s Day parties, thoughtful treats for your sweet, or simply a delightful indulgence. Bake some today and share with the ones you love!
If you love this recipe, don’t forget to save it for later!
More Delightful Cookie Recipes to Explore
If you enjoyed these Red Velvet Kiss Cookies, you’ll love exploring these other popular cookie recipes from our collection. They’re perfect for expanding your baking repertoire!
Print Recipe
Pin Recipe
Rate this Recipe
Red Velvet Kiss Cookies
12
cookies
15
mins
12
mins
27
mins
Whitney Bond
Dessert
American
Ingredients
-
1 ½
cups
flour
-
¼
cup
unsweetened cocoa -
½
teaspoon
kosher salt
-
1
teaspoon
baking soda
-
¼
cup
butter
,
melted -
½
cup
granulated sugar
-
½
cup
brown sugar
-
1
egg
-
1
tablespoon
red food coloring -
½
teaspoon
vanilla extract
-
1
teaspoon
white vinegar
-
¼
cup
powdered sugar
-
12
Hershey’s Hugs or Kisses
Instructions
-
Pre-heat the oven to 325°F (160°C).
-
Combine the flour, cocoa, salt, and baking soda in a small mixing bowl and set aside.
-
In a large bowl, cream together the melted butter, granulated sugar, and brown sugar until smooth. Add the egg and beat until well combined.
-
Stir in the red food coloring, vanilla extract, and vinegar, mixing until the color is uniform.
-
Gradually add the dry ingredients to the wet mixture, mixing until a soft, cohesive dough forms. Avoid overmixing.
-
Take a heaping tablespoon of dough, roll it into a ball, then generously roll it in powdered sugar. Place on a baking stone or parchment-lined baking sheet. Repeat for all cookies.
-
Bake for 12-14 minutes, or until the edges are lightly set and the centers are still soft.
-
Immediately upon removing from the oven, gently press a Hershey’s Hug or Kiss into the center of each warm cookie, allowing it to melt partially. Let cool slightly on the baking sheet before transferring to a wire rack.
Nutrition Facts
Calories
200
kcal
(10%)
Carbohydrates
35
g
(12%)
Protein
2
g
(4%)
Fat
5
g
(8%)
Saturated Fat
3
g
(15%)
Cholesterol
24
mg
(8%)
Sodium
248
mg
(10%)
Potassium
61
mg
(2%)
Fiber
1
g
(4%)
Sugar
22
g
(24%)
Vitamin A
140
mg
(3%)
Calcium
25
mg
(3%)
Iron
1.2
mg
(7%)
Did you make this recipe?
Tag @WhitneyBond on Instagram and hashtag it #WBRecipes!