
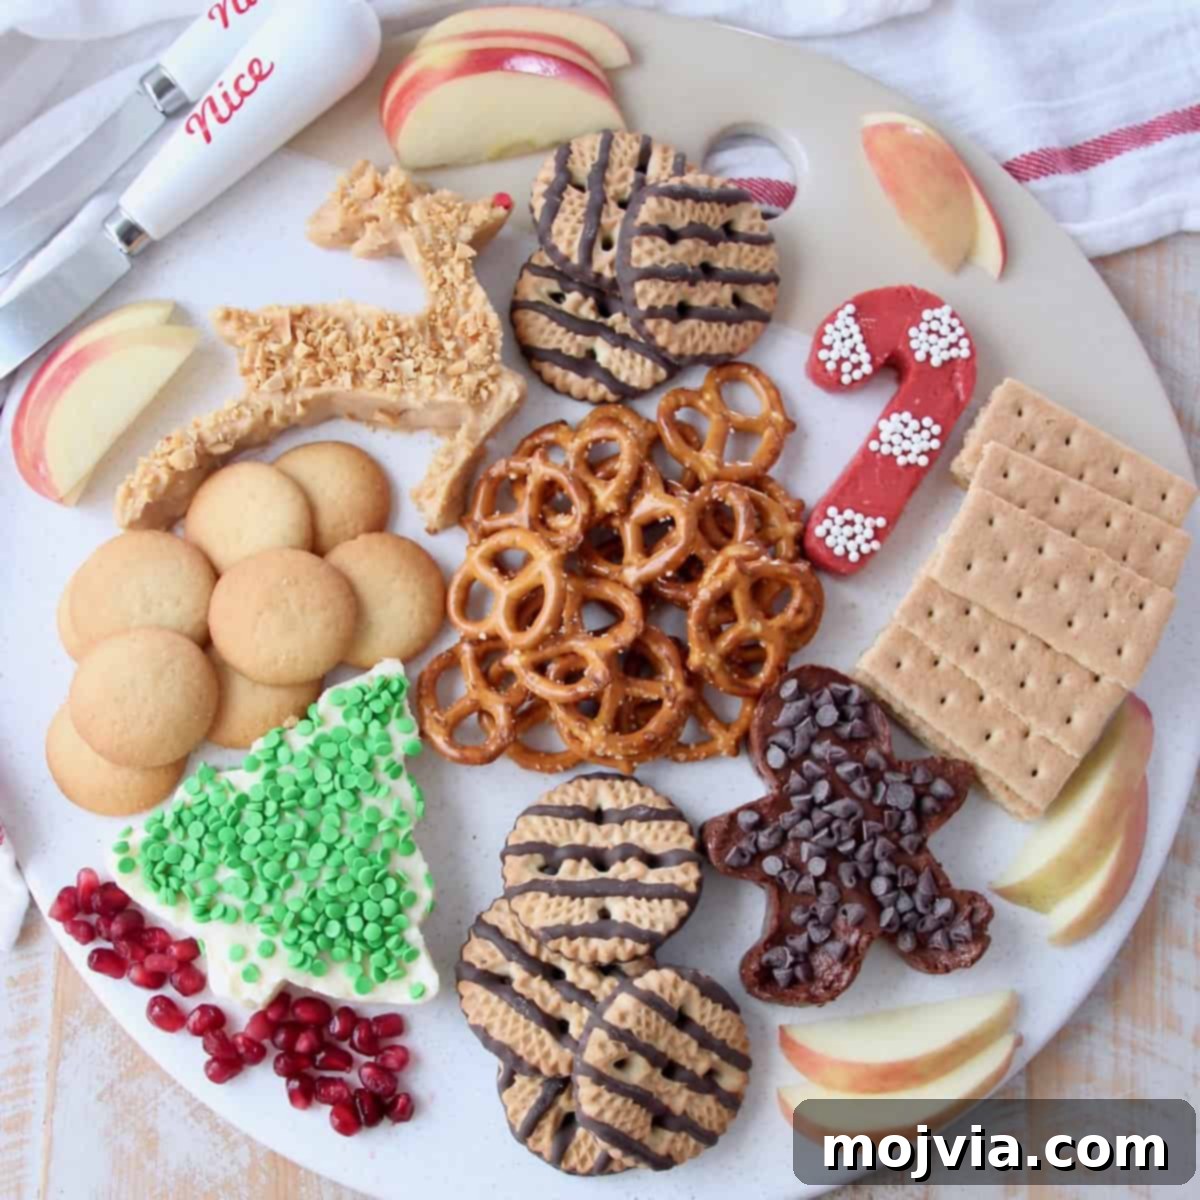
This holiday season, transform your entertaining with a stunning and effortlessly elegant dessert board! Designed to impress friends and family, this board showcases an array of delectable **Cream Cheese Dips**, artfully shaped into festive holiday designs. These creamy, sweet dips are beautifully complemented by a colorful assortment of fresh fruits, classic cookies, crispy crackers, and savory pretzels, offering a delightful treat for every palate.
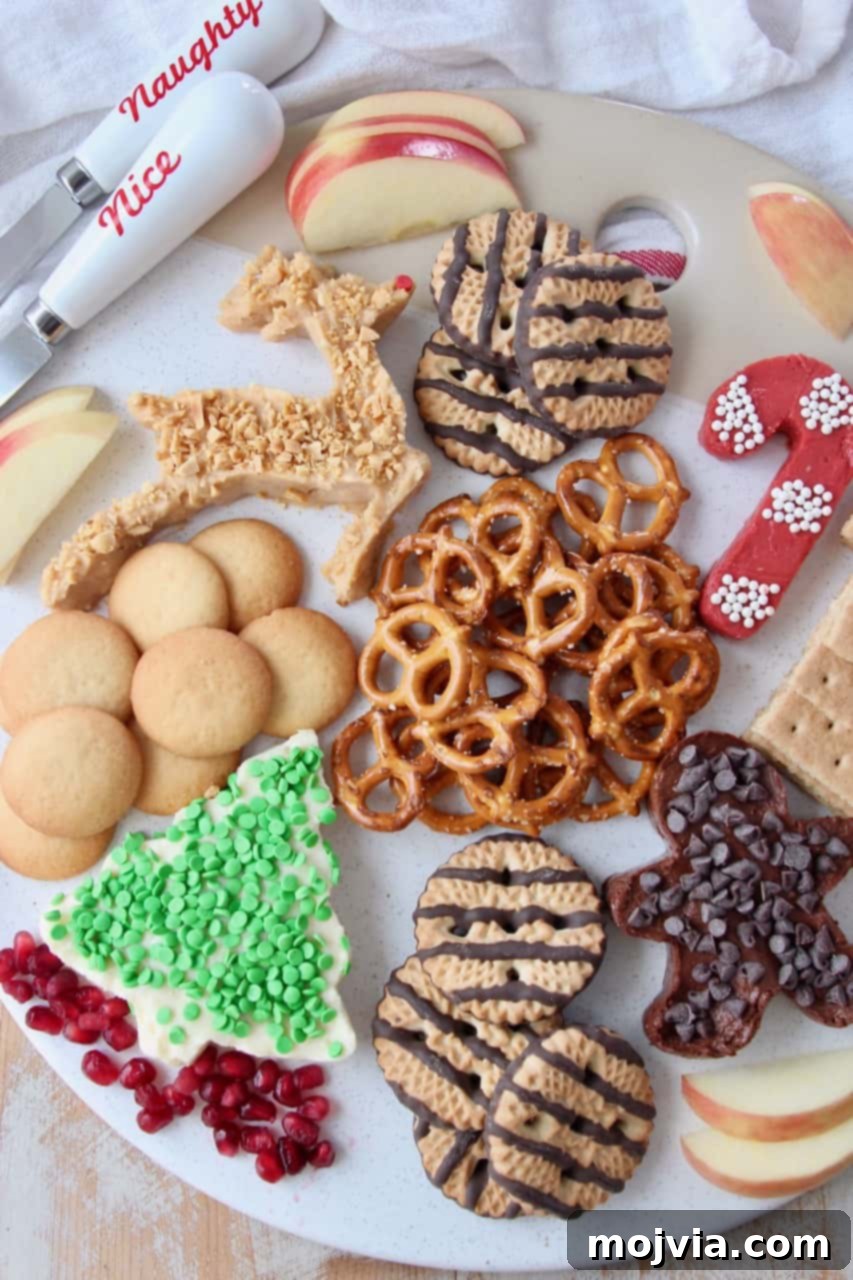
Table of Contents
- The Ultimate Holiday Dessert Board
- Why a Dessert Board is Perfect for the Holidays
- What You’ll Need for Your Festive Creation
- For the Irresistible Cream Cheese Dip Base
- To Flavor and Decorate Your Unique Dips
- For Serving with the Dip: Perfect Dippers
- Optional Additions: Elevate Your Board
- How to Create a Stunning Holiday Dessert Board
- How to Make Mini Holiday Dessert Boards for Gifting
- Expert Tips and Tricks for Success
- Frequently Asked Questions About Dessert Boards
- More Festive Holiday Recipes to Explore
The Ultimate Holiday Dessert Board
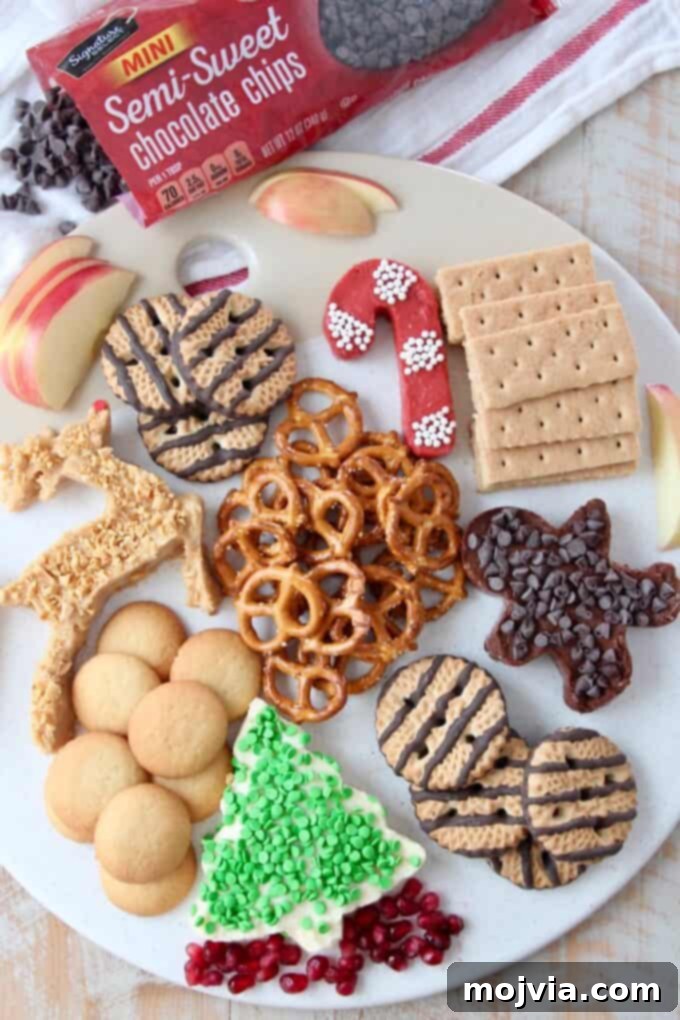
Imagine a spread featuring delightful peanut butter reindeer, charming chocolate gingerbread men, and vibrant red velvet candy canes – all on one board, and no baking required! This dessert board is the epitome of festive charm and sweet indulgence, promising to be the star attraction at any holiday gathering. It’s a creative and fun way to serve dessert that truly embodies the spirit of the season.
The magic begins with a simple, four-ingredient cream cheese dip base. This versatile foundation is then transformed into an exciting array of flavors with the addition of rich cocoa powder, creamy peanut butter, and festive red velvet cake mix. Each flavored dip is then adorned with complementary toppings like crunchy crushed peanuts, delicate mini chocolate chips, and colorful sprinkles, creating seriously delicious and visually appealing treats. The real fun lies in pressing each dip into holiday-themed cookie cutters, bringing adorable reindeer, gingerbread men, candy canes, and Christmas trees to life on your board. Surrounding these delightful creations are a variety of dipping companions, from crisp wafer cookies and classic graham crackers to fresh apple slices, ensuring there’s something for everyone to enjoy. And for those looking to share the holiday cheer, we’ll even guide you through creating charming mini dessert boards, perfect for gifting to friends, neighbors, or colleagues!
Why a Dessert Board is Perfect for the Holidays
Holiday entertaining can often feel overwhelming, but a dessert board offers a stress-free and spectacular solution. Here’s why it’s an absolute game-changer for your festive celebrations:
- **Visually Stunning Presentation:** Dessert boards are inherently beautiful. The medley of colors, textures, and shapes creates an irresistible centerpiece that will captivate your guests before they even take a bite. It’s an edible work of art that elevates any holiday table.
- **Effortless Entertainment:** Forget spending hours baking multiple desserts. This no-bake board is incredibly simple to assemble, allowing you more time to enjoy the festivities and less time in the kitchen. Most components can be prepared in advance, minimizing last-minute hustle.
- **Something for Everyone:** With a variety of flavored dips and numerous dippers, a dessert board caters to diverse tastes and dietary preferences. Guests can customize their experience, choosing their favorite flavor combinations.
- **Interactive and Fun:** Dessert boards encourage mingling and conversation. Guests can gather around, chat, and help themselves to their desired treats, making for a more relaxed and engaging dessert experience than traditional plated desserts.
- **Customizable and Versatile:** The beauty of a dessert board is its flexibility. You can easily scale it up or down depending on your guest count, swap out dippers to match themes or availability, and even introduce new dip flavors. It’s a concept that can be adapted to any holiday occasion, from an intimate family dinner to a large holiday party.
- **Perfect for Gifting:** As you’ll discover, these boards can be scaled down into charming mini versions, making them unique and thoughtful homemade gifts that spread joy to those around you.
What You’ll Need for Your Festive Creation
Crafting this impressive holiday dessert board requires a few key ingredients and tools. Here’s a comprehensive breakdown to ensure you have everything ready for a seamless preparation:
For the Irresistible Cream Cheese Dip Base
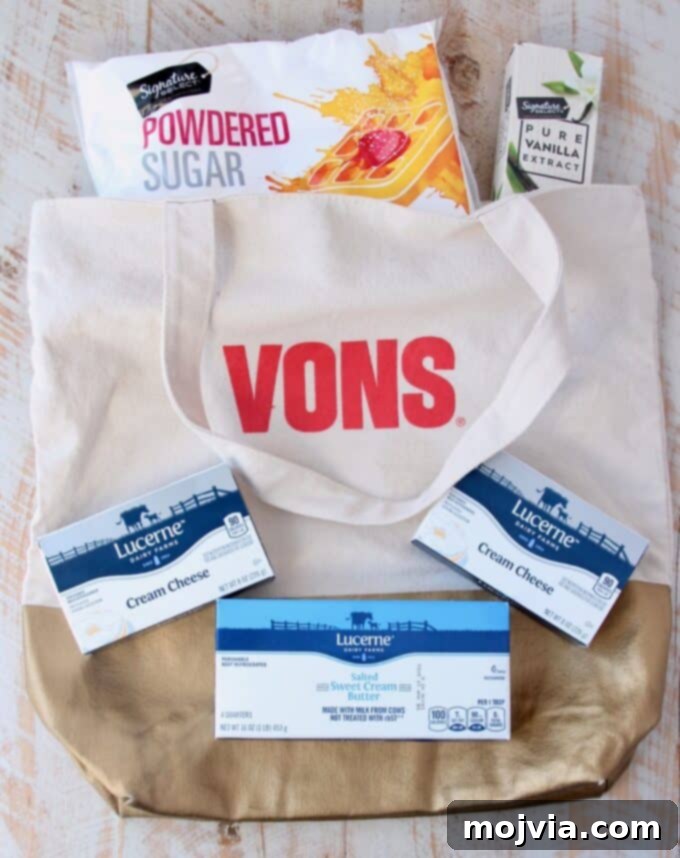
The foundation of our delightful dessert board is a rich, creamy, and subtly sweet cream cheese dip. Achieving the perfect smooth consistency is crucial, so ensure your dairy ingredients are at room temperature before you begin.
- Cream Cheese: Opt for full-fat cream cheese blocks for the best texture and flavor. Room temperature cream cheese will blend smoothly without lumps.
- Salted Butter: Good quality salted butter adds a touch of richness and balances the sweetness. Like the cream cheese, make sure it’s softened to room temperature.
- Powdered Sugar: Also known as confectioners’ sugar, this fine sugar dissolves easily, ensuring a silky smooth dip without any grainy texture.
- Vanilla Extract: A splash of pure vanilla extract enhances all the sweet flavors and adds a warm, inviting aroma.
To Flavor and Decorate Your Unique Dips
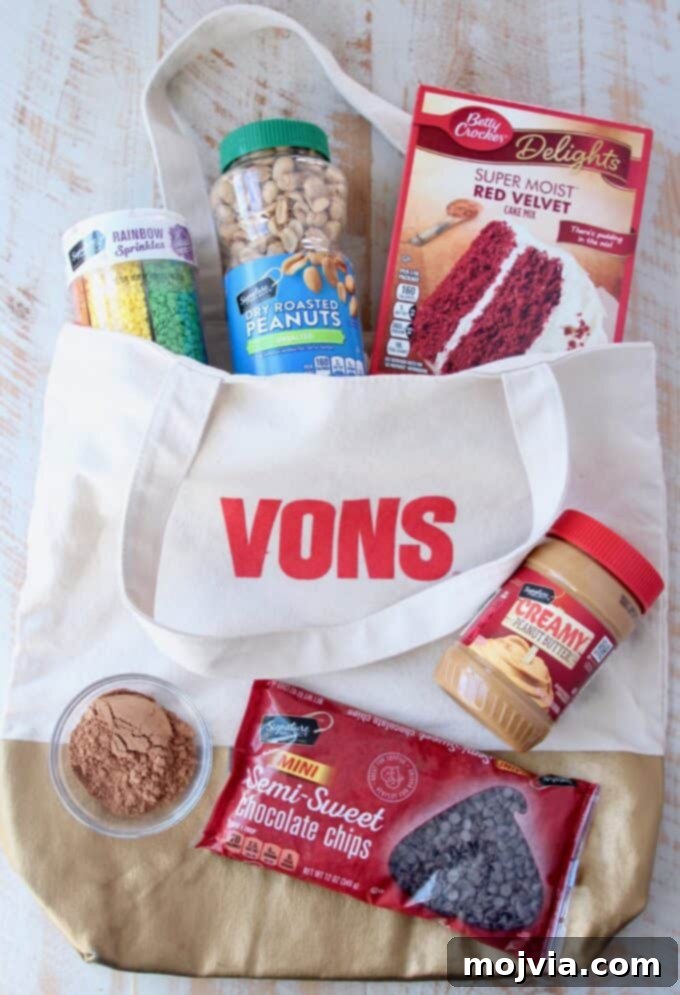
These ingredients will transform your basic cream cheese dip into a festive assortment of holiday-themed treats:
- Creamy Peanut Butter: Essential for the delicious peanut butter reindeer dip. Choose a smooth, creamy variety.
- Roasted Peanuts: Crushed roasted peanuts add a wonderful crunch and intensify the peanut butter flavor for decoration.
- Cocoa Powder: Unsweetened cocoa powder will give your gingerbread man dip its rich chocolatey flavor and color.
- Mini Chocolate Chips: Perfect for decorating the chocolate gingerbread man, these tiny chips provide a delightful texture and taste.
- Rainbow Sprinkles: While the recipe specifically calls for green sprinkles for the Christmas tree, feel free to have rainbow sprinkles on hand for extra festive cheer or other shapes.
- Red Velvet Cake Mix: This secret ingredient imbues the candy cane dip with its signature red velvet flavor and vibrant red hue.
- White Sprinkles or White Chocolate Chips: These are ideal for creating the iconic white stripes on your red velvet candy cane.

For Serving with the Dip: Perfect Dippers
A variety of textures and flavors among your dippers will make your dessert board truly outstanding. Here are some fantastic choices:
- Honey Graham Crackers: Their slightly sweet, crisp texture is a classic pairing for creamy dips.
- Vanilla Wafers: Light and delicate, these cookies offer a gentle sweetness that complements any dip flavor.
- Mini Twist Pretzels: For a delightful sweet and salty contrast, pretzels are a must-have.
- Fudge Striped Cookies: These provide an extra chocolatey crunch and a lovely visual appeal.
- Milk Chocolate Biscuits: A sophisticated touch, offering a rich chocolate flavor with a satisfying snap.
- Vanilla Creme Wafer Cookies: With their delicate layers and creamy filling, these are another elegant dipping option.
Optional Additions: Elevate Your Board
To add freshness, color, and additional flavor, consider these optional but highly recommended additions:
- Sliced Apples or Apple Chips: Crisp apple slices offer a refreshing, healthy counterpoint to the sweet dips. Apple chips add a unique crunch.
- Pomegranate Seeds: These ruby-red jewels provide a burst of juicy, tart flavor and vibrant holiday color.
- Other Fruits: Consider berries like strawberries, raspberries, or blueberries for additional color and freshness.
- Mini Marshmallows: A fun, soft texture that pairs well with chocolate or plain dips.
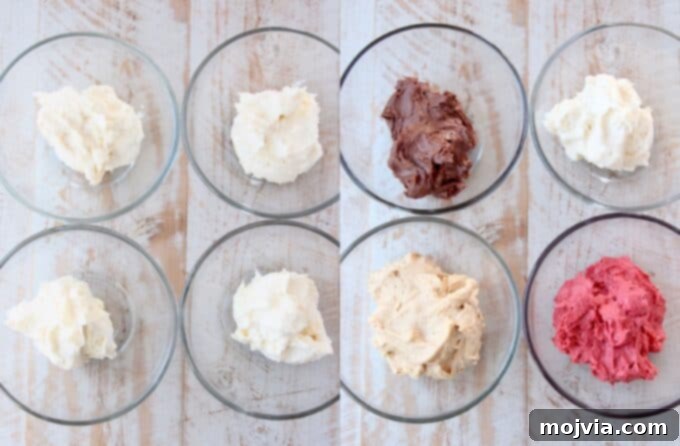
How to Create a Stunning Holiday Dessert Board
Follow these simple steps to assemble a beautiful and delicious holiday dessert board that will be the highlight of your festive celebration. This no-bake recipe is straightforward and fun to make!
- Prepare the Cream Cheese Dip Base.
The first step is creating our wonderfully creamy dip foundation. Ensure your cream cheese and butter are at room temperature for optimal blending.
- In a large mixing bowl or the bowl of a stand mixer, combine the softened cream cheese and butter.
- Add the powdered sugar and vanilla extract to the bowl.
- Using an electric hand mixer or your stand mixer, beat these ingredients together on medium speed for 2-3 minutes. Continue mixing until the mixture is completely smooth, light, and wonderfully creamy, with no lumps remaining. Scrape down the sides of the bowl as needed to ensure everything is fully incorporated.
- Prepare the Flavored Cream Cheese Dips.
Now it’s time to transform our base dip into a colorful and flavorful assortment of holiday treats.
- Carefully divide the freshly prepared cream cheese dip evenly into four separate large mixing bowls. This will give you enough space to mix in each distinct flavor.
- For the Red Velvet Dip: In the first bowl, add the red velvet cake mix. Use an electric hand mixer to thoroughly combine the cake mix with the cream cheese dip until the color is uniform and the flavor is well-distributed.
- For the Chocolate Dip: In the second bowl, incorporate the cocoa powder. Mix with an electric hand mixer until you have a smooth, rich brown chocolate dip.
- For the Peanut Butter Dip: To the third bowl, add the creamy peanut butter. Use your electric hand mixer to blend until the peanut butter is fully integrated and the dip is smooth.
- For the Plain Dip (Christmas Tree): Leave the contents of the fourth bowl as plain cream cheese dip. This will serve as the base for our festive Christmas tree design, which we’ll decorate with sprinkles.
- Once all four dips are flavored, cover each bowl tightly with plastic wrap and place them in the refrigerator for at least one hour. Chilling is a crucial step as it allows the dips to firm up, making them much easier to shape with cookie cutters.
- Make the Cream Cheese Dips into Festive Holiday Shapes.
This is where the creativity comes in! Shaping the dips turns them into an eye-catching display.
- Before you begin, lightly spray the inside edges of your holiday cookie cutters with cooking spray. This tiny step is critical and will help the dips release cleanly without sticking, preserving their beautiful shapes.
- Arrange your desired cookie cutters directly onto your serving board or platter, planning their placement. Consider the overall balance and how you want the dippers to surround them.
- Quick Tip! Once the dips are pressed into shape, they are much harder to move without losing their form. Plan your layout carefully before you start filling!
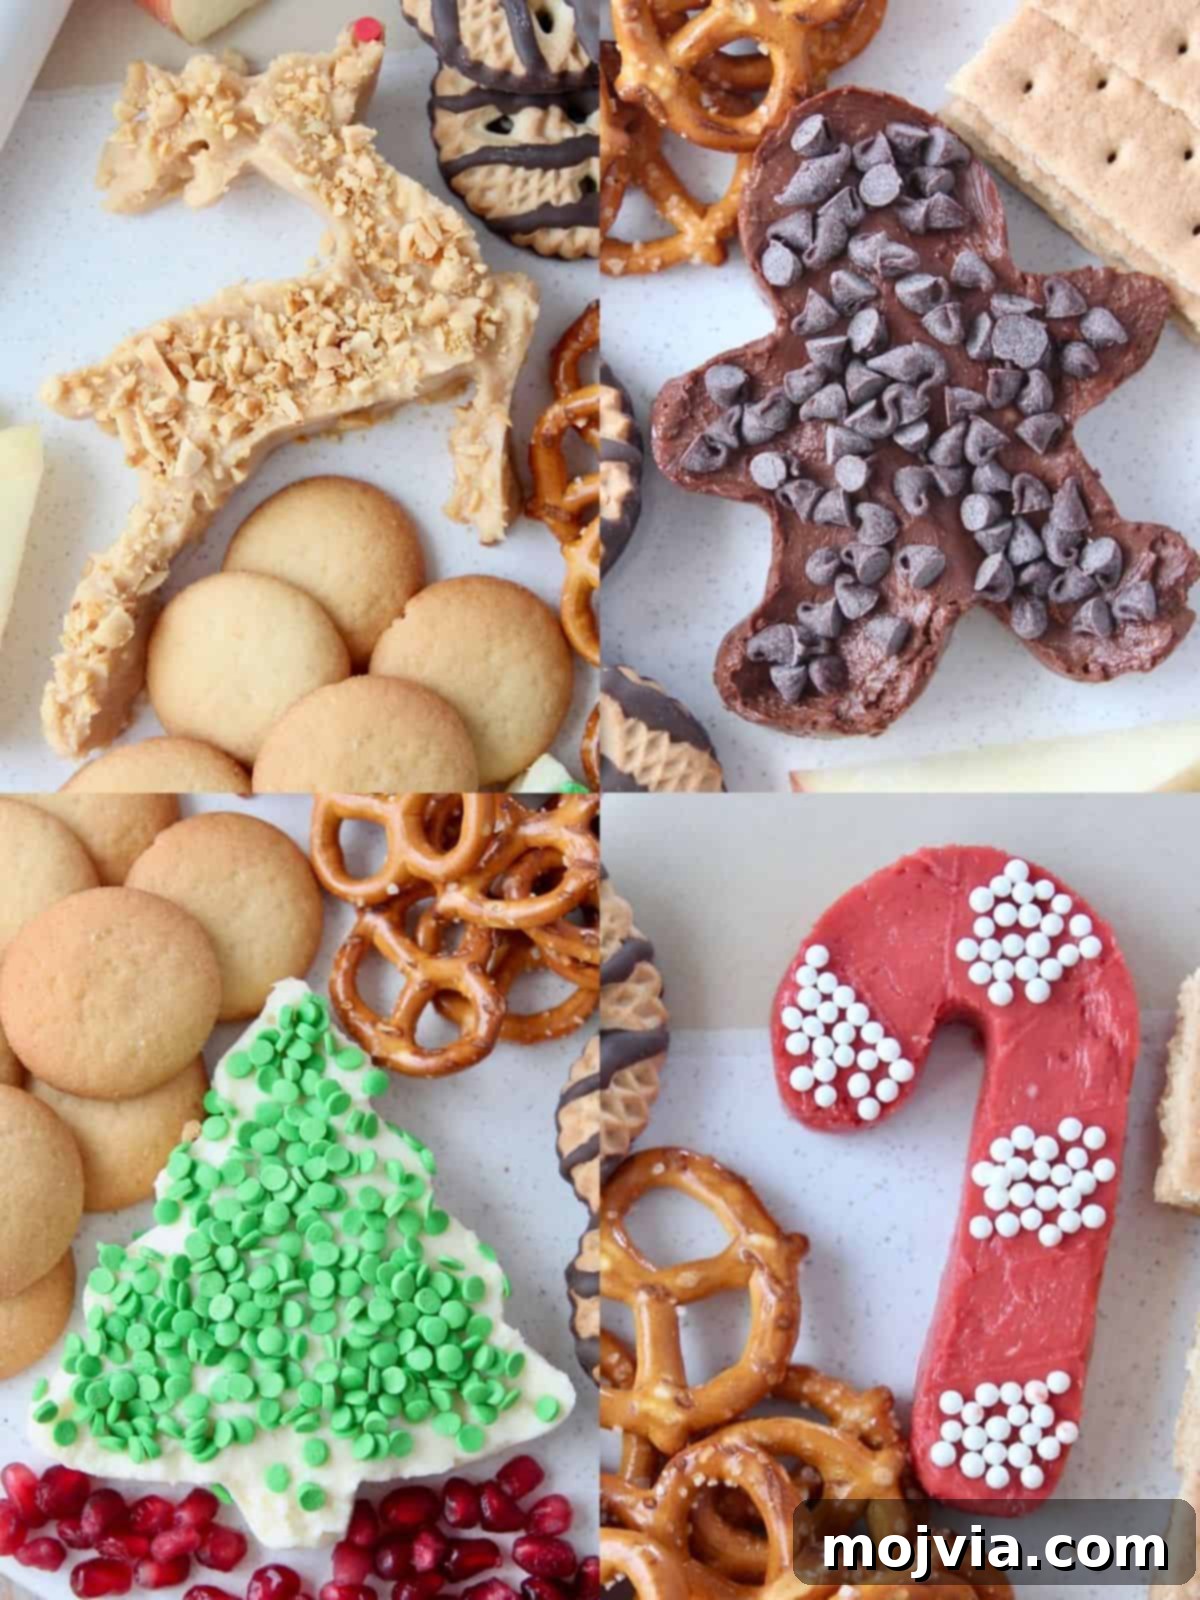
- Carefully spoon and press each chilled dip into its corresponding cookie cutter. For instance, place the red velvet dip into a candy cane cutter, the peanut butter dip into a reindeer cutter, the chocolate dip into a gingerbread man cutter, and the plain cream cheese dip into a Christmas tree cutter. Ensure the dips are pressed firmly and evenly into the cutters to get a well-defined shape.
- Once each dip is pressed firmly into its cookie cutter, gently and slowly slide the cookie cutters upwards and off the board. You should be left with perfectly shaped festive dips.
- Now, it’s time for the final decorative touches! Sprinkle crushed peanuts over the peanut butter reindeer, green sprinkles on the plain Christmas tree, mini chocolate chips on the chocolate gingerbread man, and create elegant white stripes on the red velvet candy cane using white sprinkles or white chocolate chips. Take your time with the decorations to enhance the holiday theme.

- Finish the Board with Dippers and Garnish.
With your festive dips ready, complete your stunning dessert board by artfully arranging the accompanying dippers.
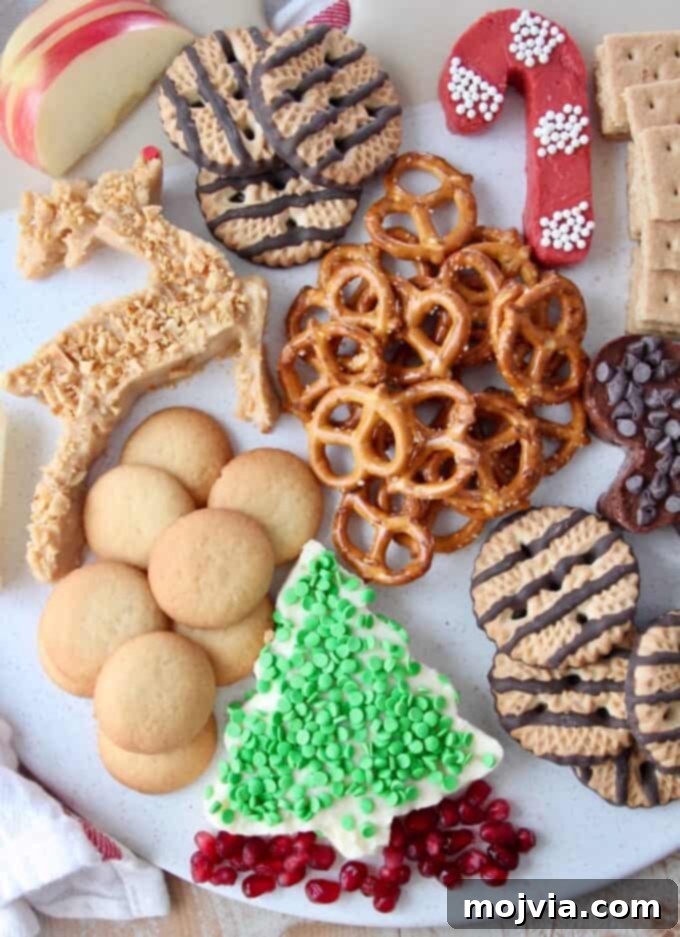
- Strategically place the cookies, crackers, pretzels, and fresh fruit around the shaped cream cheese dips. Aim for a visually appealing arrangement, creating small piles or lines of each dipper. Fill any gaps to make the board look abundant and inviting. Consider using small bowls for fruit or delicate items if desired. Your gorgeous holiday dessert board is now complete and ready to dazzle your guests!
How to Make Mini Holiday Dessert Boards for Gifting
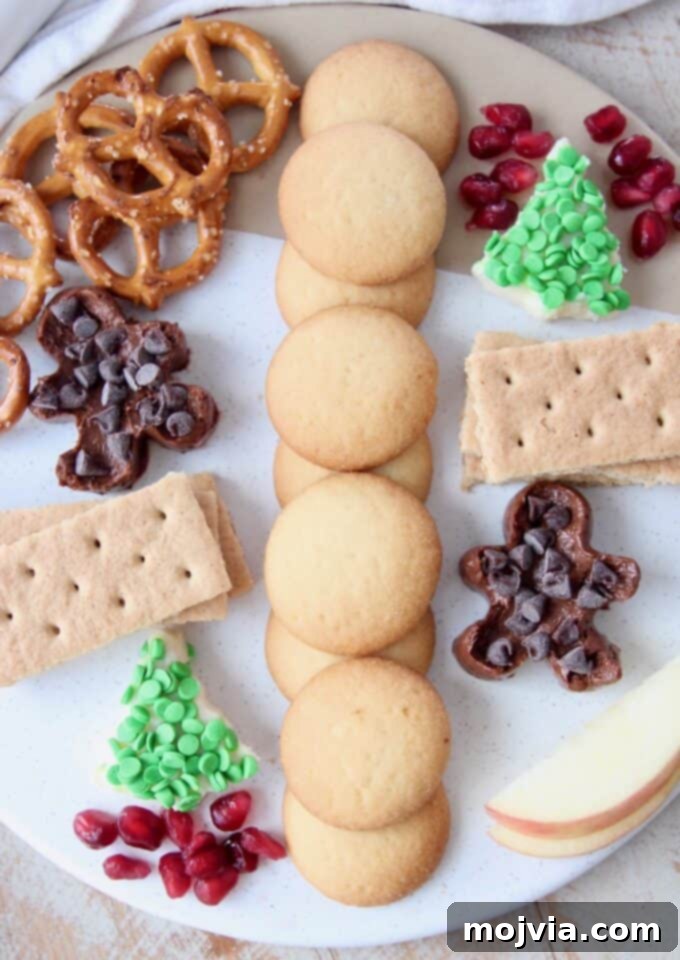
The joy of the holiday season is often found in sharing, and these mini dessert boards are a perfect embodiment of that spirit. Just as simple as creating a large board for a family gathering, it’s also incredibly easy to craft smaller, individual dessert boards that make thoughtful and delicious gifts for friends, neighbors, teachers, or even as charming party favors.
To create these delightful mini boards, begin by preparing your various flavored cream cheese dips exactly as described for the larger board. Once chilled, instead of using large cookie cutters, opt for mini holiday-themed cutters to create smaller, bite-sized festive shapes. Arrange these mini dips on small serving plates, individual wooden boards, or even sturdy disposable containers. Fill the surrounding space with a selection of mini cookies, petite crackers, and small pieces of fresh fruit. Once assembled, carefully wrap each mini board in plastic wrap to keep it fresh and secure during transport. Don’t forget to include a small note reminding the recipient to store their delicious gift in the refrigerator until they are ready to indulge. These personalized mini dessert boards are a charming way to spread holiday cheer!
Expert Tips and Tricks for Success
To ensure your holiday dessert board turns out perfectly and impresses everyone, keep these valuable tips and tricks in mind:
- Always Spray Your Cookie Cutters: This is arguably the most crucial tip! For clean, perfectly defined shapes, generously coat the inside of your cookie cutters with cooking spray. This creates a non-stick barrier, allowing you to gently lift the cutters off the chilled dip without disrupting the intricate festive designs. Skipping this step often results in frustration and messy edges.
- Chill Dips Thoroughly: Patience is key! Make sure to refrigerate your flavored cream cheese dips for at least one hour before attempting to shape them. Properly chilled dips will be firm enough to hold their form when pressed into cookie cutters, making the shaping process much easier and yielding crisp, clean edges. Warm or soft dips will be difficult to work with and prone to losing their shape.
- Storing Leftover Dips: Don’t let any delicious leftovers go to waste! Any remaining cream cheese dips can be easily stored for future enjoyment. Simply wrap them tightly in plastic wrap or transfer them to an airtight plastic zipper bag or container. When properly sealed and refrigerated, these dips will stay fresh and delightful for up to one week.
- Preparing Your Board Ahead of Time: Planning makes perfect for holiday entertaining. If you want to get a head start, prepare the festive cream cheese dips and arrange them on your serving board, within their cookie cutters, up to a day in advance. Crucially, do NOT add the cookies, crackers, pretzels, or fresh fruit at this stage. Instead, cover the dips securely on the board with plastic wrap and refrigerate. When you’re ready to serve, simply remove the board from the refrigerator, gently slide off the cookie cutters, and then artfully arrange all the fresh dippers around your beautifully shaped dips.
- Embrace Shape Versatility: Don’t feel limited by specific cookie cutter designs mentioned! Creativity is encouraged. If you don’t have a reindeer cookie cutter, for example, simply make two gingerbread men—one chocolate and one peanut butter. No candy cane cutter? Use a star or heart shape for your red velvet dip; hearts aren’t exclusively for Valentine’s Day when they’re red and festive! Mix and match to use what you have and create your own unique holiday theme.
- Achieving Perfect Candy Cane Stripes: For those beautifully defined white stripes on your red velvet candy cane, a clever trick can help. After shaping the red velvet dip, gently press toothpicks into the dip, spaced about one inch apart, following the curve of the candy cane. Then, carefully fill in the spaces between the toothpicks with white sprinkles or mini white chocolate chips. Once the sprinkles are in place, remove the toothpicks, leaving behind neat, crisp white stripes.
- Room Temperature for Creaminess: Always ensure your cream cheese and butter are at room temperature. This is vital for achieving a smooth, lump-free dip base that is easy to beat and perfect for shaping.
- Variety in Dippers: Beyond the suggested items, consider adding a broader range of dippers. Think shortbread cookies, ginger snaps, animal crackers, or even different types of fruit like pear slices or orange segments for added color and flavor.
- Engage the Kids: This is a wonderful recipe for getting children involved in holiday prep. Let them help with decorating the dips, arranging the dippers, or even choosing their favorite cookie cutters. It’s a fun, low-stress activity they’ll love.
Frequently Asked Questions About Dessert Boards
Here are some common questions you might have when preparing your holiday dessert board:
- Can I make the dips entirely in advance? Yes! You can prepare the cream cheese dip base and all the flavored dips up to 3-4 days ahead of time. Store them in separate airtight containers in the refrigerator. Just remember to give them ample chilling time (at least an hour) before attempting to shape them on the day of serving.
- What kind of board should I use? A large wooden cutting board, a slate platter, or a decorative serving tray works wonderfully. Choose one with enough surface area to accommodate all your dips and dippers without looking overcrowded.
- How long can the dessert board sit out? Due to the cream cheese base, the board should not be left at room temperature for more than 2 hours. If serving for a longer event, consider refreshing the board or keeping it partially refrigerated.
- Can I use different flavorings for the dips? Absolutely! Feel free to experiment. Pumpkin spice, gingerbread spice, peppermint extract, or even lemon zest could make delightful additions to the plain cream cheese dip.
More Festive Holiday Recipes to Explore
If you loved creating this holiday dessert board, you might be looking for more delightful treats to complete your festive spread. Explore these other fantastic holiday recipes:
- Red Velvet Puppy Chow
- Nutella Cheesecake Bites
- Hot Chocolate Cookie Cups
- Glitter Fortune Cookies
- Nutella Chocolate Chip Cookies
- Apple Pie Dip
- Oatmeal Cranberry Bars
Print Recipe
Pin Recipe
Rate this Recipe
Holiday Dessert Board
8
people
30 minutes
1 hour
1 hour
30 minutes
Whitney Bond
Dessert, Snack
American
Ingredients
Cheesecake Dip Base
-
16
ounces
Lucerne Cream Cheese,
room temperature -
½
cup
Lucerne Salted Butter,
room temperature -
1
cup
Signature SELECT Powdered Sugar -
2
teaspoons
Signature SELECT Vanilla Extract
Chocolate Cheesecake Dip – Gingerbread Man
-
¼
cup
cocoa powder
-
2
tablespoons
Signature SELECT Mini Chocolate Chips
Peanut Butter Cheesecake Dip – Reindeer
-
¼
cup
Signature SELECT Creamy Peanut Butter -
2
tablespoons
Signature SELECT Unsalted Peanuts,
crushed
Red Velvet Cheesecake Dip – Candy Cane
-
¼
cup
red velvet cake mix -
1
tablespoon
white sprinkles,
or white chocolate chips
Plain Dip – Christmas Tree
-
2
tablespoons
Signature SELECT Green Sprinkles
For Serving
- Signature SELECT Honey Graham Crackers
- Signature SELECT Vanilla Wafers
- Signature SELECT Mini Twist Pretzels
- Signature SELECT Fudge Striped Cookies
- Signature SELECT Milk Chocolate Biscuits
- Signature SELECT Vanilla Creme Wafer Cookies
-
apple
,
sliced -
pomegranate seeds
Instructions
Prepare the cream cheese dip base.
-
Add room temperature cream cheese and butter to a large mixing bowl or the base of a stand mixer.
-
Add powdered sugar and vanilla extract.
-
Use an electric hand mixer or stand mixer to beat the ingredients together on medium speed for 2-3 minutes, or until smooth and creamy.
Prepare the flavored cream cheese dips.
-
Divide the prepared cream cheese dip into 4 large mixing bowls.
-
In the first bowl, add ¼ cup red velvet cake mix and use an electric hand mixer to combine the cake mix into the cream cheese dip.
-
In the second bowl, add ¼ cup cocoa and use an electric hand mixer to combine the cocoa into the dip.
-
For the third bowl, add ¼ cup peanut butter and use an electric hand mixer to combine the peanut butter into the dip.
-
Leave the last bowl of cream cheese dip plain, it will be used to make the Christmas tree with sprinkles.
-
Place the cream cheese dips, covered in the refrigerator for one hour to chill.
Make the cream cheese dips into festive holiday shapes.
-
Spray the inside of the cookie cutters with cooking spray.
-
Place the cookie cutters on the board, arranged how you want them.
-
Press the dips into their corresponding cookie cutters.
-
Red velvet in a candy cane cookie cutter, peanut butter in a reindeer cookie cutter, chocolate in a gingerbread man cookie cutter and plain cream cheese dip in a Christmas tree cookie cutter.
-
Once the dips are pressed into the cookie cutters, gently slide the cookie cutters up and off the board.
-
Decorate each of the dips by placing crushed peanuts on the peanut butter reindeer, green sprinkles on the Christmas tree, mini chocolate chips on the chocolate gingerbread man and white sprinkles or white chocolate chips in rows on the candy cane.
Finish the board.
-
Now that the festive dips are ready to go, add the cookies, crackers, pretzels and fruit to the board, surrounding the cream cheese dips.
Notes
- The nutritional information provided does not include the serving options, as the information will change based on which serving options you include on the board.
- If making the board ahead of time, only refrigerate the cream cheese dips; do not refrigerate the various serving options with the dips.
- Cream cheese dips can be stored in the refrigerator for up to 7 days.
Nutrition Facts
Calories
483
kcal
(24%)
Carbohydrates
30
g
(10%)
Protein
7
g
(14%)
Fat
39
g
(60%)
Saturated Fat
20
g
(100%)
Cholesterol
93
mg
(31%)
Sodium
355
mg
(15%)
Potassium
208
mg
(6%)
Fiber
2
g
(8%)
Sugar
25
g
(28%)
Vitamin A
1124
mg
(22%)
Calcium
78
mg
(8%)
Iron
1
mg
(6%)
Did you make this recipe?
Tag @WhitneyBond on Instagram and hashtag it #WBRecipes!