
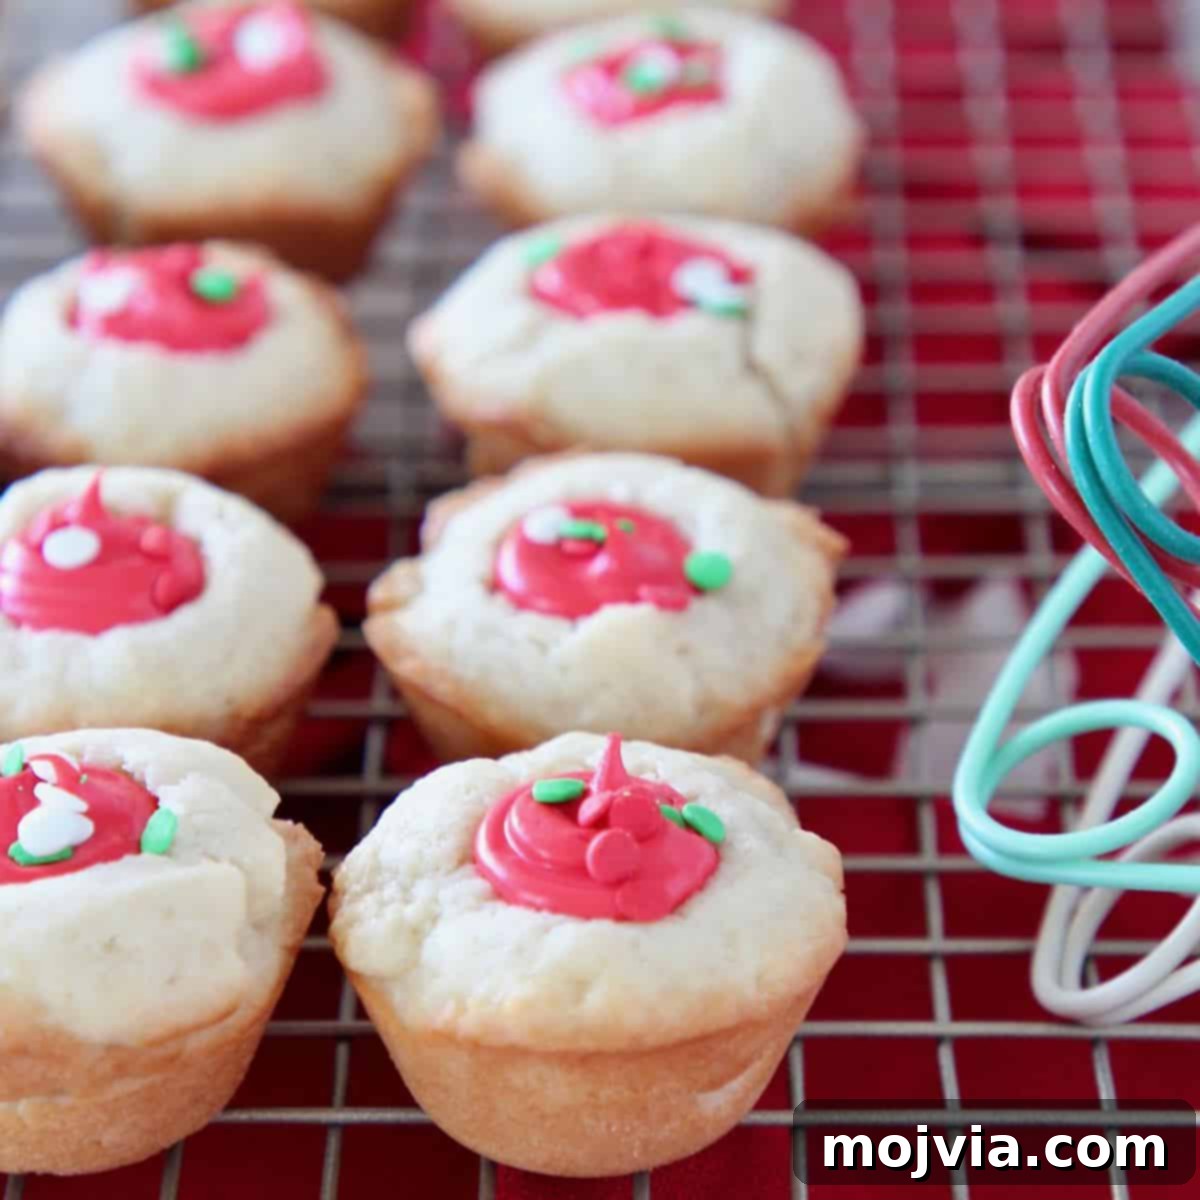
Sugar Cookie Cups are truly an adorable and versatile treat perfect for any celebration! These delightful mini desserts offer endless possibilities for customization, allowing you to fill them with your favorite frosting and add vibrant food coloring or sprinkles for a festive seasonal flair.
Inspired by my Mom’s beloved sugar cookie recipe, these charming cookie cups are crafted to perfection, then generously filled with creamy vanilla frosting and, of course, a scattering of colorful sprinkles to complete their irresistible appeal.
If you’ve previously enjoyed my Red Velvet Cookie Cups or indulged in the rich flavors of my Chocolate Chip Cookie Cups, then prepare to fall in love with these new Sugar Cookie Cups – a sweet addition to your baking repertoire that promises to be a crowd-pleaser!
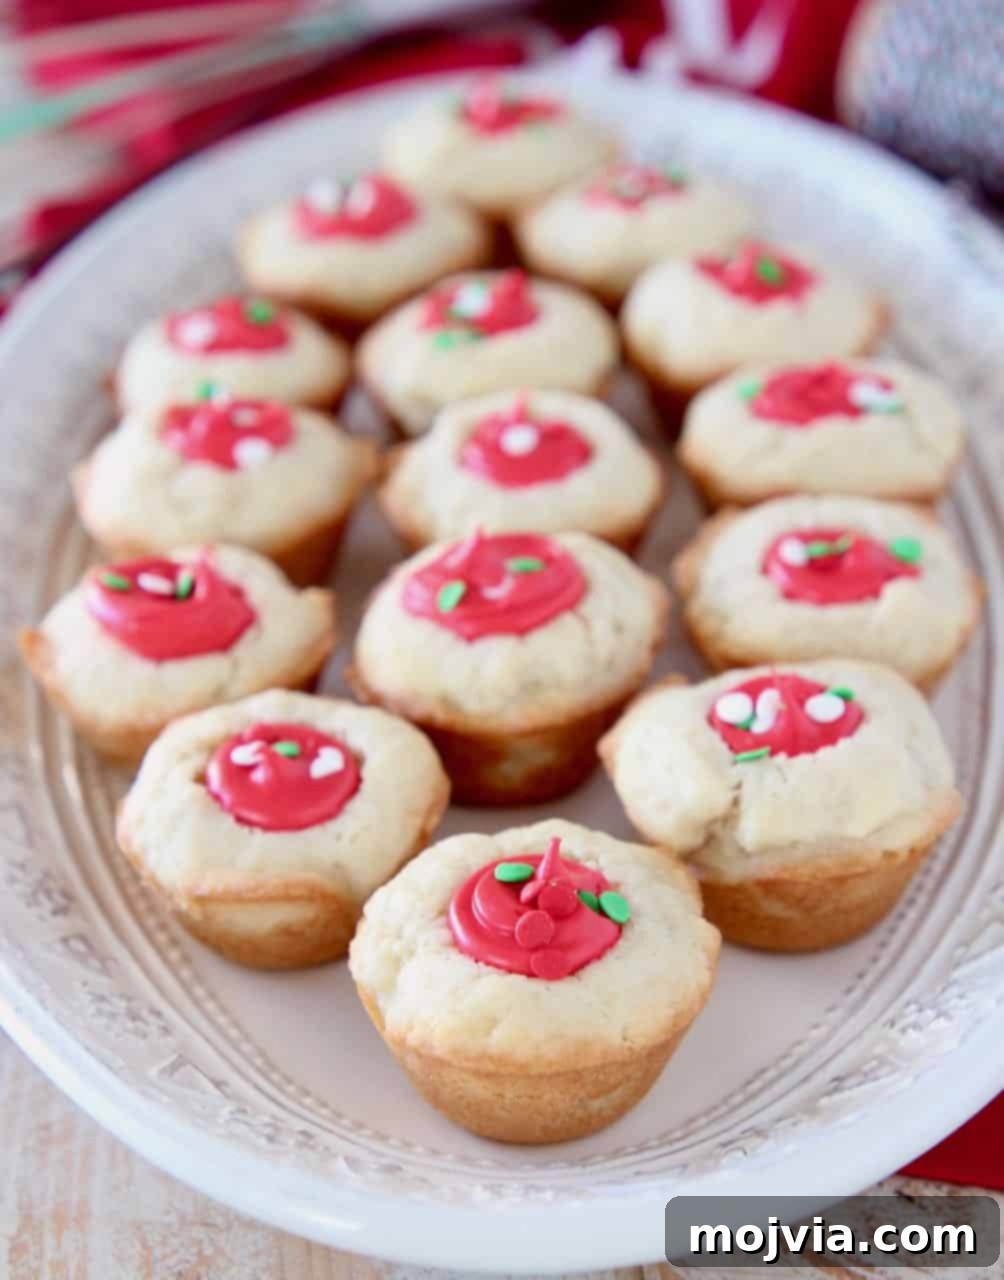
Discover the Charm of Sugar Cookie Cups: Your Go-To Dessert for Every Occasion
There’s something uniquely delightful about cookie cups. They are the epitome of a bite-sized indulgence – perfectly portioned, incredibly easy to enjoy, and ideal for sharing at social gatherings or intimate moments with friends. Their individual serving size makes them not only convenient but also wonderfully hygienic for parties, minimizing mess and maximizing enjoyment.
My kitchen has developed a happy tradition of creating cookie cups for nearly every holiday and special event. Last Christmas, for instance, I whipped up a batch of my popular Hot Chocolate Cookie Cups with Marshmallow Creme Filling, which were an undeniable sensation. Building on that success, this year, I decided to transform my Mom’s legendary sugar cookie recipe into these enchanting cookie cups, bringing a touch of nostalgic comfort to a modern treat.
My Mom’s sugar cookie recipe is more than just a set of instructions; it’s a cherished family tradition passed down through generations. Every Christmas, we gather to bake, frost, and decorate these classic cookies, creating memories as sweet as the treats themselves. This year, I innovated by placing the luscious frosting directly into the hollowed-out cookie cups, finishing them with a generous sprinkle of festive holiday decorations. The result? A stunning and utterly delicious twist on a beloved classic.
Unleash Your Creativity: The Versatility of Sugar Cookie Cups
While these sugar cookie cups are undeniably perfect for Christmas festivities, their appeal extends far beyond a single holiday. They are wonderfully adaptable, making them an excellent choice for birthday parties, school events, baby showers, and celebrations throughout the entire year. The magic lies in their customizable nature.
For example, I simply enhanced plain vanilla frosting with a few drops of red food coloring to achieve the vibrant filling you see. However, the possibilities are truly limitless! You can infuse your frosting with any food coloring of your choice, tailoring the treats to match specific themes or seasonal palettes. Beyond coloring, the decorations can transform these simple cookie cups into edible works of art. From classic sprinkles and shimmering edible glitter to fresh fruit and various candies, your imagination is the only limit.
Imagine topping these adorable Sugar Cookie Cups with colorful M&M’s for a fun Halloween treat, or adorning them with fresh strawberries and blueberries to celebrate the 4th of July. For Valentine’s Day, a mix of red and pink sprinkles would be charming, while green food coloring and sprinkles would be perfect for St. Patrick’s Day. The ability to easily change colors and toppings makes these cookies an invaluable recipe for any host or hostess looking to impress with minimal effort.
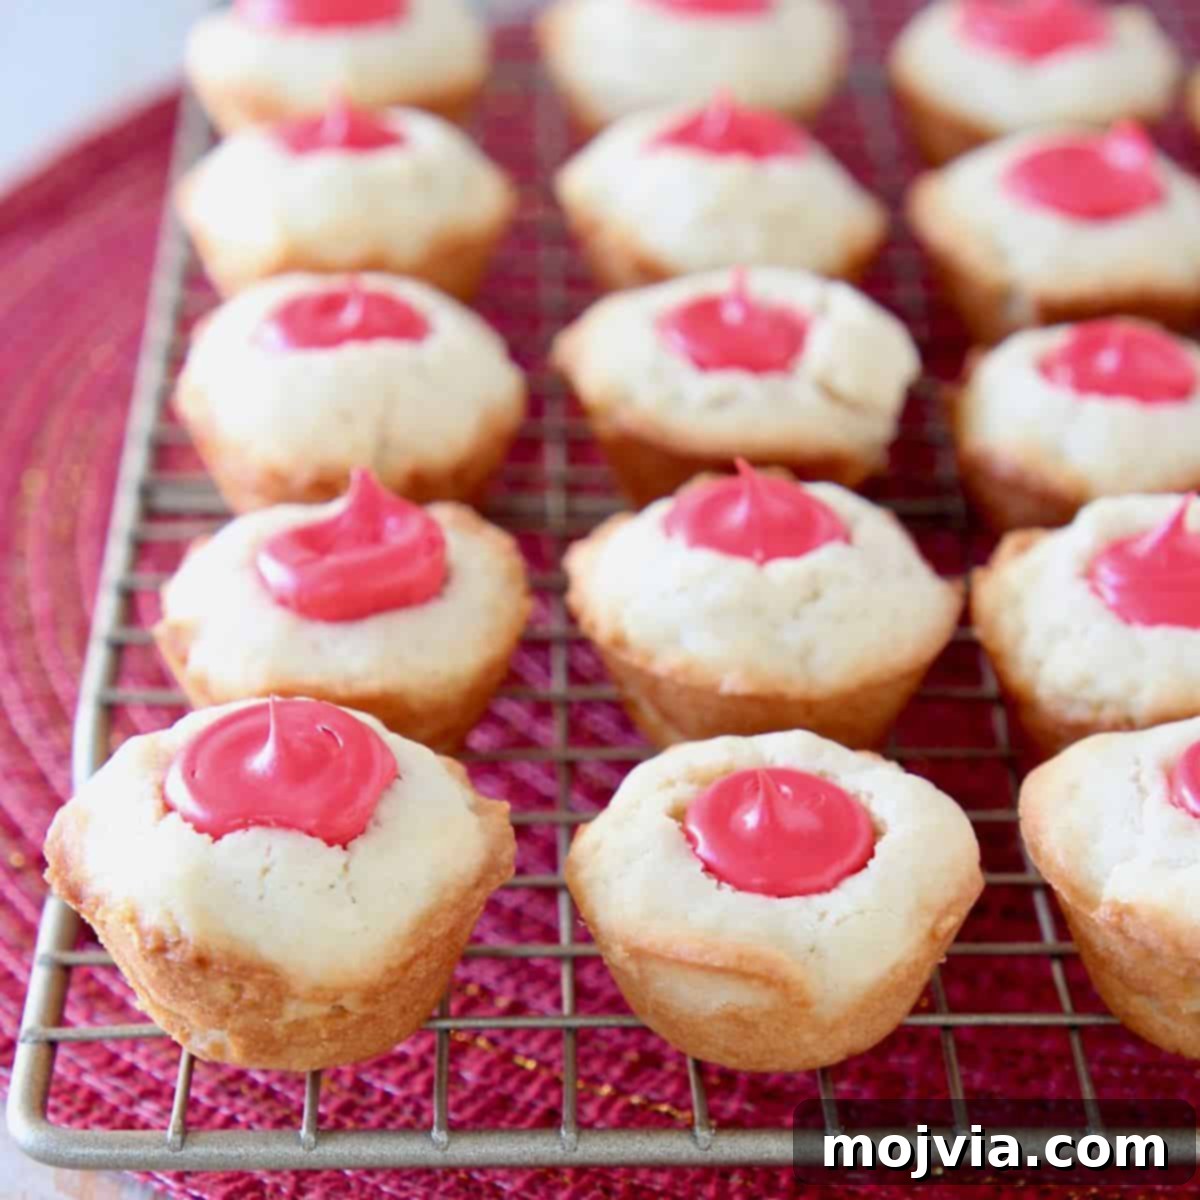
Mastering the Art of Sugar Cookie Cups: A Step-by-Step Guide
Creating these delightful sugar cookie cups is a straightforward process, even for novice bakers. Follow these detailed steps to ensure perfectly formed, delicious treats every time.
Step 1: Preparing the Perfect Sugar Cookie Dough
- Gather Your Dry Ingredients: In a medium-sized mixing bowl, combine your all-purpose flour, baking powder, and salt. Whisk them together thoroughly to ensure the leavening agent and salt are evenly distributed. Set this mixture aside.
- Cream the Wet Ingredients: In a large mixing bowl, or the bowl of a stand mixer fitted with the paddle attachment, cream together the softened butter and granulated sugar until the mixture is light, fluffy, and pale in color. This step is crucial for incorporating air and achieving a tender cookie texture.
- Add the Liquids and Flavor: Beat in the egg, milk, and vanilla extract until they are fully incorporated into the butter-sugar mixture. Scrape down the sides of the bowl as needed to ensure everything is well combined.
- Combine Wet and Dry: Gradually add the reserved flour mixture to the wet ingredients, mixing on low speed until just combined. Be careful not to overmix, as this can lead to tough cookies. Stop mixing as soon as no dry streaks of flour remain.
- Chill the Dough: Cover the cookie dough and place it in the refrigerator to chill for 10-15 minutes. This brief chilling period helps firm up the dough, making it easier to handle and preventing the cookie cups from spreading too much during baking.
Step 2: Baking and Shaping Your Cookie Cups
- Prepare Muffin Tins: Lightly grease two 24-cup mini muffin pans with cooking spray. This will ensure your cookie cups release easily after baking.
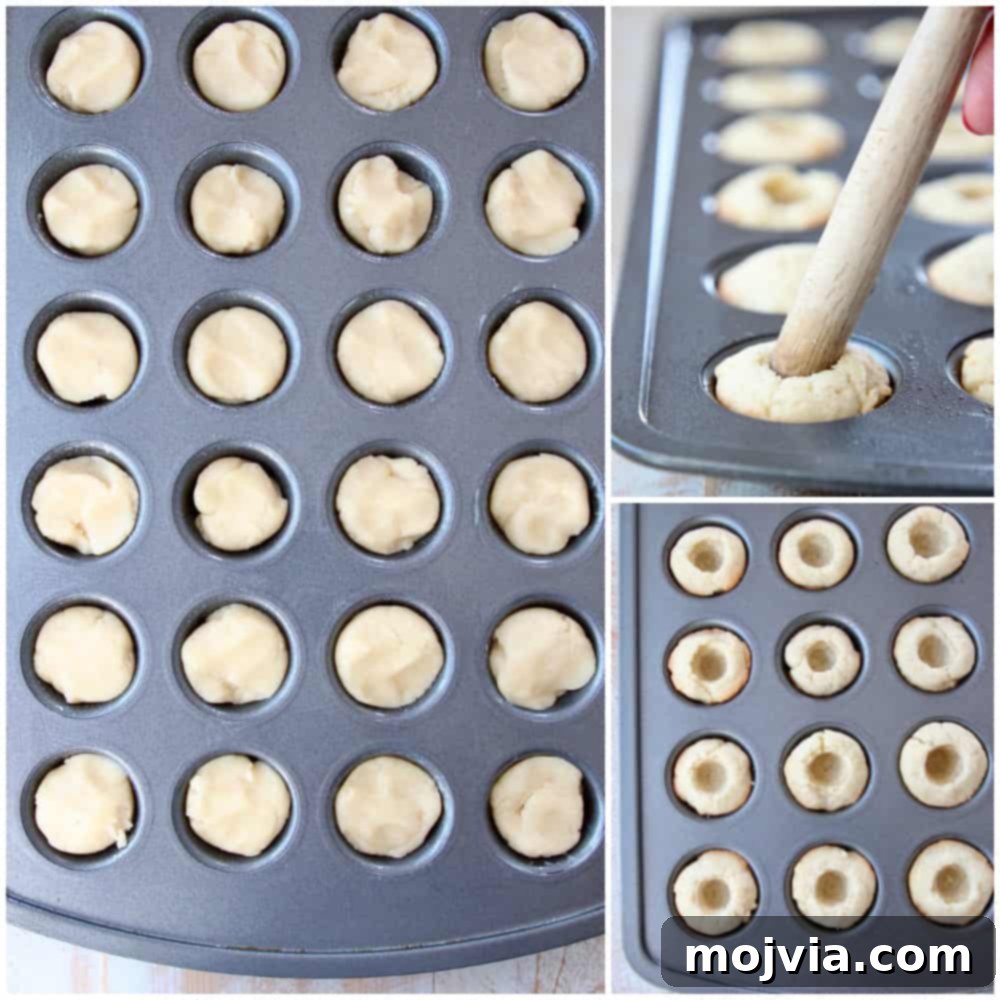
- Fill the Tins: Take small, approximately 1-inch balls of chilled cookie dough and place them into each mini muffin tin, filling each cup about three-quarters full. There’s no need to press them down; they will spread slightly.
- Bake to Perfection: Place the muffin pans in a preheated 350°F (175°C) oven and bake for approximately 12 minutes, or until the edges are lightly golden and the centers are set. Baking times can vary, so keep a close eye on them.
-
Create the Indentation (Crucial Step!): This is the most critical part of forming your cookie cups. As soon as you remove the muffin pans from the oven, immediately use the rounded end of a spatula or a wooden spoon to gently indent the center of each hot sugar cookie.
- Important Note: The word “immediately” cannot be stressed enough! The cookies must be hot and pliable for this step. If you wait even a few minutes for them to cool, they will set, and you won’t be able to achieve that perfect, deep indentation needed to create the “cup” shape for your frosting. Work quickly but carefully.
- Cooling Process: Allow the newly formed cookie cups to cool in the muffin tins for about 5 minutes. This helps them firm up slightly before transferring. After 5 minutes, carefully remove them from the tins and transfer them to a wire rack to cool completely. Ensure they are fully cooled before adding frosting to prevent melting.
- Prepare Your Frosting: While the cookie cups are cooling, prepare your chosen frosting. Spoon the frosting into a sturdy plastic piping bag (or a Ziploc bag if a piping bag isn’t available).
-
Pipe the Frosting: Cut a small hole in the corner of the piping bag. Once the cookie cups are completely cool, pipe the frosting artfully into the center of each cup.
- Quick Tip! For best piping results, avoid using “stand and fill” style Ziploc bags. Their folded bottoms are not ideal for creating a consistent piping stream. A standard heavy-duty freezer bag works better if you don’t have a dedicated piping bag.
- Optional Finishing Touches: Elevate your cookie cups by adding toppings! This is where you can truly personalize them with sprinkles, fresh fruit, small candies, or even a dusting of cocoa powder.
Choosing Your Perfect Frosting for Sugar Cookie Cups
The beauty of sugar cookie cups lies not only in their charming appearance but also in their incredible adaptability, particularly when it comes to frosting. The type of frosting you choose is entirely a matter of personal preference, allowing for endless creative combinations to suit any taste or occasion.
For this recipe, I opted for a rich and creamy vanilla frosting, vibrant with a touch of red food coloring. You have the flexibility to use a high-quality store-bought frosting – many brands offer excellent options. If you’re going this route, I highly recommend Duncan Hines Homestyle Classic Vanilla for its smooth texture and delightful flavor.
Alternatively, for those who love the taste of homemade, you can easily prepare your own Perfect Vanilla Frosting from scratch. This fantastic recipe comes courtesy of my talented friend Julianne at Beyond Frosting, ensuring a truly decadent filling.
Don’t hesitate to experiment with different frosting flavors and colors! Imagine adding orange food coloring to vanilla frosting for a spooky Halloween treat, or green food coloring for a festive St. Patrick’s Day celebration. The possibilities are truly endless for seasonal and themed desserts.
Exciting Frosting Flavor Ideas:
- Rich Chocolate Frosting: An absolute dream for any chocolate enthusiast, pairing beautifully with the sweet sugar cookie base.
- Cream Cheese Frosting: Its tangy sweetness and incredibly creamy texture are always a winning combination, adding a sophisticated touch.
- Zesty Lemon Frosting: Perfect for those who adore a delightful balance of tart and sweet, offering a refreshing citrusy kick.
- Luscious Strawberry Frosting: Naturally pink and bursting with fruity flavor, making it an ideal choice for romantic occasions like Valentine’s Day or spring gatherings.
- Joyful Funfetti Frosting: The ultimate choice for a lively birthday party or any fun celebration, packed with colorful sprinkles for an extra festive touch.
Smart Storage Solutions: Refrigerating and Freezing Sugar Cookie Dough
One of the many conveniences of this sugar cookie recipe is its fantastic make-ahead potential, particularly with the dough. Proper storage ensures you can enjoy freshly baked cookie cups whenever the craving strikes or an unexpected celebration arises.
Yes, sugar cookie dough is wonderfully freezer-friendly! You can store the prepared cookie dough in the refrigerator for up to a week, making it perfect for preparing in advance for upcoming events. For longer storage, the dough can be kept in the freezer for up to 6 months without compromising its quality or flavor.
For ultimate convenience, I highly recommend portioning out the sugar cookie dough into small, individual balls before freezing. This ingenious trick allows you to simply grab the number of dough balls you need, pop them directly into a mini muffin tin, and bake these delightful cookie cups anytime. No thawing or extra prep required – just pure, instant gratification!

Frequently Asked Questions About Sugar Cookie Cups
Here are answers to some common questions about making and enjoying these versatile cookie cups.
Q: Can I use regular-sized muffin tins instead of mini ones?
A: While mini muffin tins are ideal for creating bite-sized cookie cups, you can absolutely use a standard-sized muffin tin. The baking time will need to be adjusted, likely increasing to 15-18 minutes, and you’ll yield fewer, larger cookie cups. Remember to still indent them immediately after baking!
Q: How can I make these cookie cups gluten-free?
A: You can often substitute all-purpose flour with a 1:1 gluten-free baking flour blend. Ensure your chosen blend contains xanthan gum for best results. No other major adjustments are usually needed for this recipe.
Q: How long do Sugar Cookie Cups stay fresh?
A: Once frosted, Sugar Cookie Cups are best enjoyed within 2-3 days when stored in an airtight container at room temperature. If they contain cream cheese frosting or fresh fruit, they should be refrigerated and consumed within the same timeframe.
Q: Can I make the cookie cups ahead of time and frost later?
A: Yes, absolutely! You can bake the cookie cups and let them cool completely. Store them in an airtight container at room temperature for up to 3-4 days, or freeze them for up to a month. When ready to serve, thaw if frozen, and then frost fresh for the best presentation and taste.
Q: What are some kid-friendly decoration ideas?
A: Kids love decorating! Provide a variety of colorful sprinkles, mini chocolate chips, small candies, edible glitter, or even small fruit pieces like raspberries or blueberries. Let them get creative with different colored frostings for a fun activity!
Looking for More Delicious Sweet Treats? Explore These 5 Popular Cookie Recipes!
If you’ve fallen in love with these Sugar Cookie Cups, you’ll surely enjoy exploring more of my favorite cookie creations. Each recipe offers a unique flavor profile and is designed to bring joy to your kitchen.
- Nutella Chocolate Chip Cookies: A dreamy combination of classic chocolate chip with a delightful swirl of hazelnut spread.
- Oatmeal Raisin Cookies with Caramel Filling: A comforting classic elevated with a luscious, gooey caramel center.
- Salted Caramel Cashew Cookies: The perfect balance of sweet and salty, with a delightful crunch from cashews.
- Pumpkin Spice Cookies with White Chocolate Chips: Embrace the flavors of fall with these warmly spiced, sweet cookies.
- Double Chocolate Cookies: Rich, intensely chocolatey cookies for the ultimate chocolate lover.

Print Recipe
Pin Recipe
Rate this Recipe
Sugar Cookie Cups
Ingredients
- 3 cups all-purpose flour
- 1 ½ tsp baking powder
- ½ tsp salt
- 1 cup butter, softened
- 1 cup granulated sugar
- 1 egg
- 3 tbsp milk
- 2 tsp vanilla extract
- 1 cup creamy vanilla frosting
Instructions
-
Preheat your oven to 350°F (175°C).
-
In a small mixing bowl, combine the flour, baking powder, and salt. Whisk them together until well mixed, then set aside.
-
In a large bowl, or using a stand mixer, cream together the softened butter and granulated sugar until the mixture is light and fluffy.
-
Beat in the egg, milk, and vanilla extract until fully incorporated.
-
Gradually add the reserved flour mixture to the wet ingredients, beating on low speed until just combined. Be careful not to overmix.
-
Place the cookie dough in the refrigerator to chill for 10-15 minutes. This helps prevent spreading during baking.
-
Lightly grease two 24-cup mini muffin tins with cooking spray.
-
Fill each of the mini muffin cups about ¾ full with cookie dough. Place the tins in the preheated oven and bake for 12 minutes.
-
Immediately after removing the muffin tins from the oven, use the rounded end of a spatula or a wooden spoon to indent the middle of each warm sugar cookie. This forms the cup shape.
-
Allow the cookie cups to cool in the muffin tins for 5 minutes, then carefully transfer them to a wire rack to cool completely before frosting.
-
While the cookie cups are cooling, place your creamy vanilla frosting (or chosen frosting) into a plastic piping bag.
-
Cut a small hole in the corner of the piping bag, then pipe the frosting into the cooled cookie cups.
-
Optionally, add your desired toppings, such as sprinkles, candy, or fresh fruit, for extra flair.
Notes
- Frosting Tips: I used a creamy vanilla frosting with red food coloring for a festive touch. Feel free to use your favorite store-bought frosting or try a delicious homemade vanilla frosting. Other delightful options include chocolate, lemon, or strawberry frostings.
- Cookie Dough Storage: Unbaked sugar cookie dough can be stored in the refrigerator for up to 7 days. For longer preservation, freeze the dough for up to 6 months. For convenient, on-demand baking, I recommend pre-portioning the dough into small balls and freezing them. This way, you can easily pop them into a mini muffin tin and bake fresh cookie cups anytime you wish!